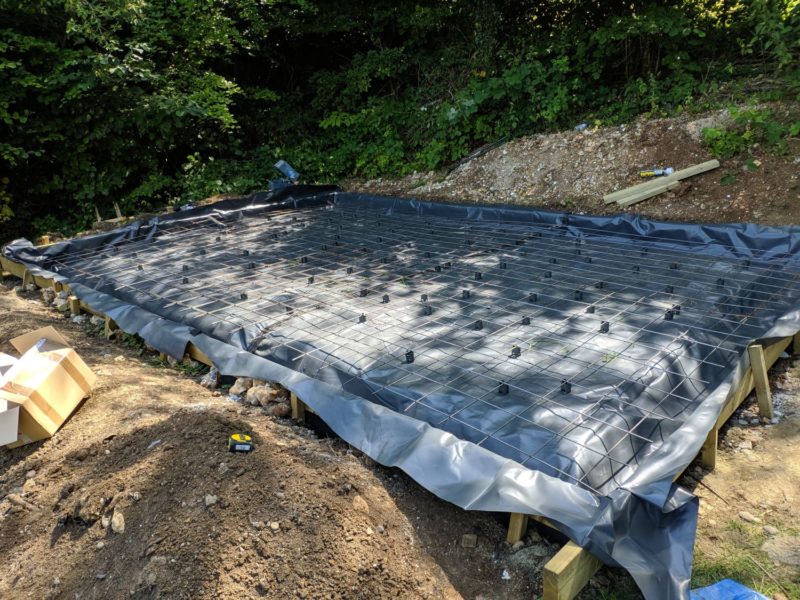
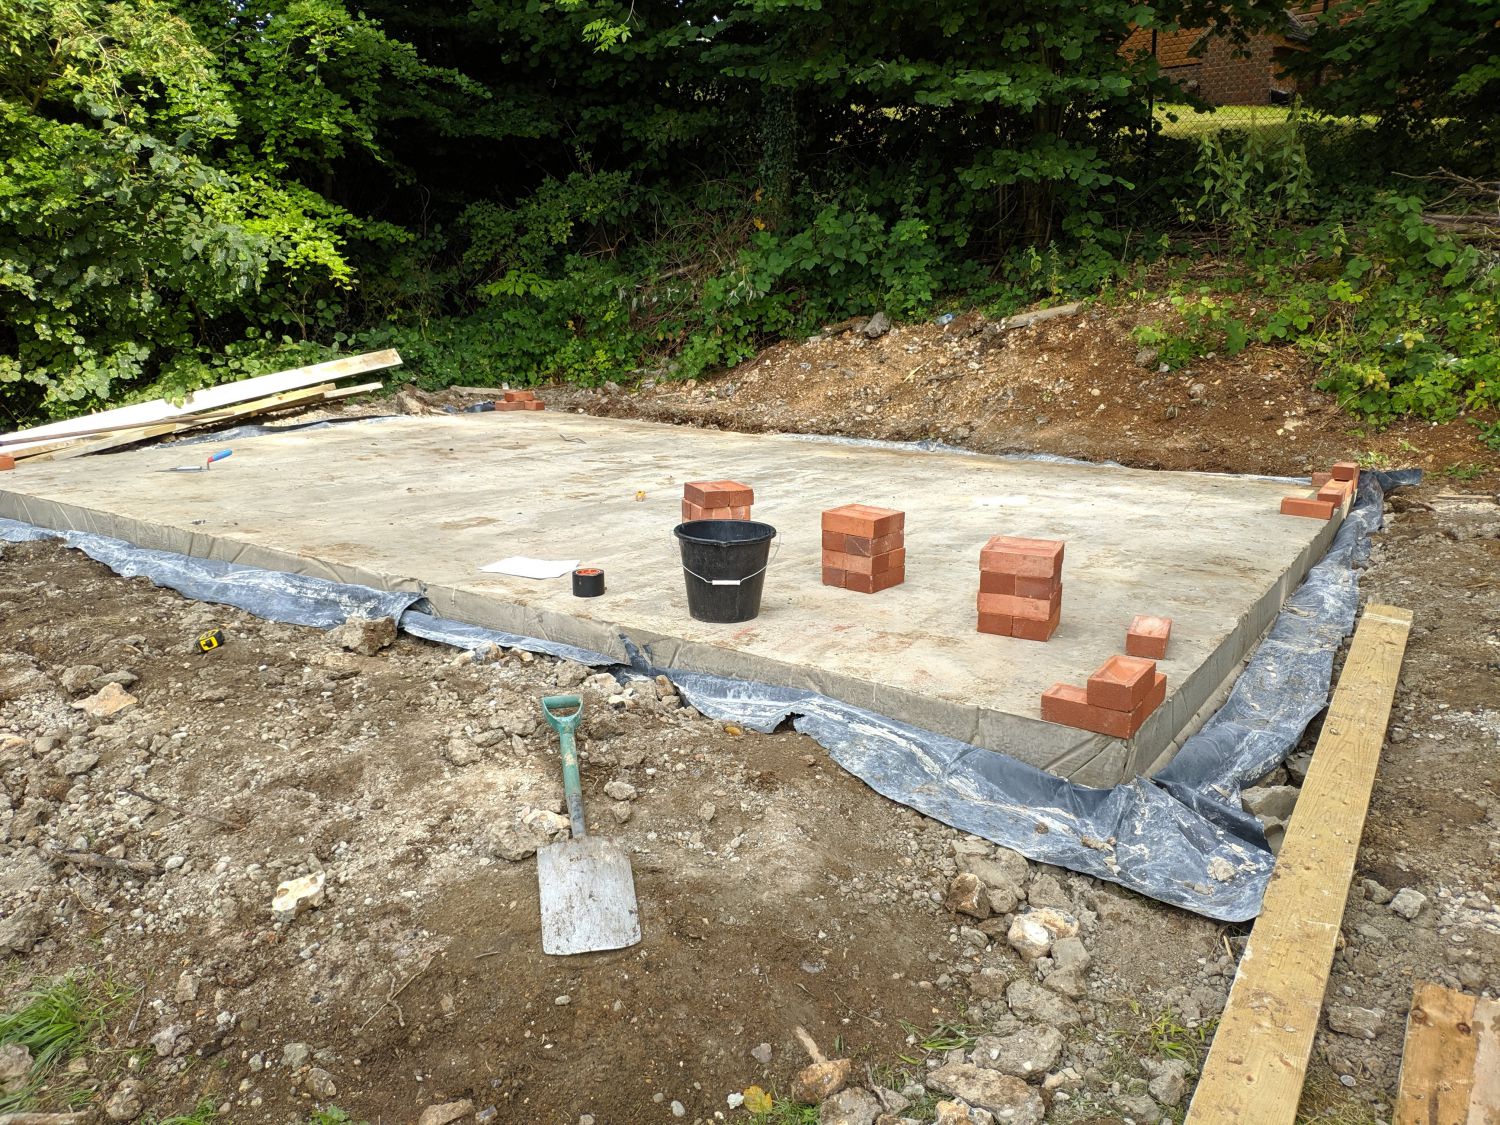
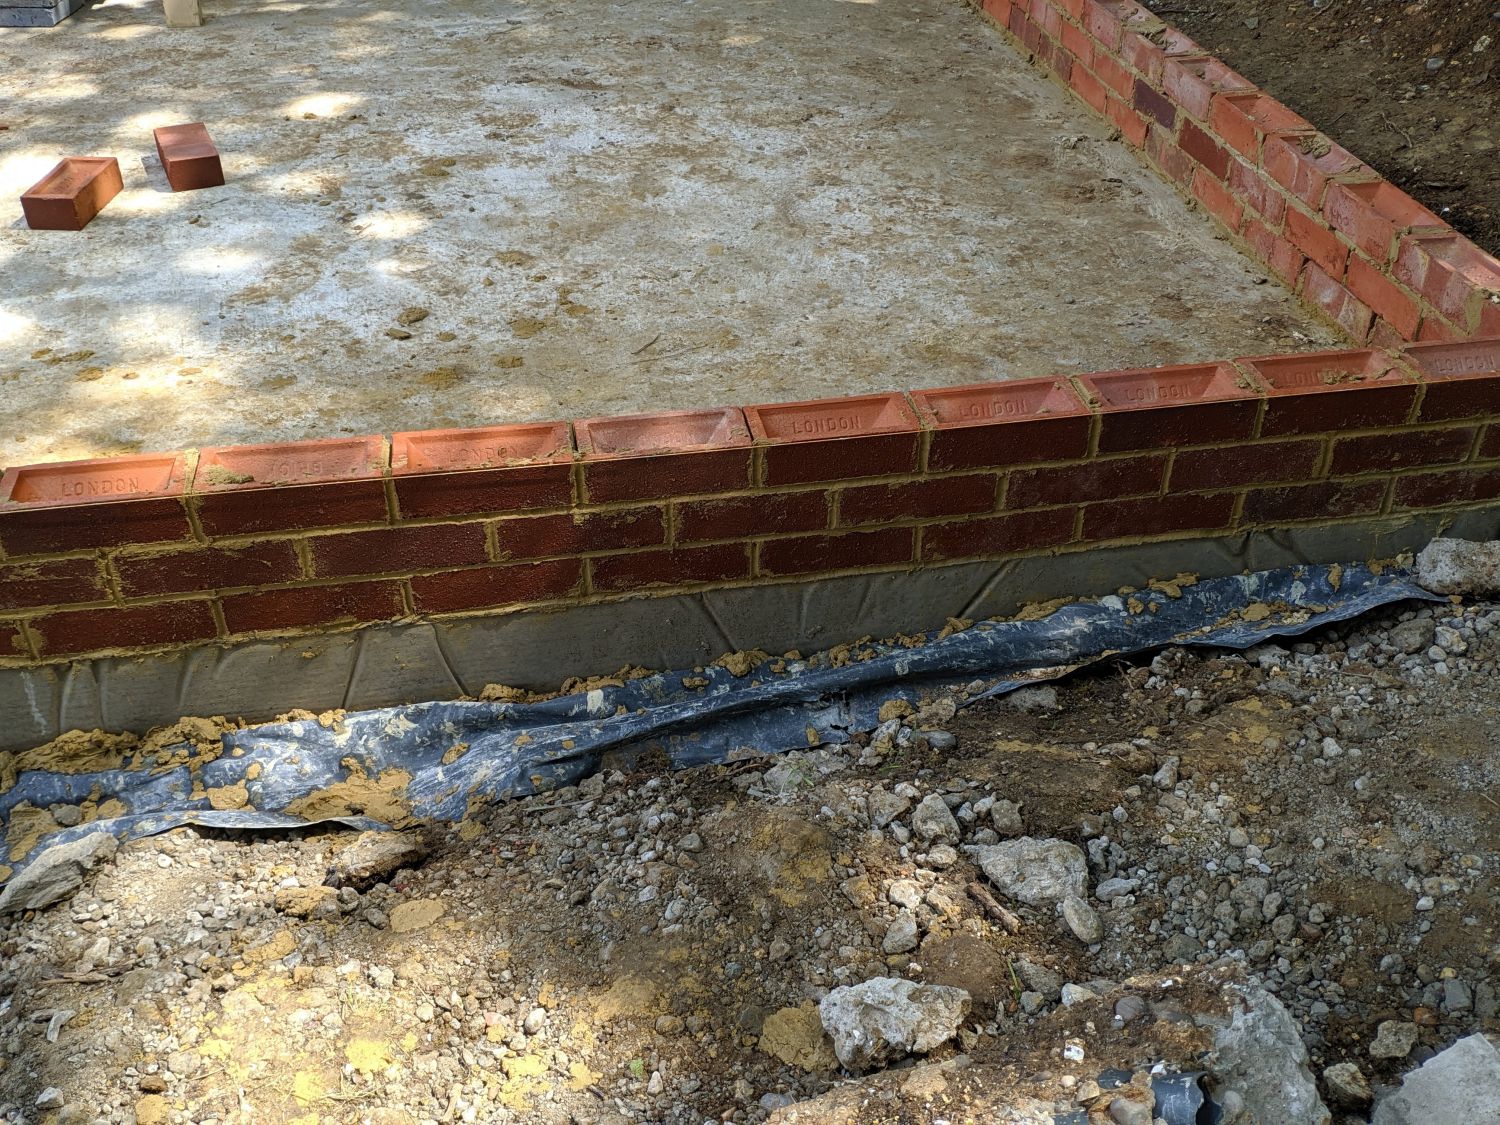
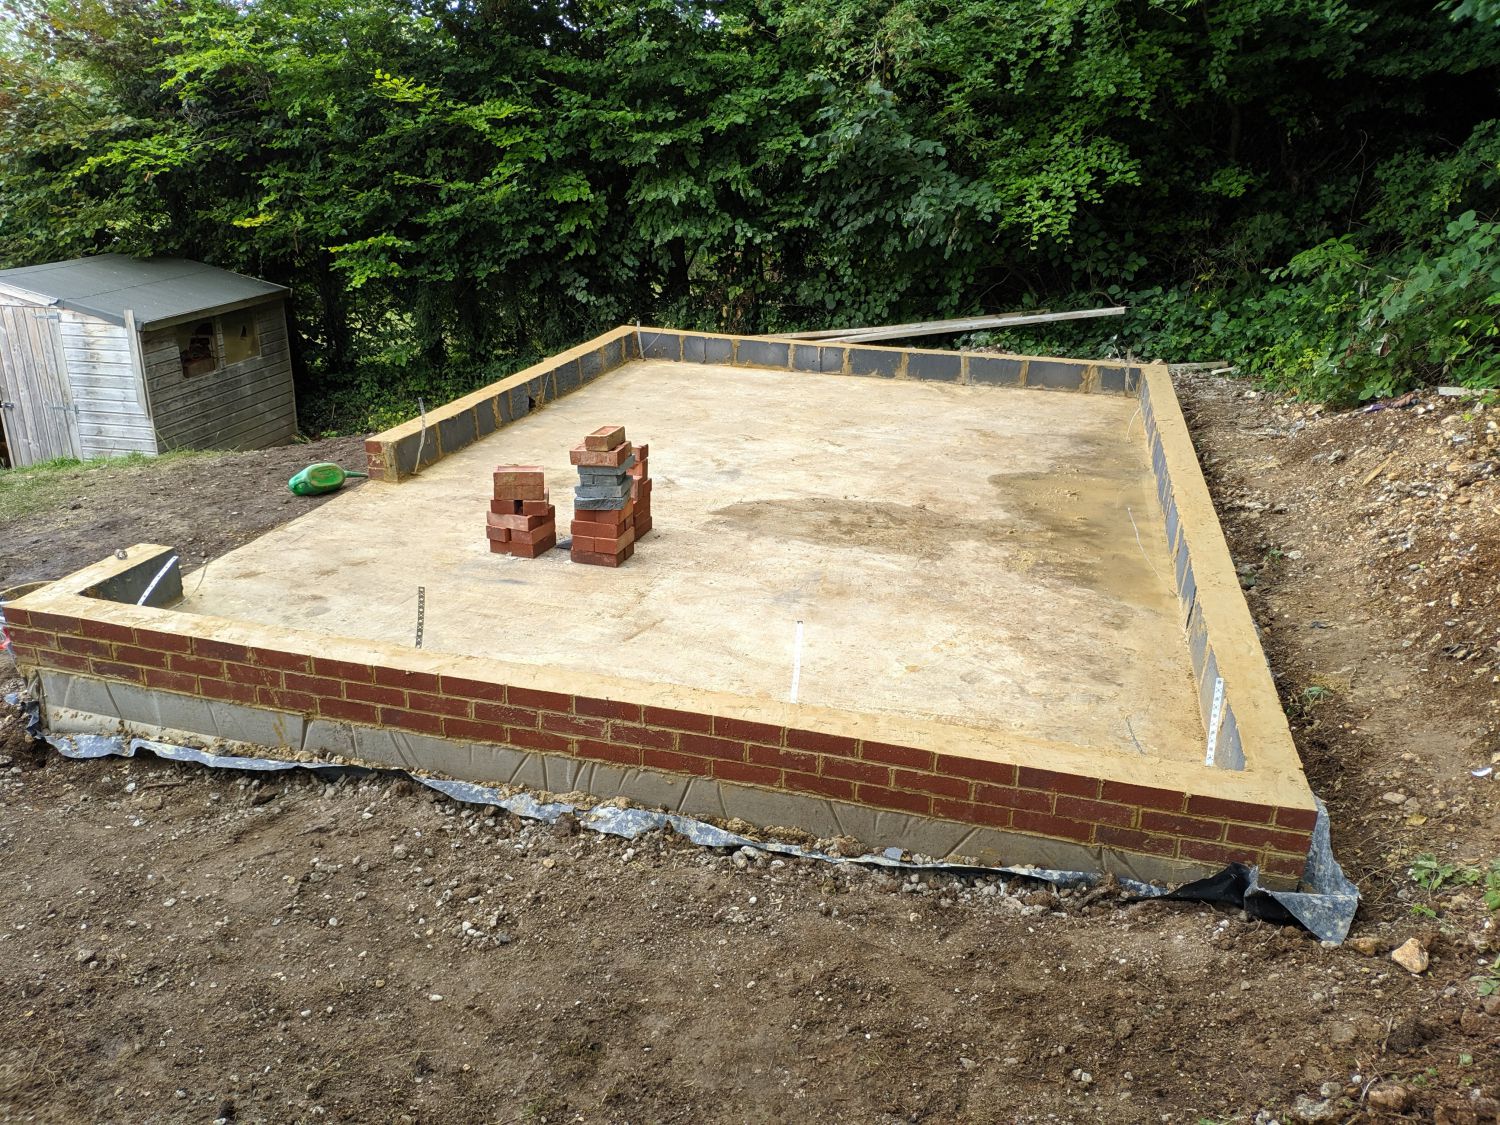
At this point the site had been fully prepared and was ready for concrete. The design by Mike shows a plinth of two to three brick courses; I decided to go for three along with an additional 50mm block bedded onto the back of the brickwork to make the featheredge just overhang the front of the brickwork (drawing here).
Pouring the concrete
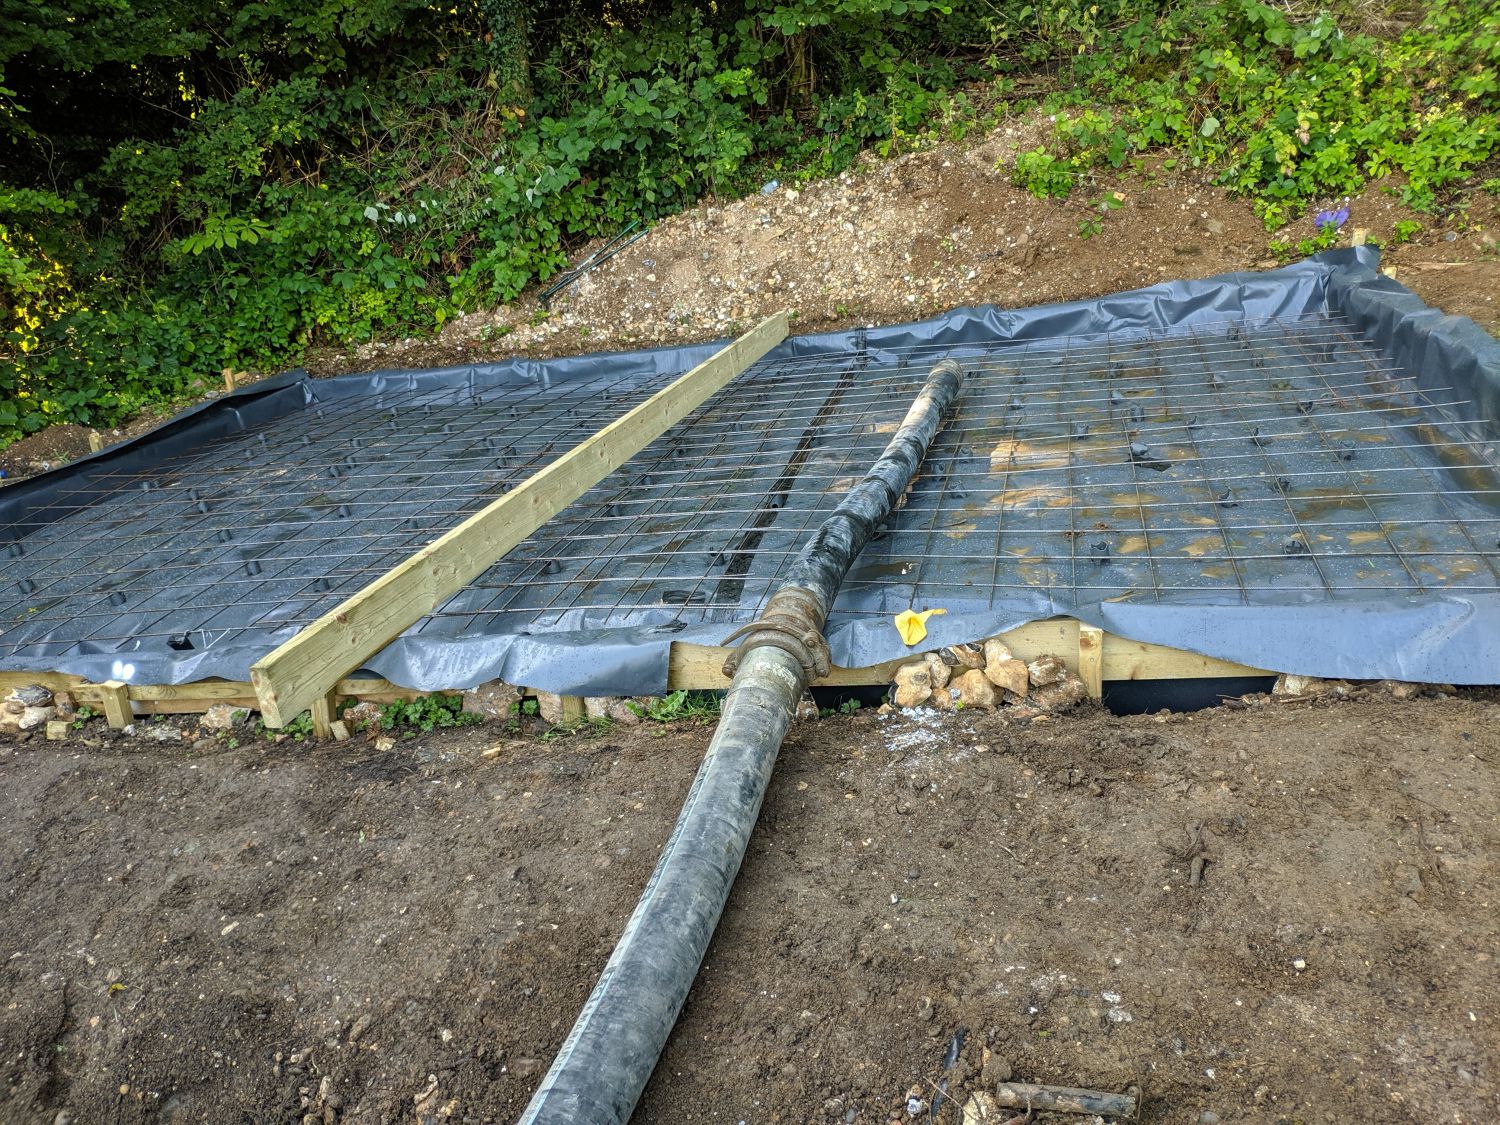
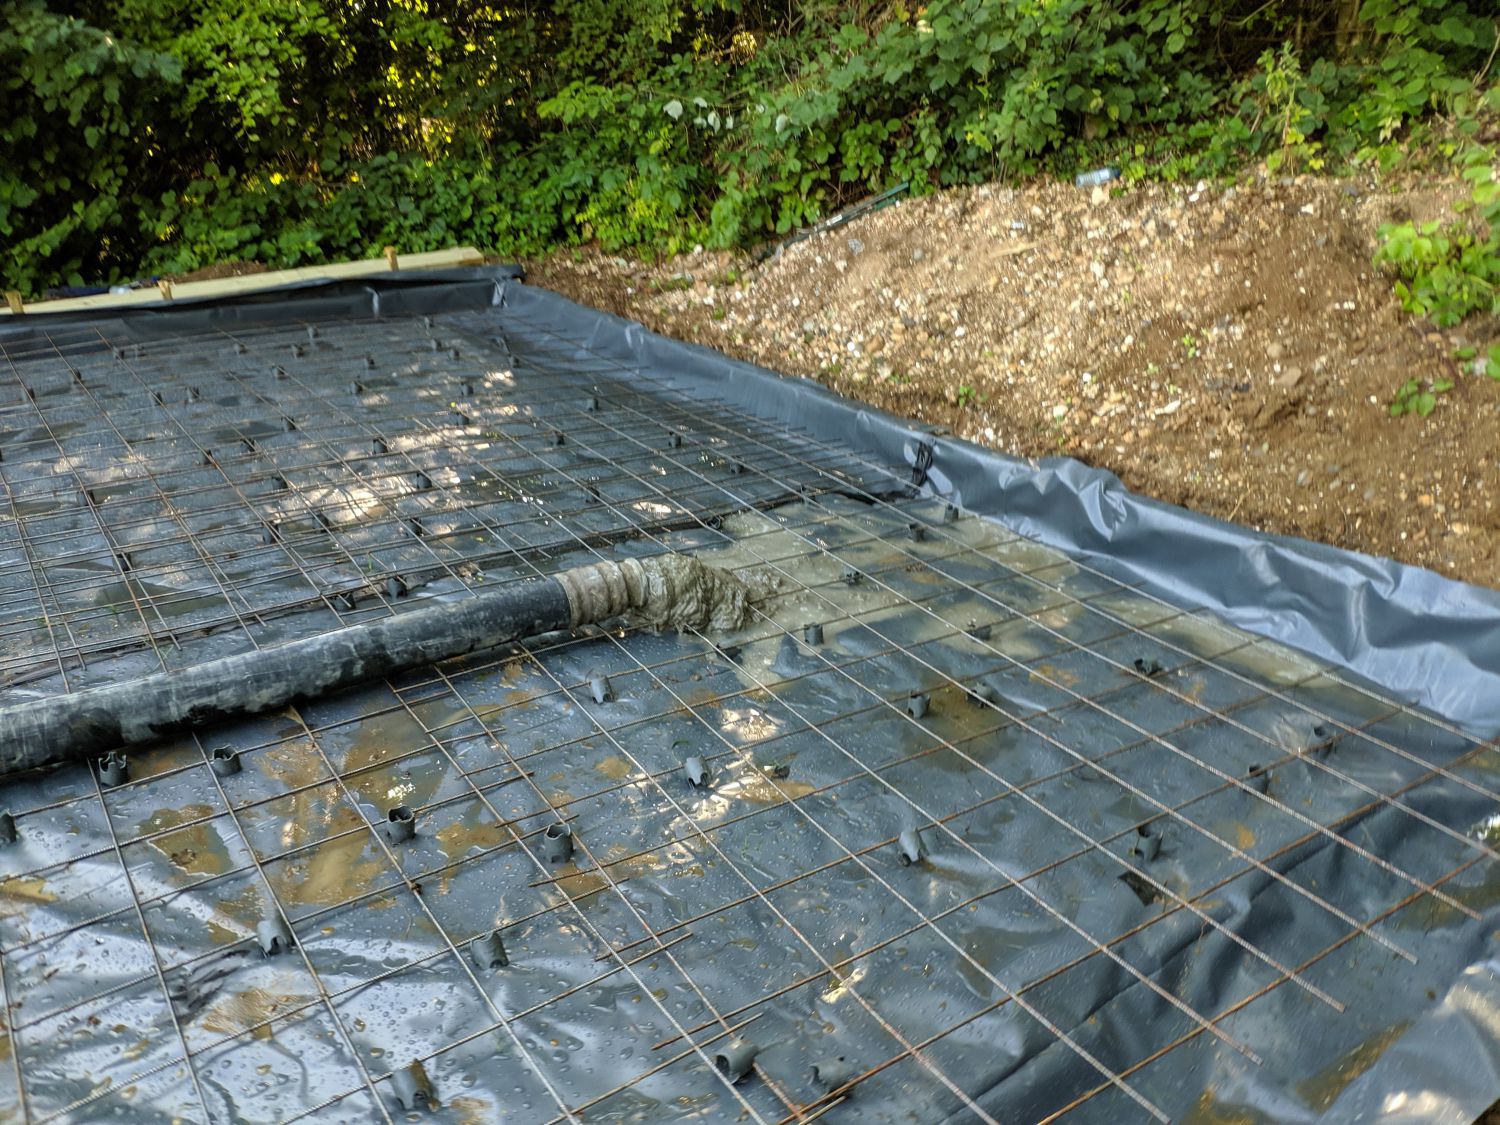
Due to the volume of concrete required along with the steep hill the only way to get concrete on site was by use of a ground-line pump. This pumped the concrete, which was a C25 mix, 60m up-hill. One disadvantage of a pump is the risk of the pump operator pumping too much concrete due to wrongly estimating the amount left in the pipe; in my case I estimate ~2 cubic metres too much was pumped, quite a large additional cost. This extra concrete ended up outside the form after screeding and ended up having to be dug out the next day to remove the forms!
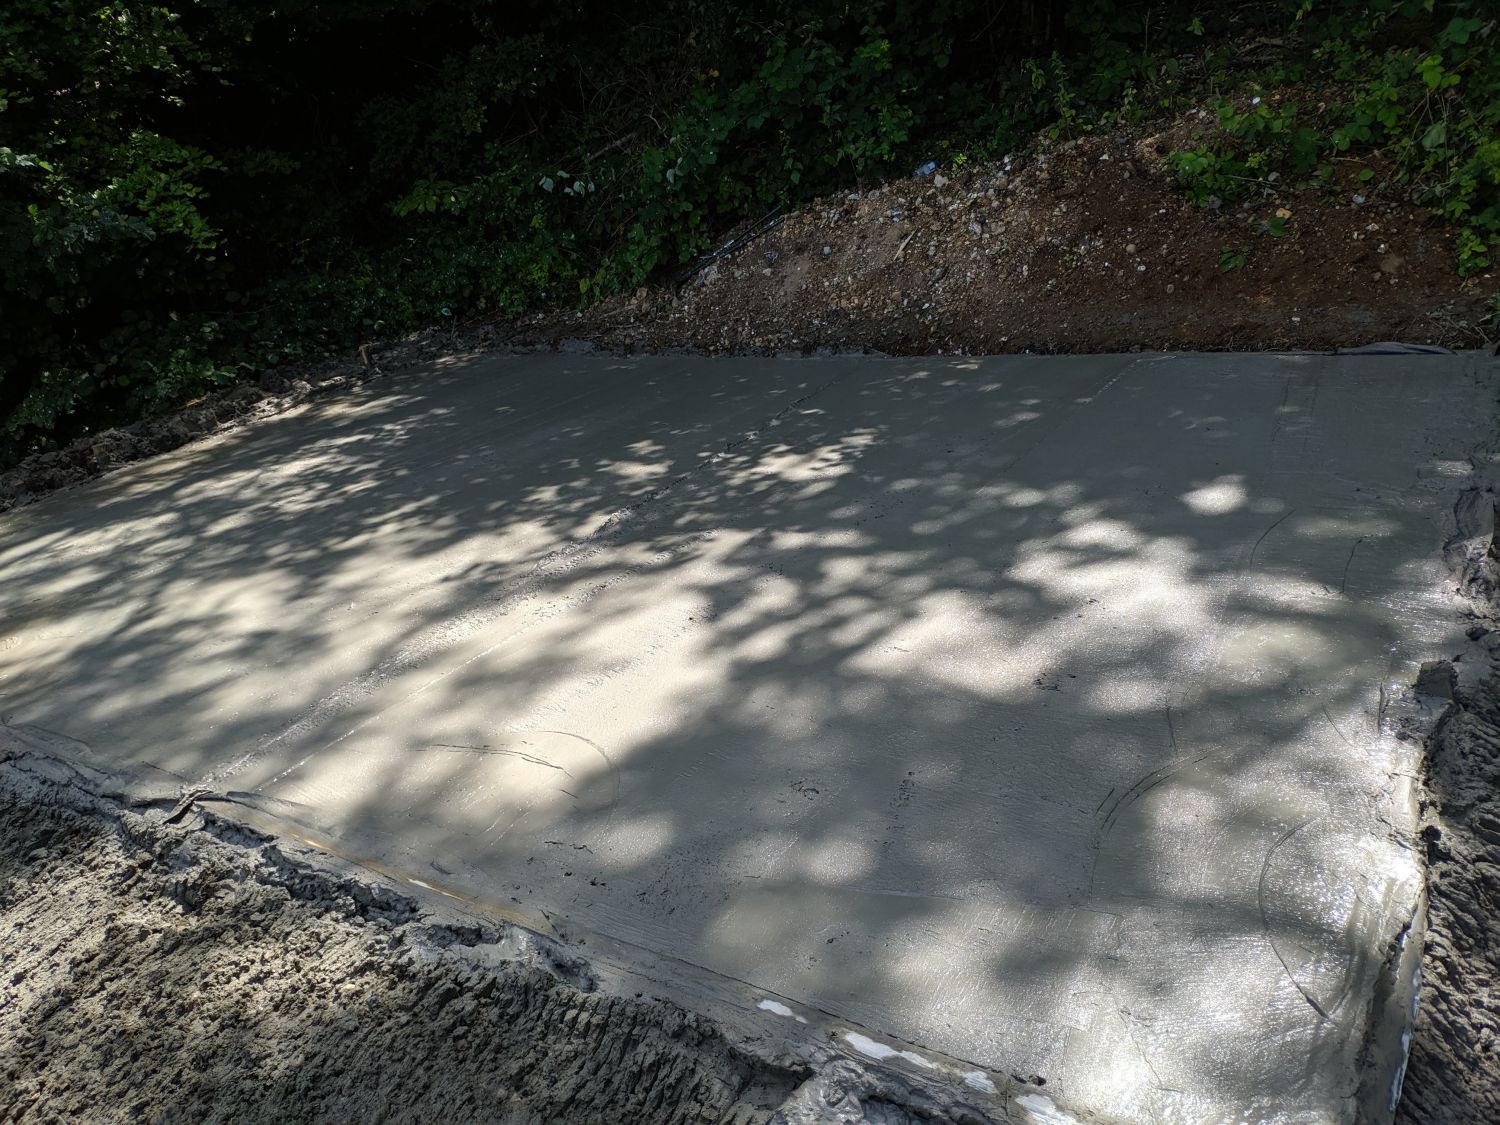
Once the concrete had been screeded flat and started to dry, I hand floated, using two long timbers to support me. Over the next few sunny days, I wet and covered the slab to slow the drying process, resulting in greater strength.
Making the plinth
Once the slab was dry I could begin bricklaying. For all of the brickwork I used a mortar mix of 6:1:1/2, sand:white cement:lime. I used white Portland cement and lime to give the mortar a lighter more appealing look (this could have been excluded for the blocks which are not externally visible). I mixed my cement on a large board of plywood by hand. I had help from my grandpa for this stage who is a former bricklayer.
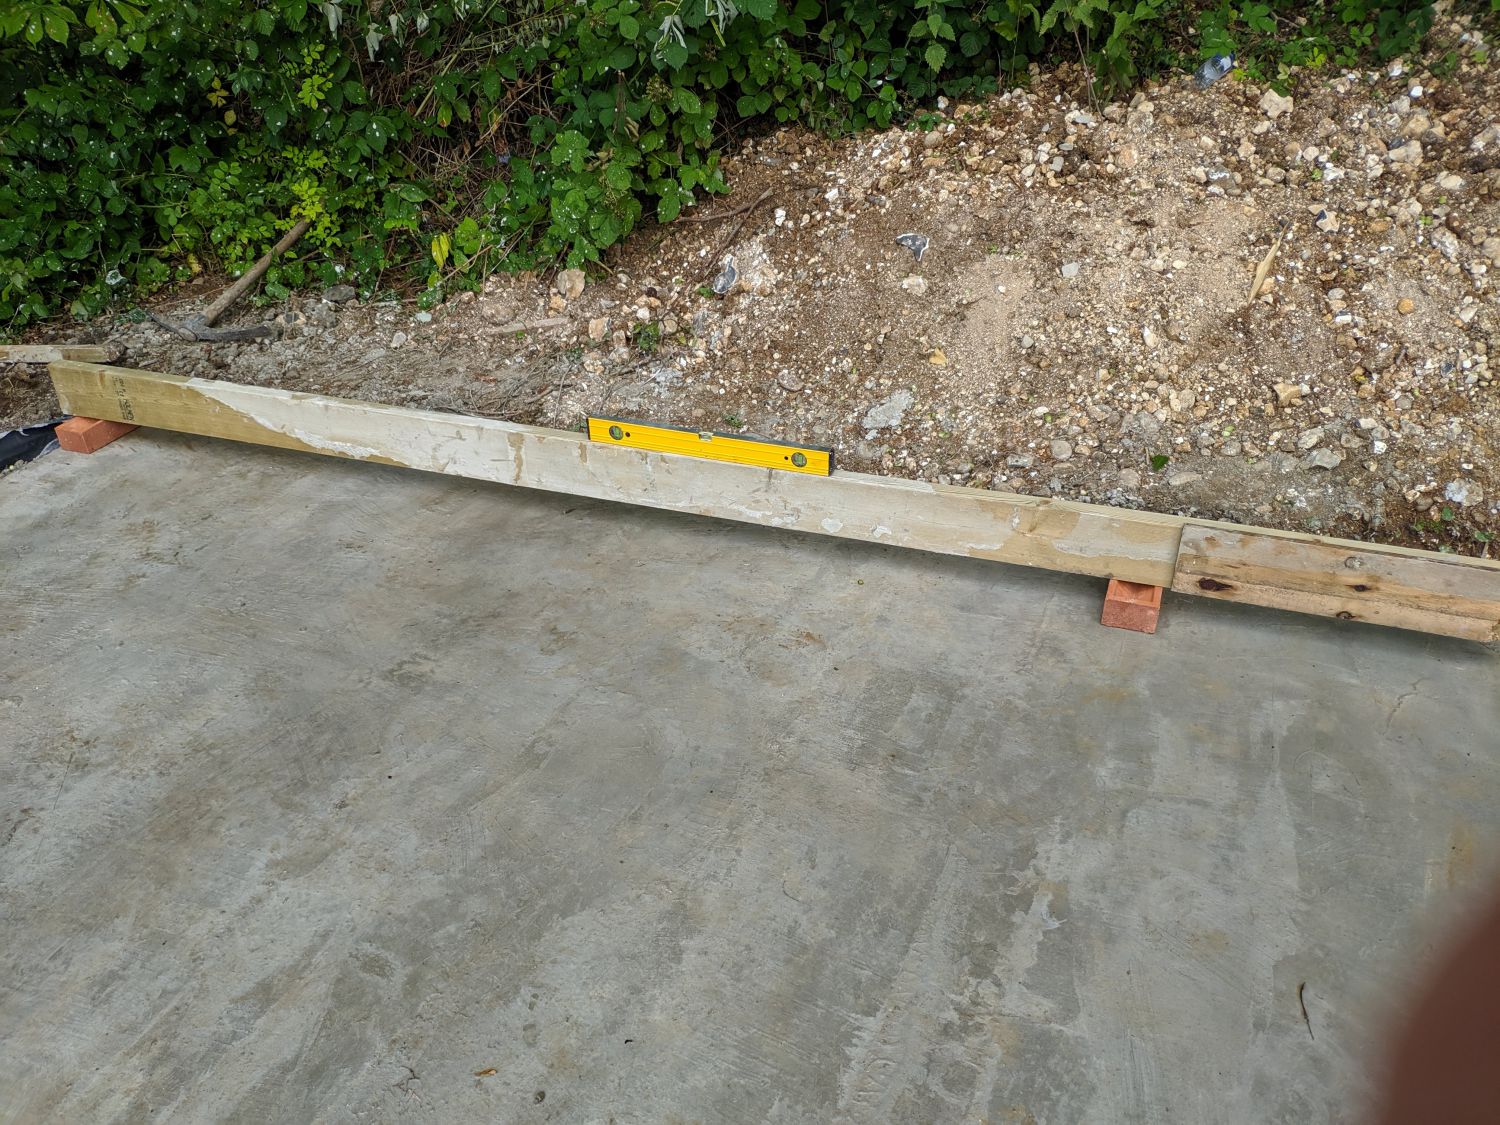
Before we started laying brick we had to determine if the slab had any minor slope. To do this we used a straight timber, a level, and two bricks which we moved between the corners noting their heights in relation to each other. We could then vary the thickness of the mortar bed on the first course to ensure the plinth was level for the frame.
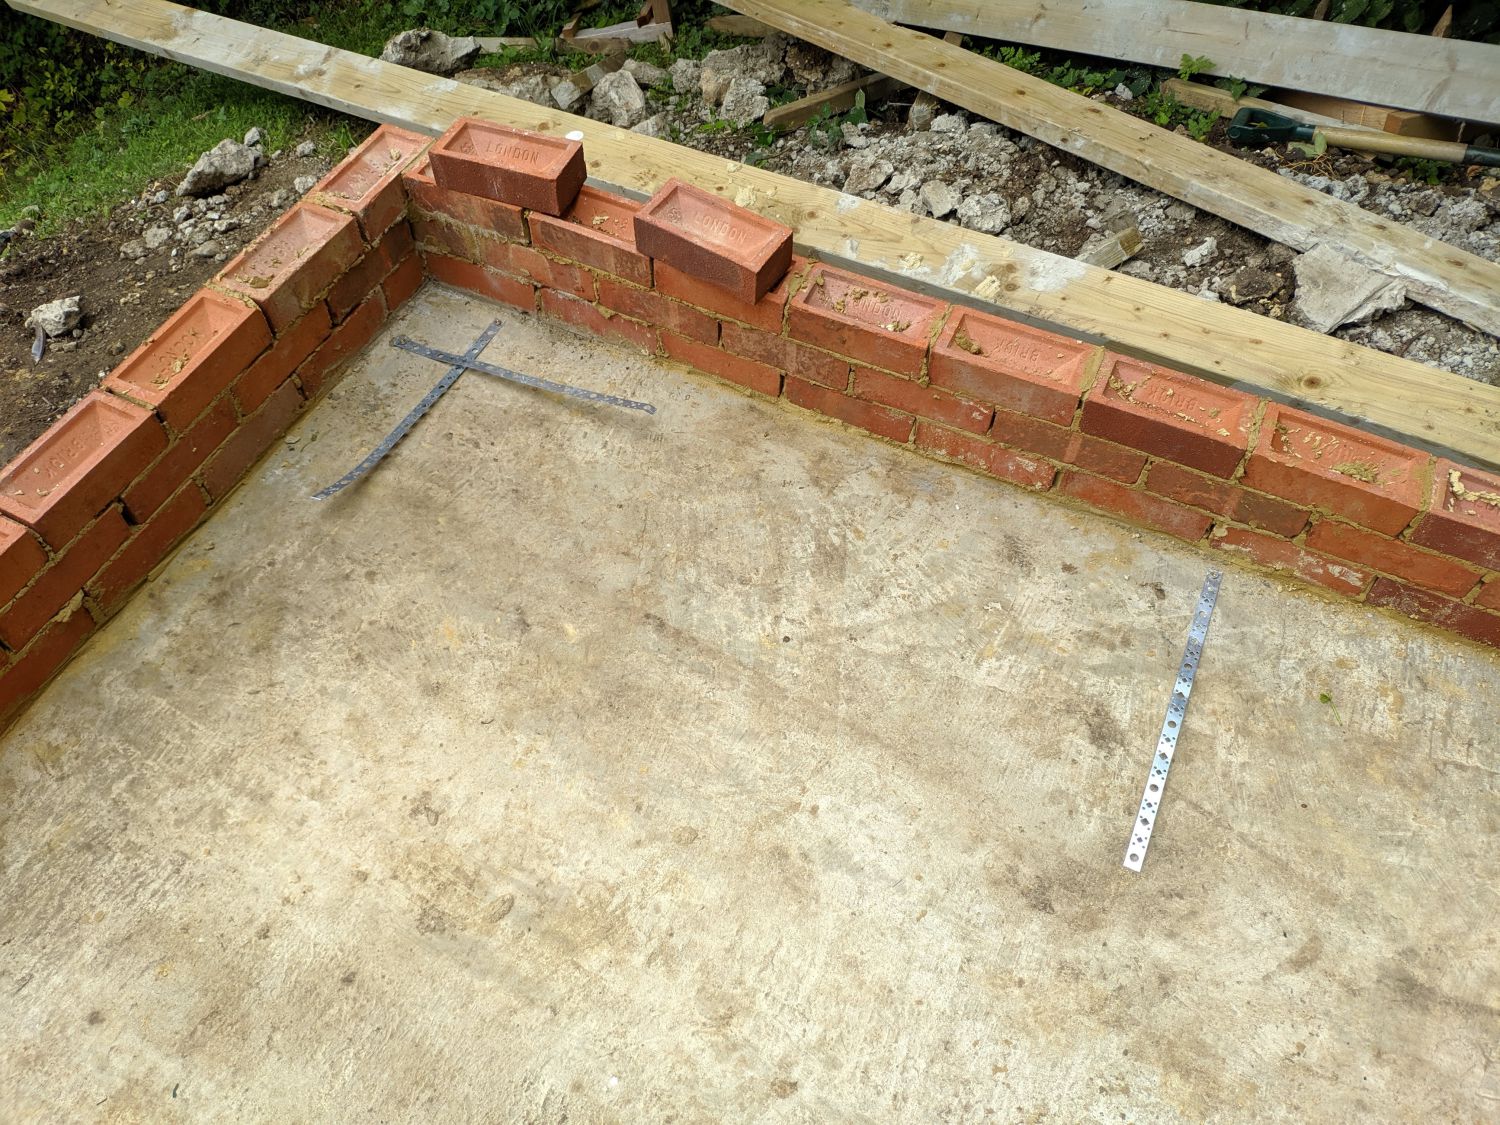
Raising the corners
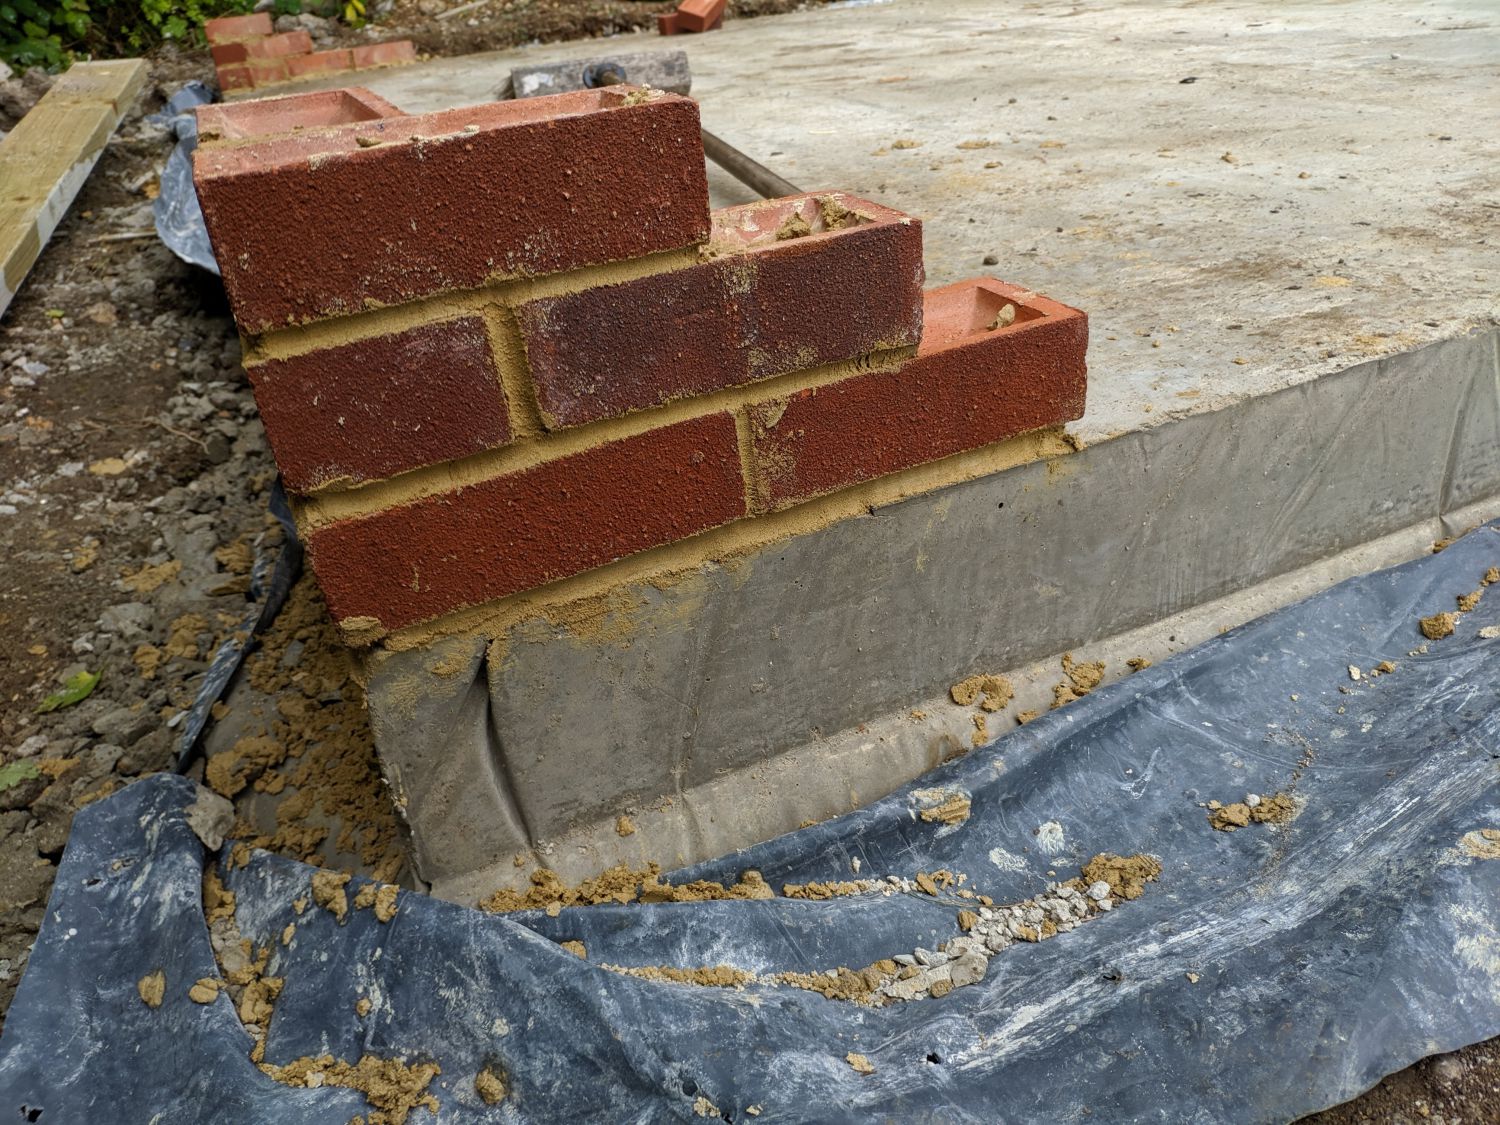
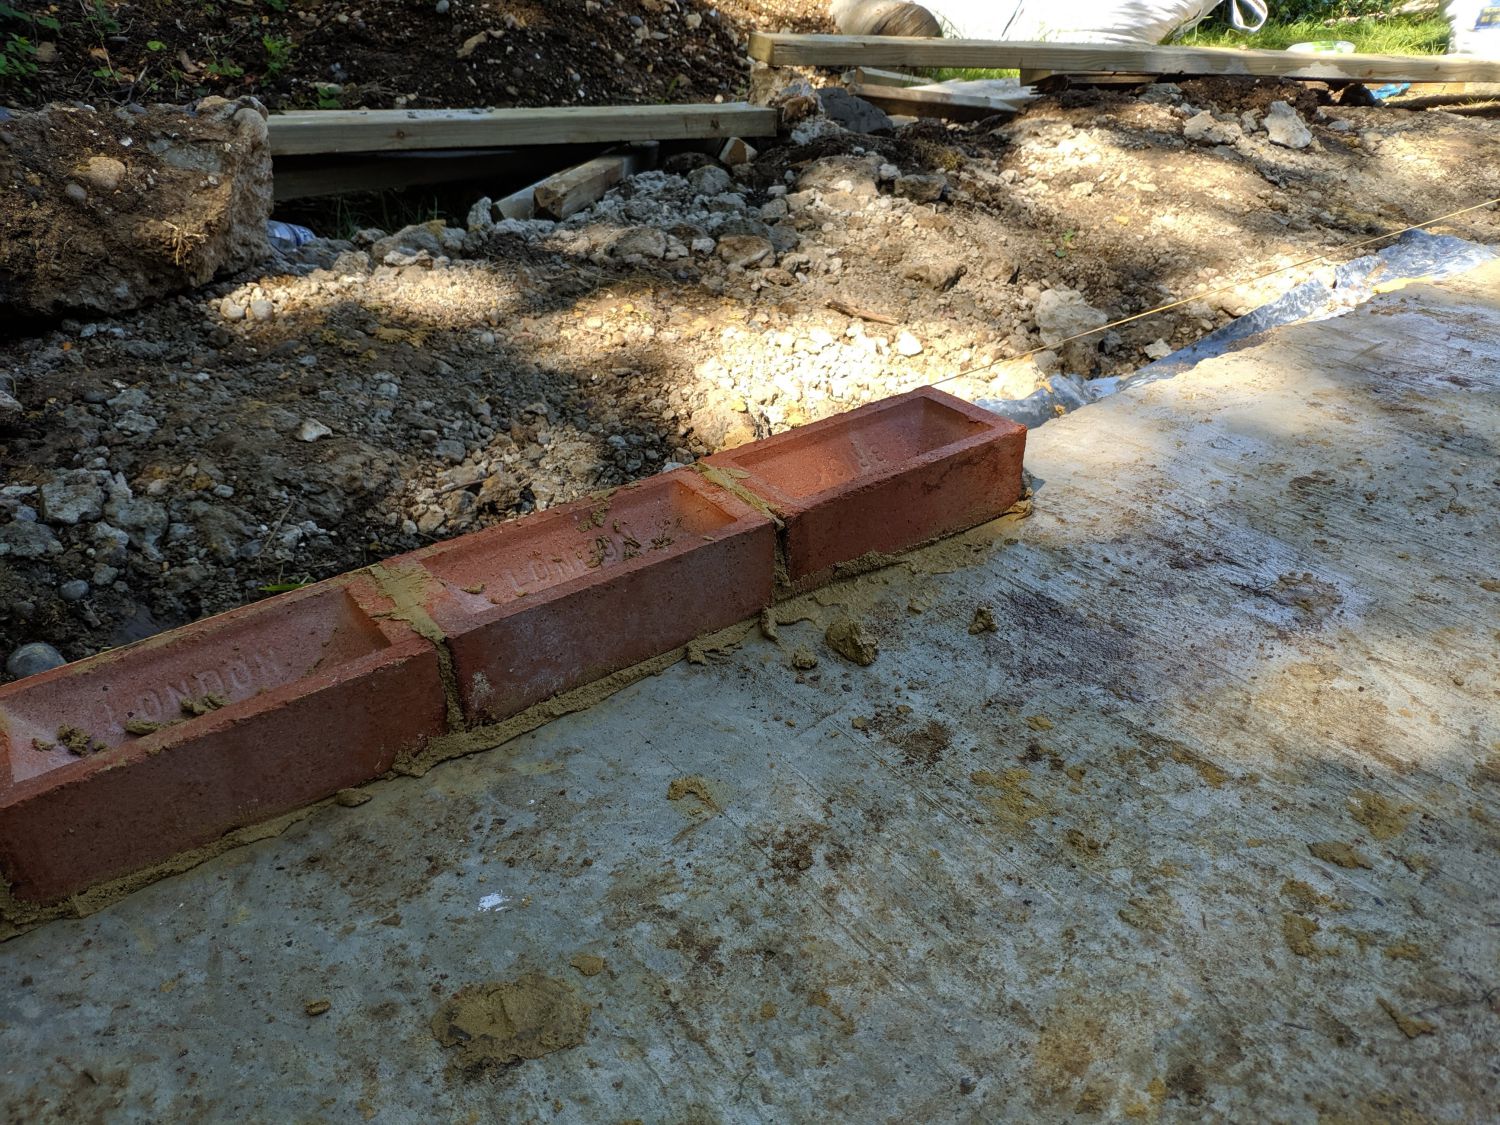
The first brick laid were at the corners where we raised corners three bricks high (height of the plinth). It was critical that these were square as they are used as a reference point for all other bricks on the plinth. Some corners were also chipped as I forgot to purchase an edging trowel for the concrete which made getting the first brick level a challenge.
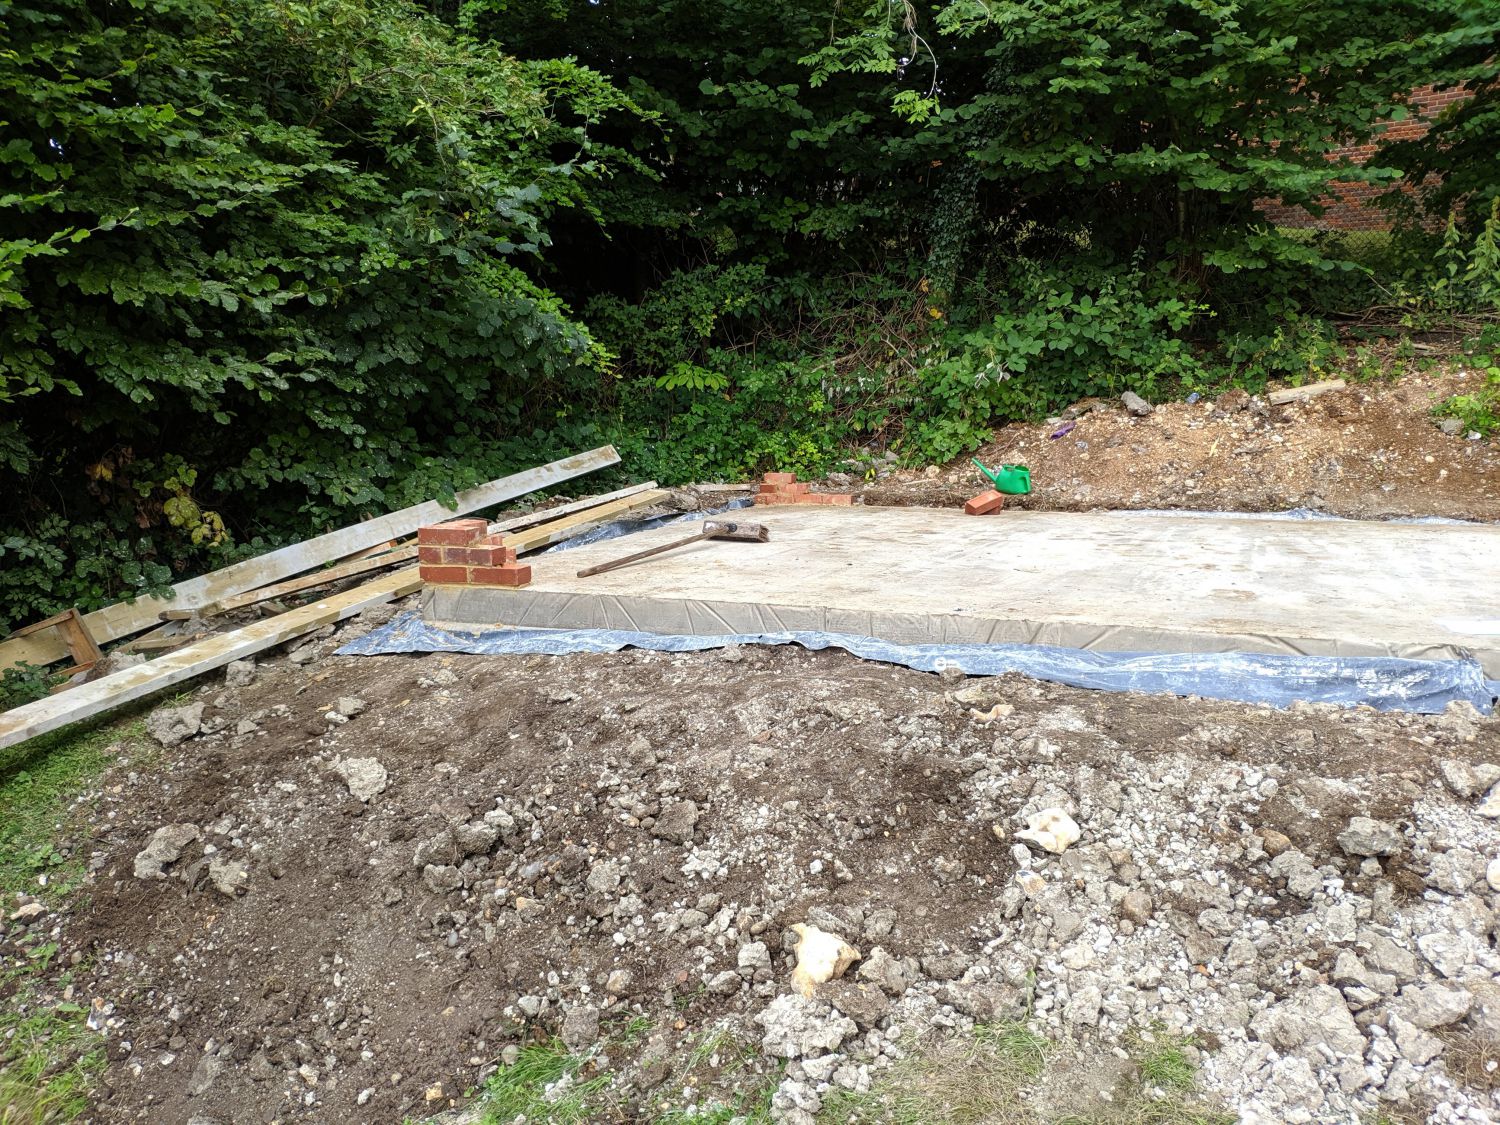
Raising the dwarf wall
Before starting to fill between the corners we estimated the mortar side joint thickness by laying out bricks dry and keeping the remainder in mind: this meant we could ensure side joint thickness was fairly consistent.
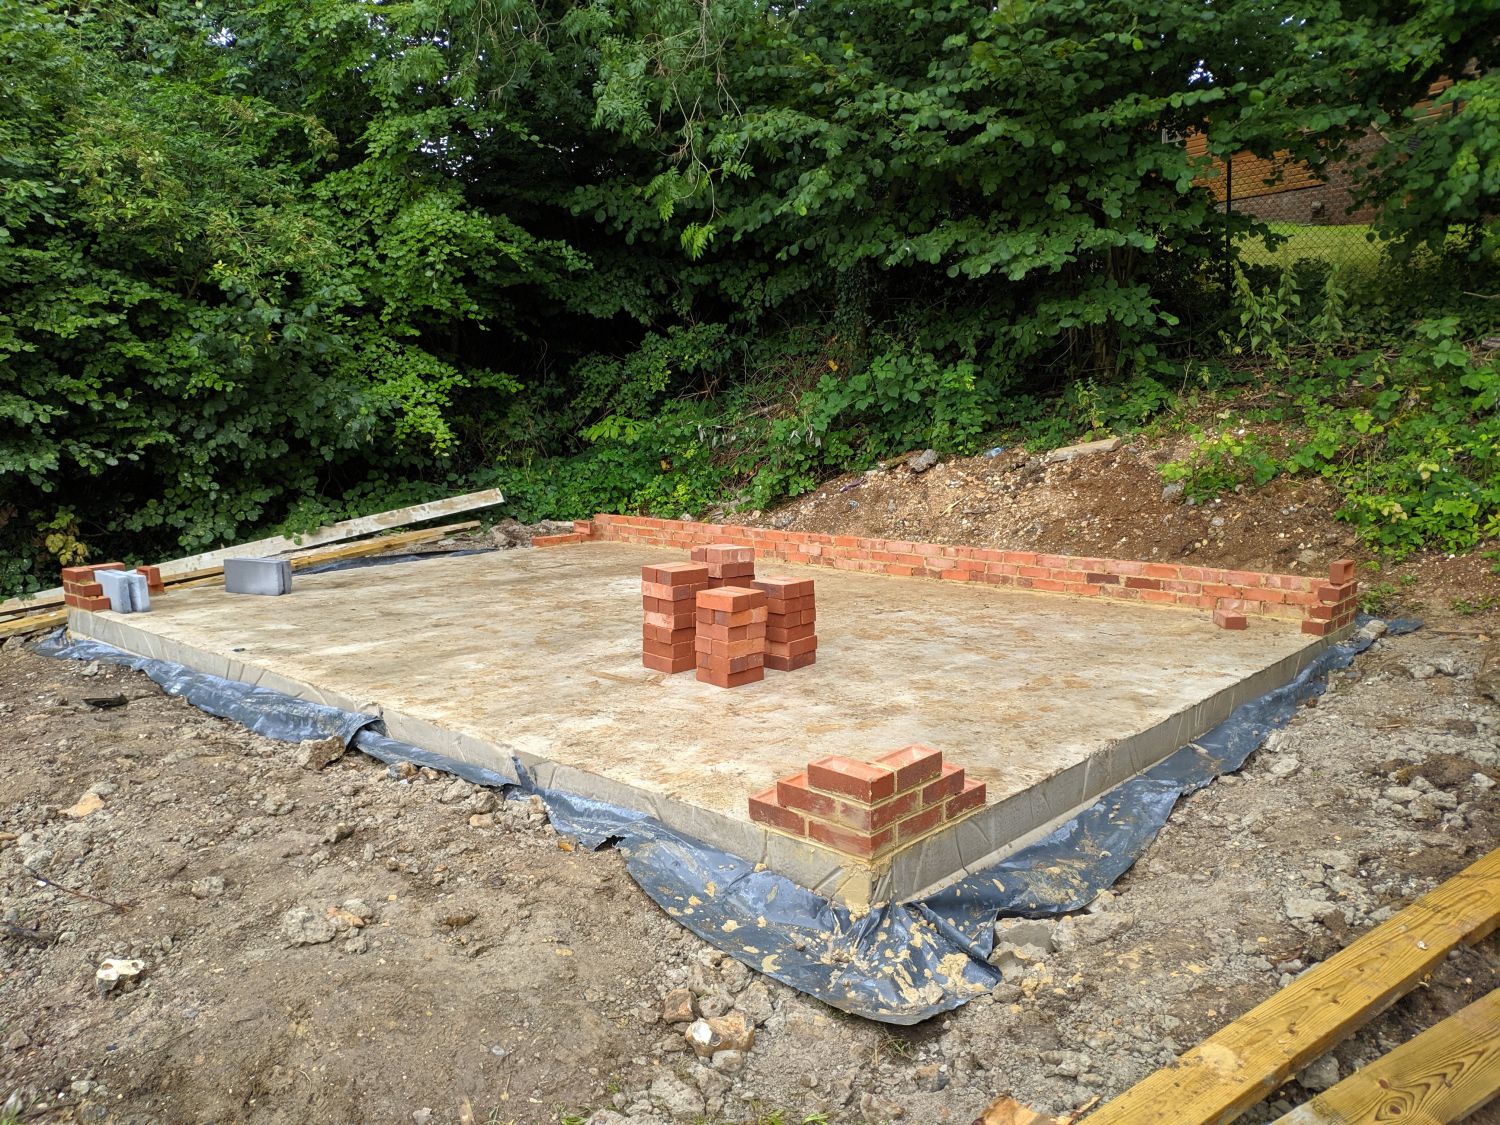
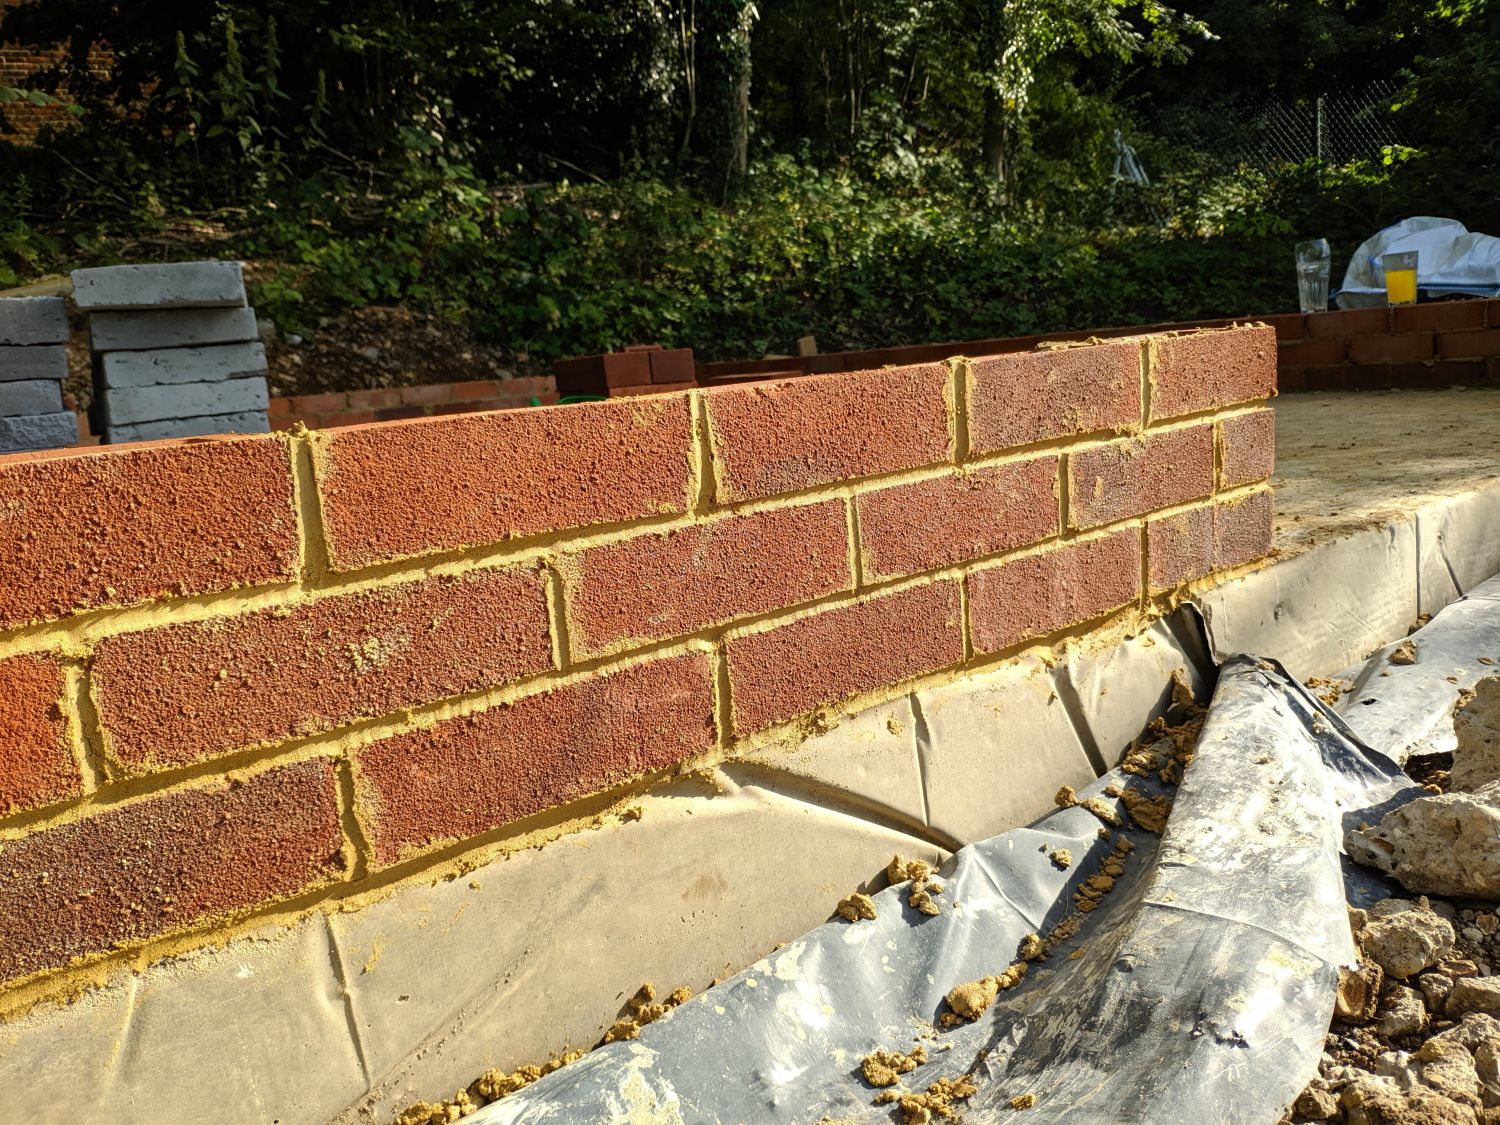
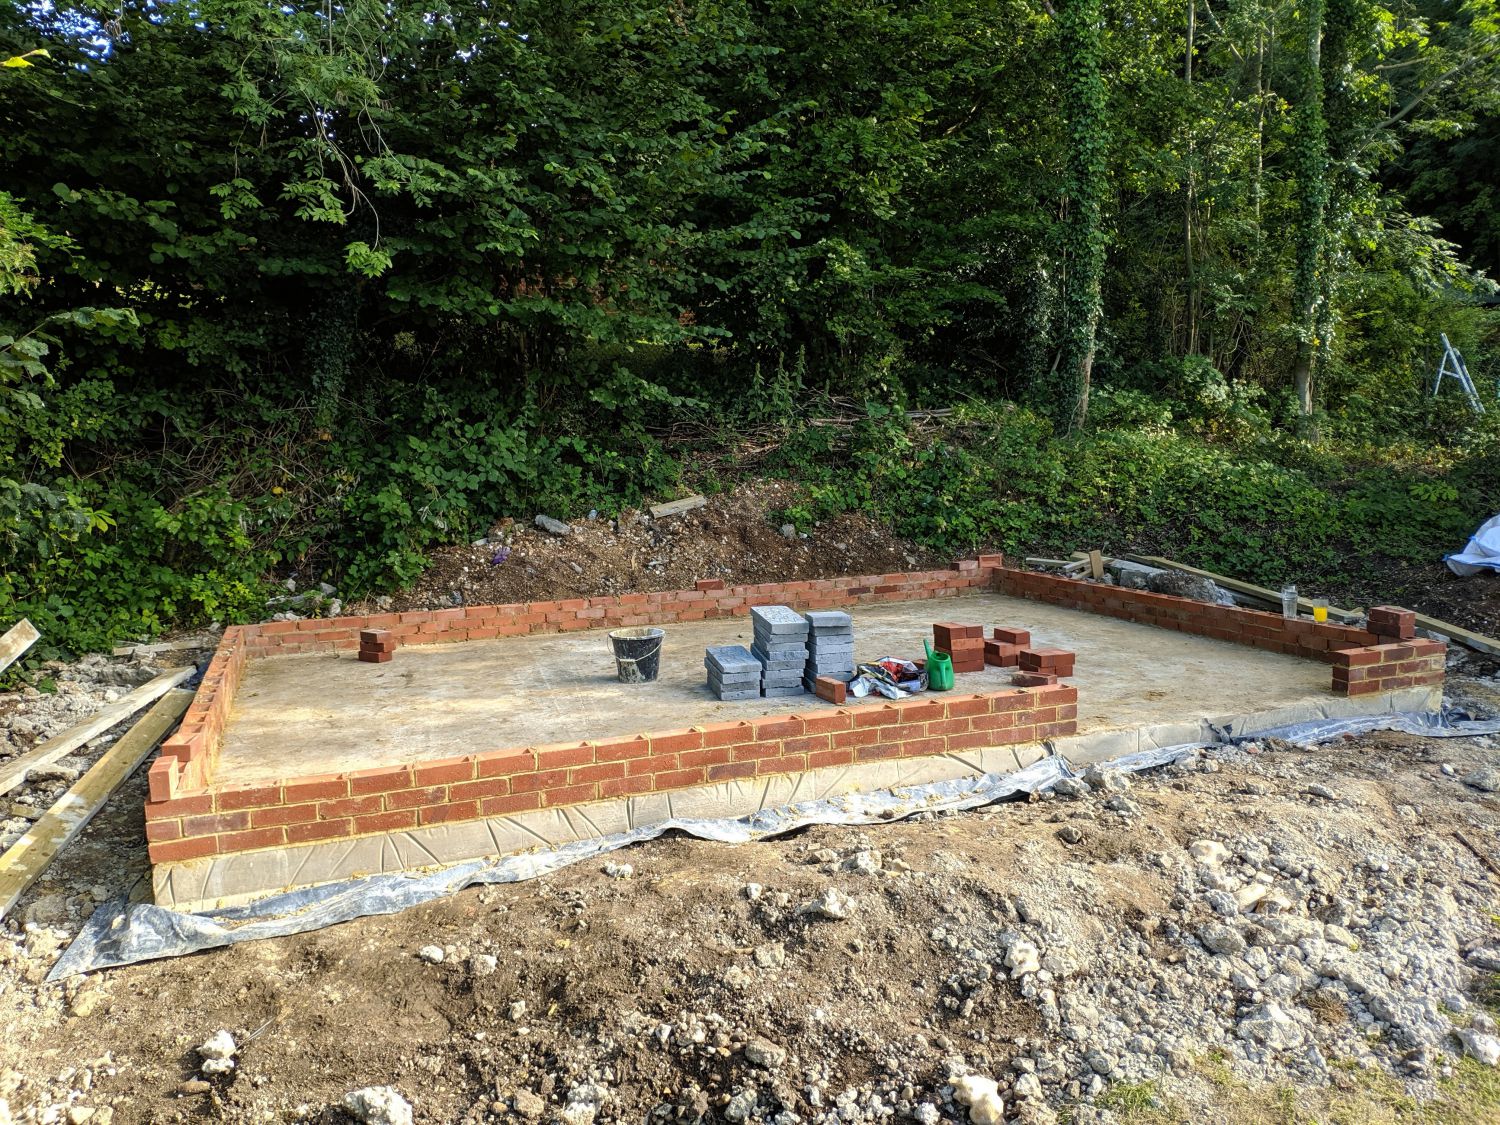
I then began to lay brick at the back of the building; this gave me the opportunity to practice laying, pointing and jointing on a non-facing side. I first laid a few bricks before coming back with a pointing trowel to fill gaps and then jointing with a jointing bar. While the finish on the back was fairly poor, by the tile I had reached the front I was able to get an acceptable look. We were able to finish all the bricklaying in two days and then moved onto block-laying.
Ties and blocks
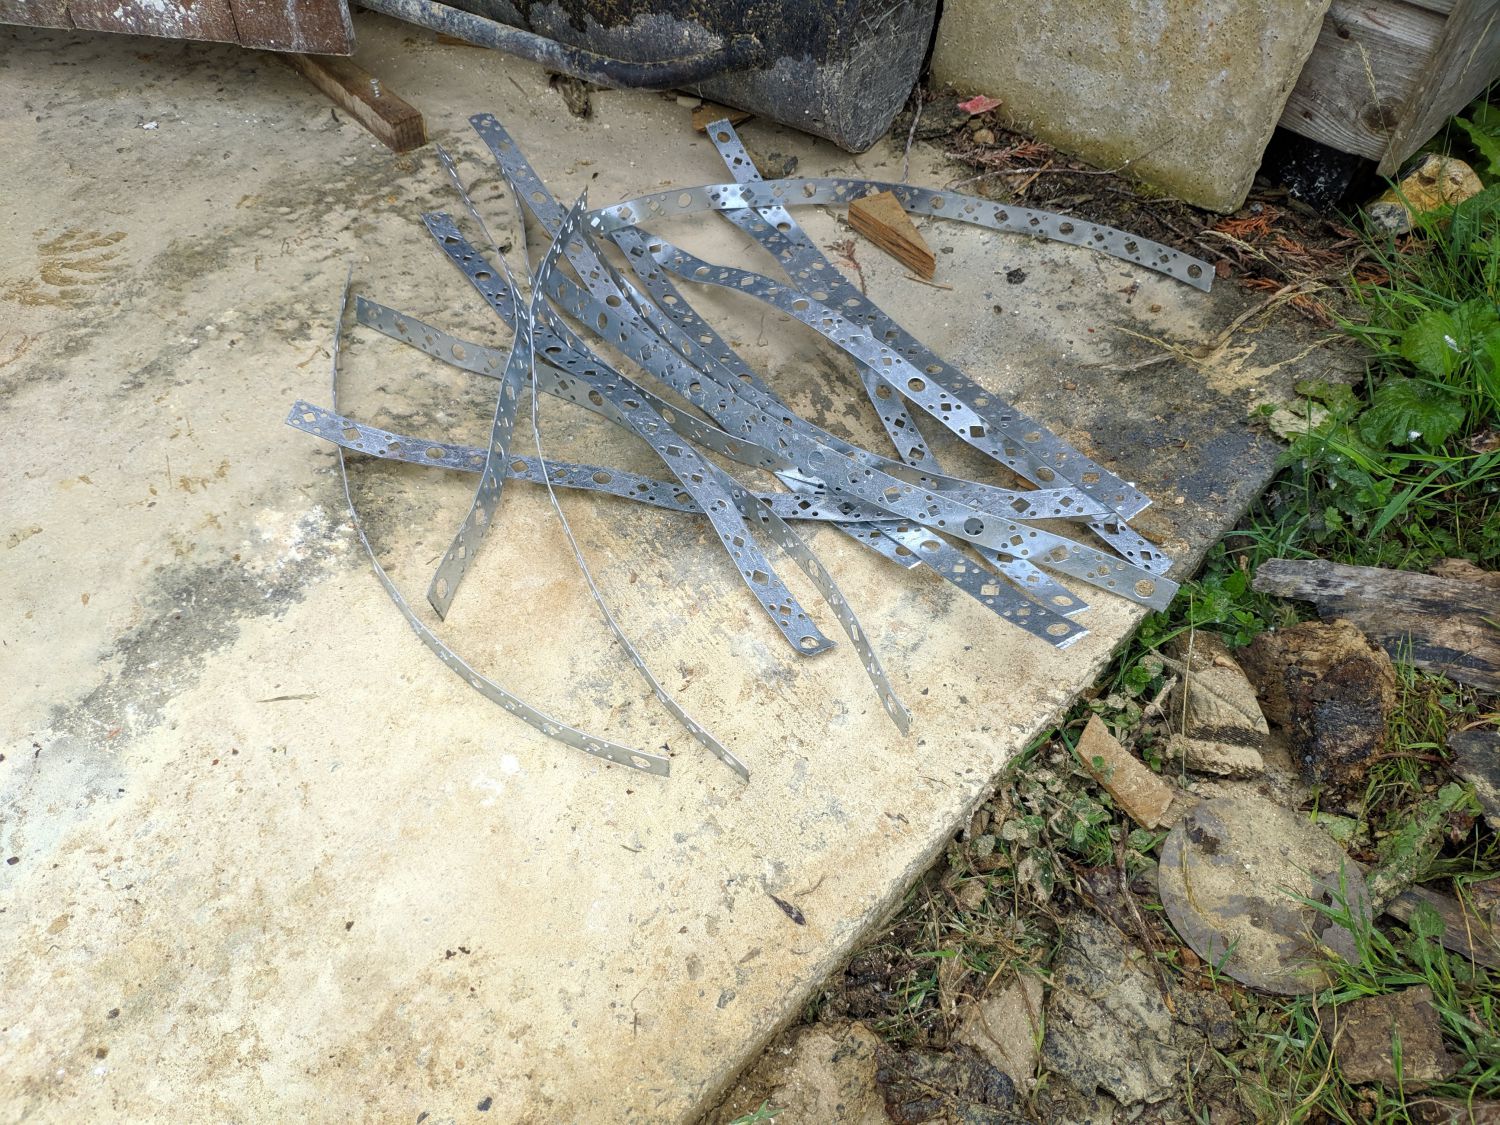
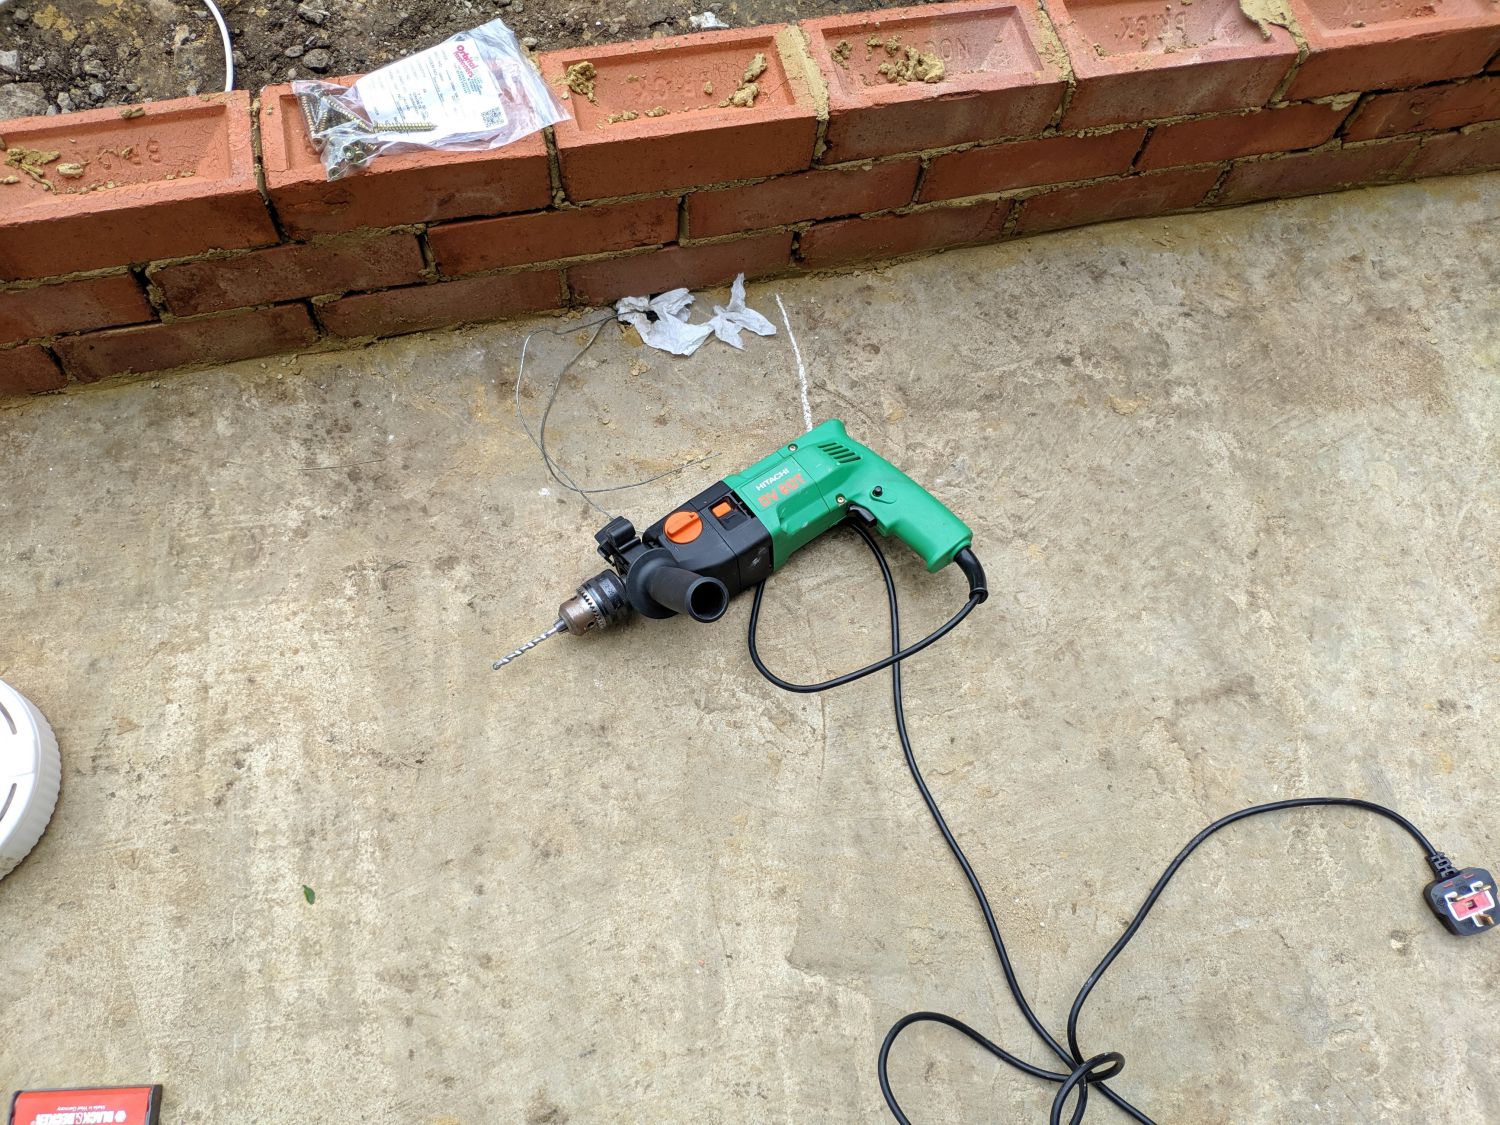
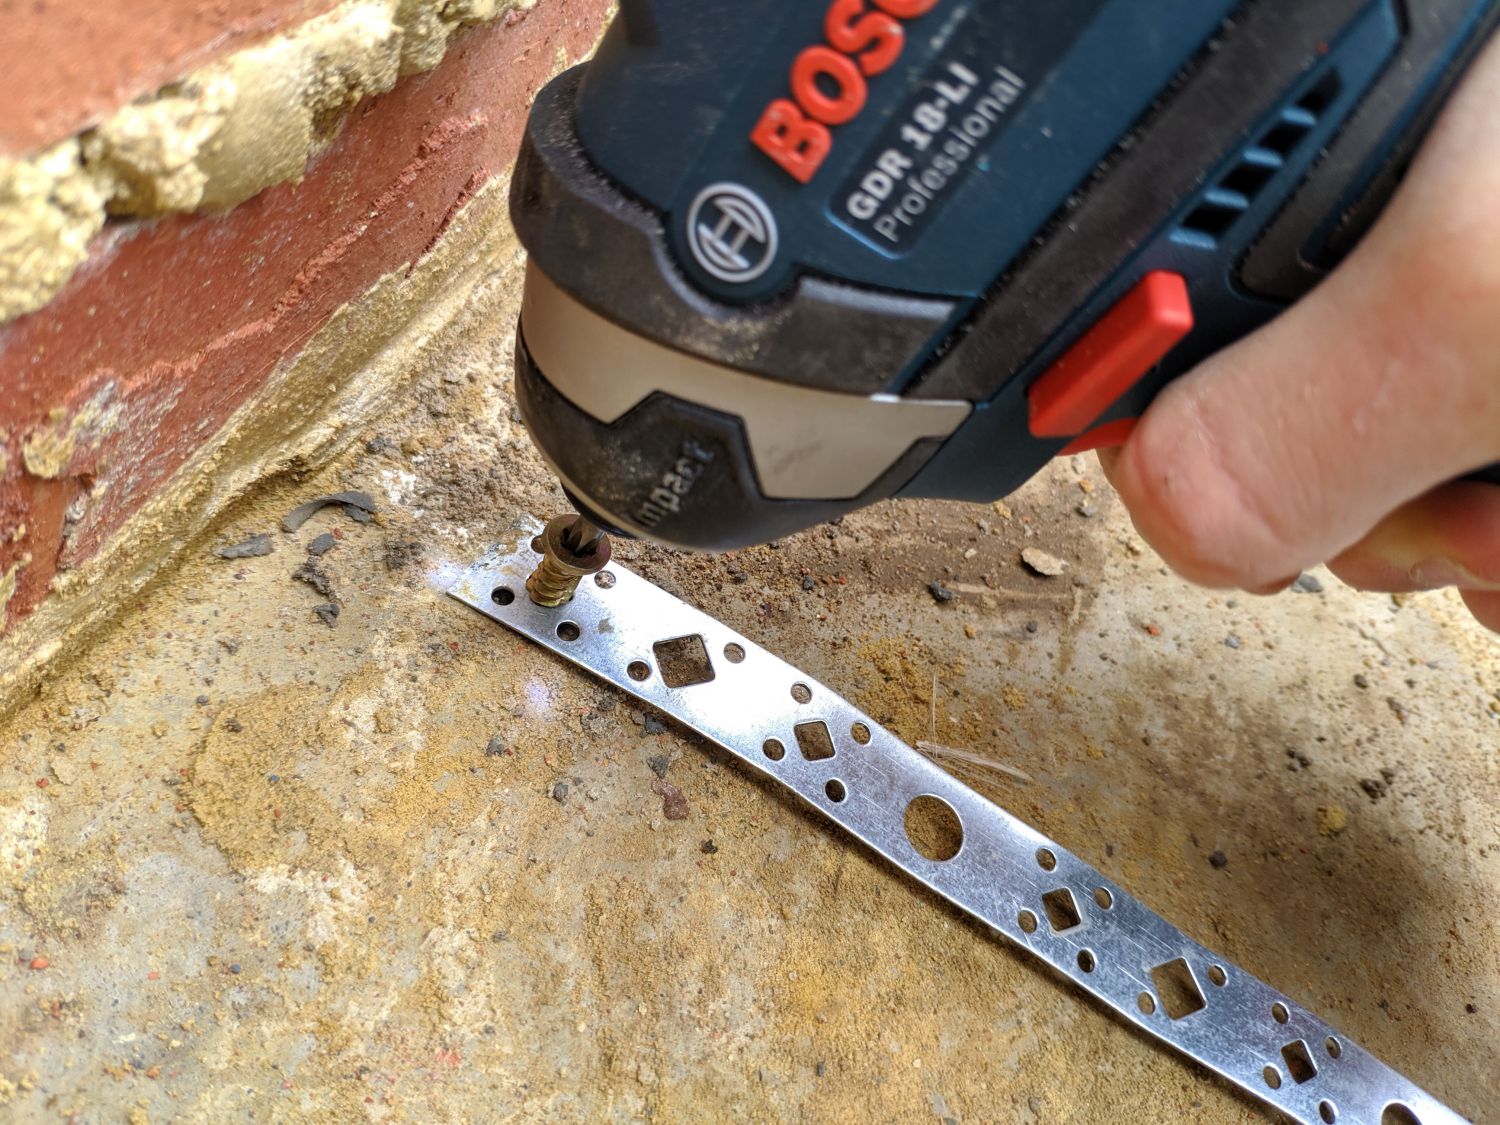
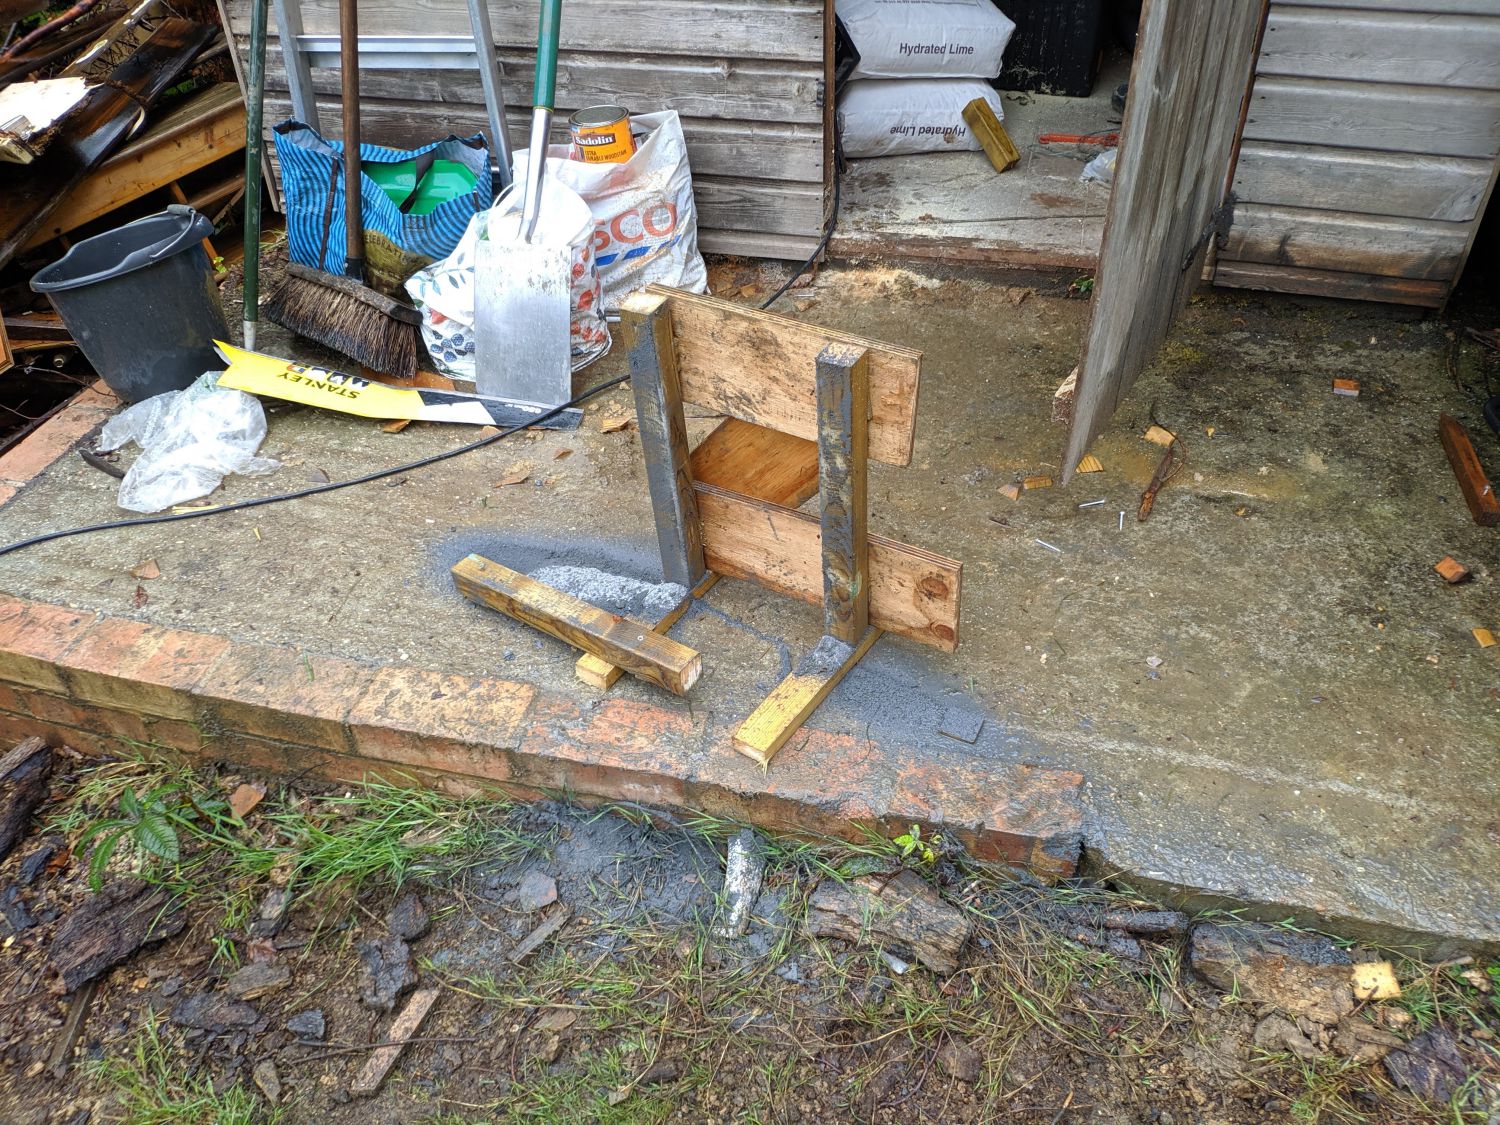
The timber frame of the building needs to be held down to the foundation; in reality gravity is mostly sufficient but for high winds ties are needed to keep it in place. I used flexible galvanised strapping, these could be cast into the slab but I chose to screw them in. First I cut the strapping with a masonry chisel, I left some extra space as I was unsure how thick the mortar bed the frame would sit on would be. I then used an SDS drill to make pilot holes every 1.5m, just in front of the brickwork (ideally these are away from the corners for increased strength). I then screwed them in place with concrete screws – using star head screws and an impact driver made this easy.
Next came the blockwork; I made a simple jig to cut 100mm blocks in half, this was quite a bit of work so ideally 50mm blocks could be sourced. These were standard Thermalite blocks so were simple to cut with a hand block saw. They were also very easy to crack but fortunately I bought enough spares.
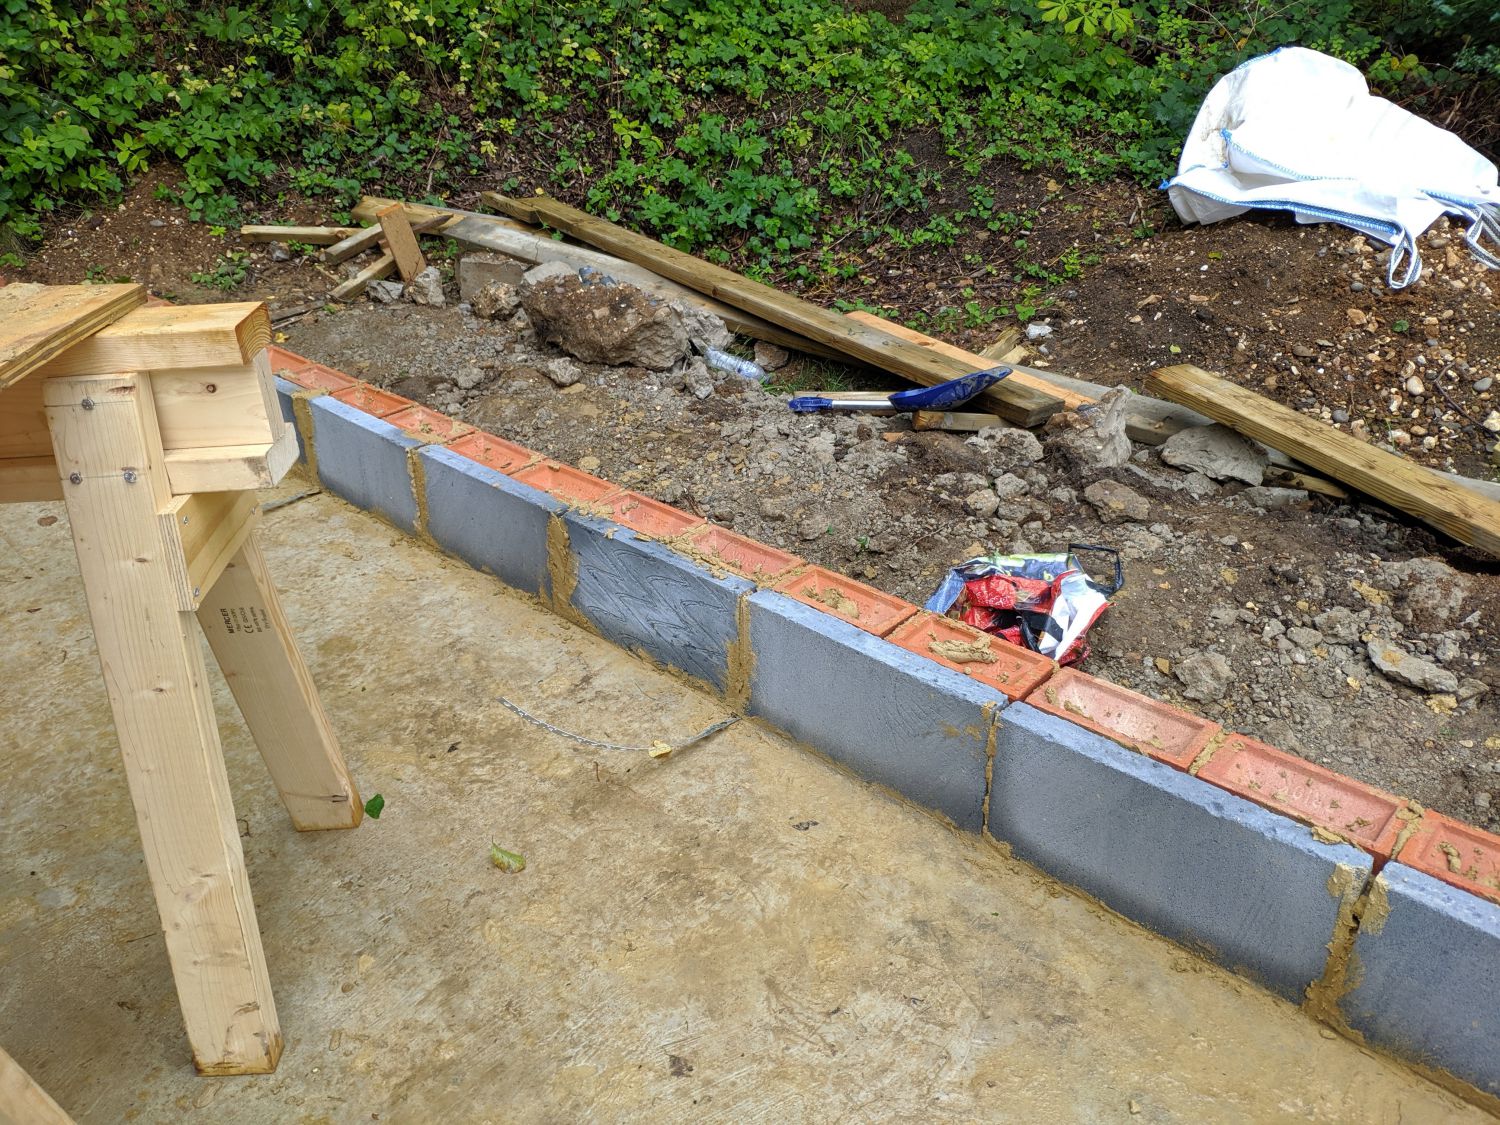
Once all the blocks were cut we began to place them; we did not bed the entire back of the block but only the centre and sides. We also used a wetter mix (too wet in some areas) to try and make it easier to set the blocks in the correct place. One (of the larger) mistakes I made was not to use a string line when placing the blocks and not to check they were plumb. This meant a number of the blocks tapered outwards and I had to later cut the OSB to above the blocks as it would not sit flat against them.
Finally we poured grout in the voids between the blocks and bricks and filled the top frogs with mortar.
Conclusion
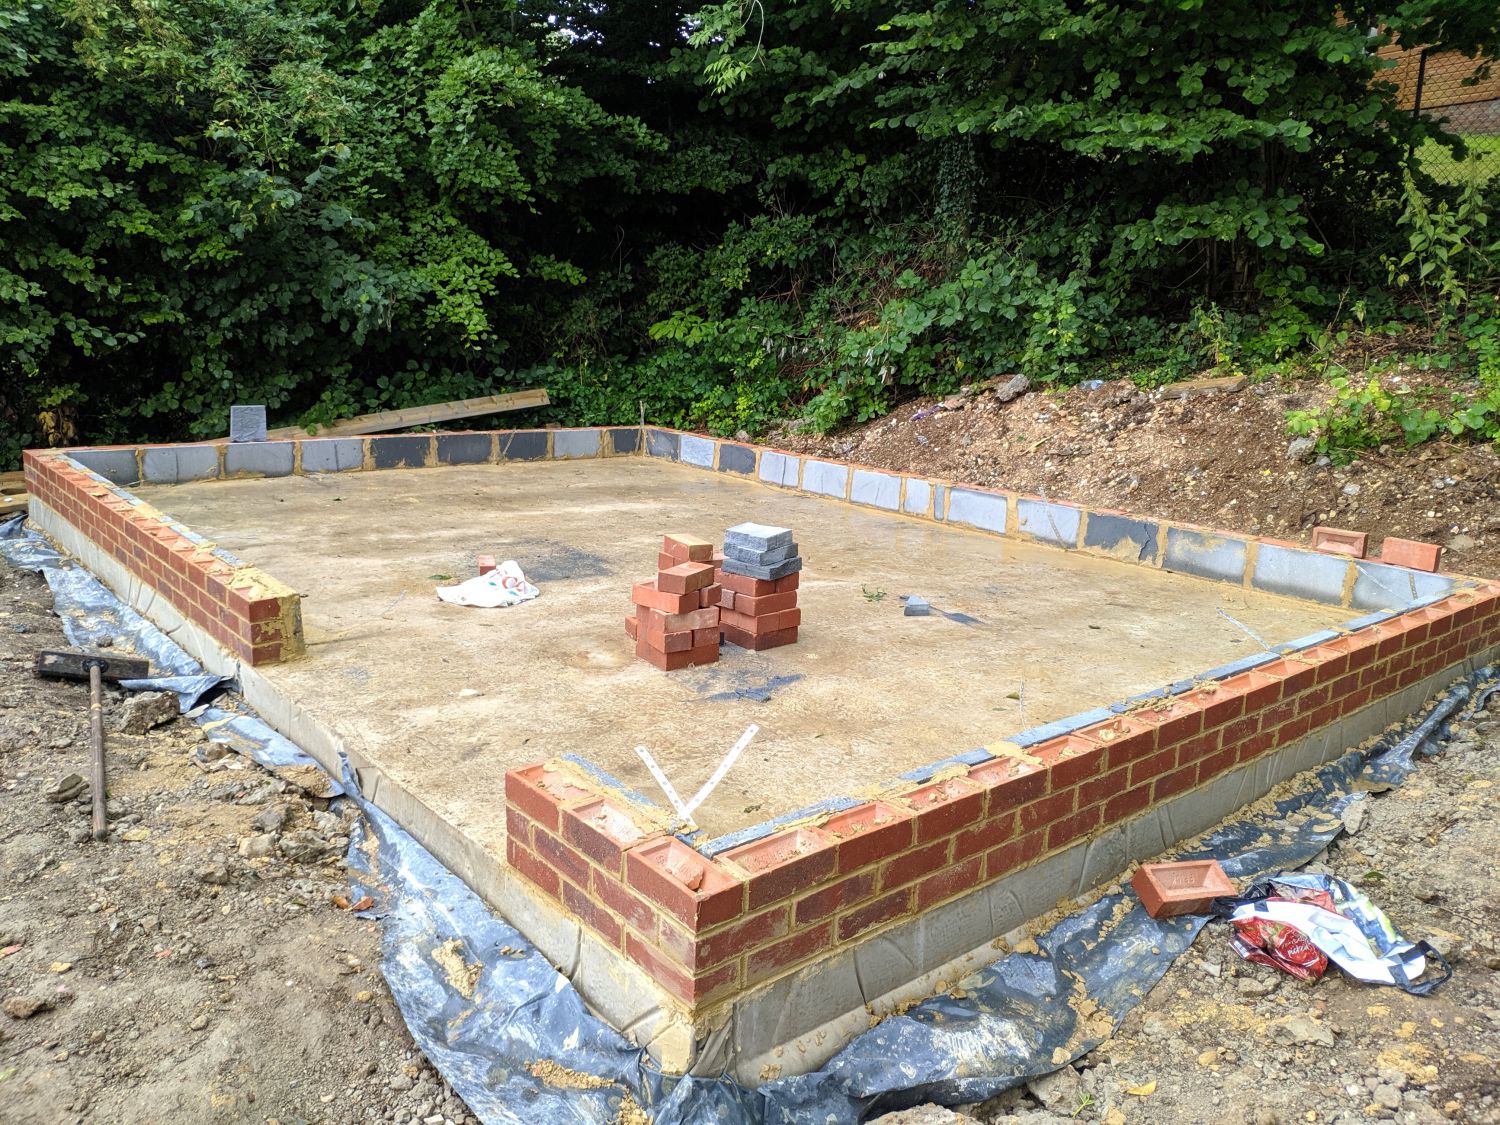
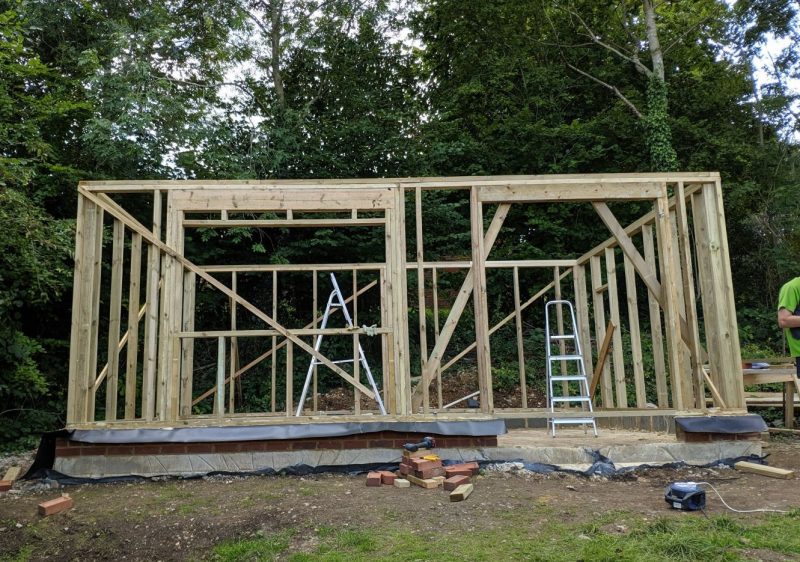
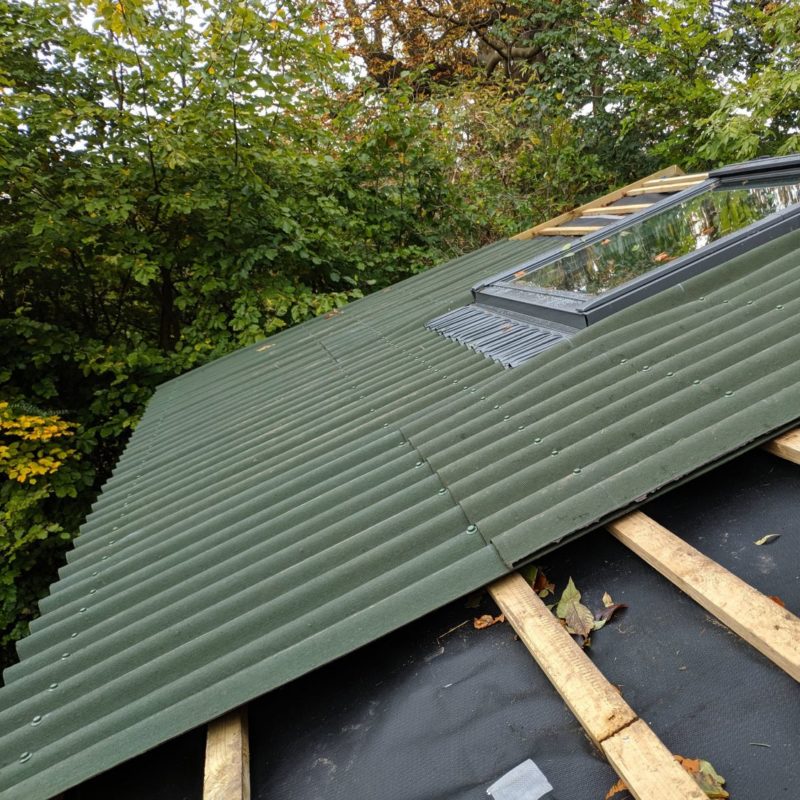
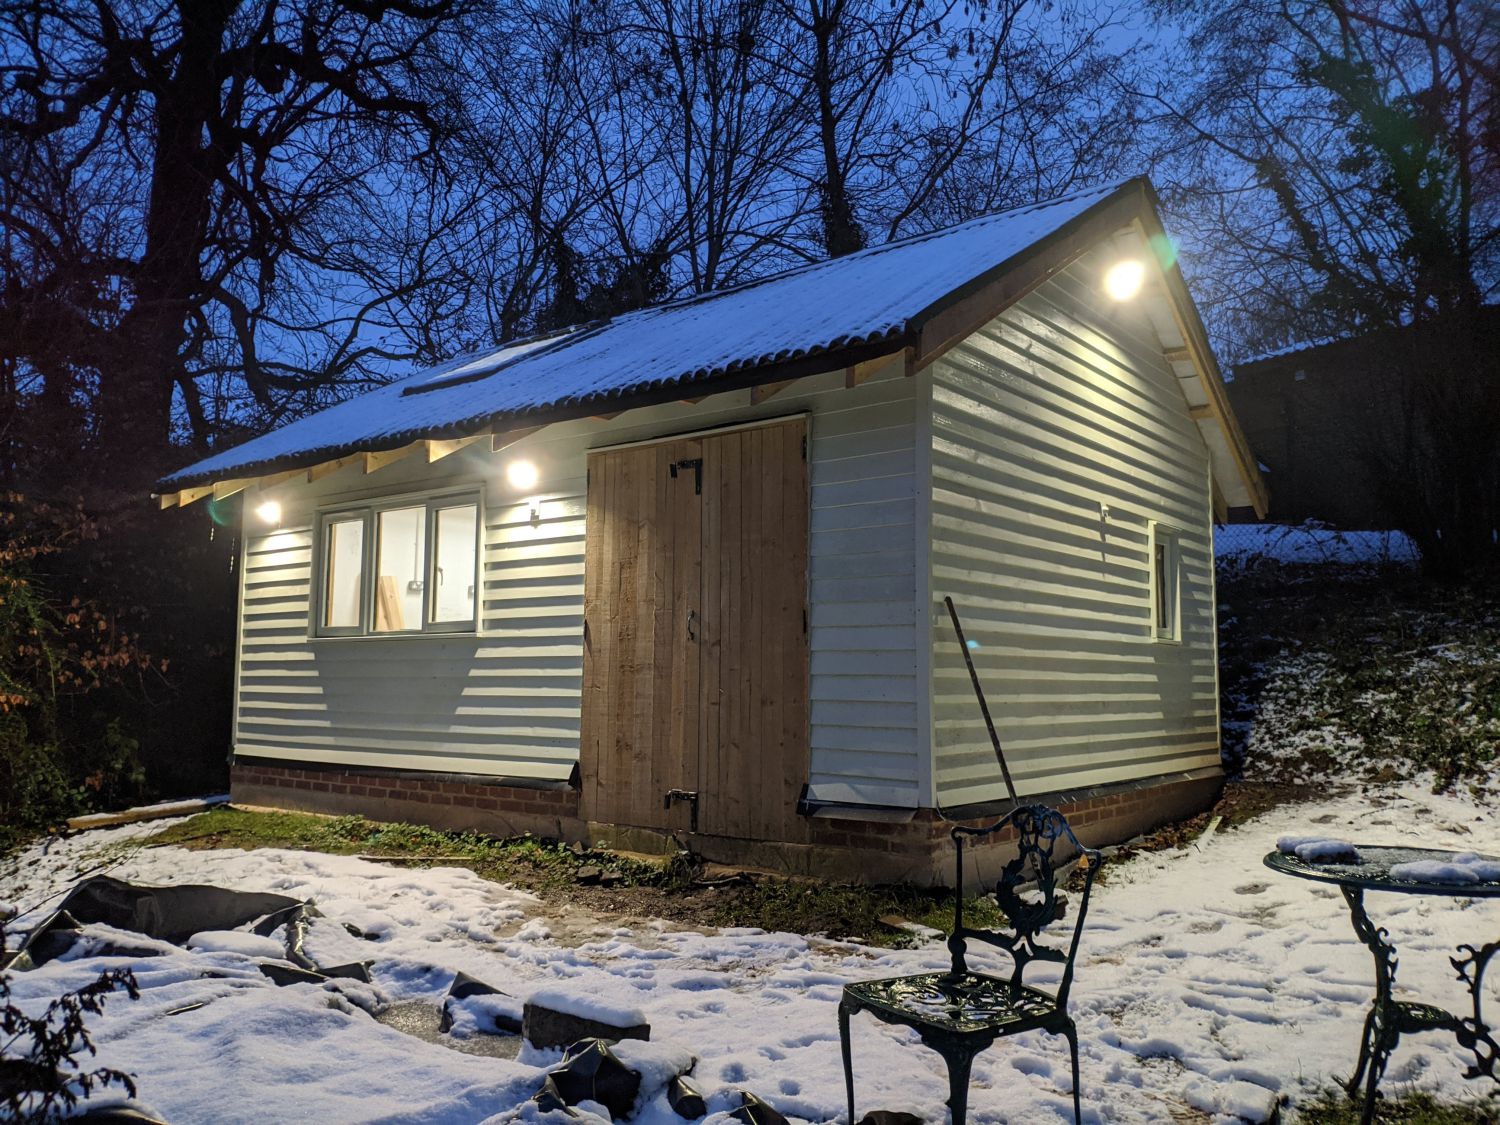
A solid square foundation made the rest of this build much easier and will ensure the building lasts for much longer. The next step is the timber frame.