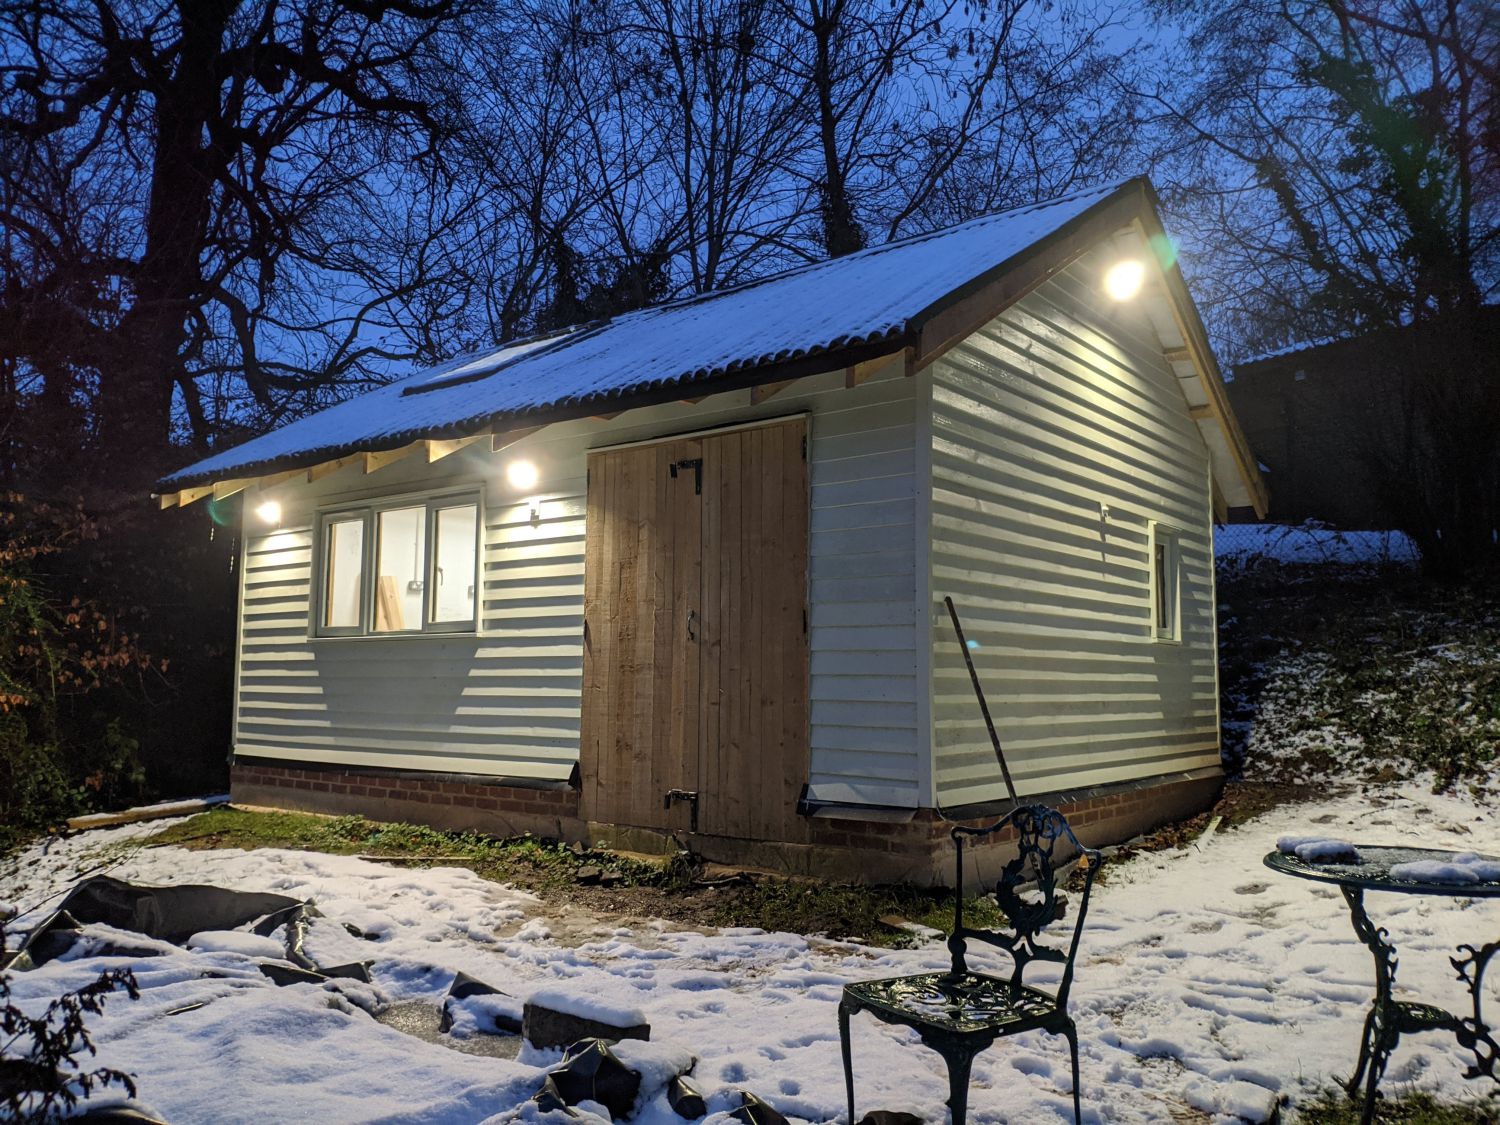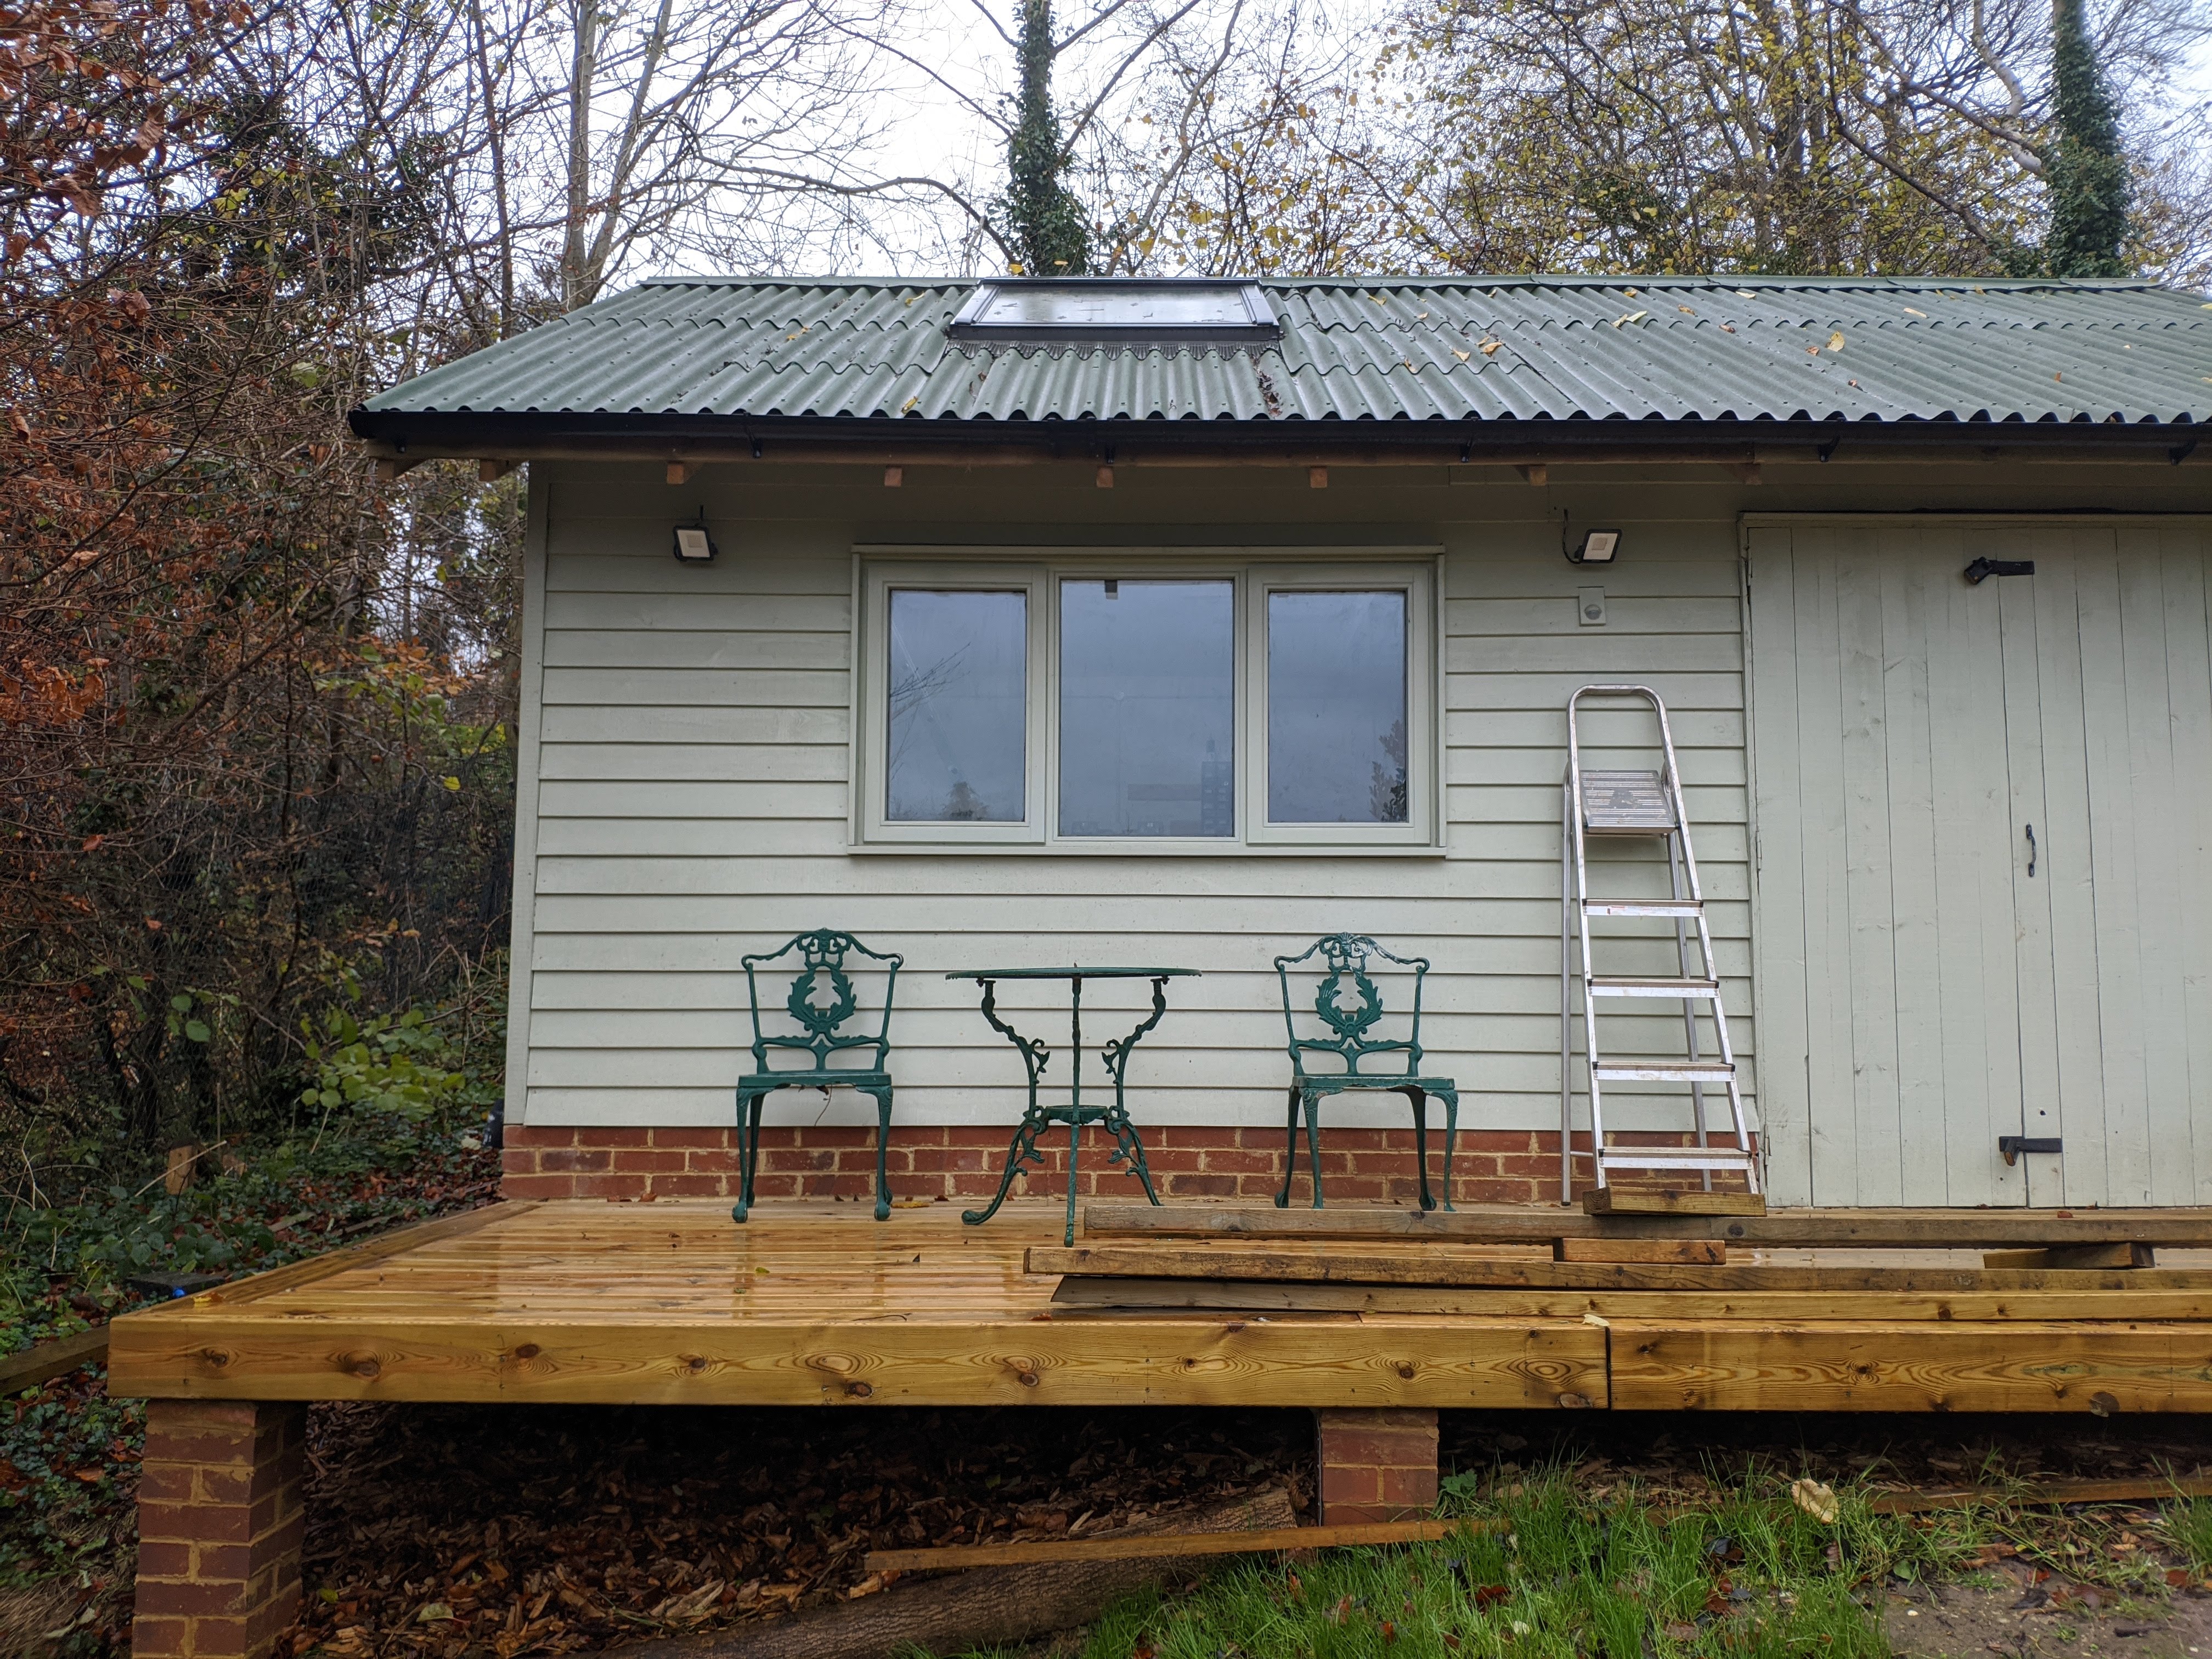
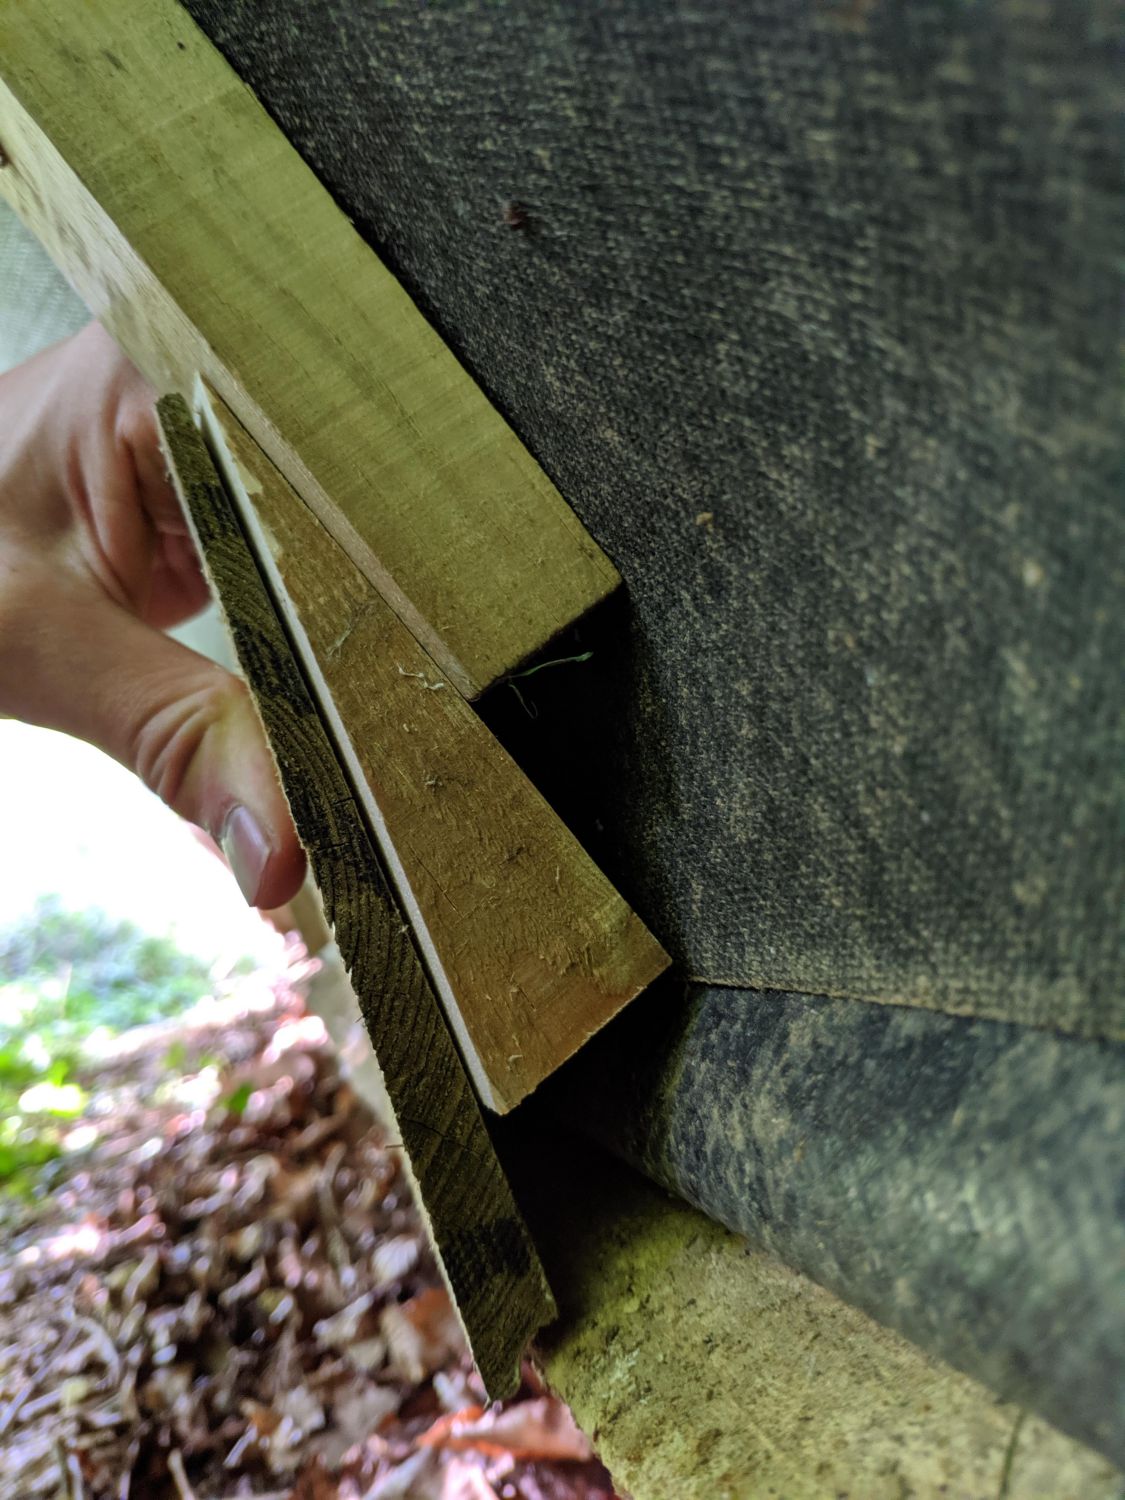
To ensure the workshop can weather for many years it needs to be clad.
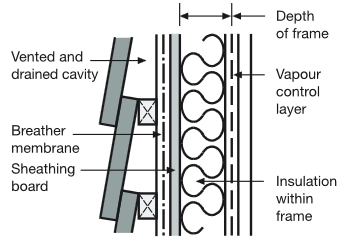
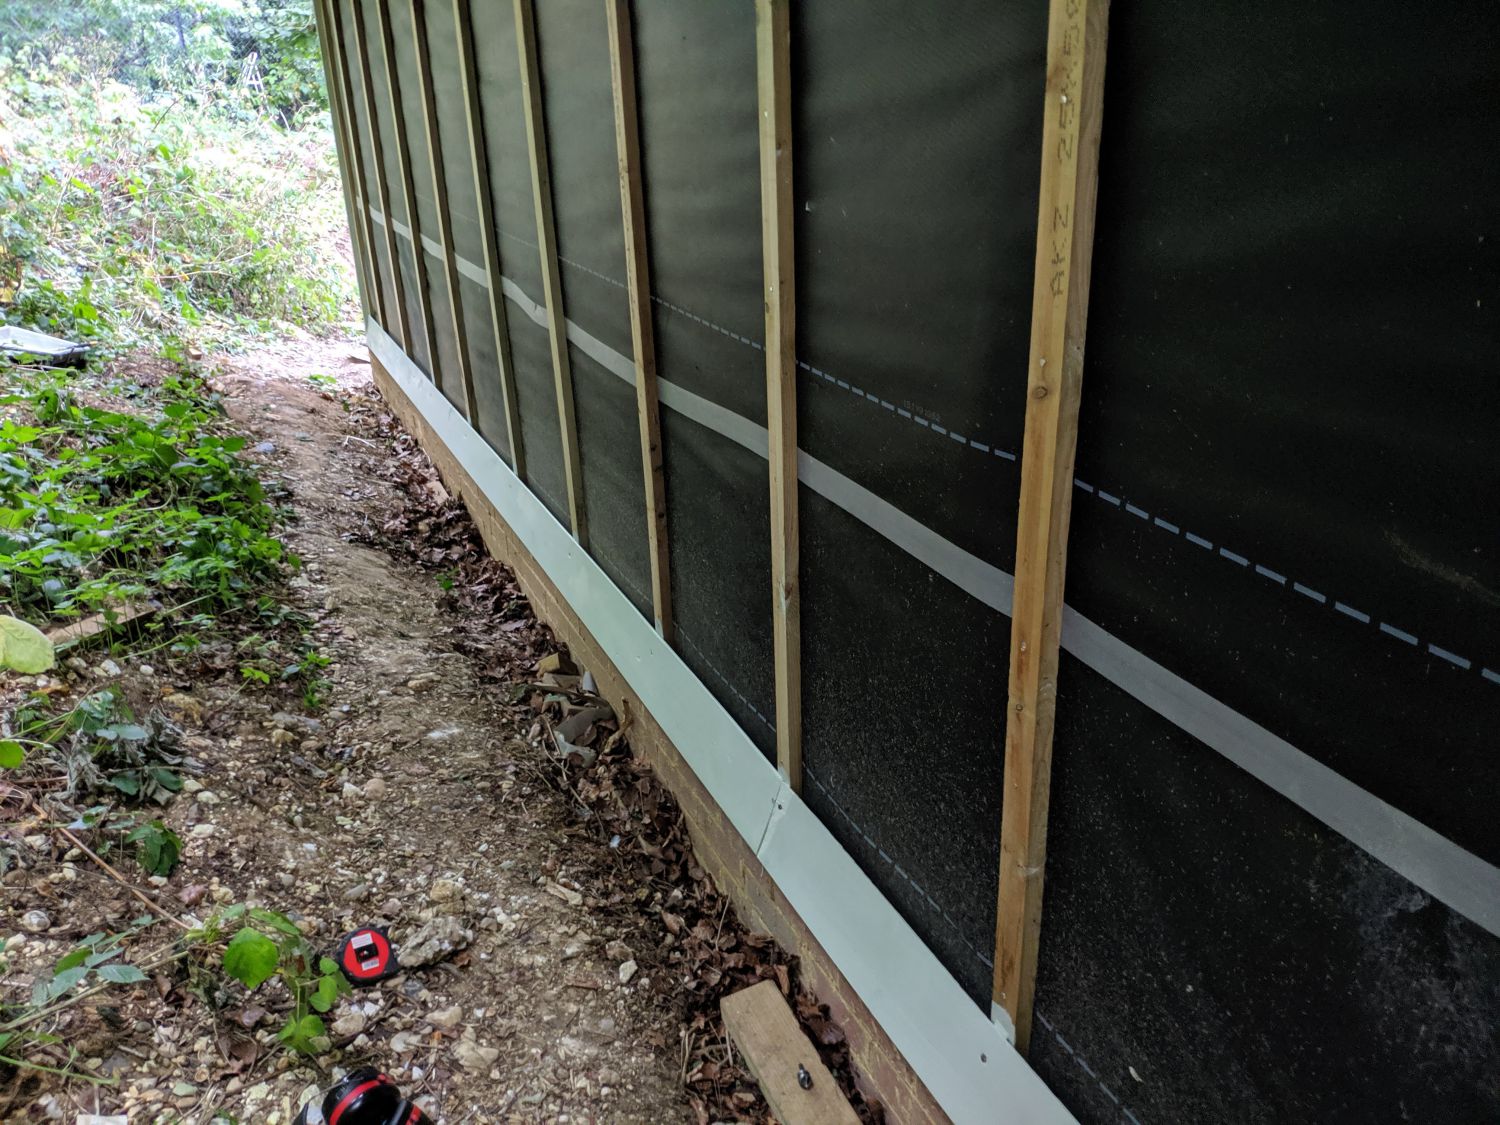
The cladding acts as a first layer of protection from water ingress. Even so driven rain or damaged boards could lead to water getting behind the cladding; in this scenario it is important the water can drain freely down the second layer of protection, the breathable membrane. To ensure this is possible a ventilated void is created with battens allowing water to run out at the bottom or evaporate off and be carried away by circulating air.
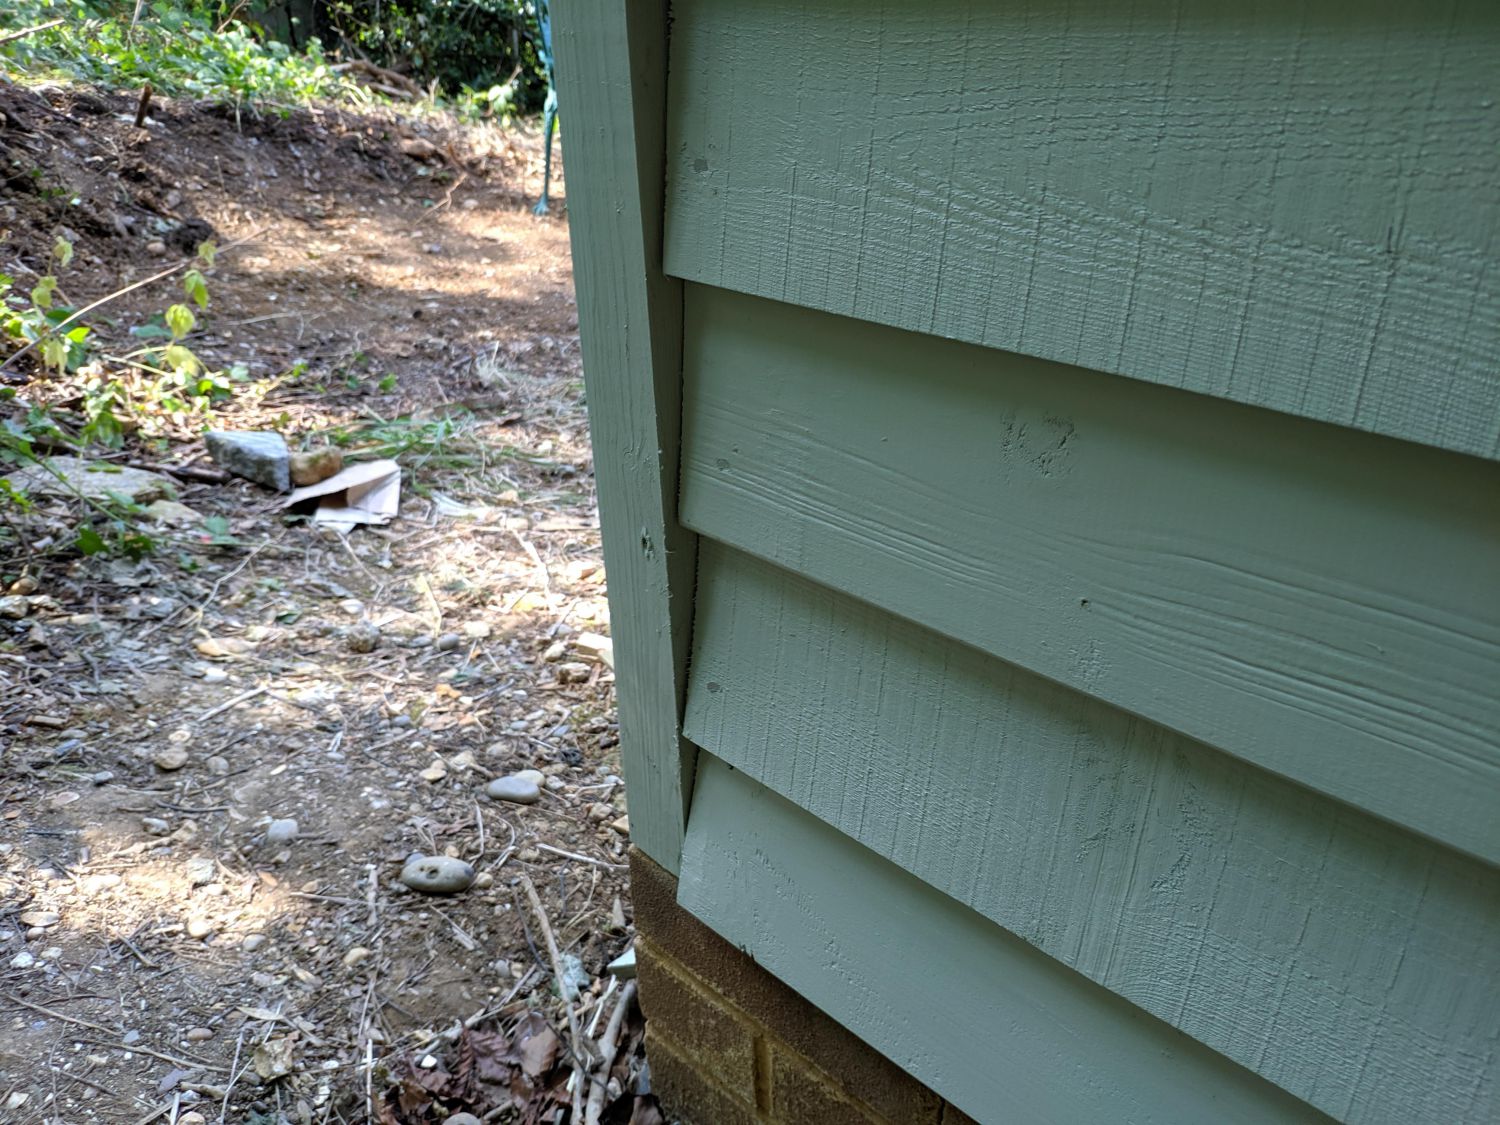
There are many different cladding options but in line with the style of the rest of the building, I wanted to use timber cladding. This typically consists of boards, either vertical or horizontal, that overlap or interlock to prevent water getting past. The cheapest timber cladding boards are rough cut feather-edge, so this is the style I went with.
Some wood species such as cedar and oak are characteristically hardy (due to natural oil and acid respectively) but inexpensive woods tend to need treatment to resist rot. The cladding boards I purchased needed additional treatment on top of the timber merchant’s pressure treatment to ensure they would last many years.
I had hoped to use a transparent treatment so the grain of the timber would remain visible but after research it seemed like paint was a superior choice. Stains and oils seem to require re-coats every few years whereas paints can last decades. In the end I picked French Grey Bedec Barn Paint, which is well respected online.
Battening

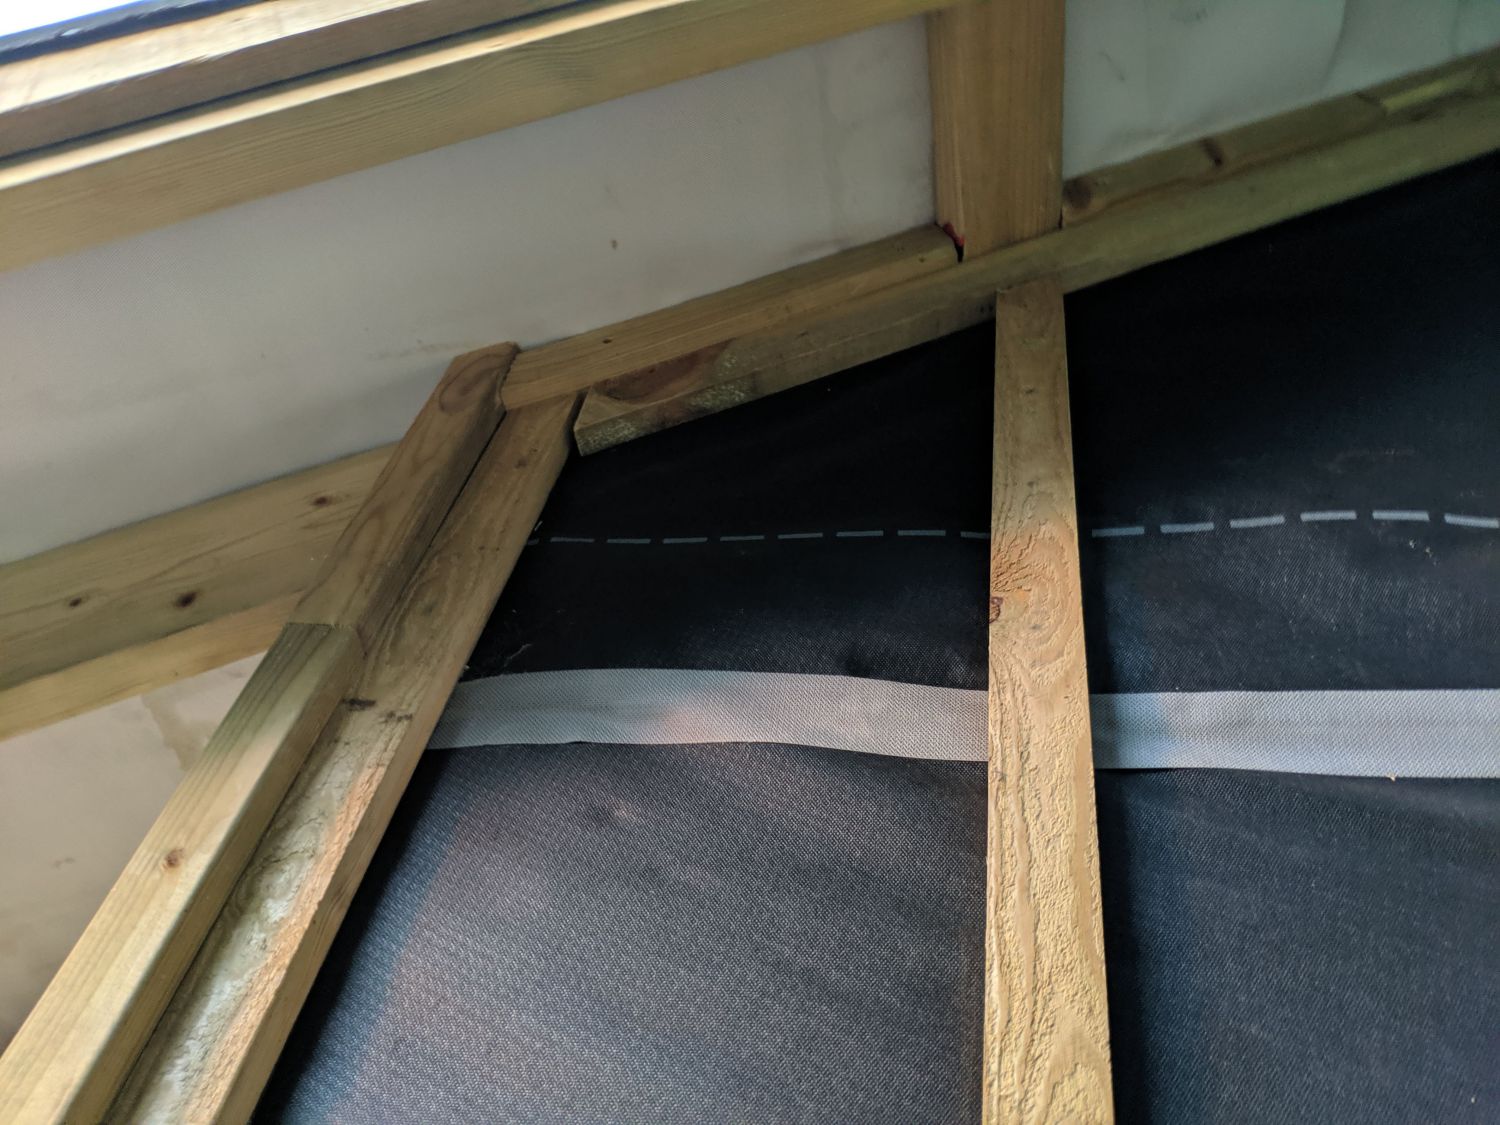
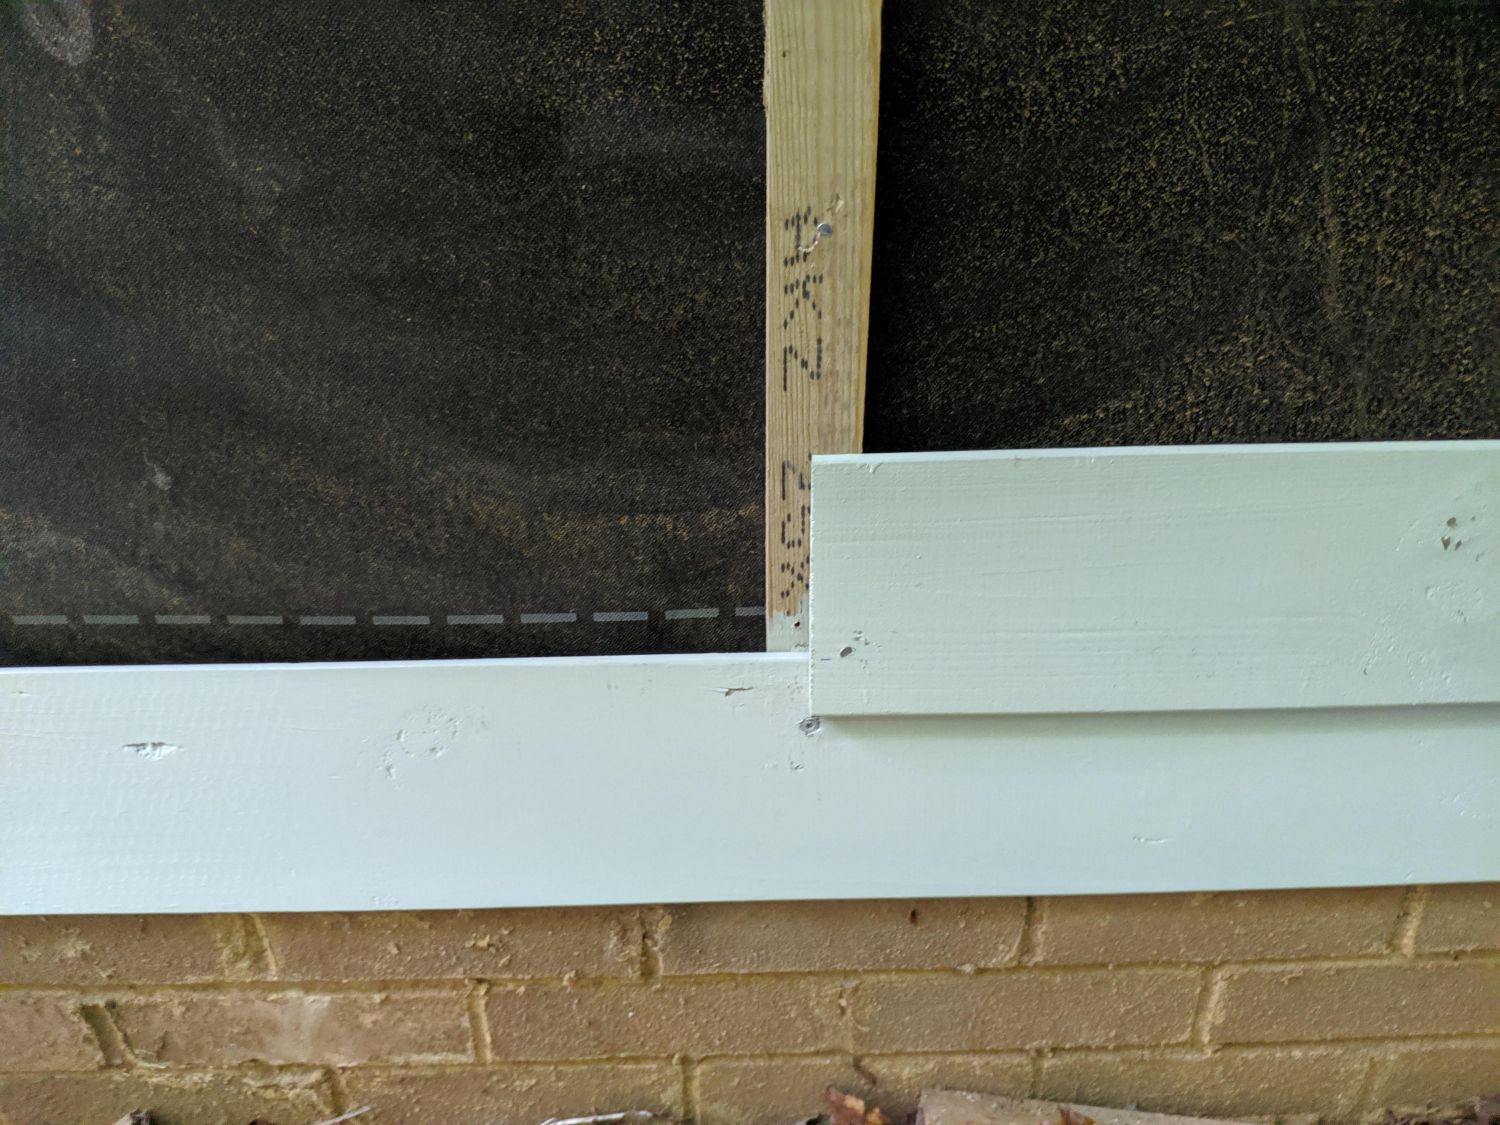
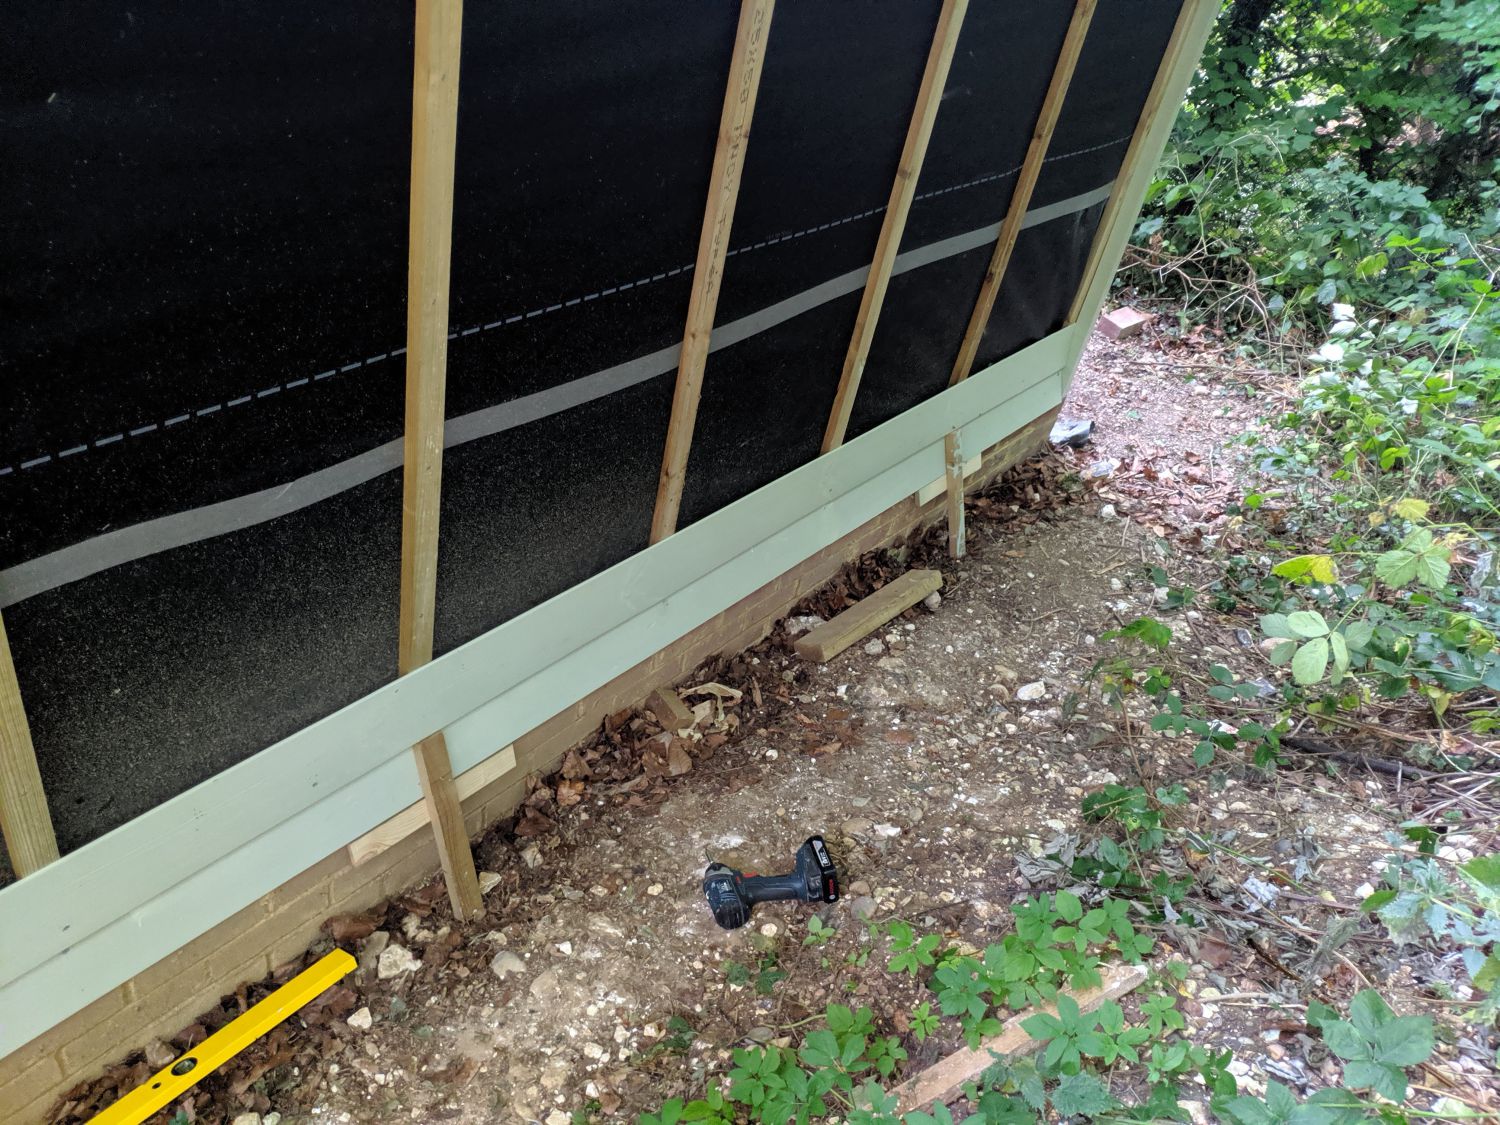
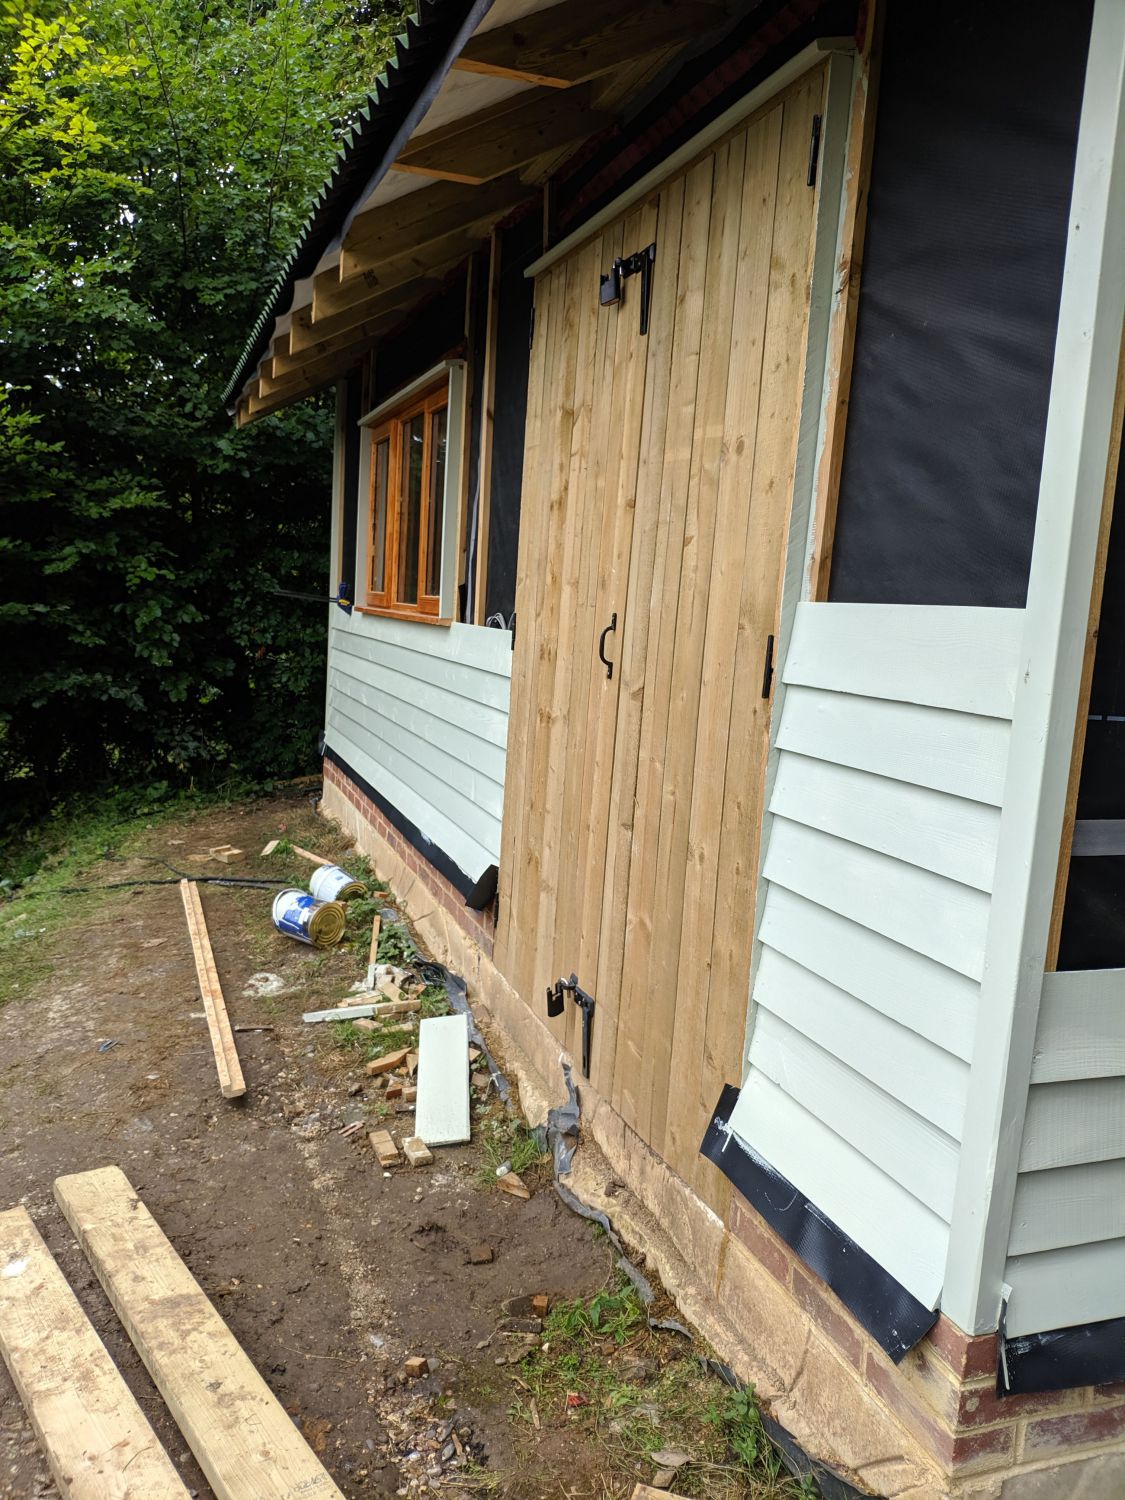
I used 50*25mm treated battens for the walls, the same as I had done for the roof. They are nailed into each stud, except those that are right next to each other, and extend from the top of the walls down to just above the plinth. I added additional battens around windows and the door as this will provide a surface to terminate the cladding boards on.
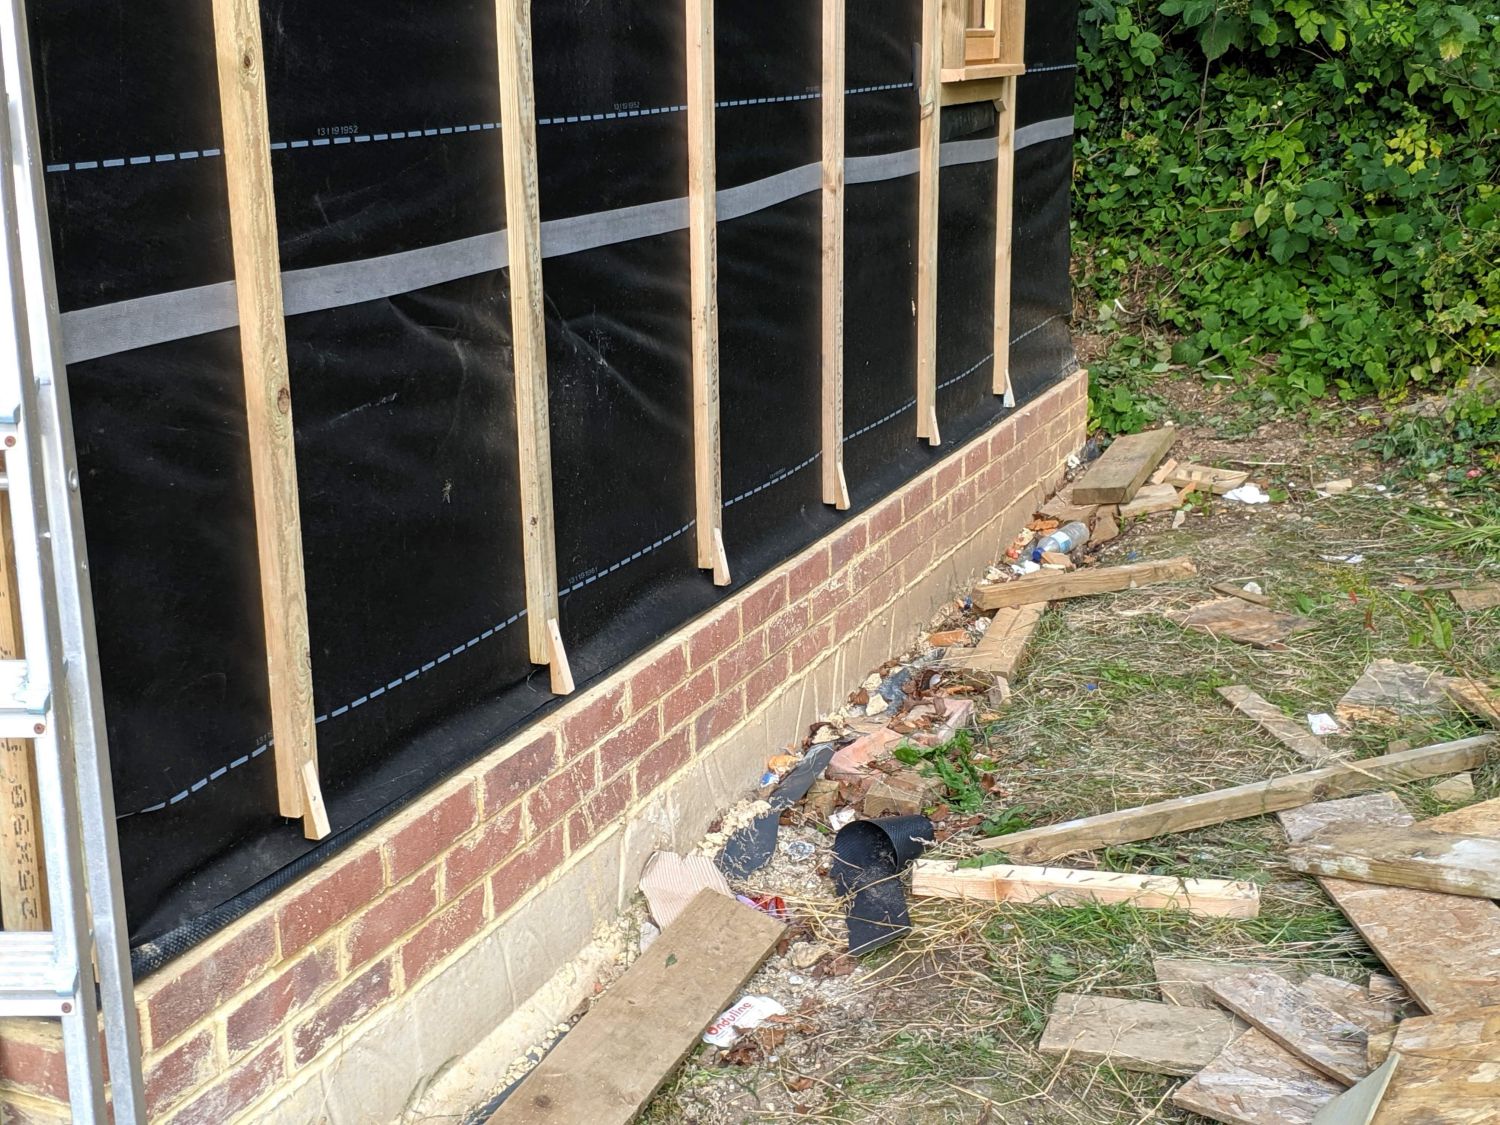

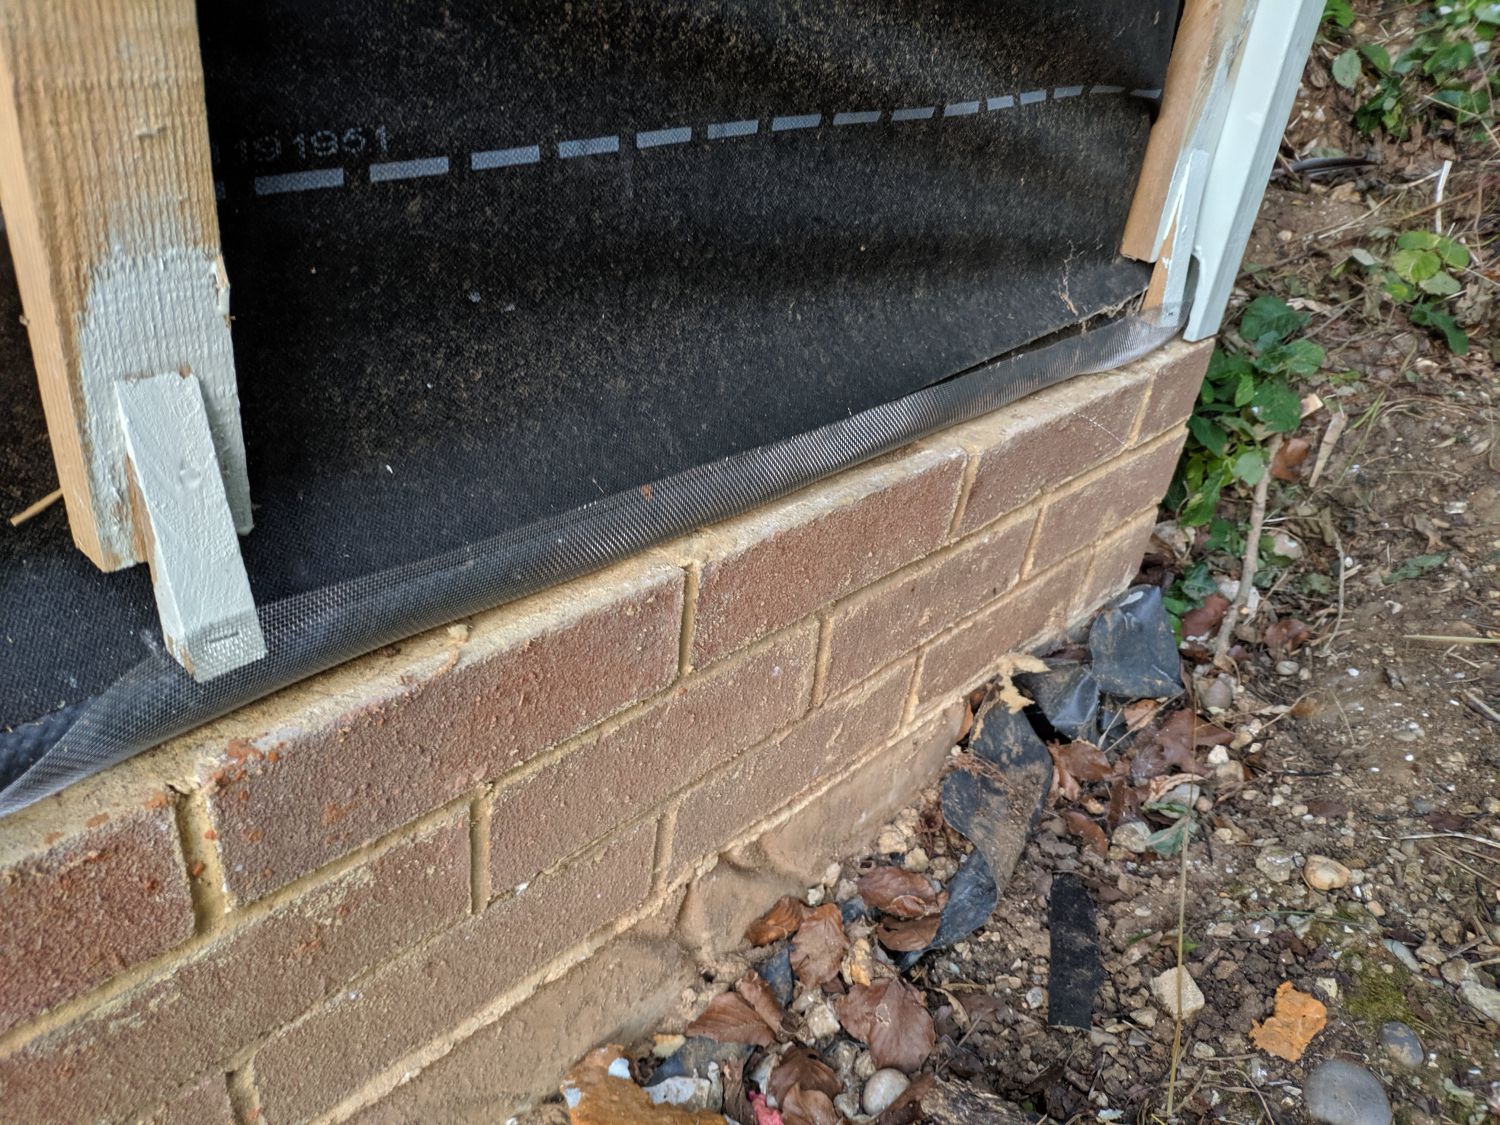
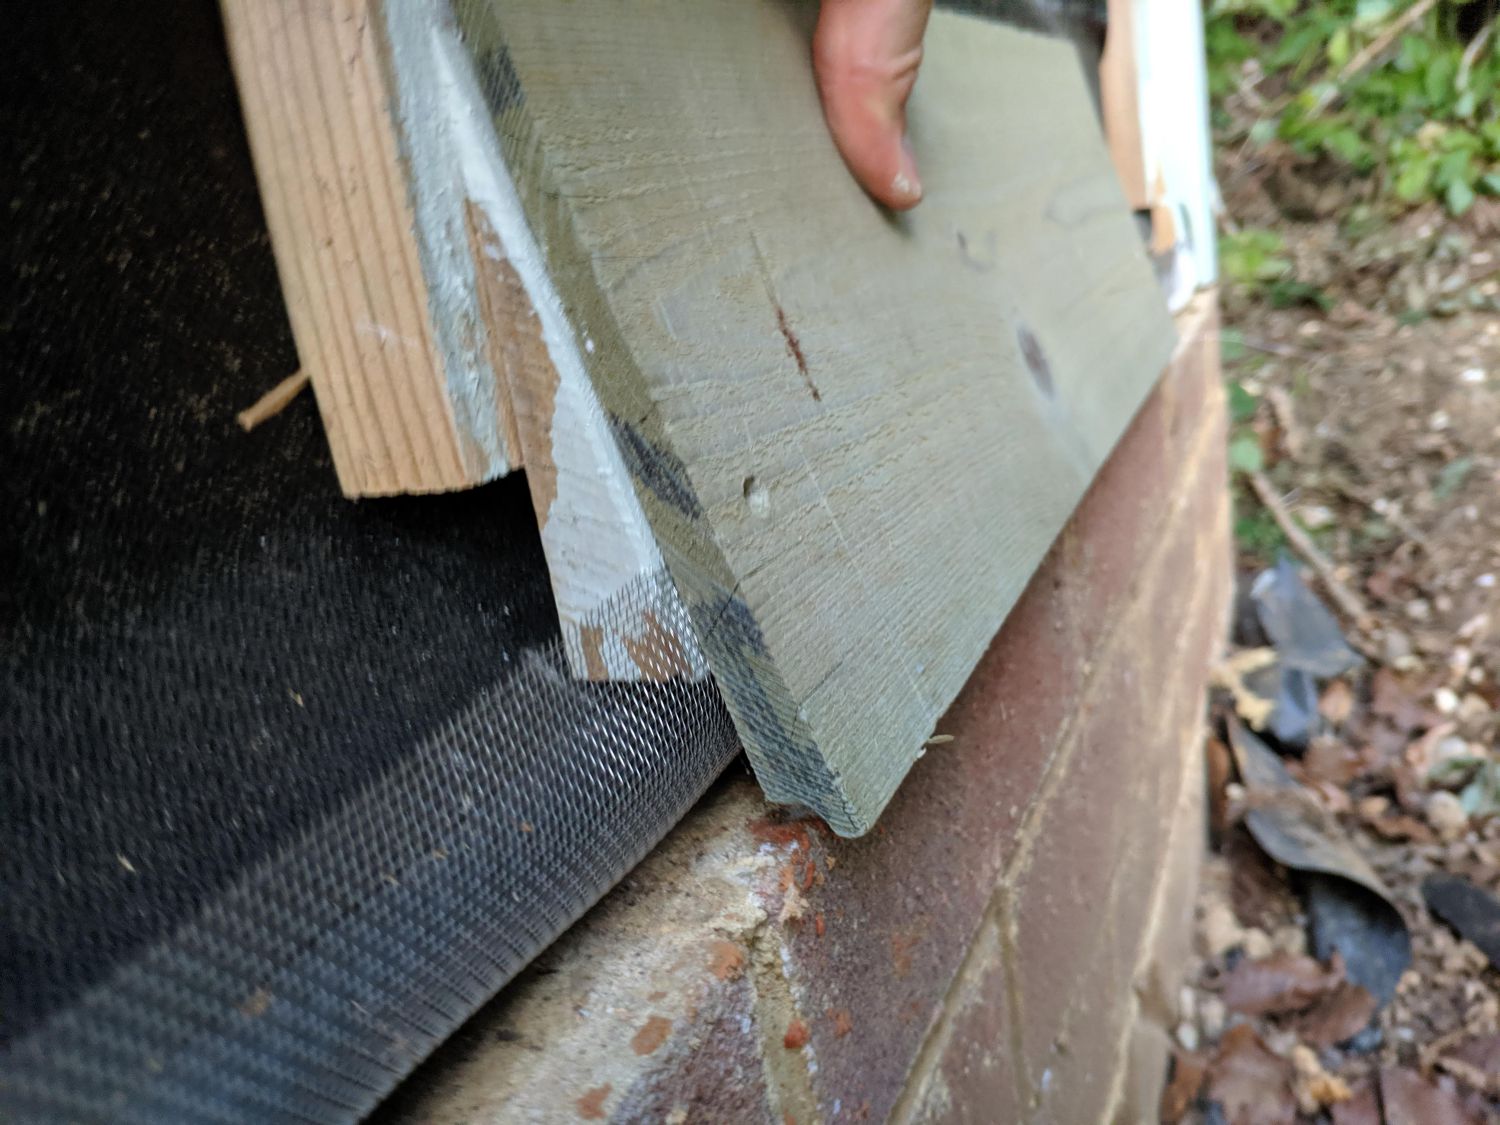
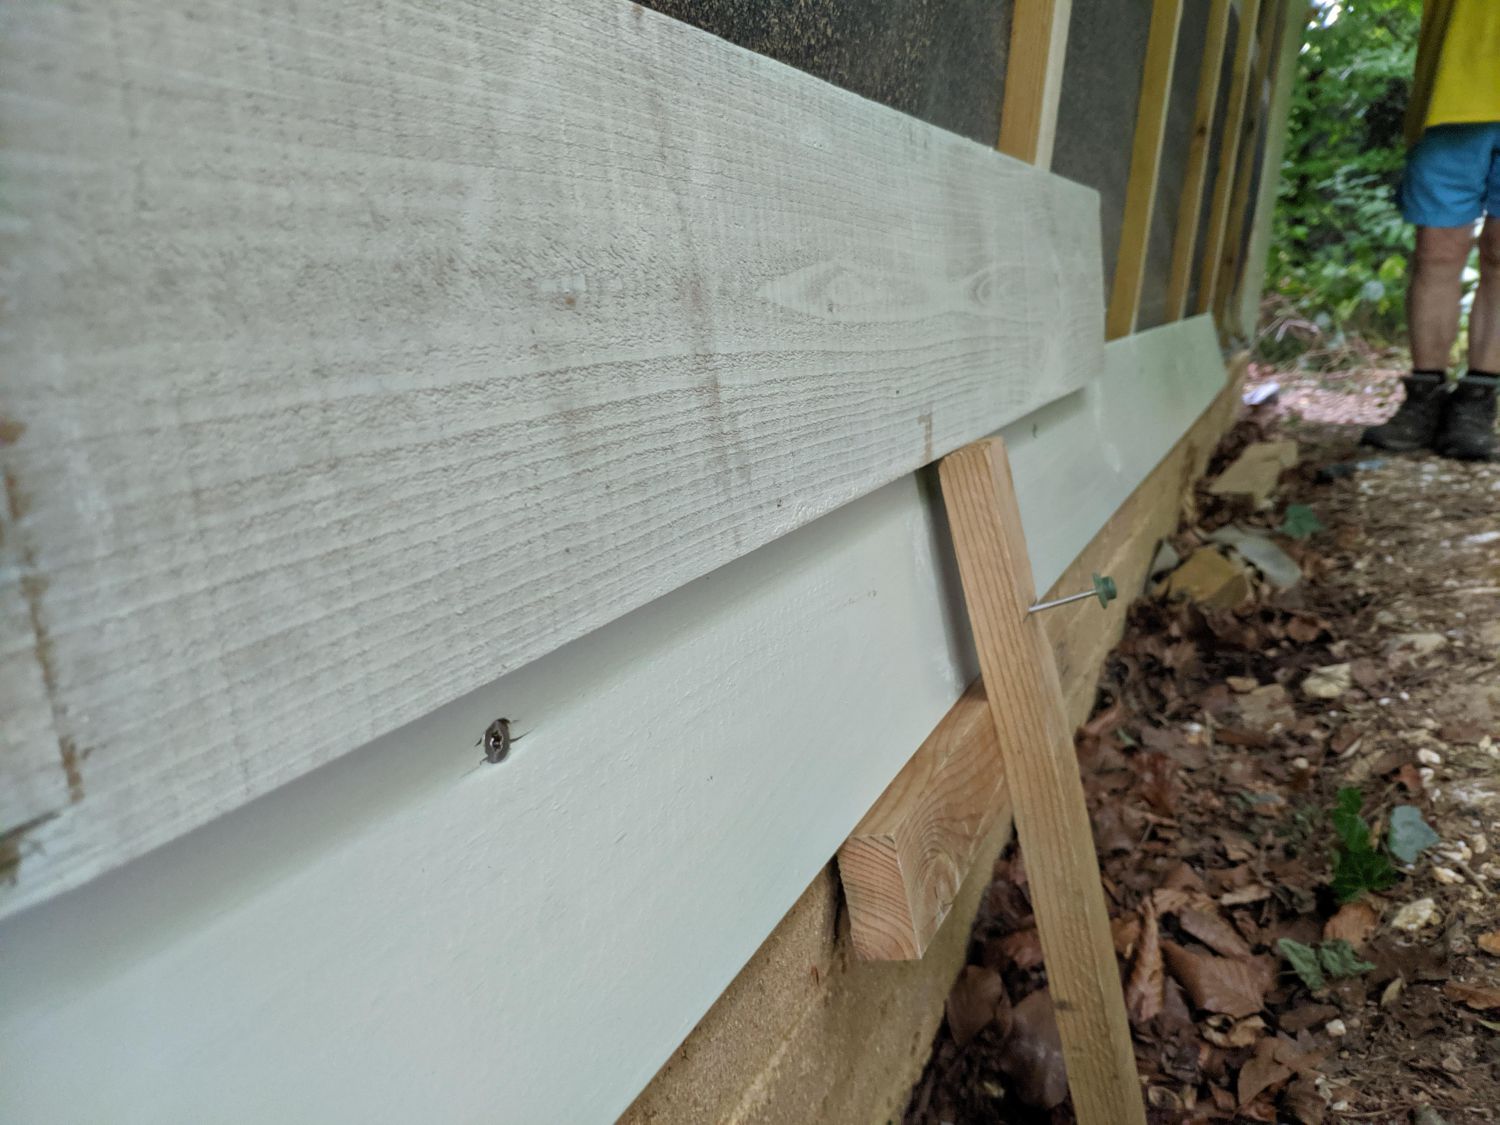
The bottom feather-edge board needs a ‘kick’ to give it an outward slant over the brick plinth. To achieve this a horizontal batten is typically installed which contacts the bottom board at its corner; this method can cause problems as it provides a surface for water to collect on eventually leading to rot.
Instead I used wedges nailed into the battens that were angled so the boards would peek over the edge perfectly. Because of variation in plinth width these each had to be cut and test fitted individually. Additionally the bottom boards have a cove cut into their thicker edge for an aesthetic transition between the plinth and cladding.
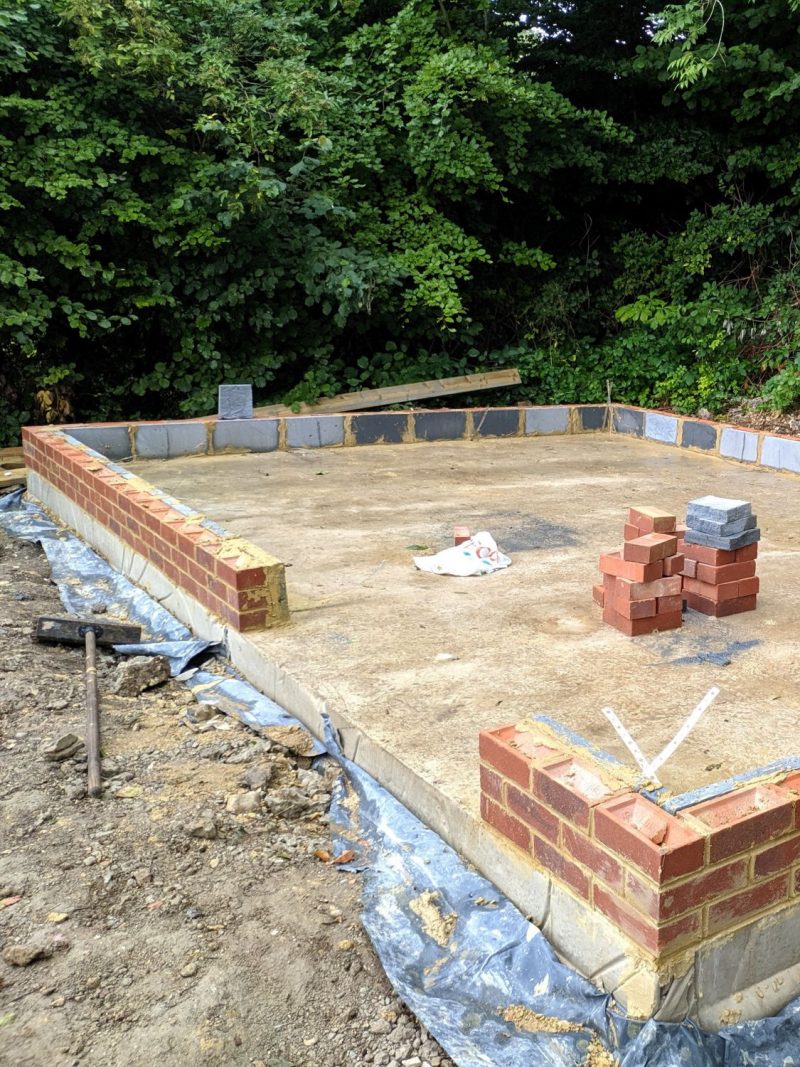
Corners
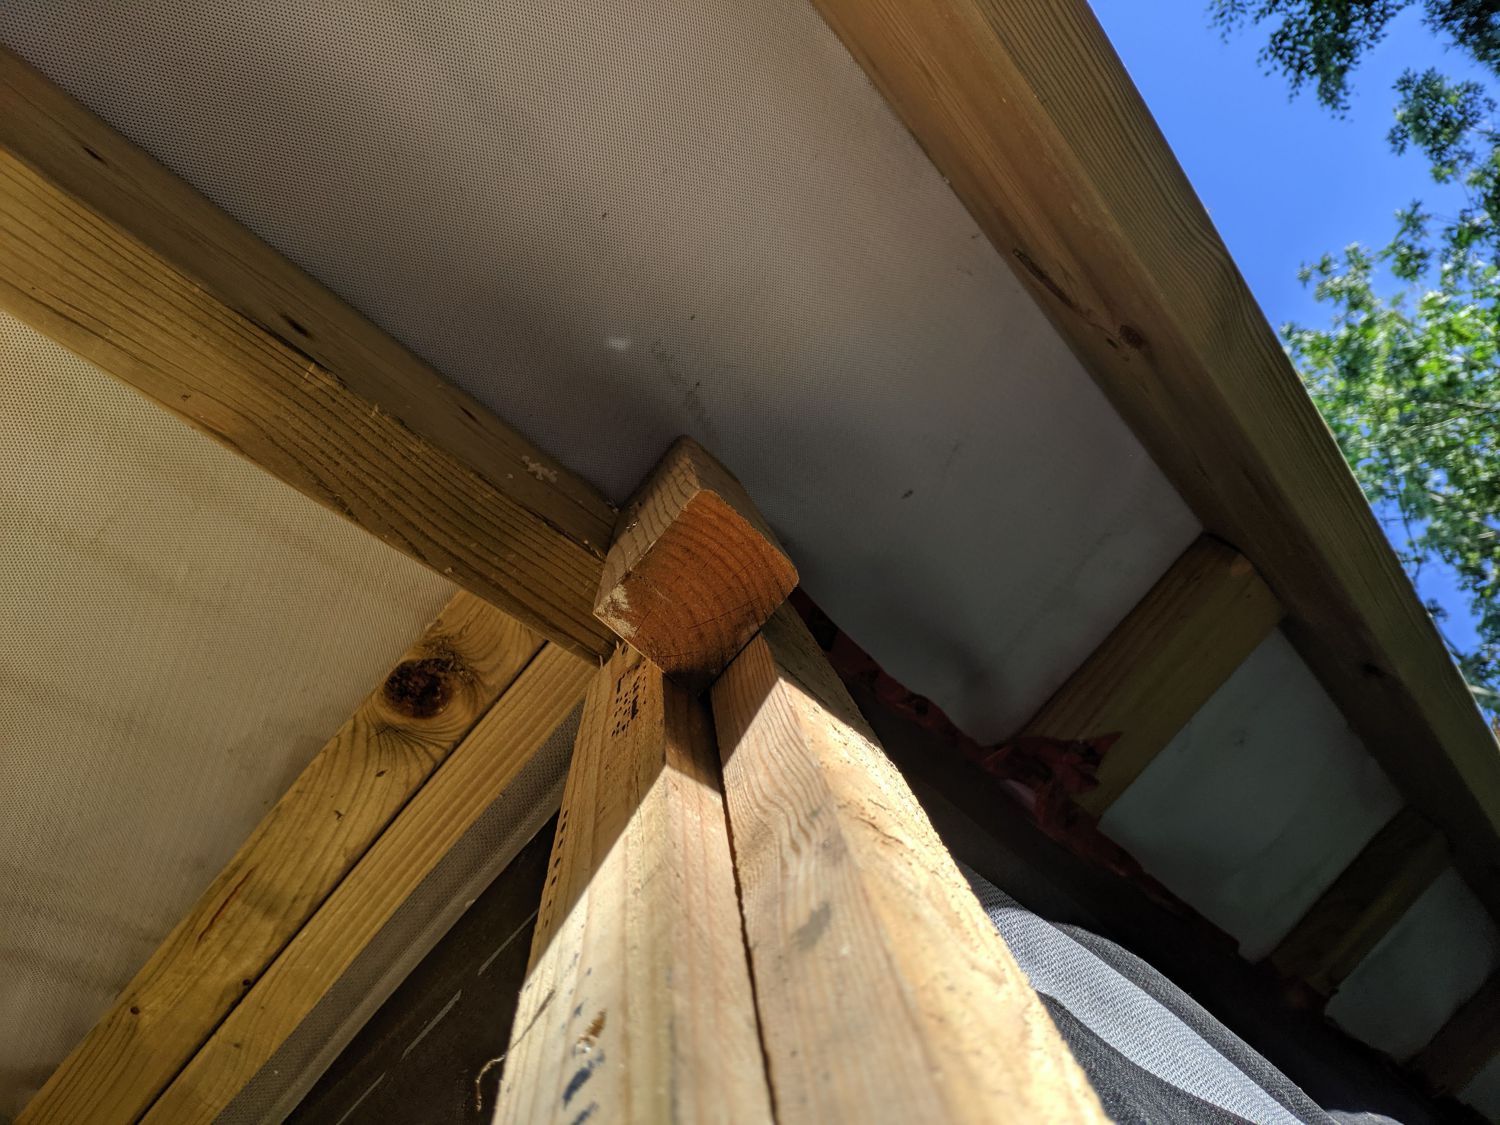
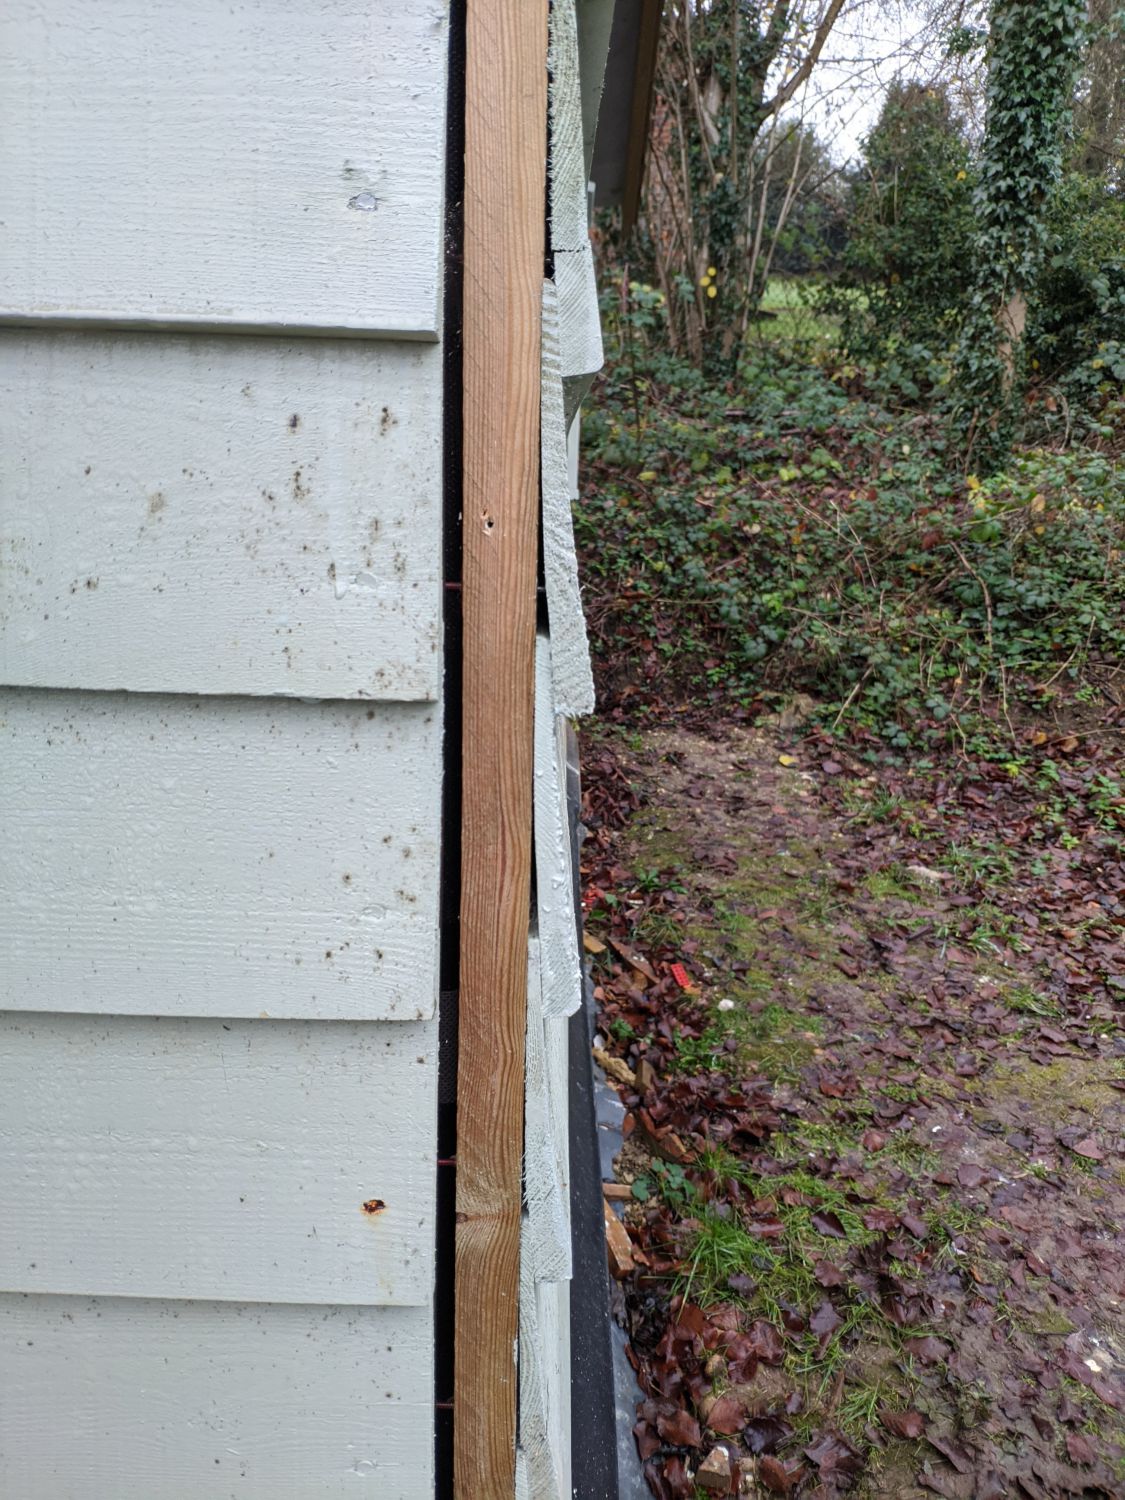
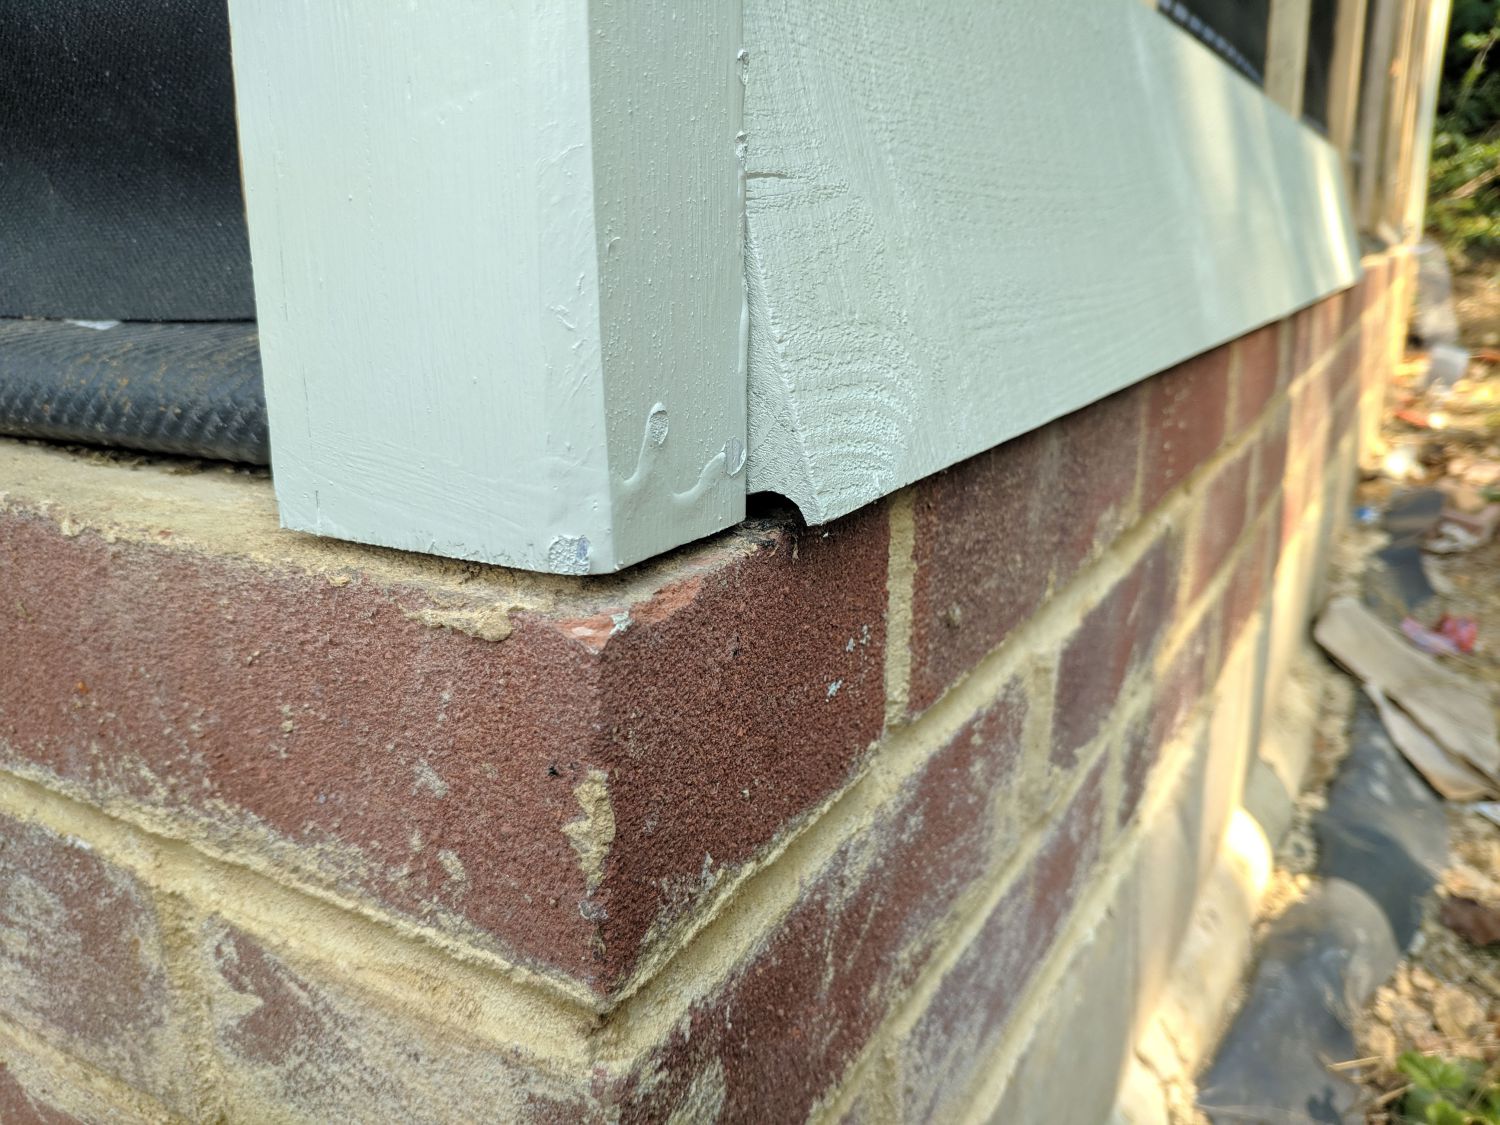
The corners of the building were a complex detail to get right but eventually I settled on using a ripped 4×2″ to ensure they stuck out even amounts from the surface of the cladding. One batten is placed in line with the side wall and the other hangs over enough so the final overhang of the corner on each side of the wall is even. The bottom of the corner needs to be hollow to make space for the DPC ramp that sheds water from inside the wall. To achieve this I used a router and chisel to hollow out the inside while leaving the outer faces intact. Once the cladding is in place the void is closed off.
At the top of the gables I nailed in 2×2″ blocking between the outlookers for the cladding to butt up against.
Cladding
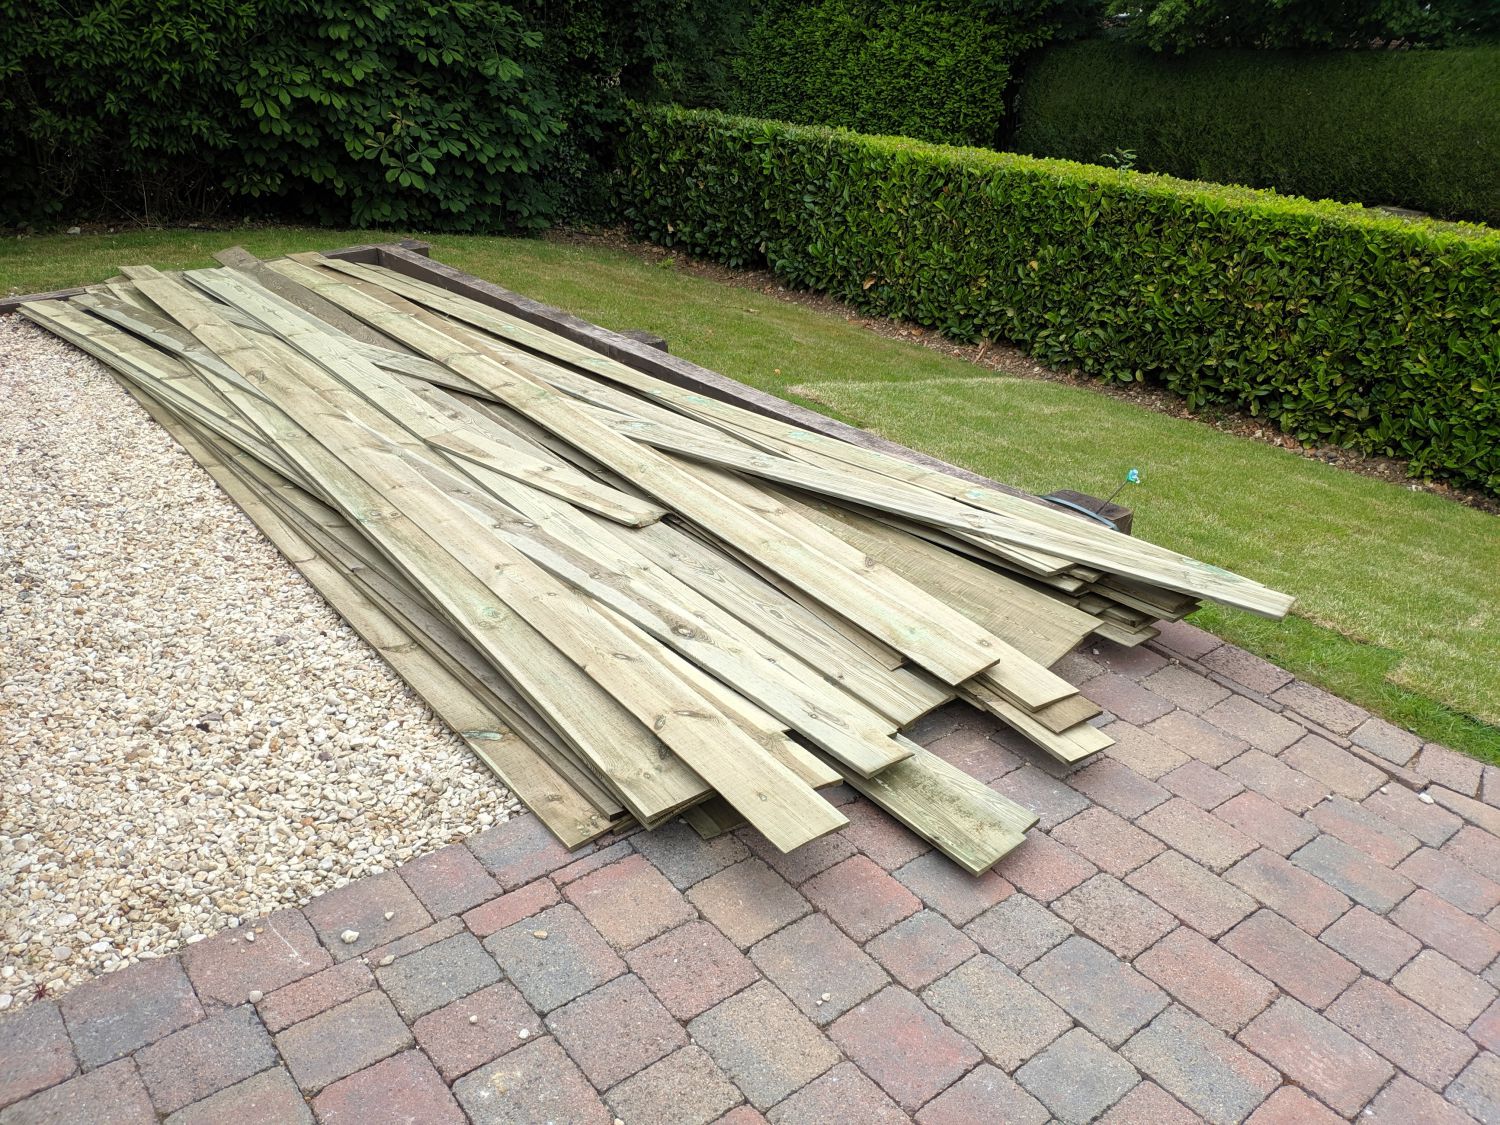
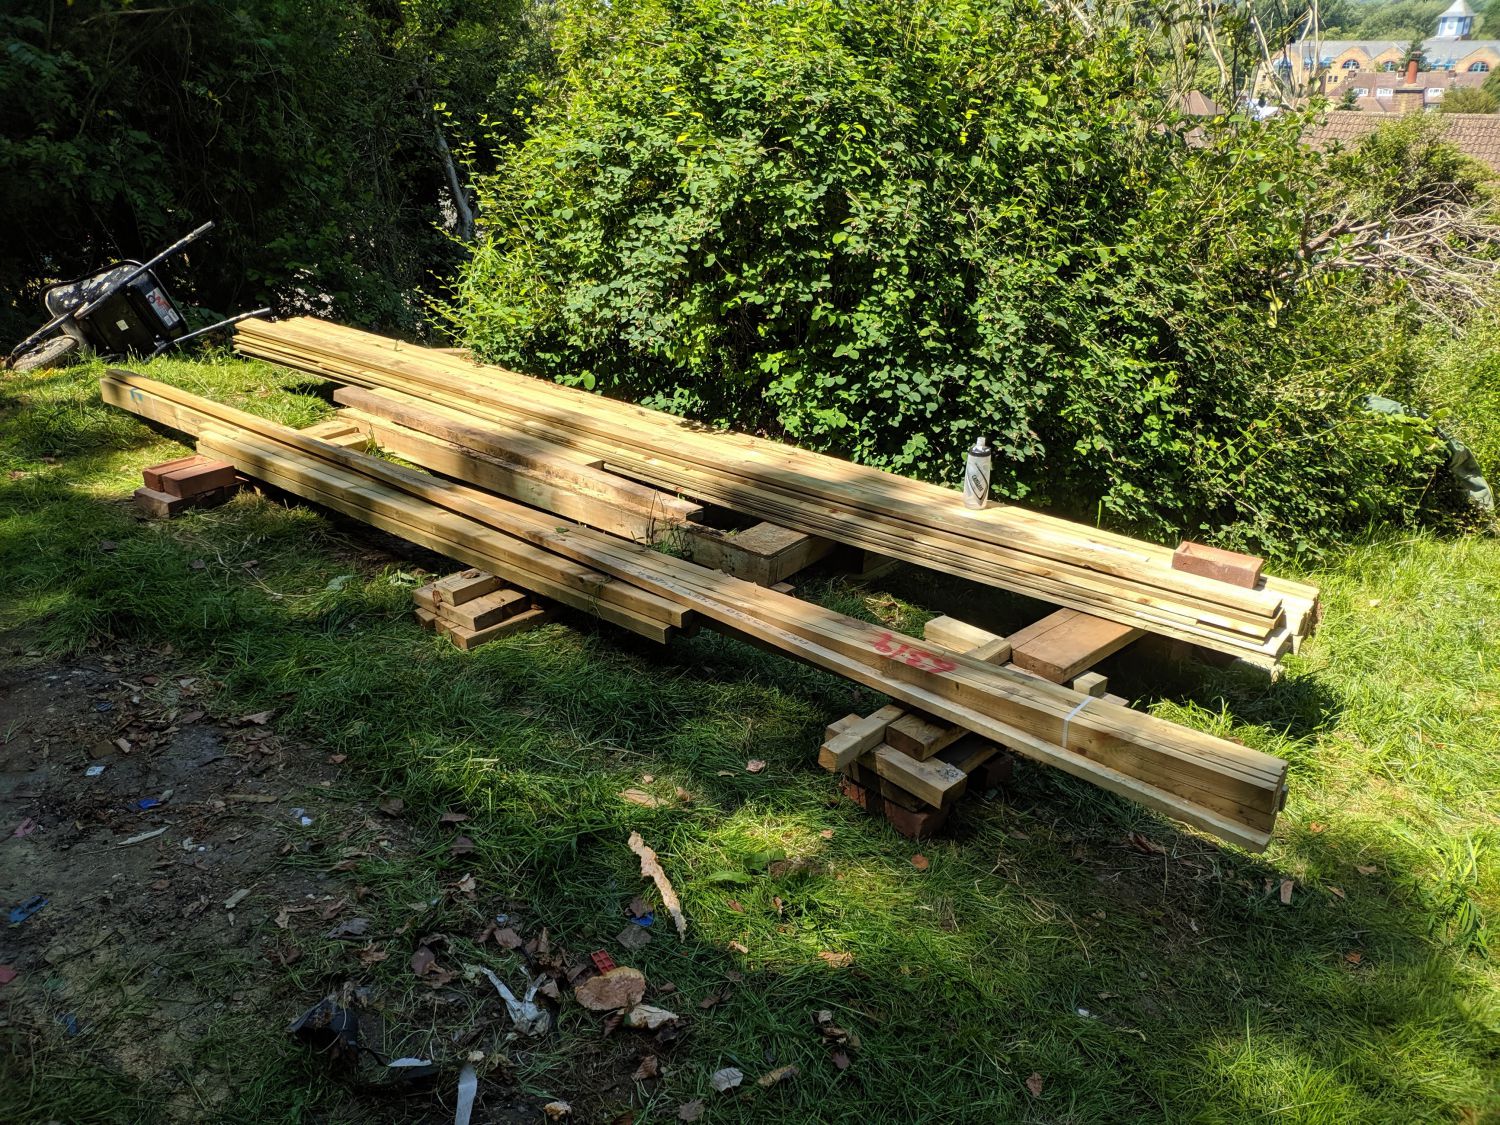
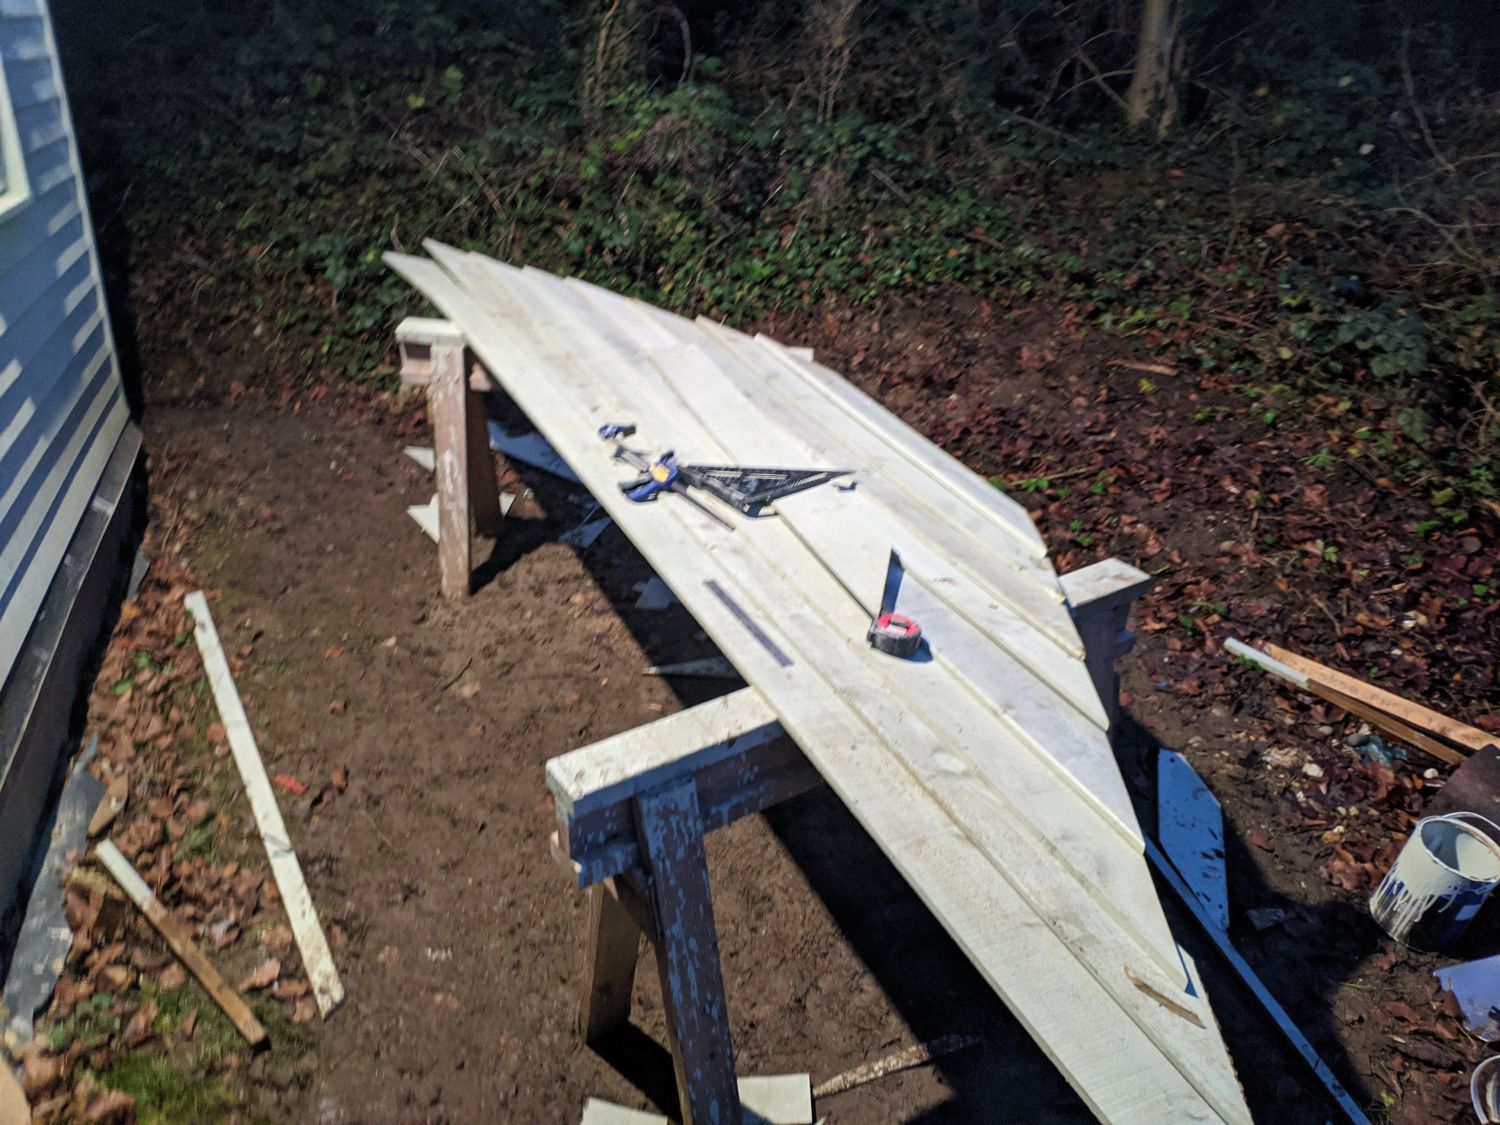
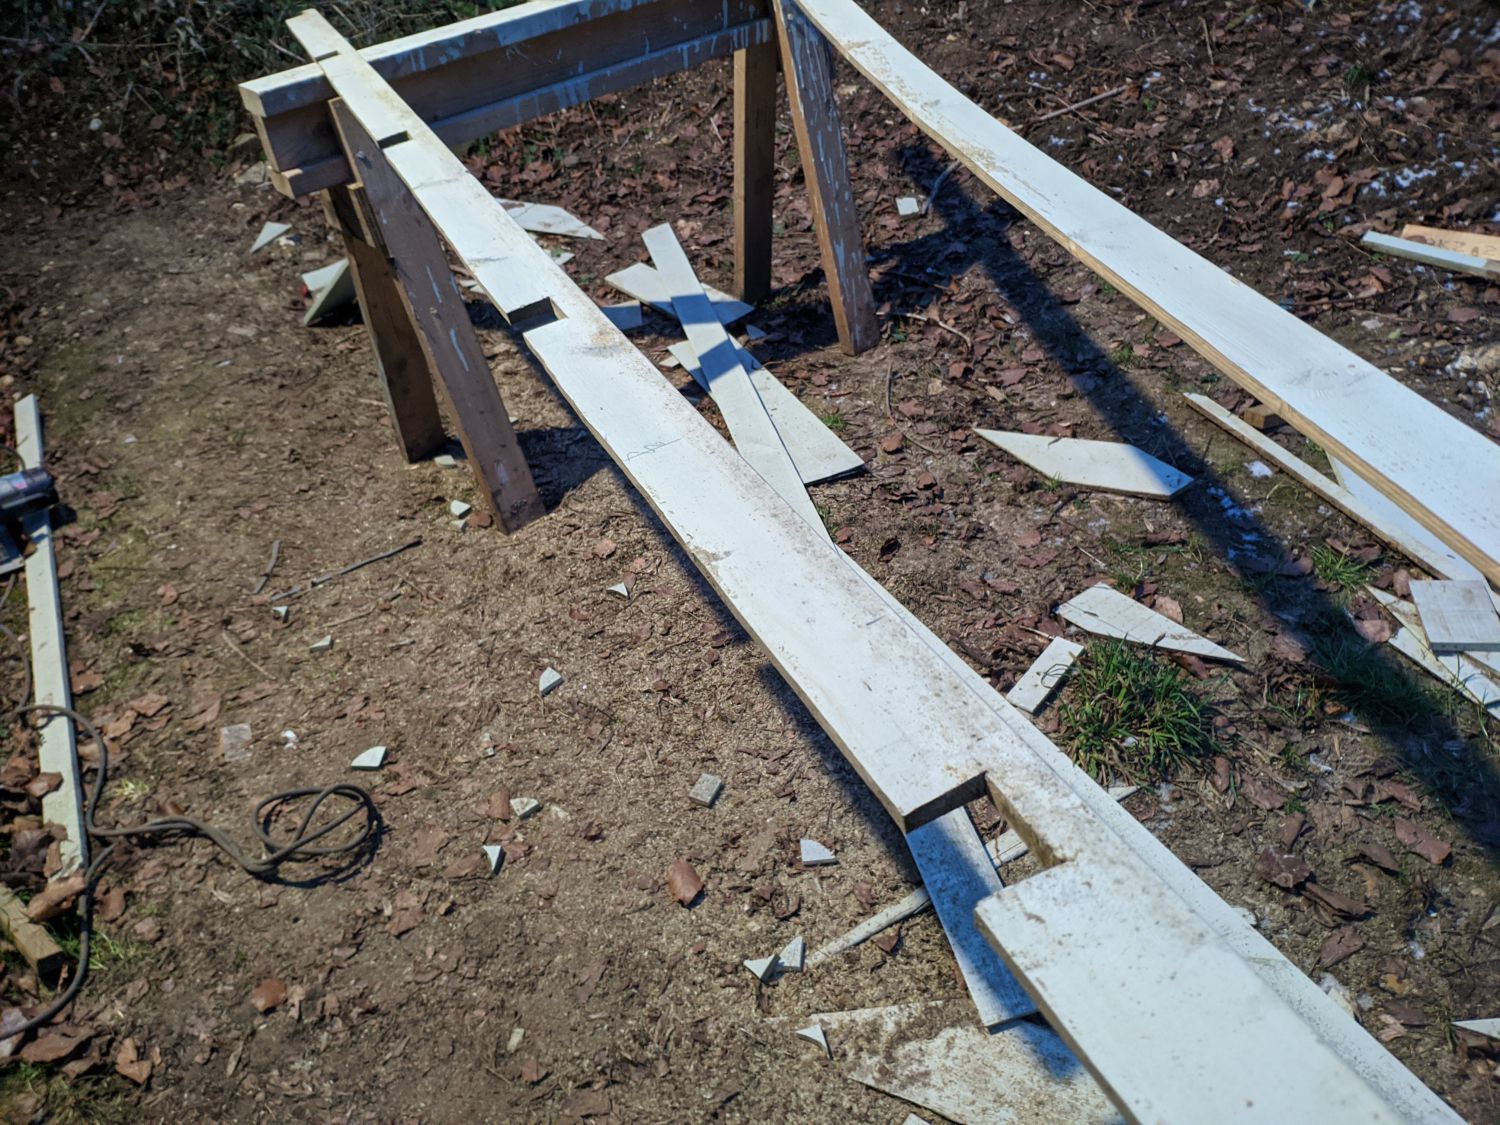
Next came the cladding itself. I ordered 90x 150mm*4.8m feather edge boards; they are fairly thin going down to about 5mm at the top edge but were definitely strong enough given my batten spacing.
Painting
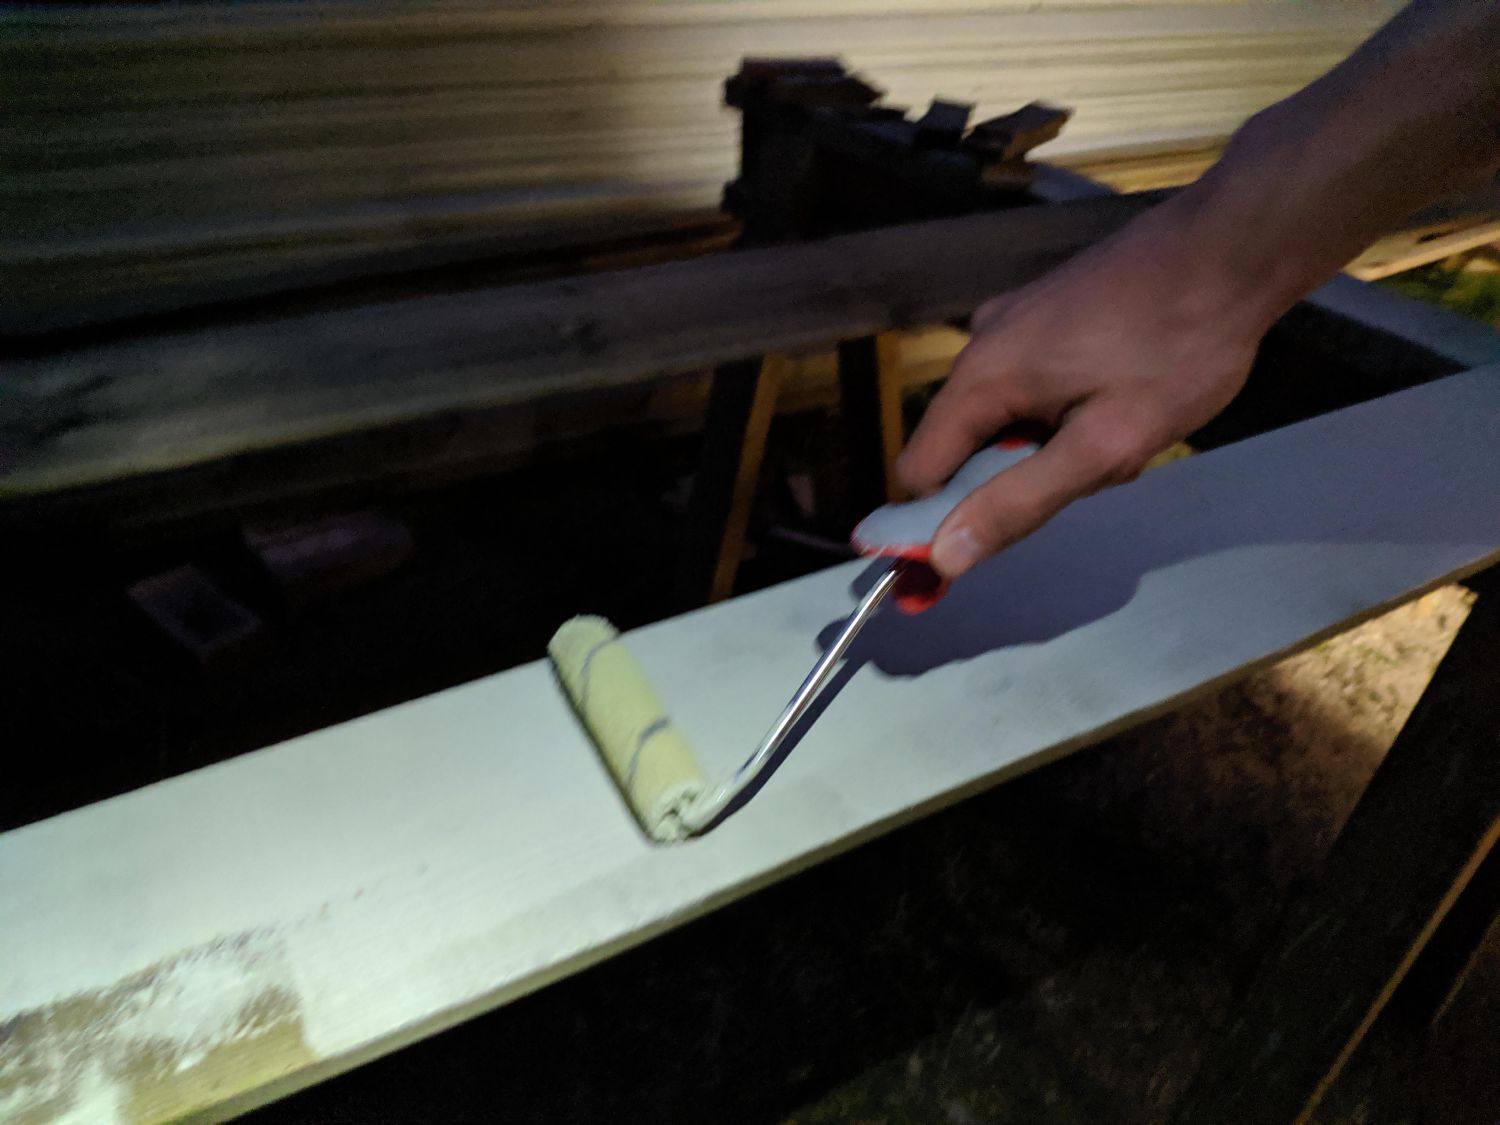
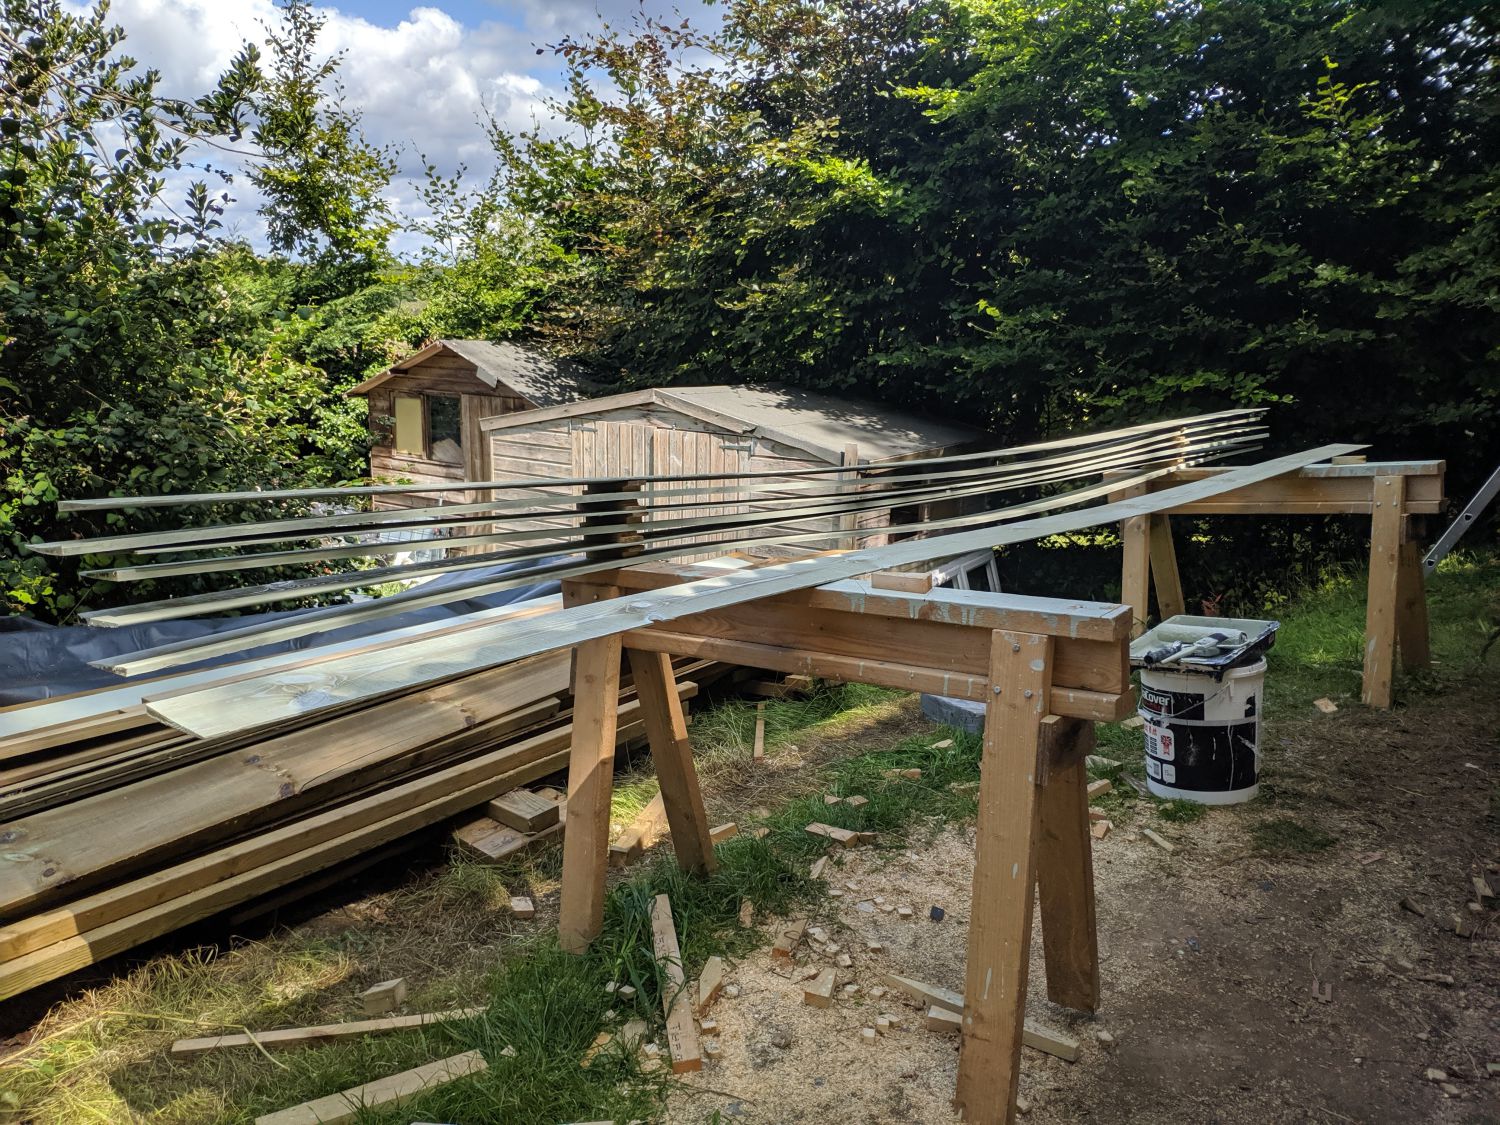
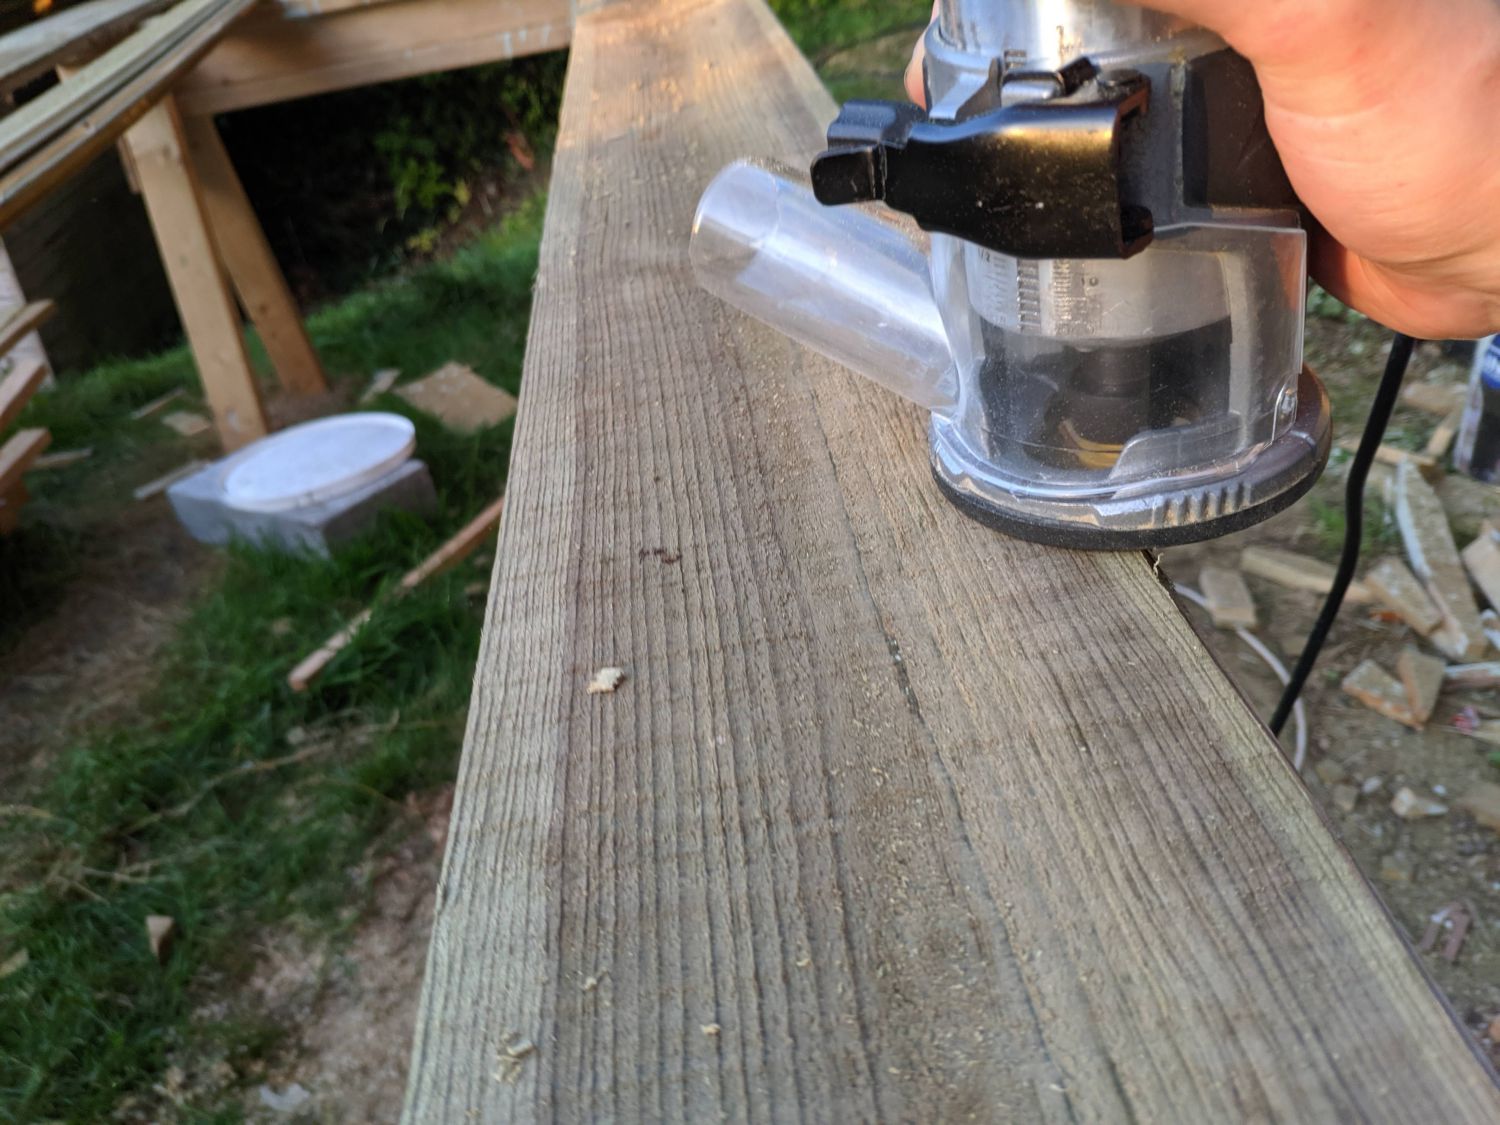
Before nailing the boards in place I was advised to coat both sides of the cladding with paint to prevent rotting on the back side of the board. I combined the paint with 30% water for the first coat to aid adhesion, additional coats were applied at full thickness. At first I used a paintbrush to cover the boards but quickly realised a roller was much faster, even though it did mean more paint wastage.
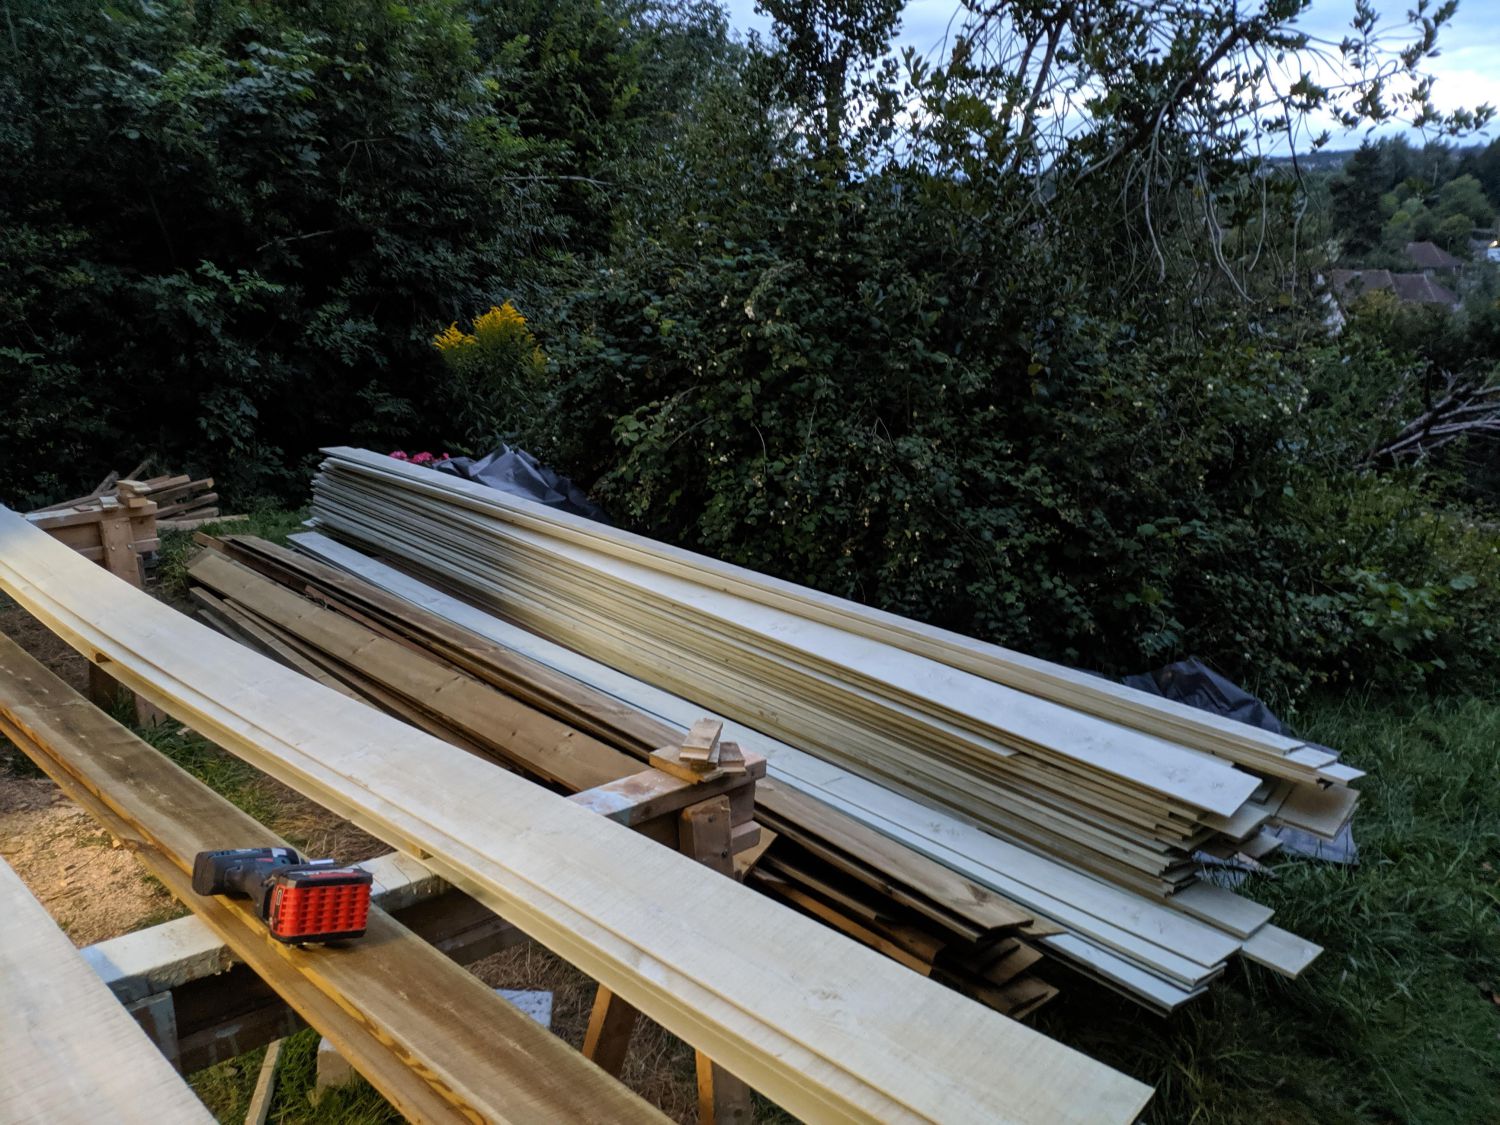
After painting both sides and all four edges I stacked the boards with spacers to dry.
Bottom board
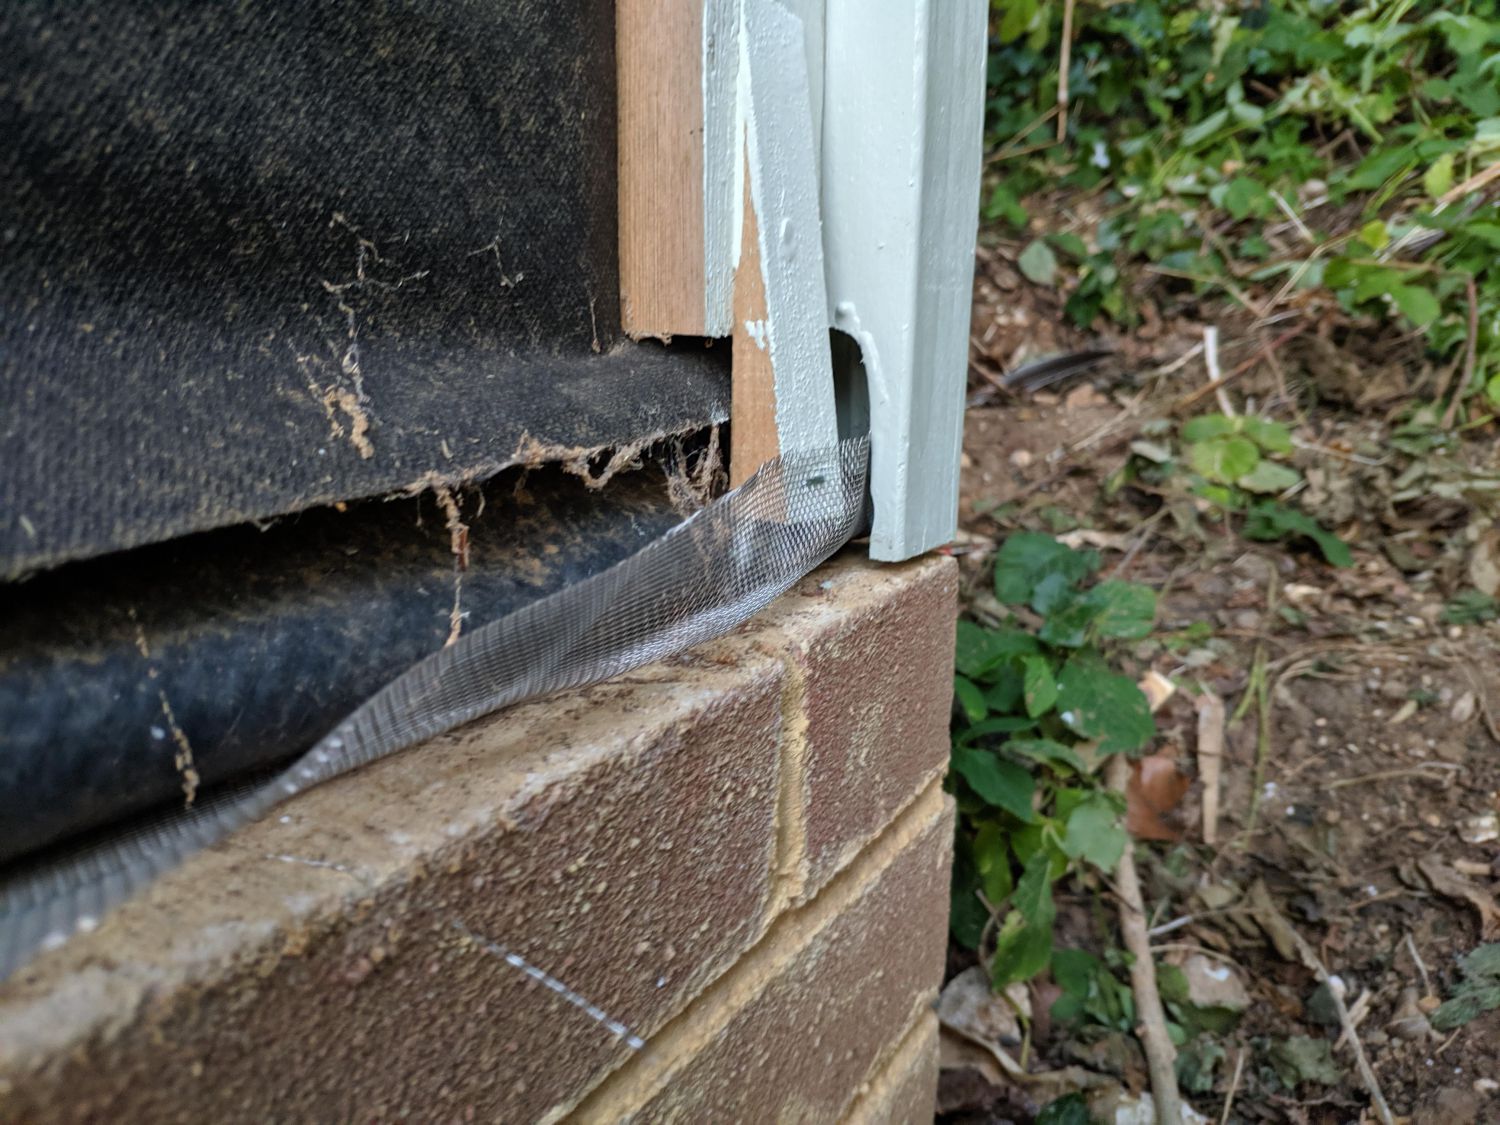
The bottom board is the most complicated to install as it sets the parallel for all above boards and needs to be spaced perfectly to ensure the edge is not in contact with the brickwork. I decided to screw this board in place so I could move it around if any issues arose.
First I stapled a strip of DPC to the back of the board, this will cover the brickwork temporarily while I apply a third coat of paint to the cladding. Once I have finished painting I can pull this out to uncover the plinth.
Because of the wedges, the back of this board is secured against a flat surface; this is far more stable than if a batten provided the bottom kick.
Up and up
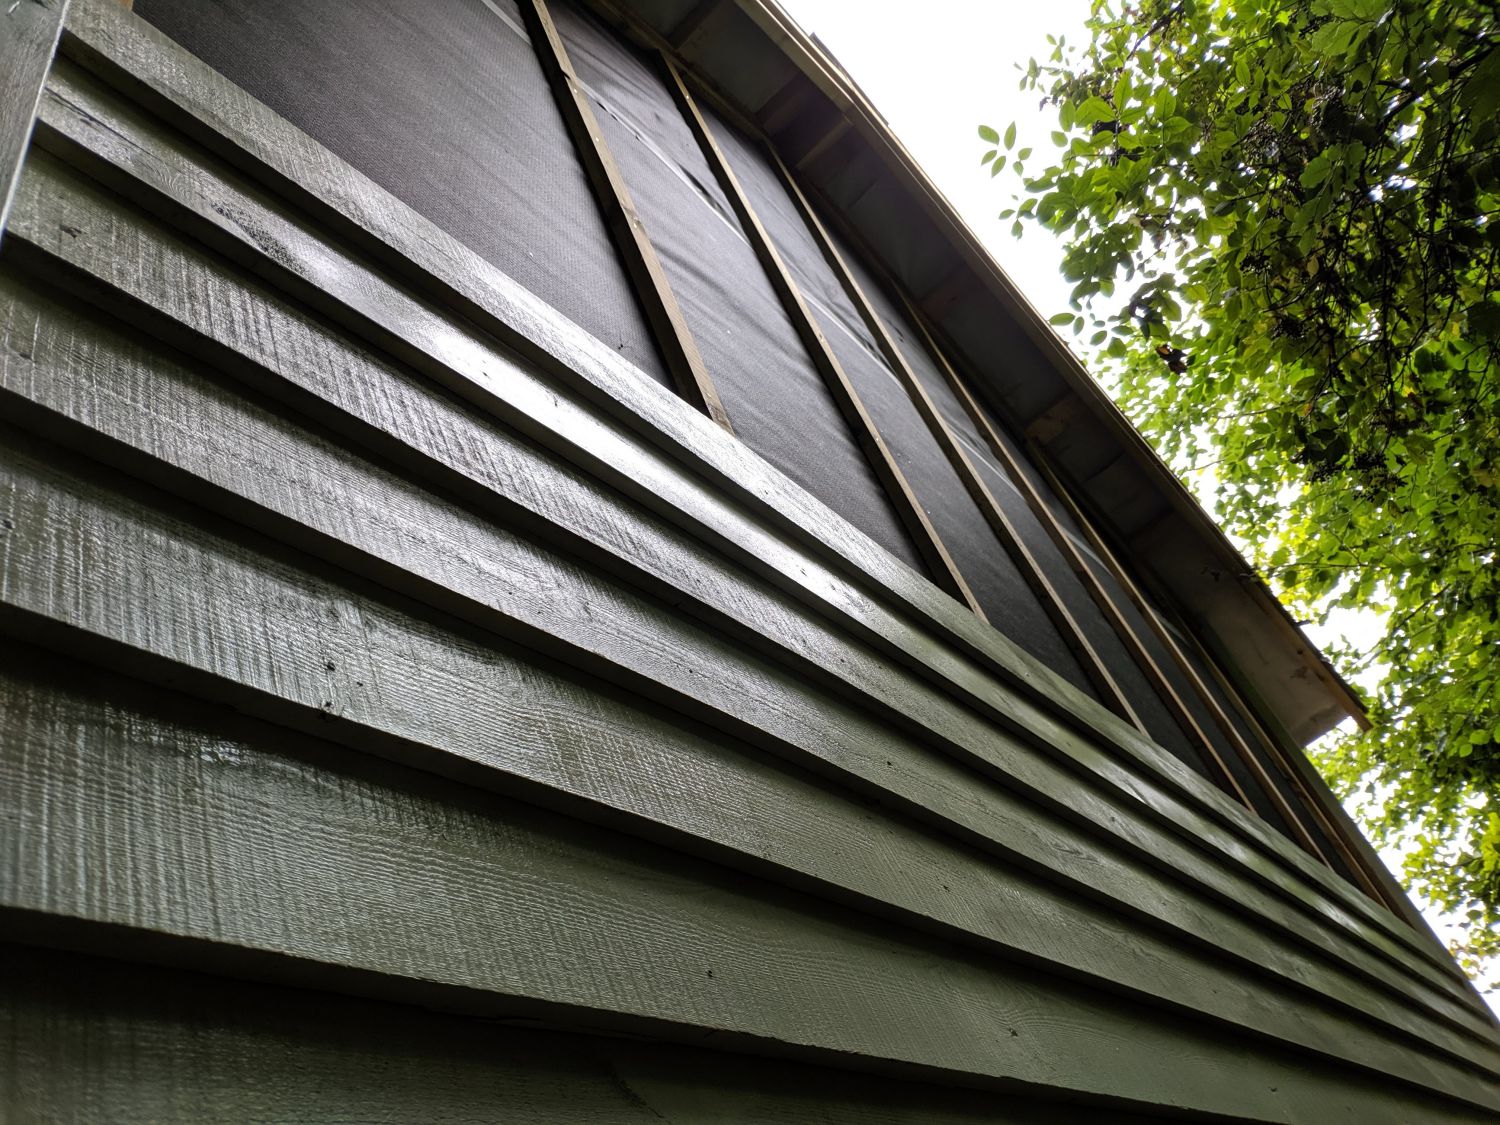
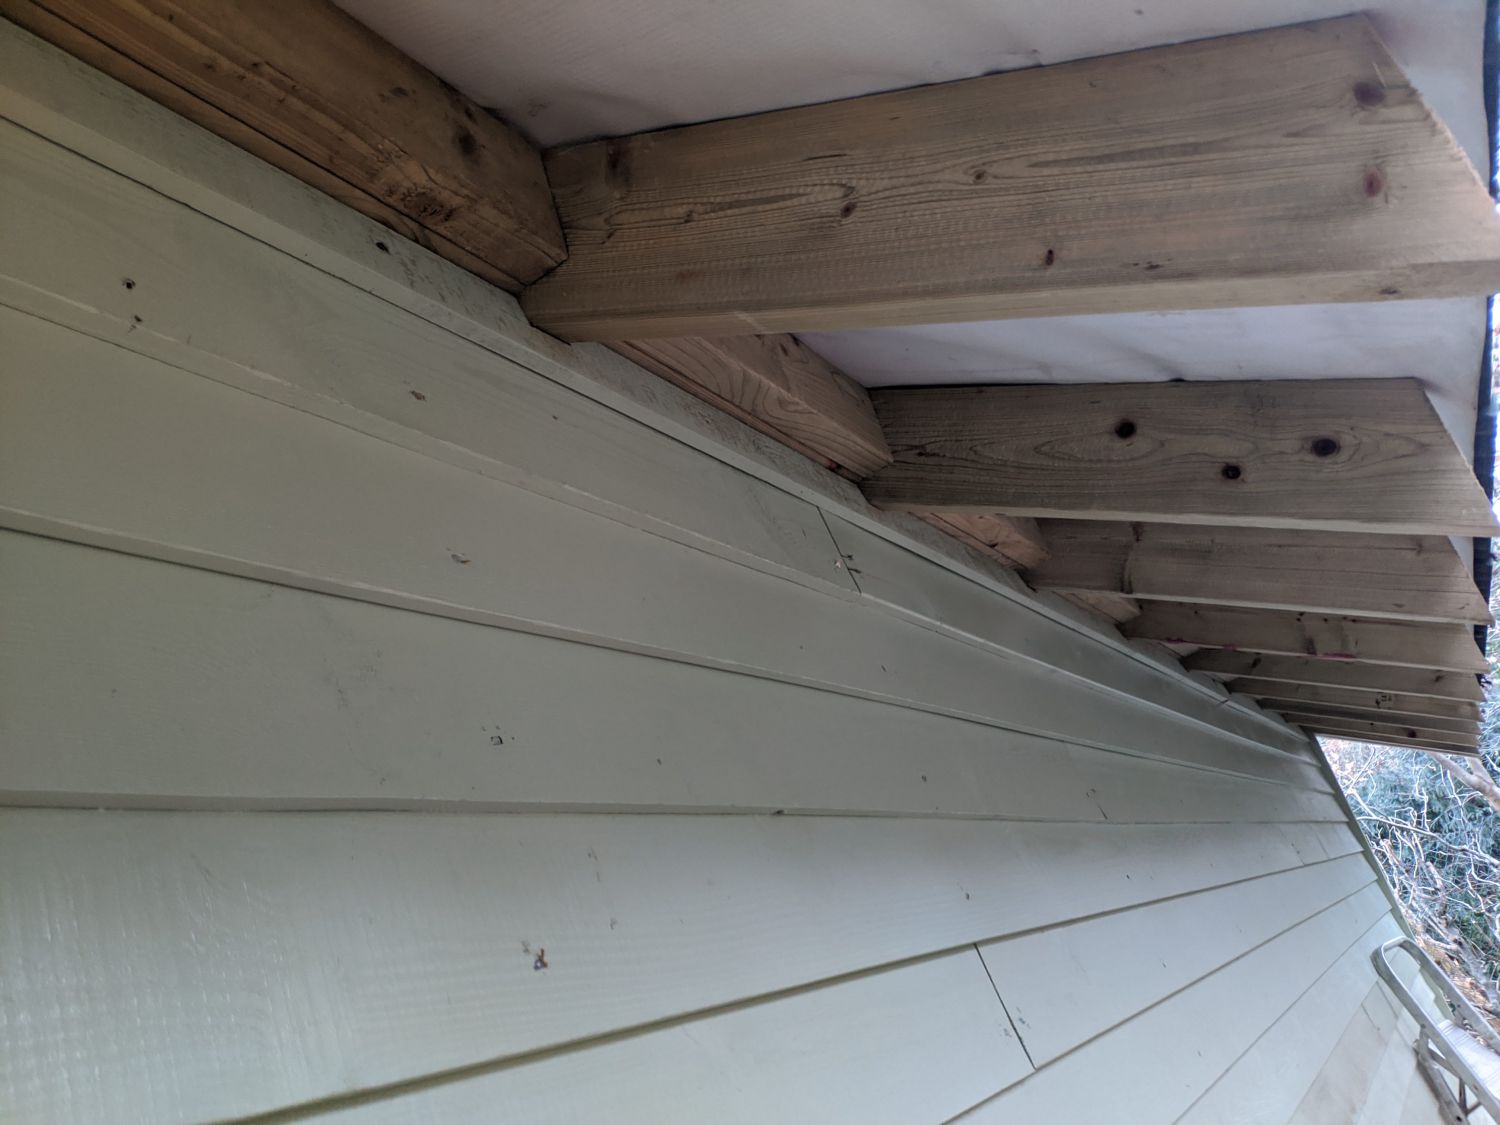
Each feather-edge board laps over the one below it by ~30mm. This ensures all water falling on the cladding runs up and makes it harder for the wind to drive water into the ventilated void.
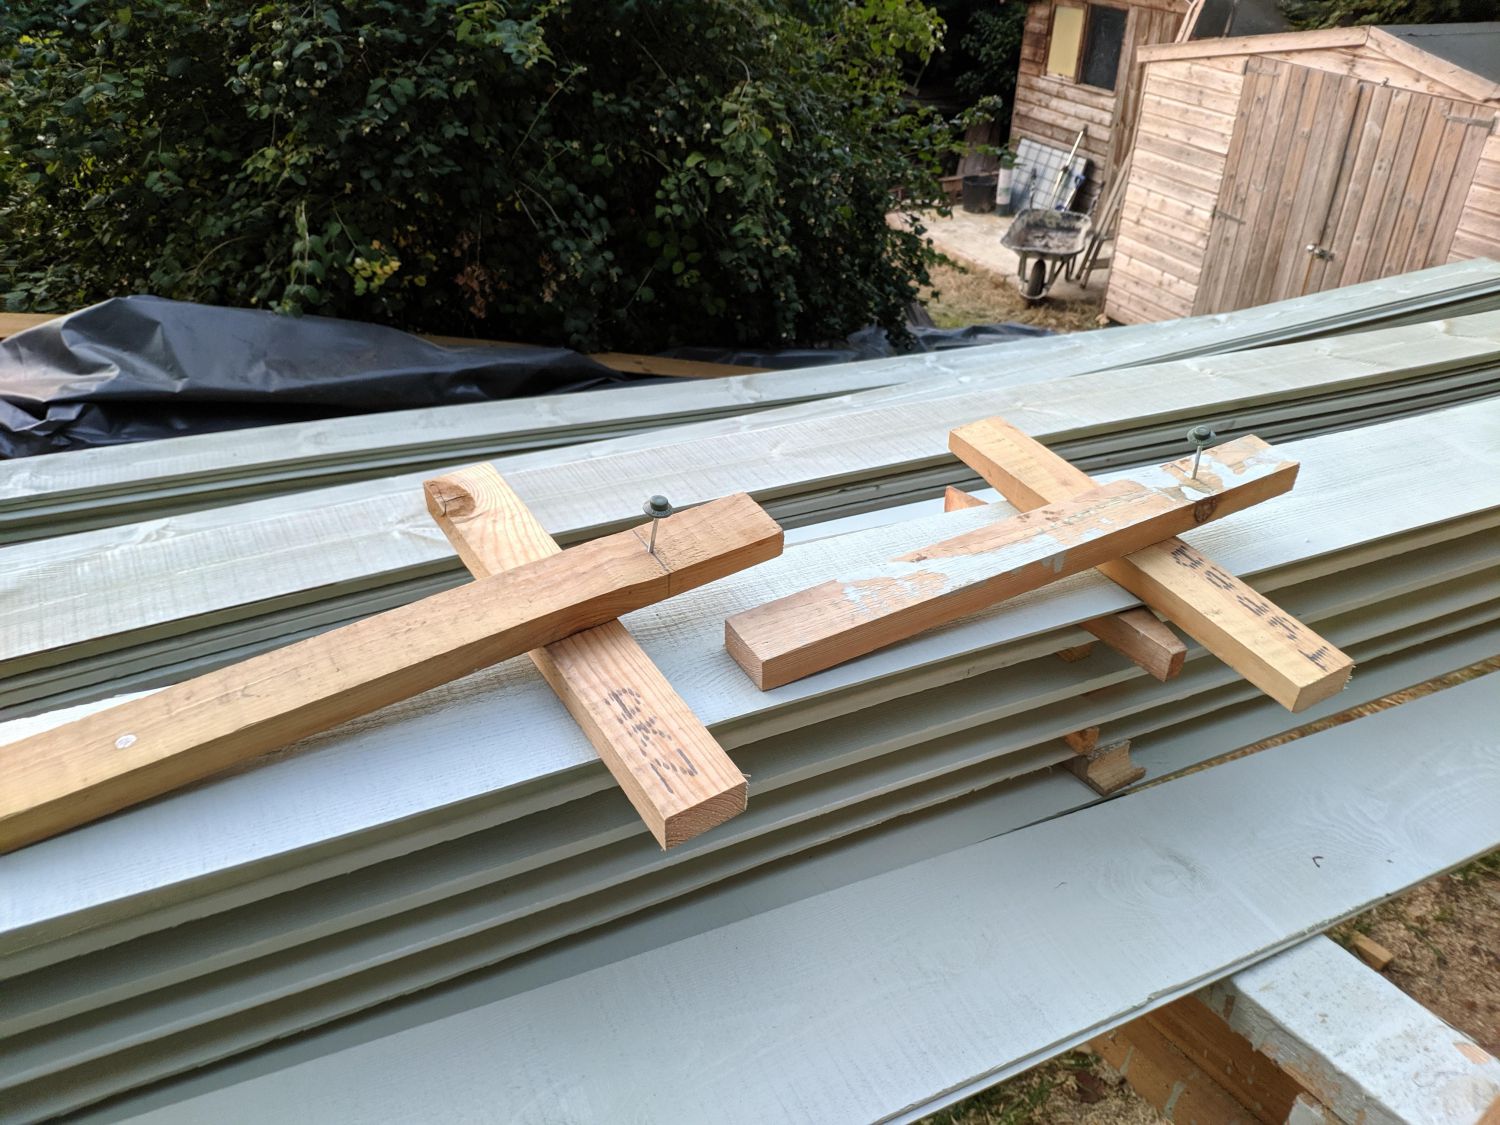
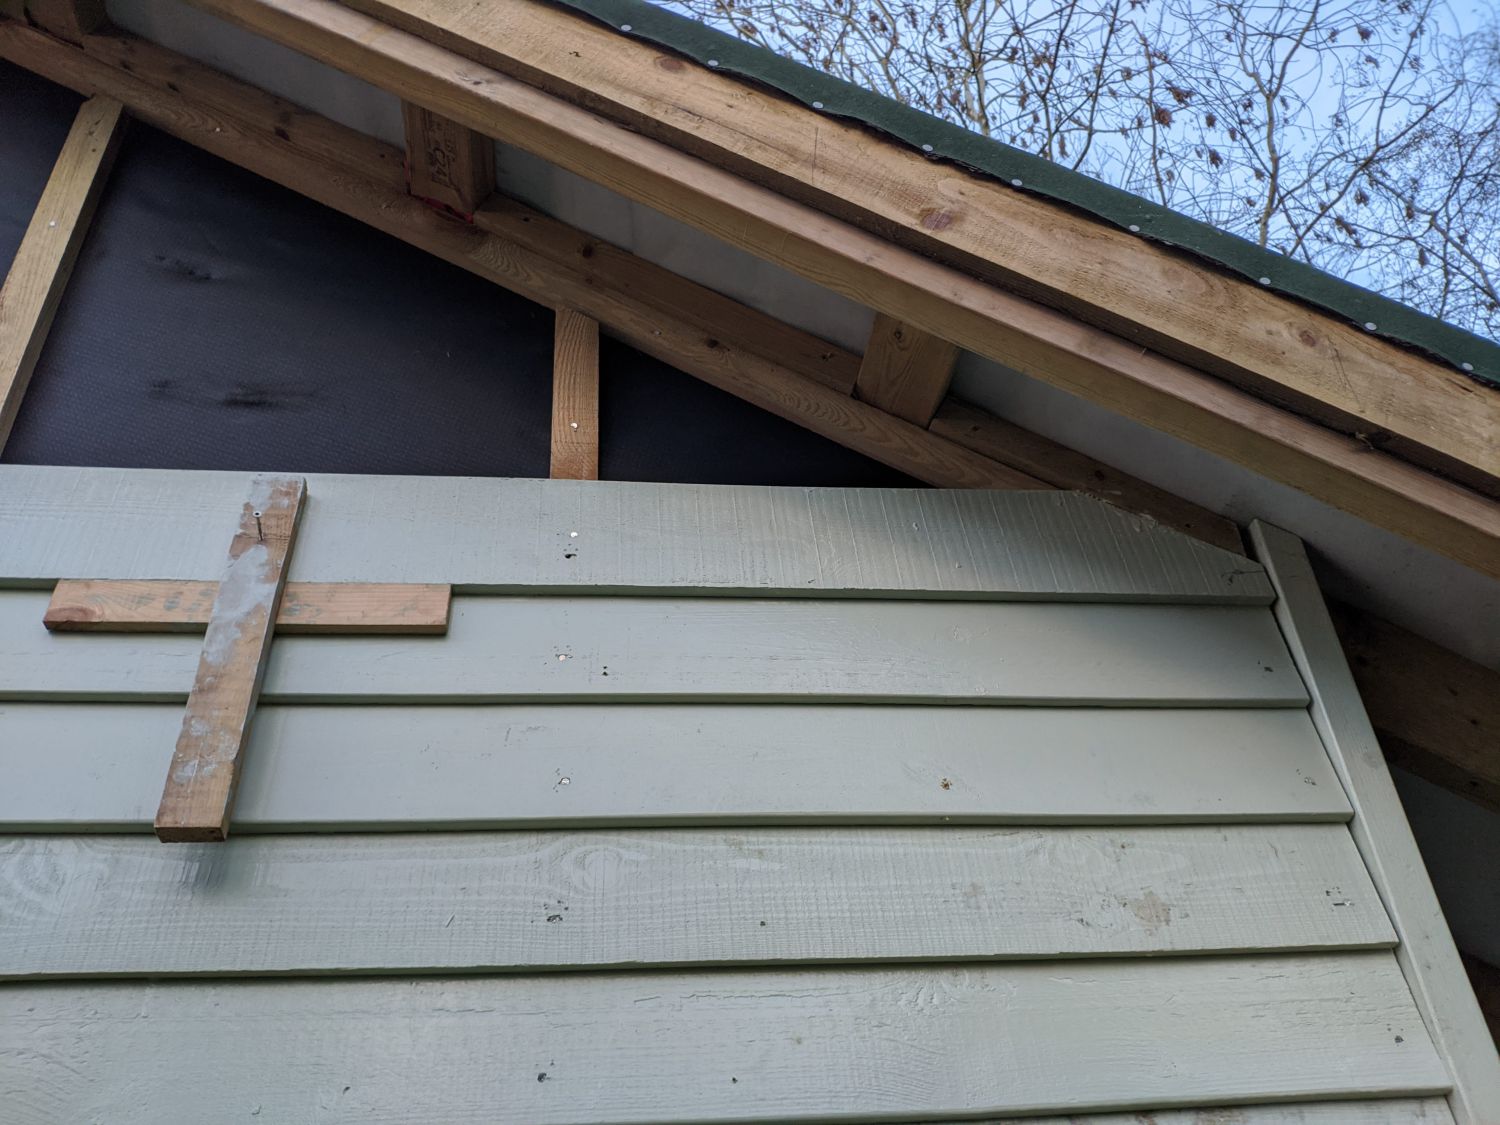
To maintain a constant spacing during installation I screwed together two crosses cut from 50*25mm battens. Each cross has 120mm above its horizontal, so when it is pushed up against the bottom of a board it creates a ledge exactly 30mm below the top of the board. The next board is sat on this ledge and nailed in place.
To allow for expansion and contraction of the cladding perpendicular to its grain I used one nail per board per batten. This means on each side of the nail expansion and contraction can take place; if two fixings were used the space in between would be constrained.
It is critical that the nail only goes through one board, so it has to be located ~40mm up from the bottom of each to miss the under-lapping board. To ensure this, I made a jig which marked this level when bumped against the bottom edge of the board.
Every few boards spaced using the crosses, I confirmed the rows were still parallel with a level.
Gable ends
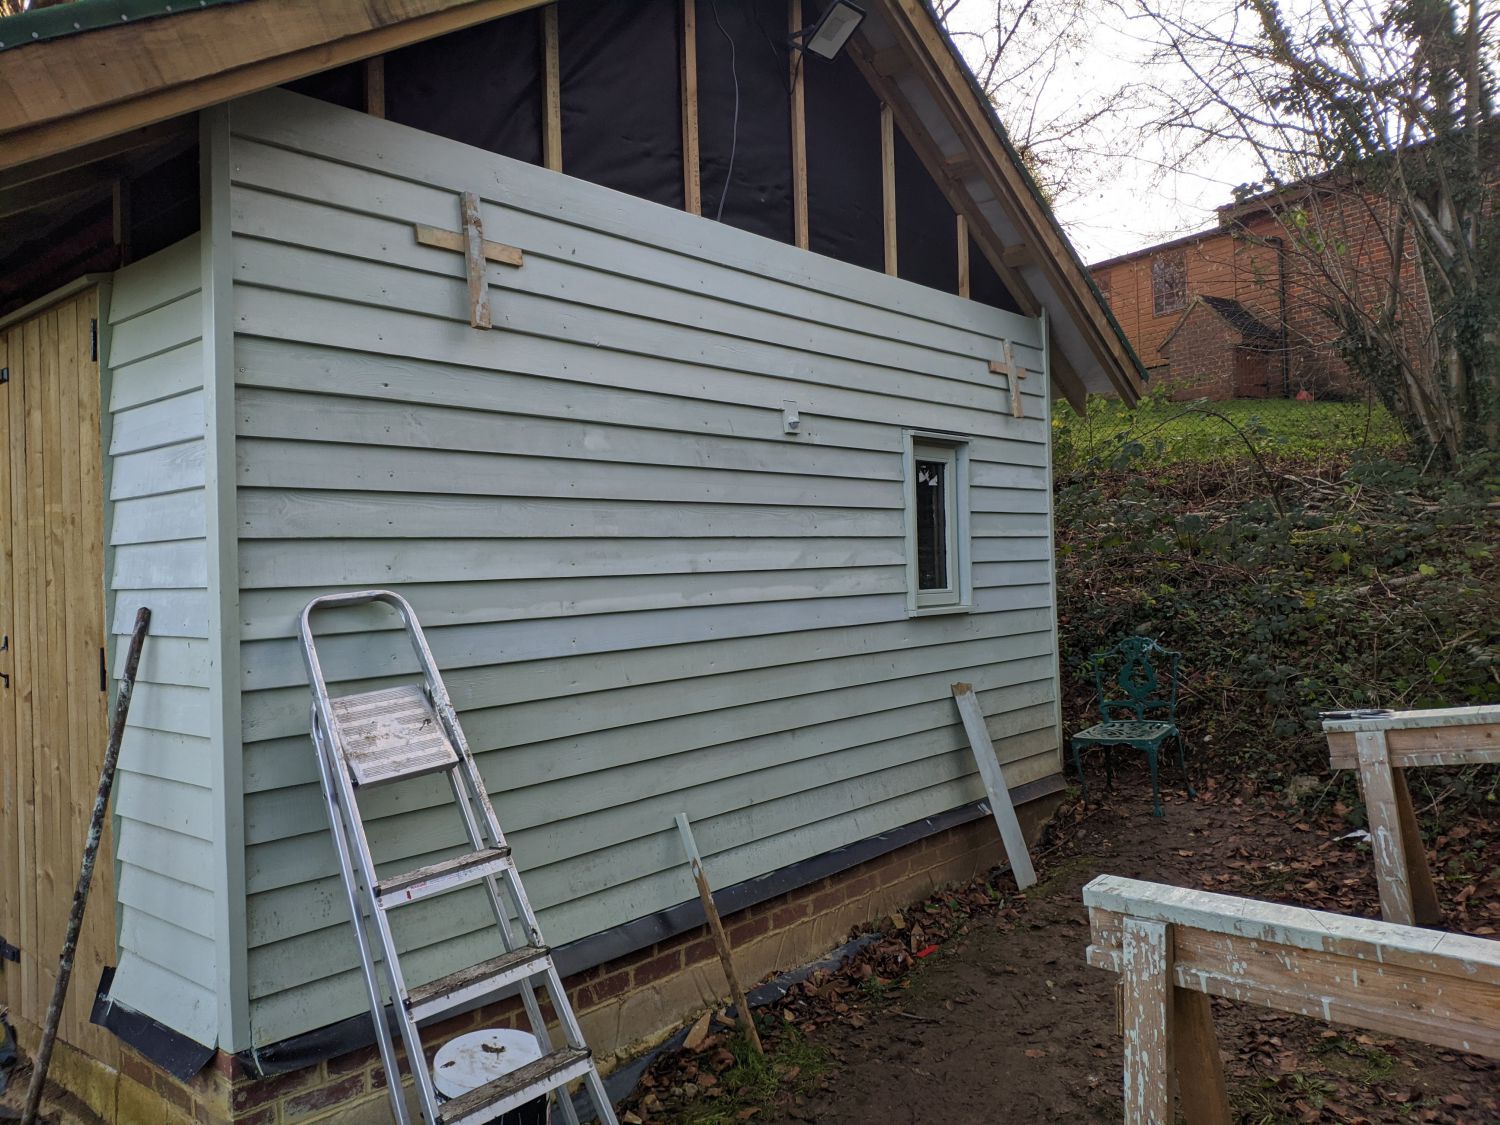
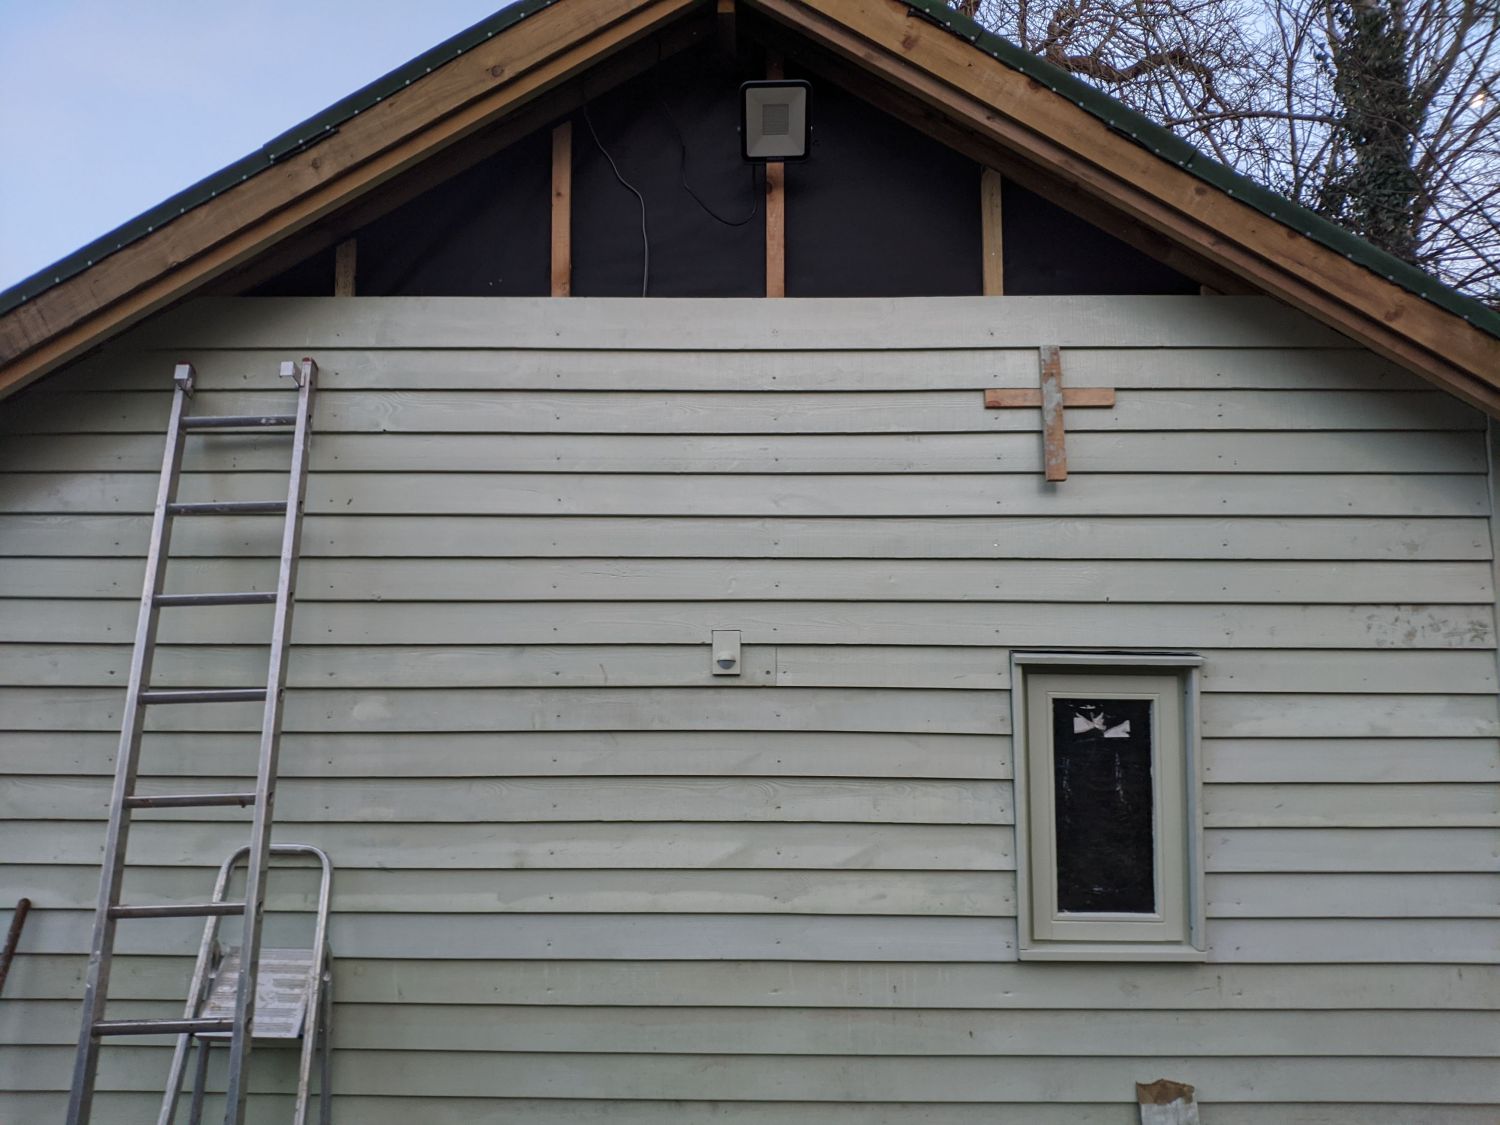
The cladding extends up into each gable and needs to be cut to match the 30° roof pitch. After manually measuring and fixing the first board, I calculated the offset distance for each shorter board with trigonometry. I then cut the entire gable at once, totalling ~12 boards.

These boards were easier to fix than the sides as I could align them by using a single cross on one side and butting the other against the top 2×2″ for termination.
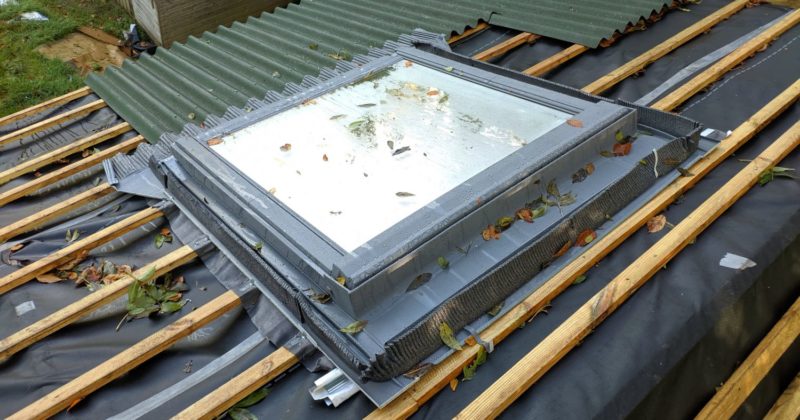
At the top I cut a slot in a board to slot around the ridge. The battens running parallel to the roof just below the 2×2″ blocking were used to fix shorter boards.
Top boards
At the top of the front and back walls the cladding needed regular notches cut into it to fit around the rafters. I screwed in the crosses halfway up the penultimate board and sat the final board on them before marking parallel to each rafter. I then cut the notches out with a circular saw and applied a thick layer of paint on the freshly cut wood.
The top ventilation for the walls is provided by imperfections in the cut-outs around the rafters, which I was advised would be sufficient.
Lighting
While nailing on the cladding I installed the following lights and PIR sensors for security and use of the space around the shed:
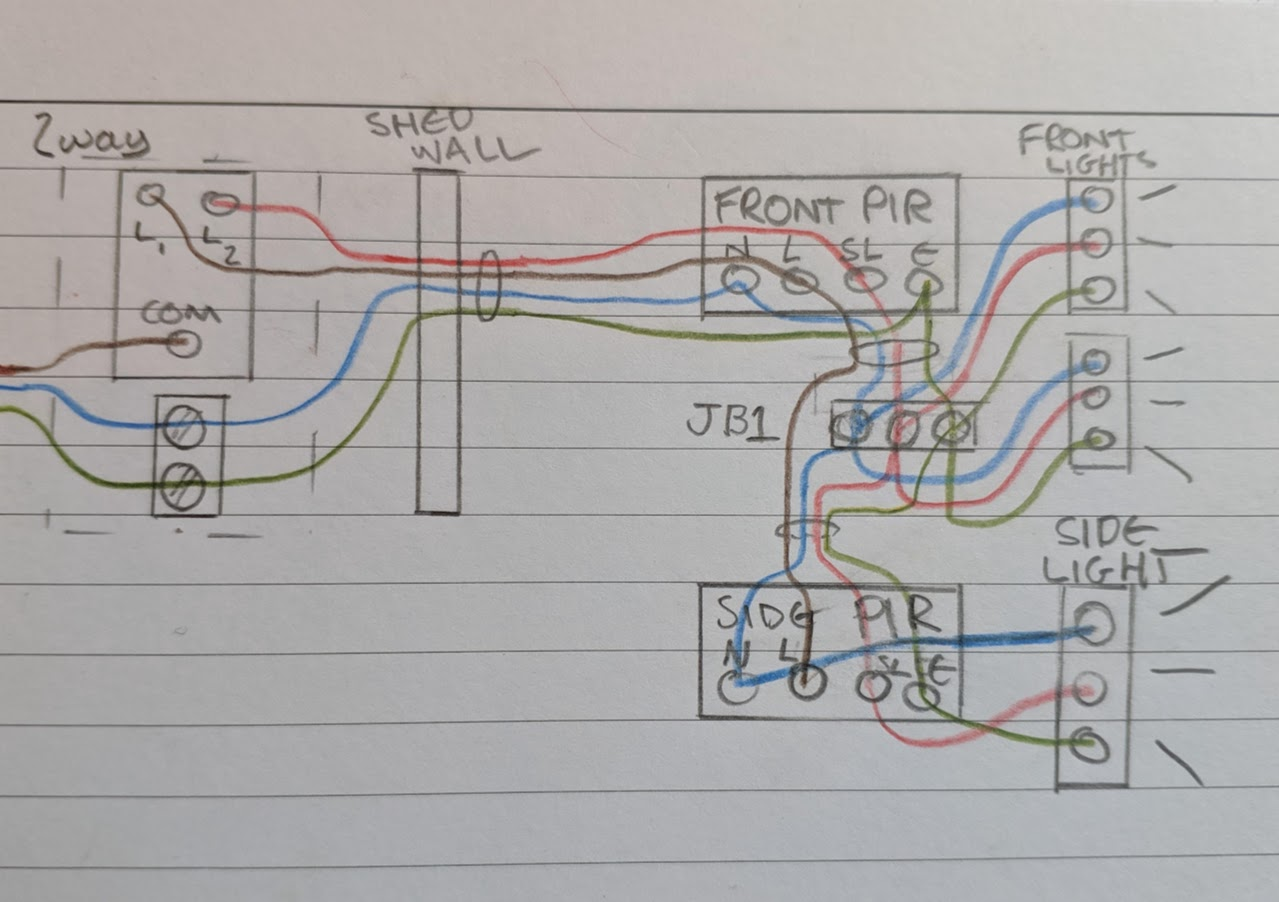
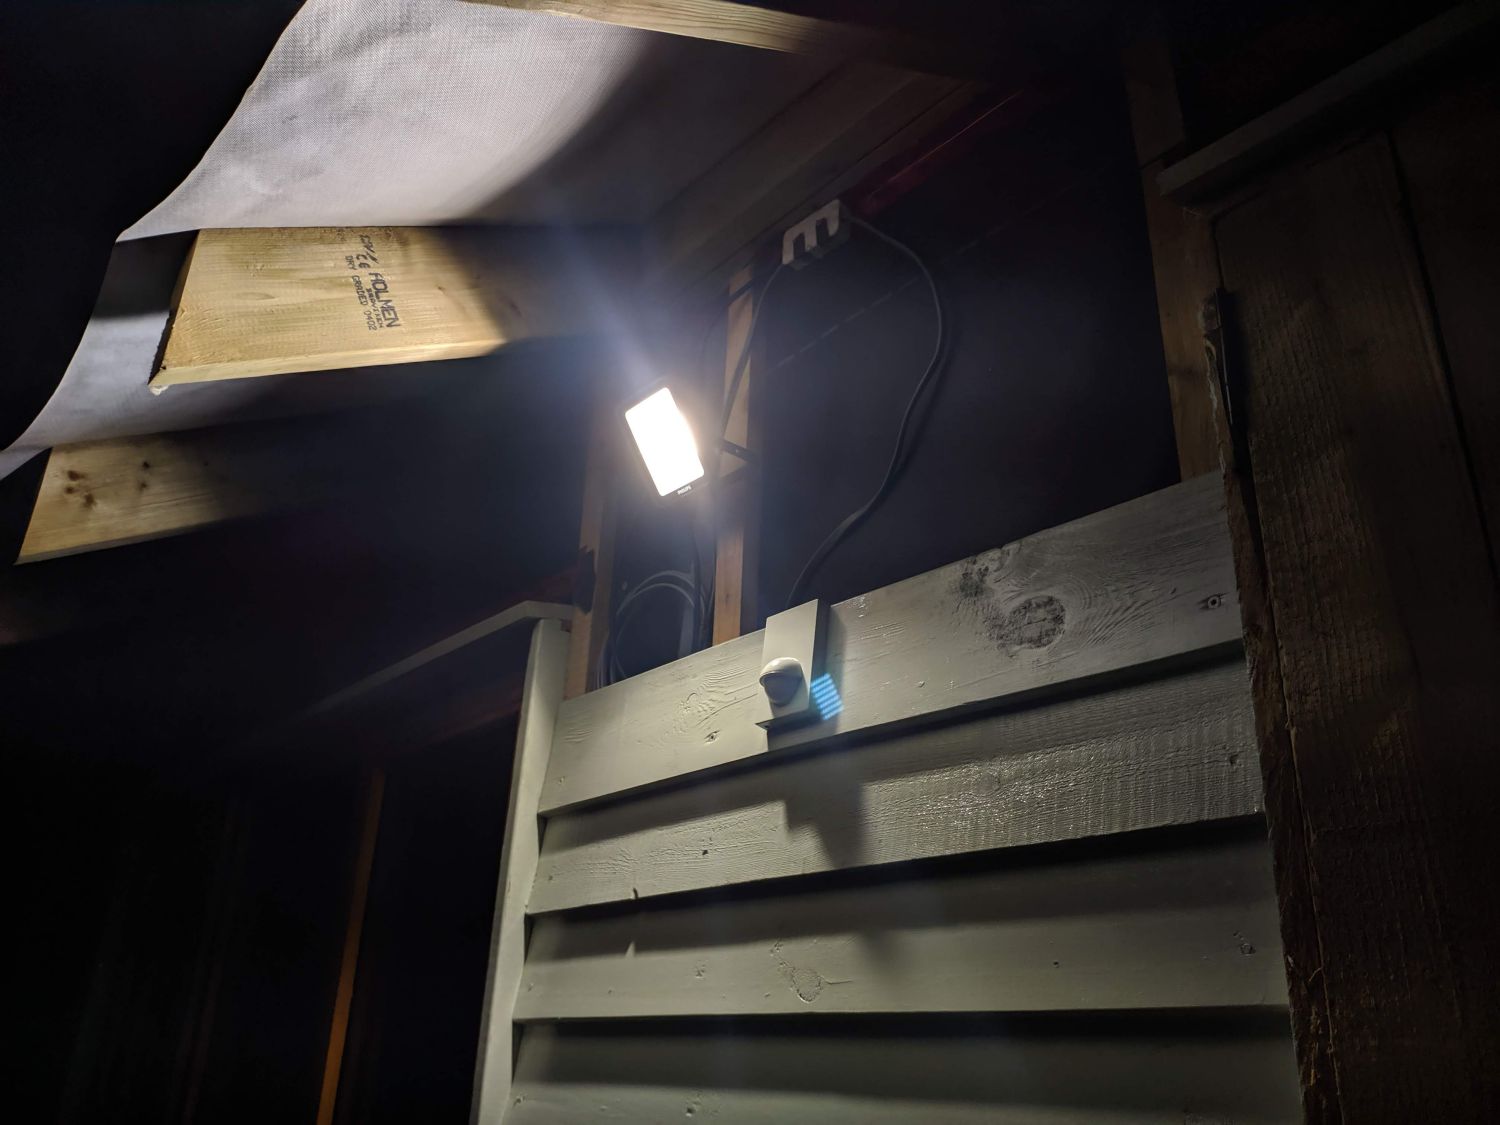
- 2x Flush Wall Mounted PIR Sensor
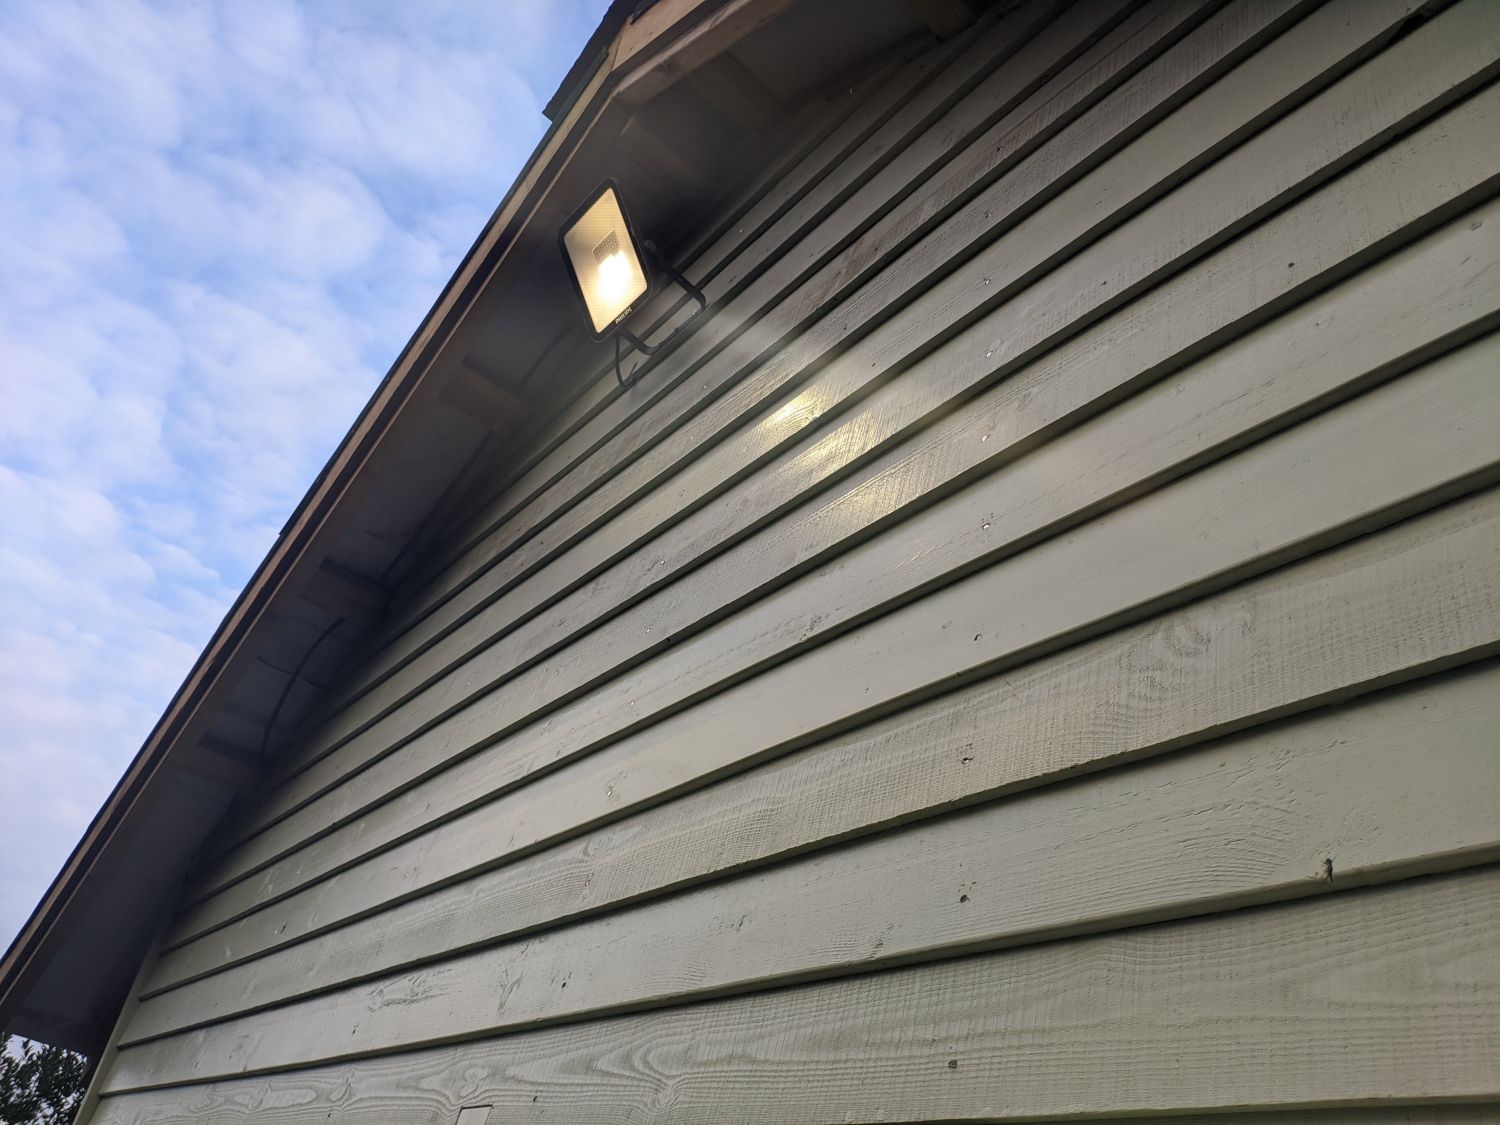
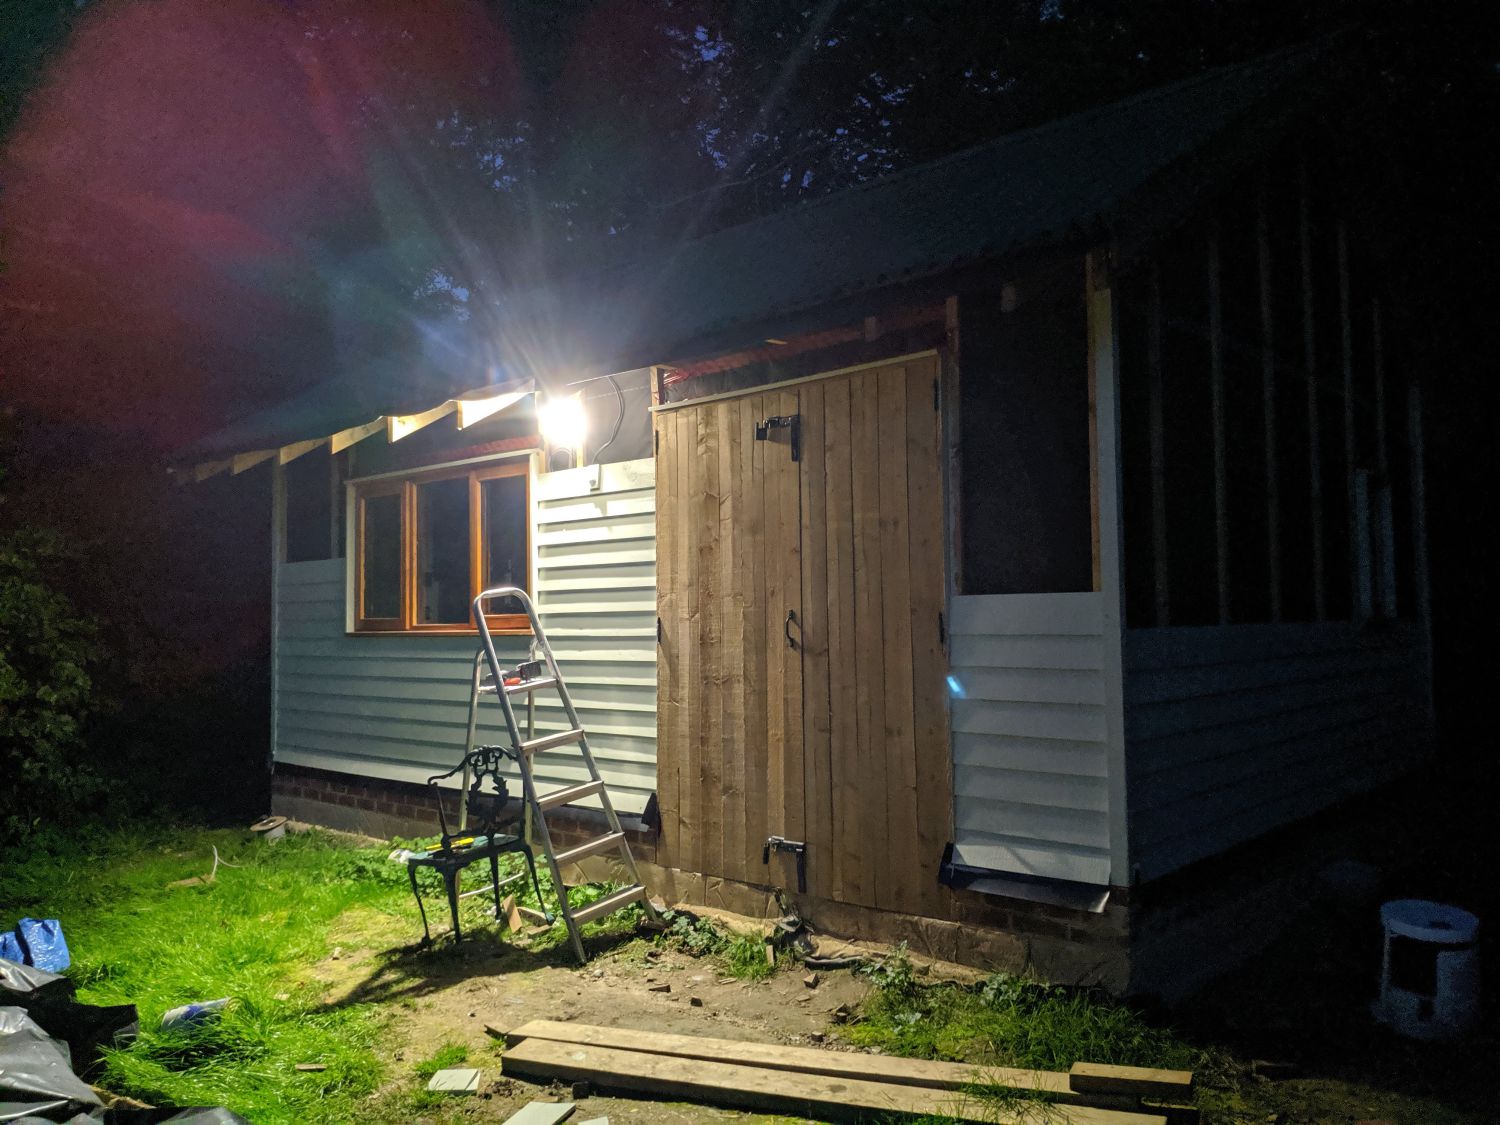
- 2x Philips Cool White 20W LED Floodlight
- 1x Philips Cool White 50W LED Floodlight
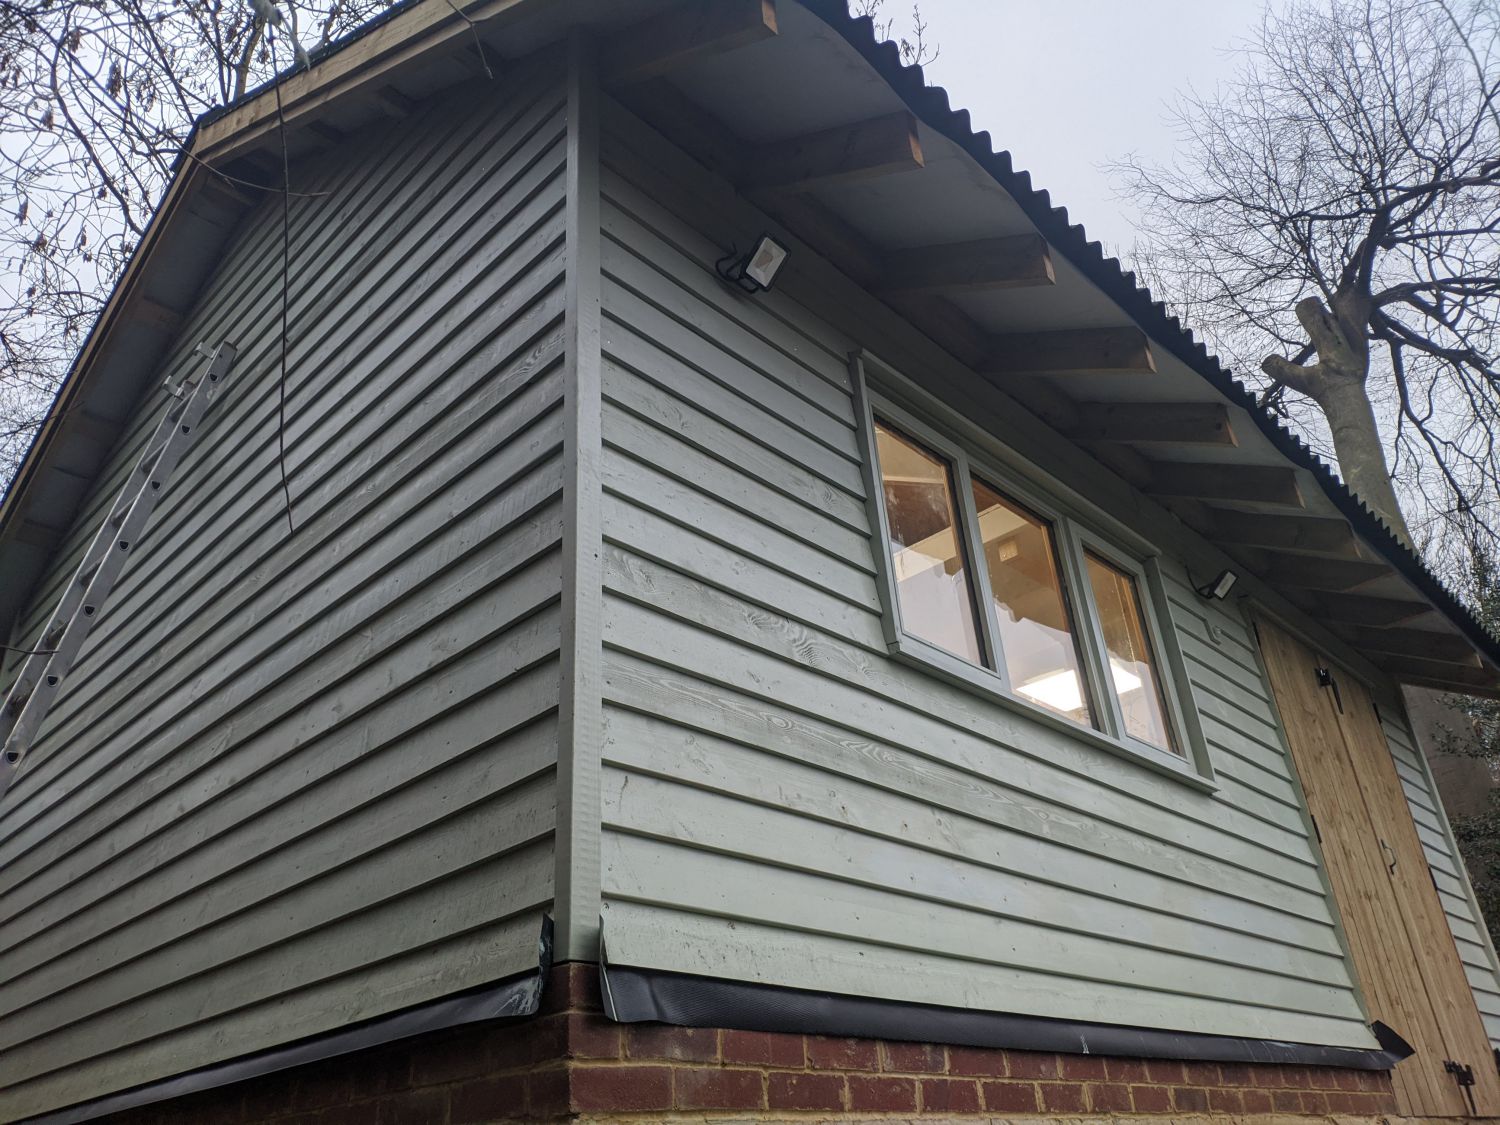
The two smaller 20W floodlights light the area in-front of the building and the 50W LED, mounted higher, illuminates the right side. Both have independent PIR sensors that activate at night and switch the lights if infrared movement is detected.
For extra flexibility, I had allocated a switch inside the shed to override the sensors and keep the lights on. This will be useful if I am ever working outside for a longer period. Some PIR sensors do not support this setup so I made sure mine did before purchasing.
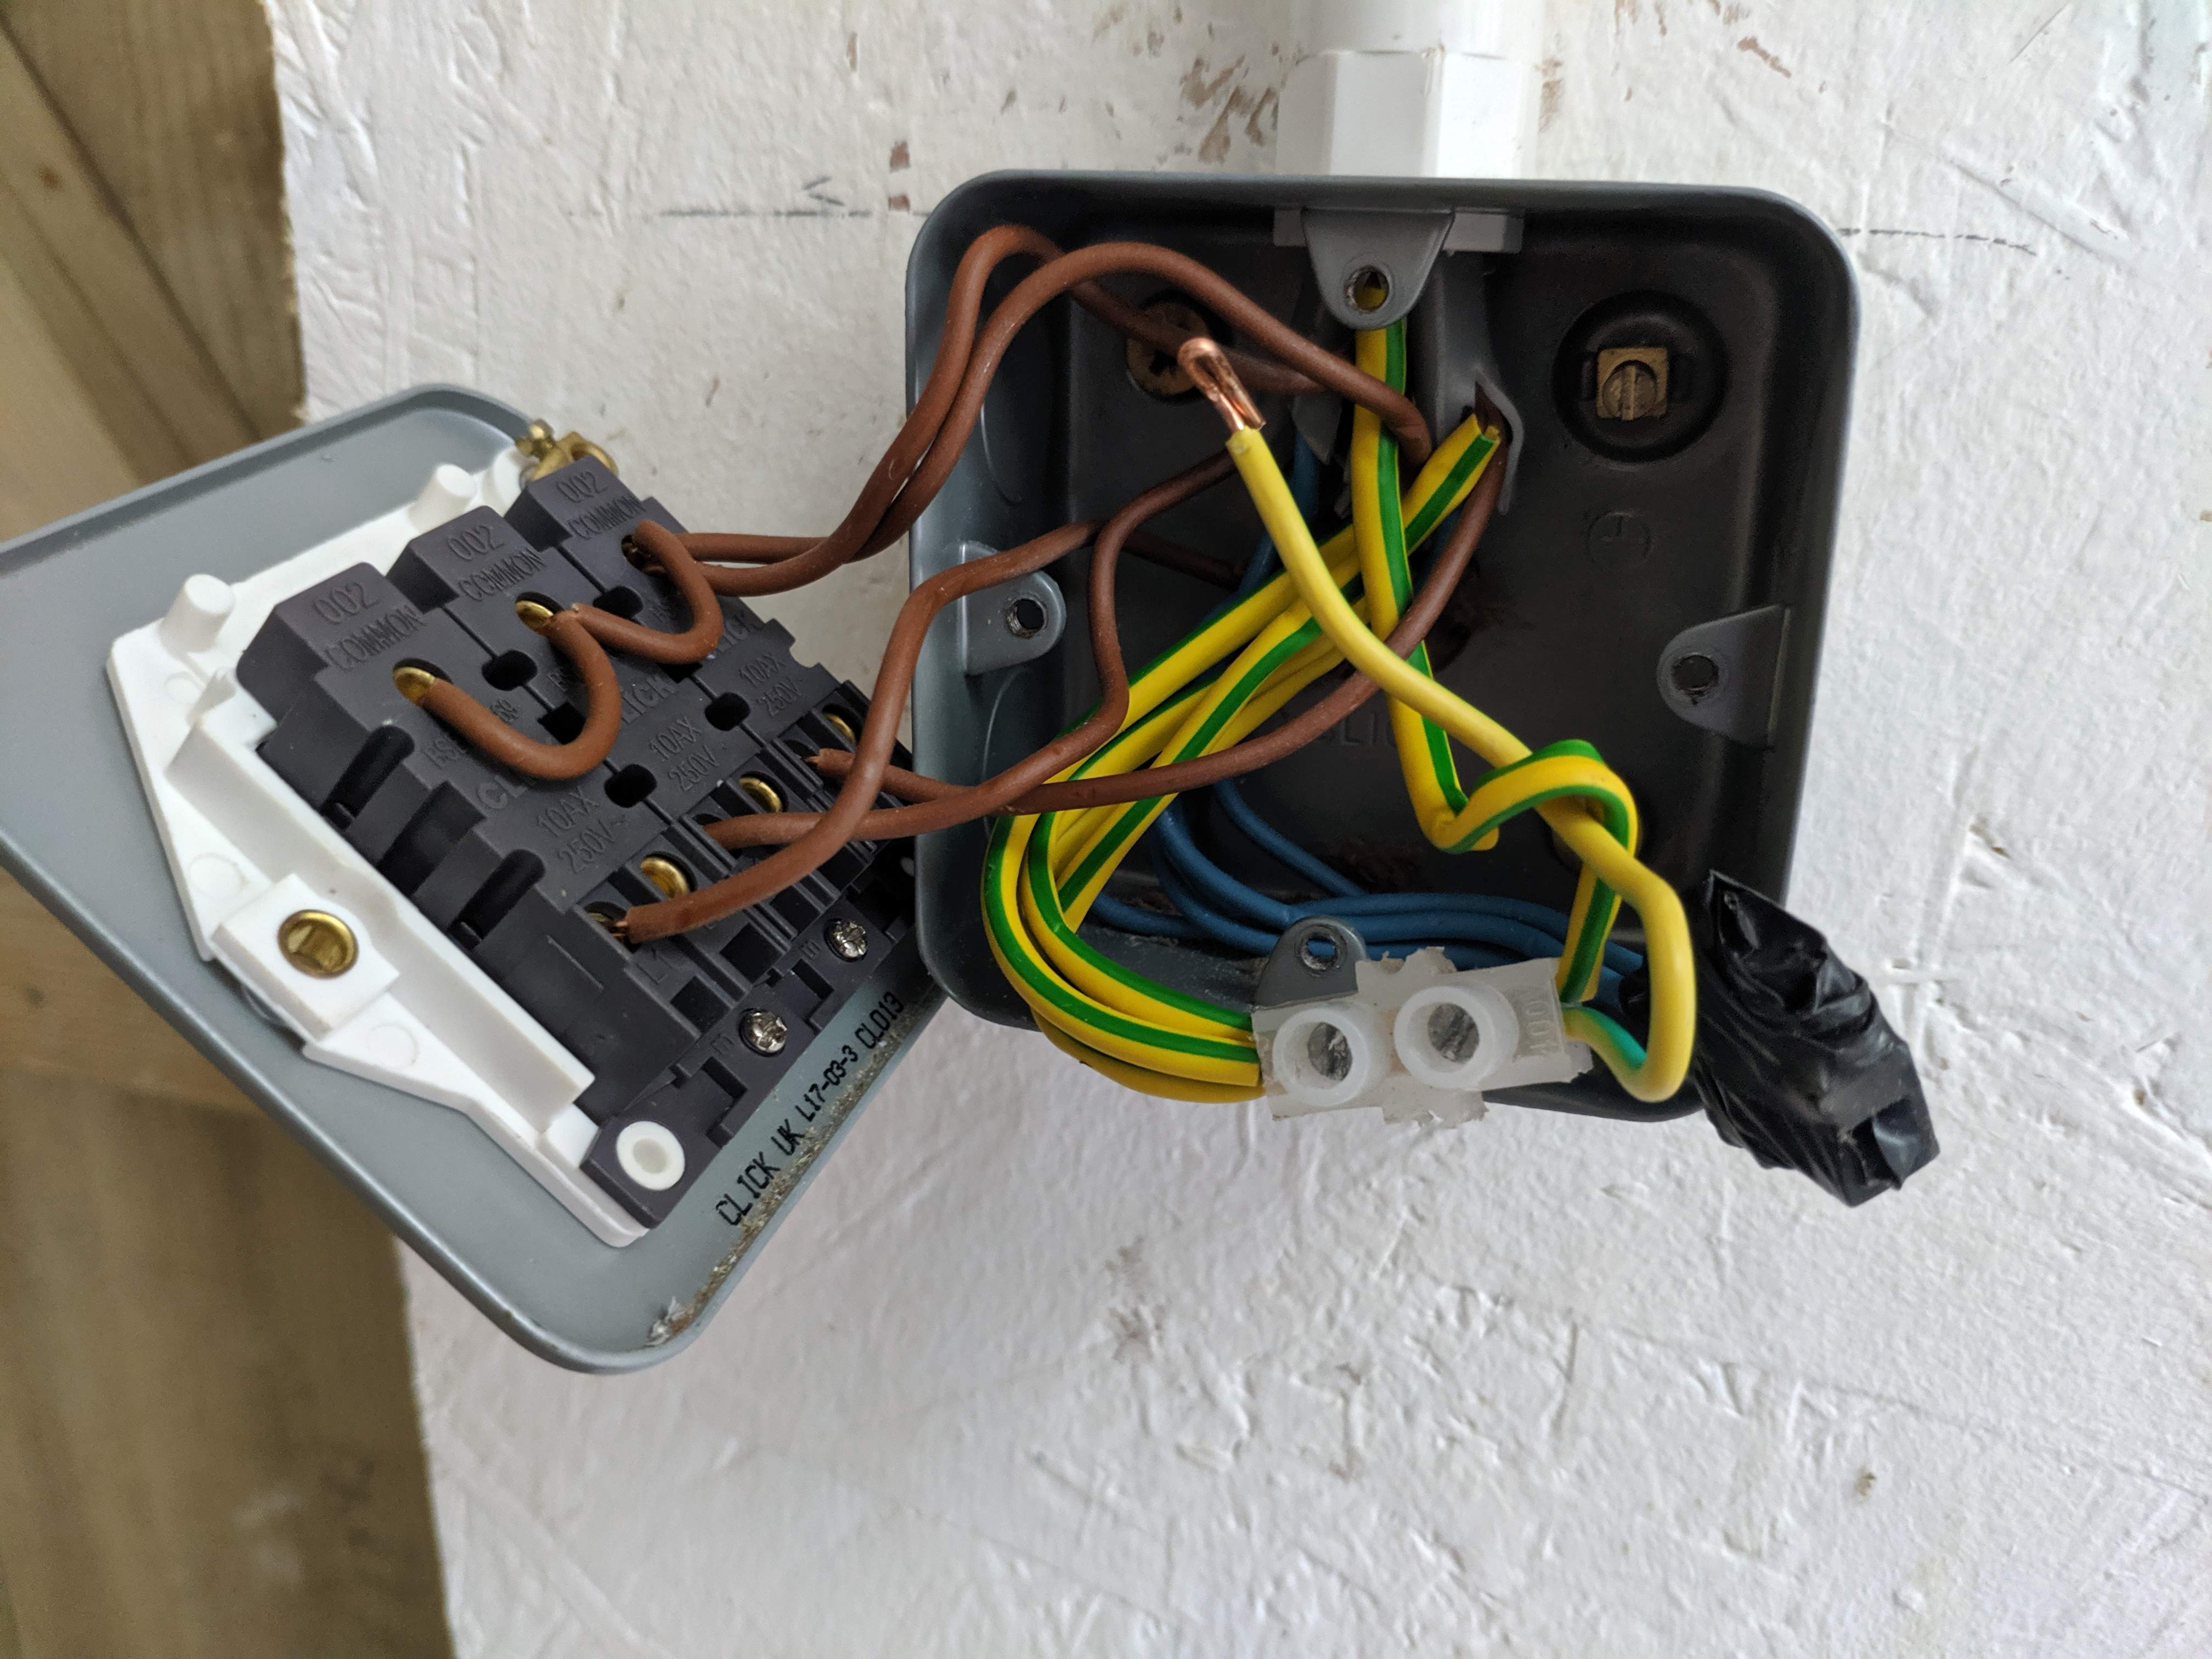
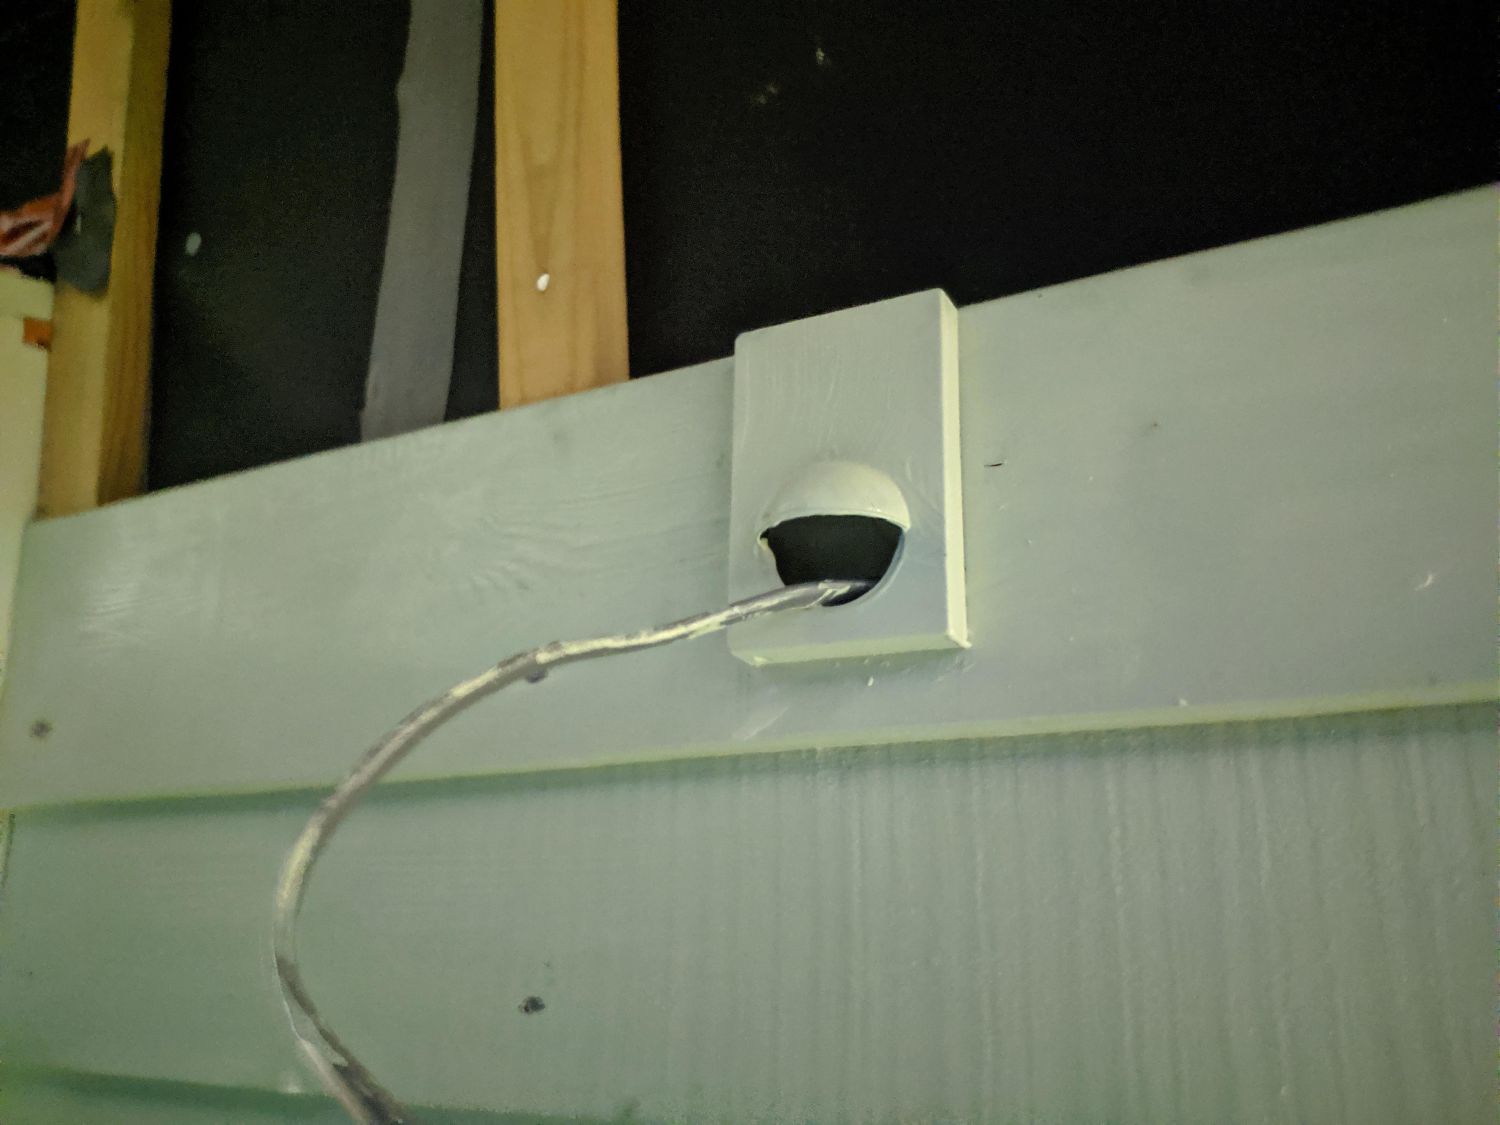
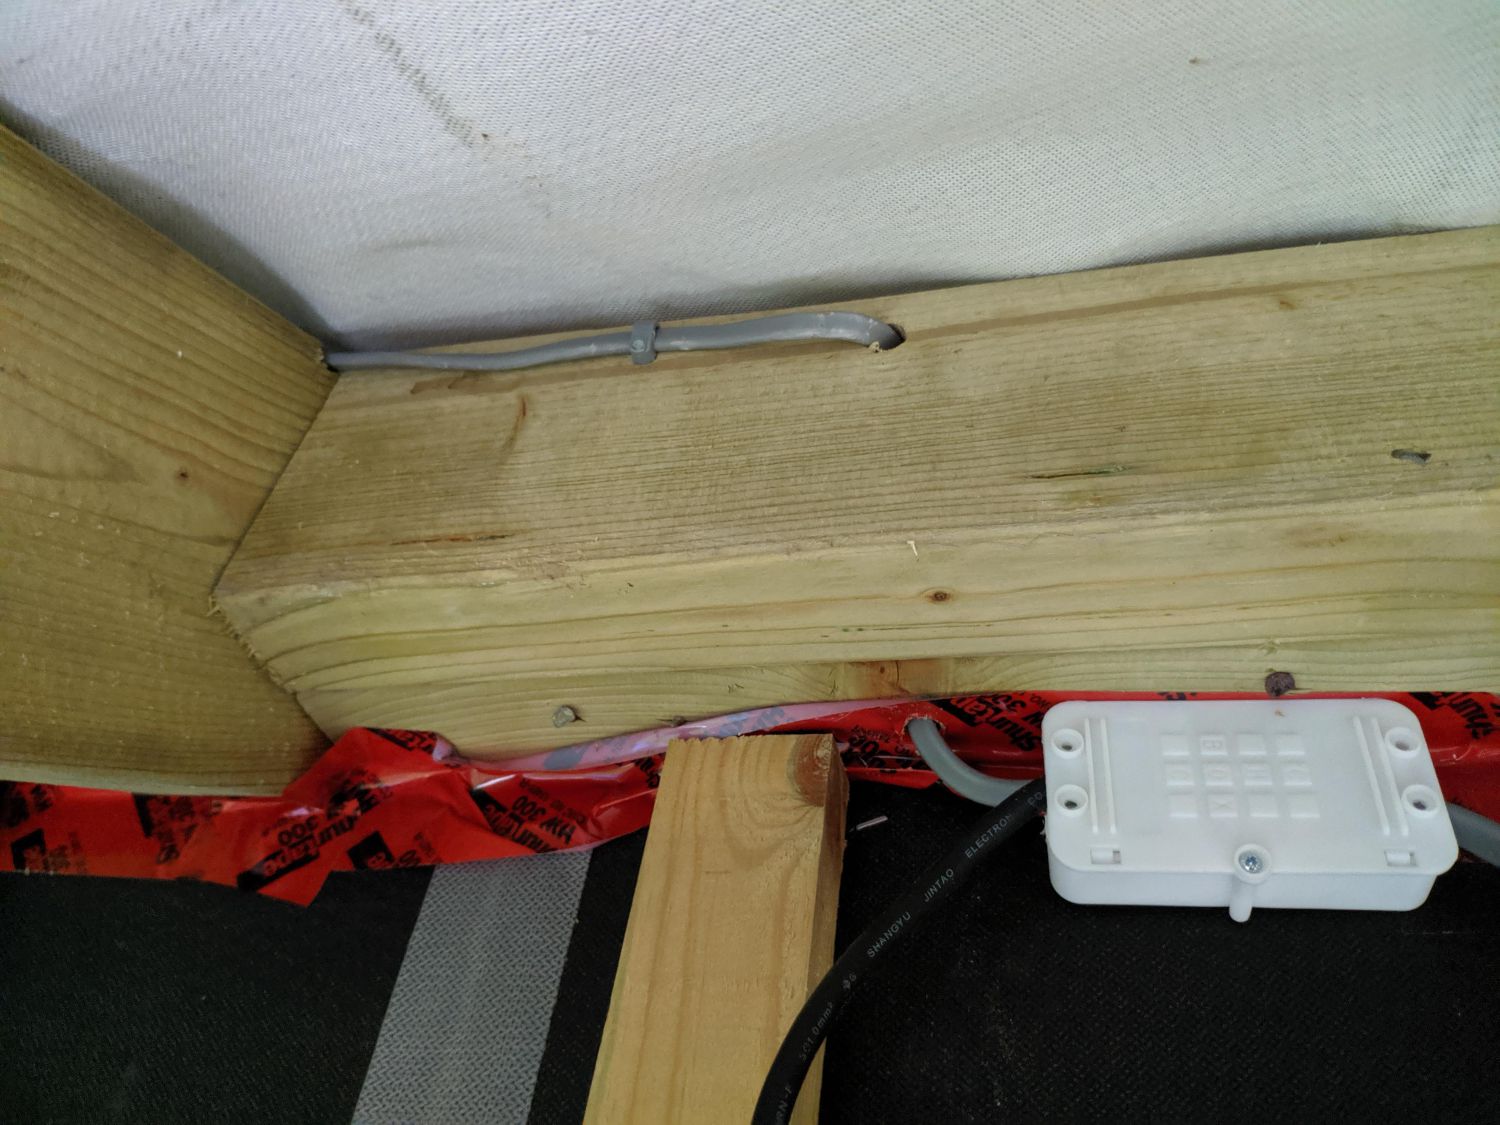
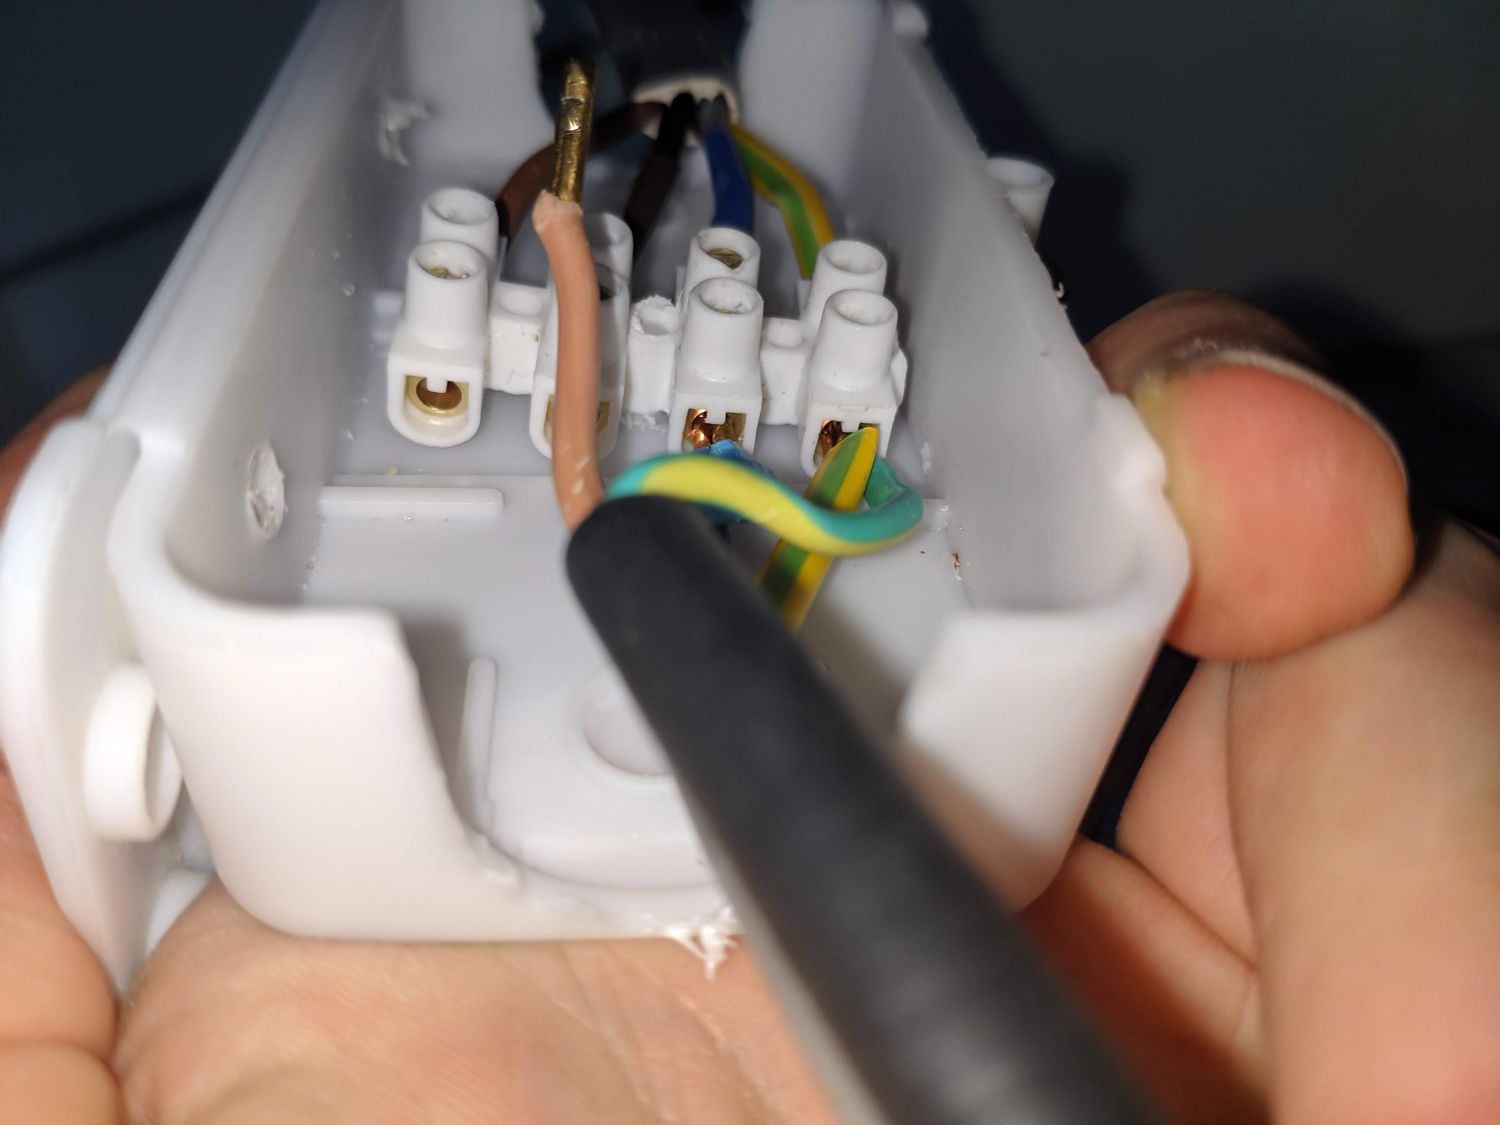
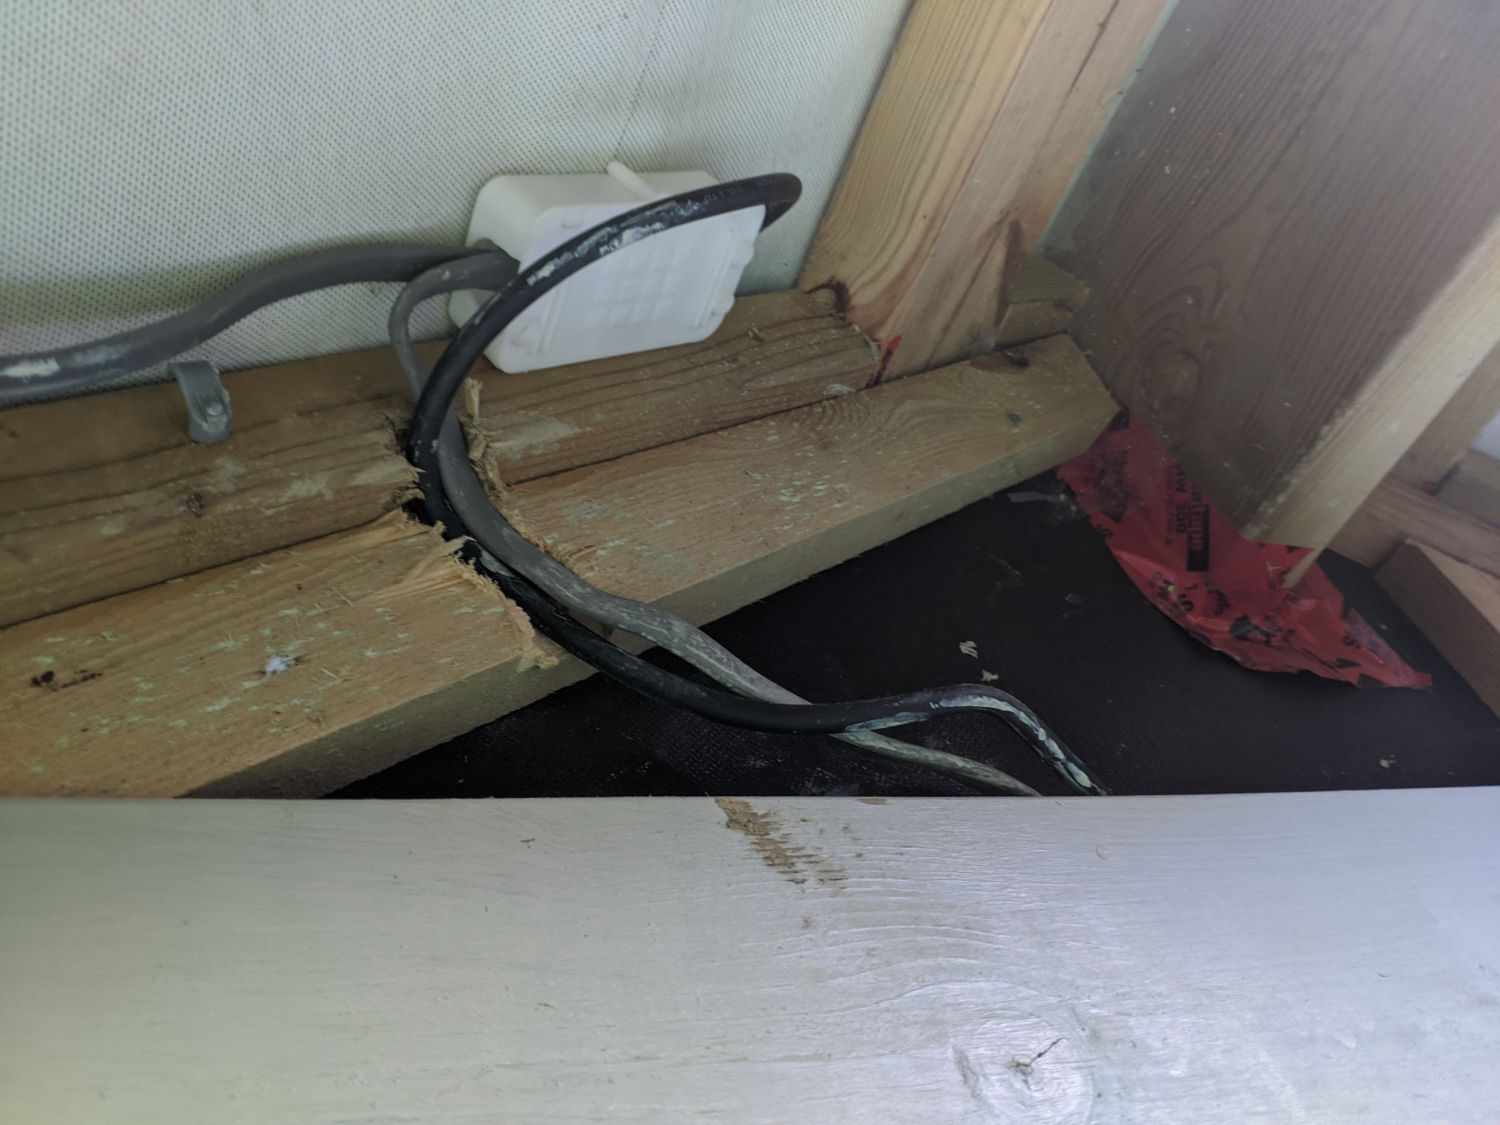
To carry the override line out of the shed I used 3 core and earth cable; in addition to the standard live, neutral and earth conductors the fourth conductor was connected to one line of the switch. I drilled the hole for this cable directly behind the back box and after installation, sealed the opening with EBT+.
I wired all of the electrics behind the cladding, trying to ensure wires only ran directly above and below fittings – an electrician confirmed this was compliant in this scenario. Additionally, all boards with fittings on them were screwed in place, allowing easy removal for replacement or to locate wires.

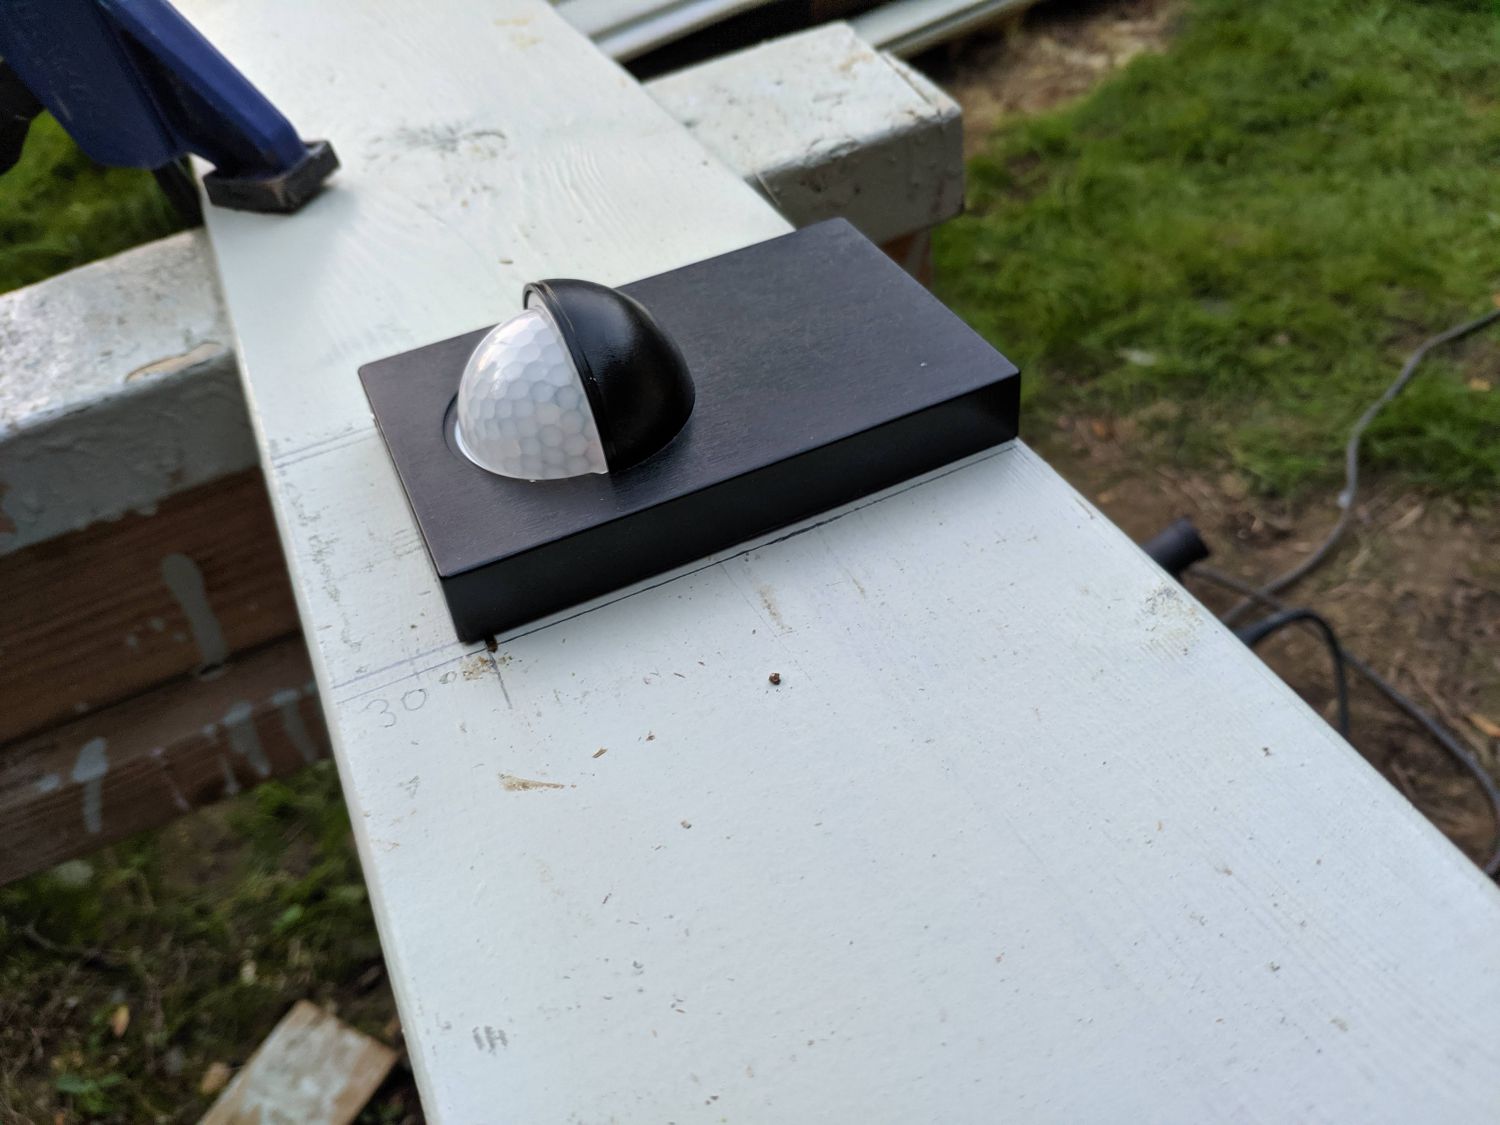

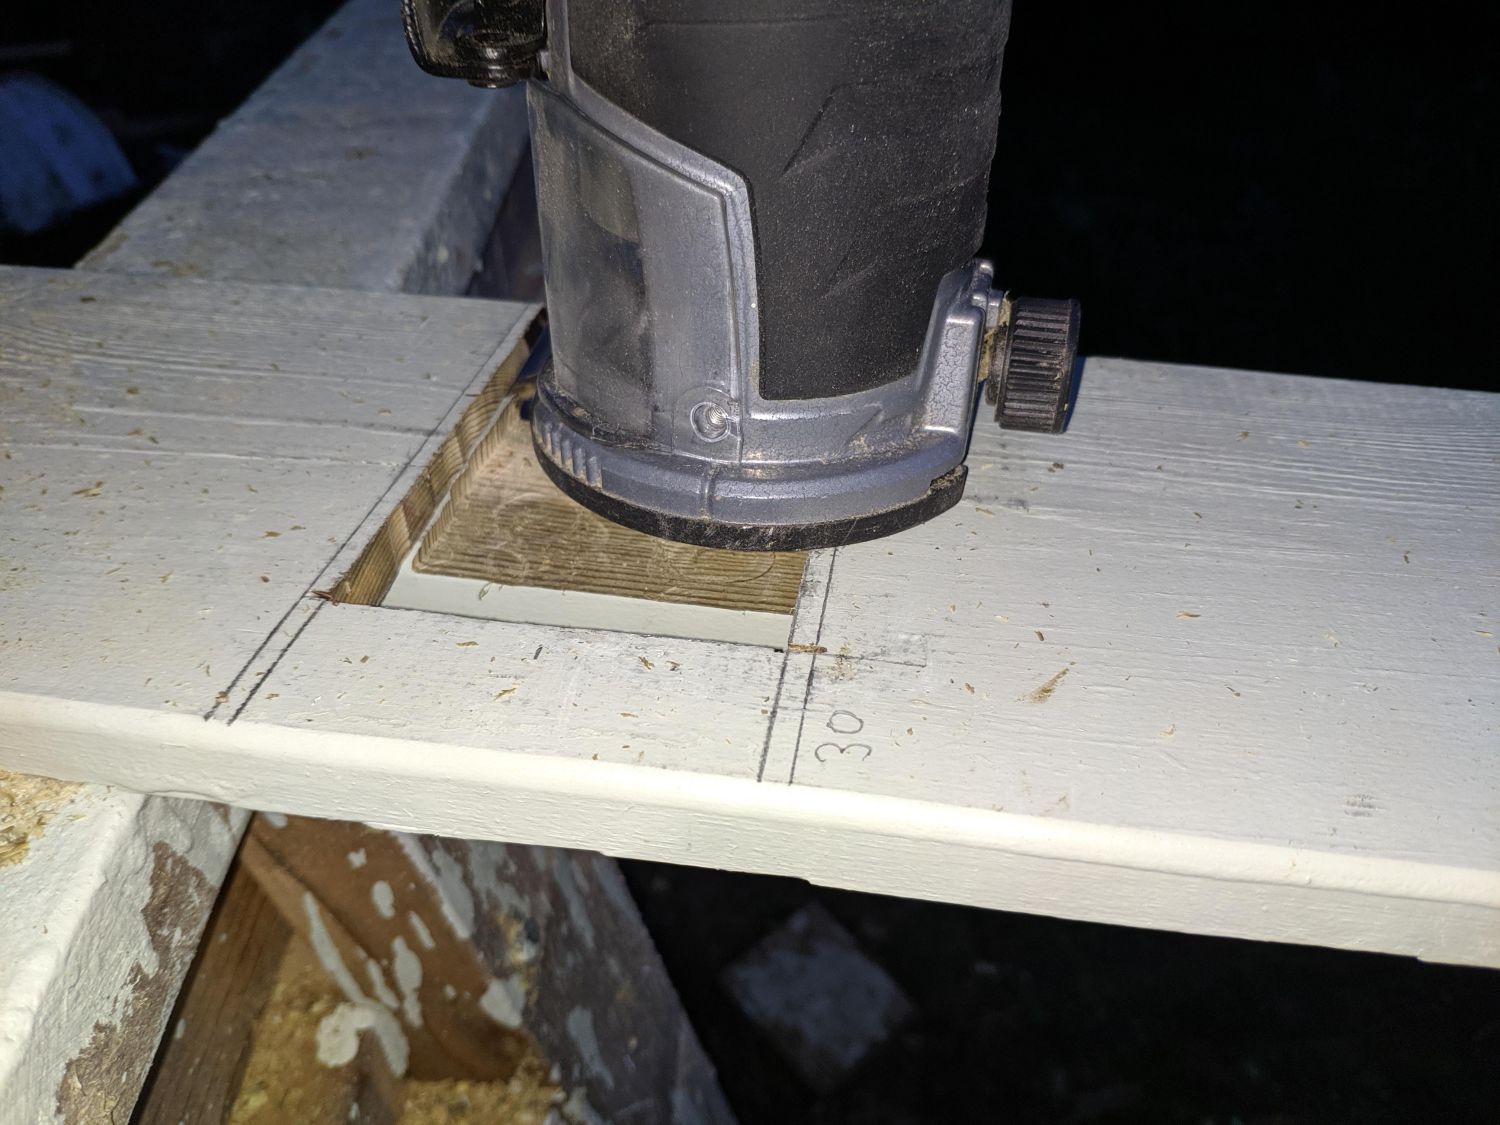
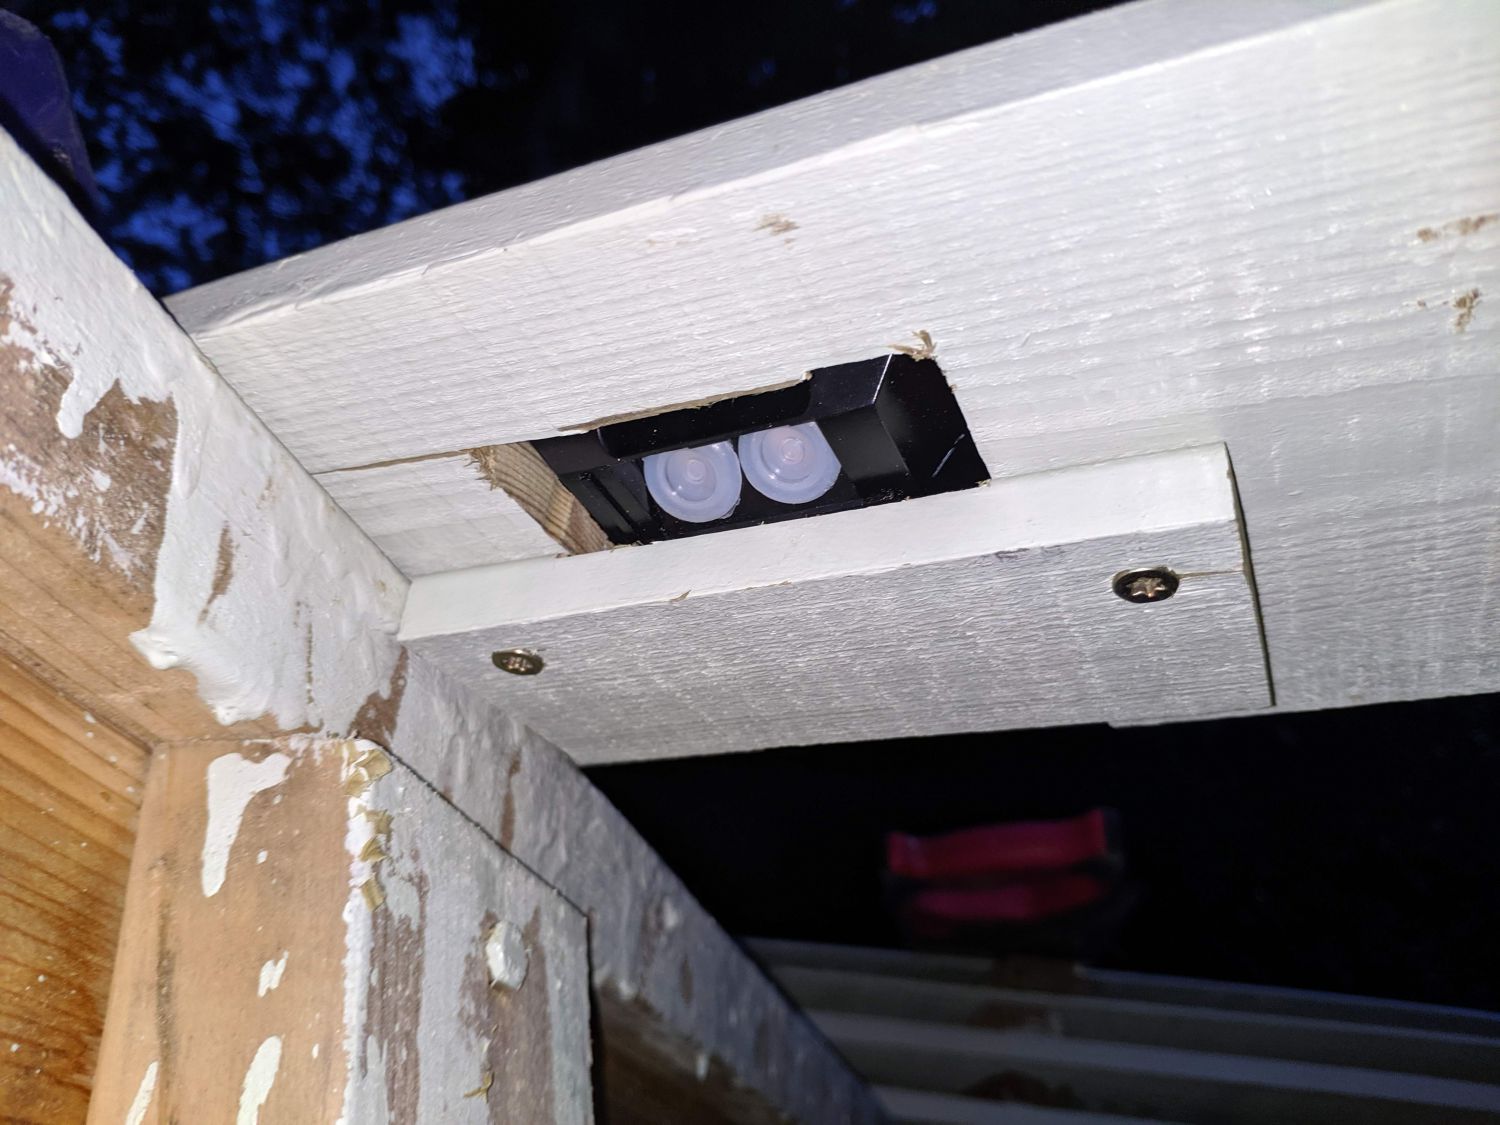
To lower the profile of the PIR sensors I decided to recess them into the cladding. This also allows cables to easily enter the cladding void. I cut a notch in the boards and slotted the PIRs into place but realised it would be tricky to fix the sensors along the thin edge – instead I needed to provide backing for screws to go into. I added a backing board and used a router, guided along the face of the cladding to cut it parallel. To further hide the sensors I painted the casing in the same French Gray as the cladding.

For each sensor I ran the 3C+E wire up to a junction box in the eaves and then ran individual T+E cables from these boxes to the LEDs and sensor. Up and down the wires could just be run in the ventilated void but due to battens (and safety considerations) it was not possible to go from side to side. Instead I had to run wire above the blocking and through rafters.
To get the wires above the blocking I drilled into the roof insulation void and guided the wires in and out – an extremely fiddly and time consuming task. At the gable I instead had to cut a notch in the blocking and a batten to allow cable access to the void. Once the cladding and timber soffit boards are installed none of this wiring will be visible.
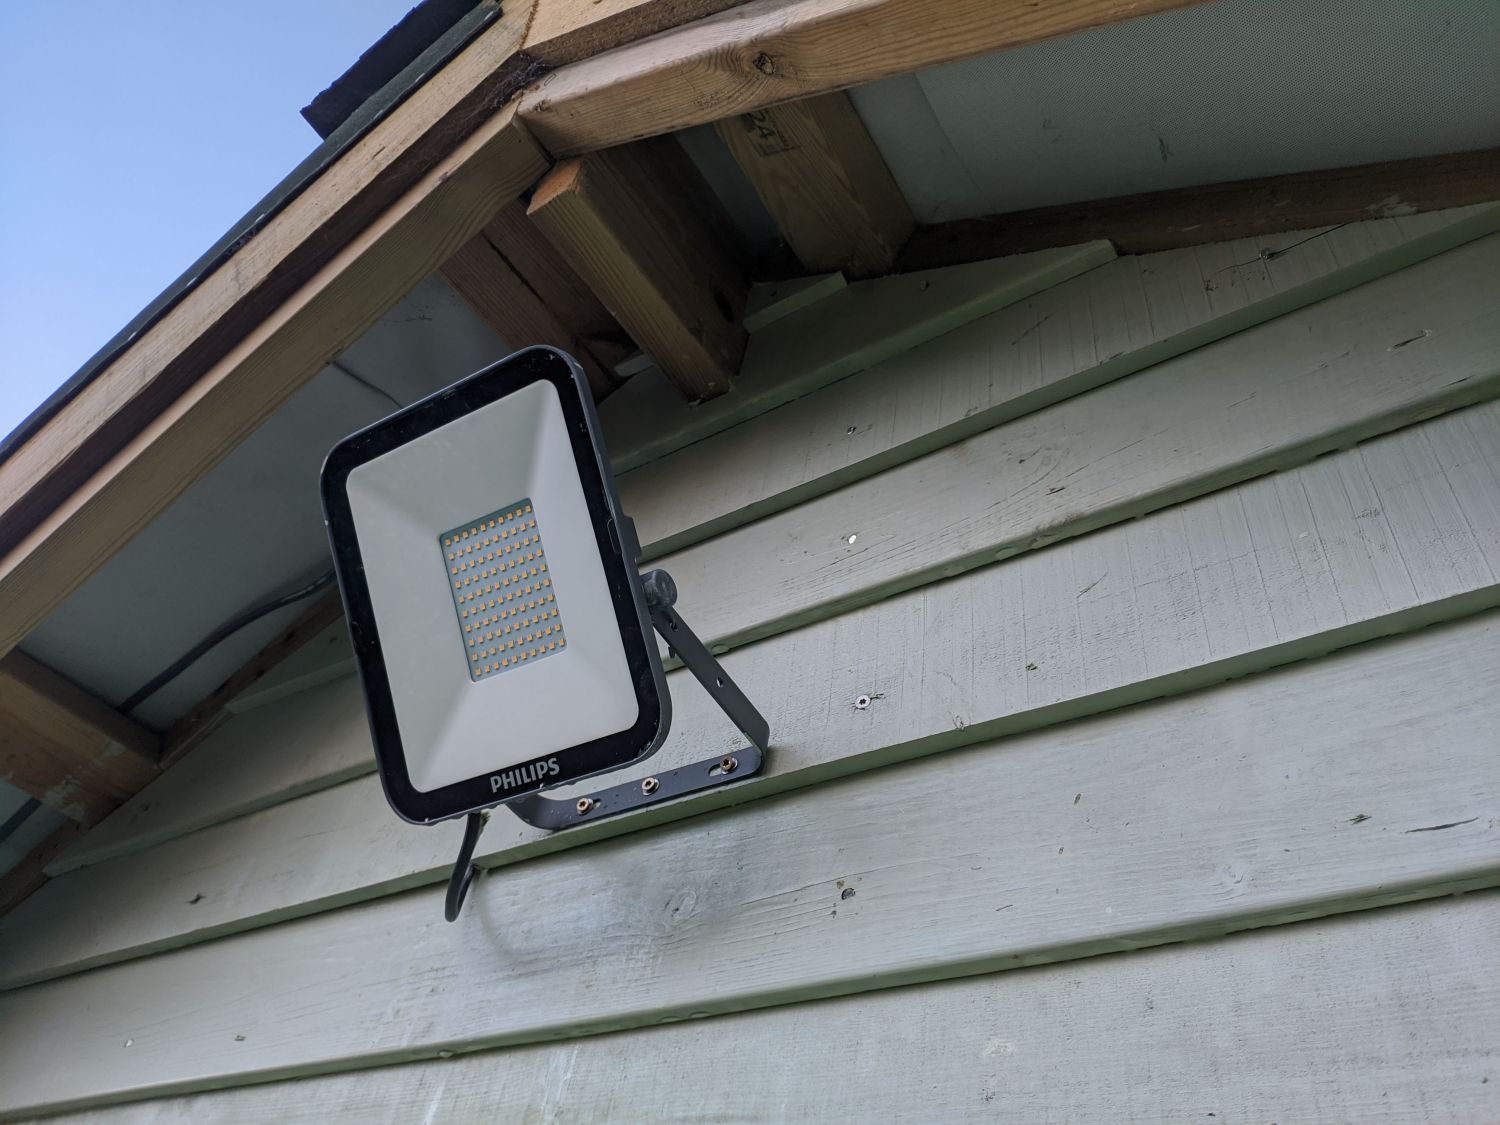
Installation of the lights themselves was straightforward and I fixed each to the lower half of a cladding board with three screws. Notches in the boards allow the power cables to quickly disappear into the walls.
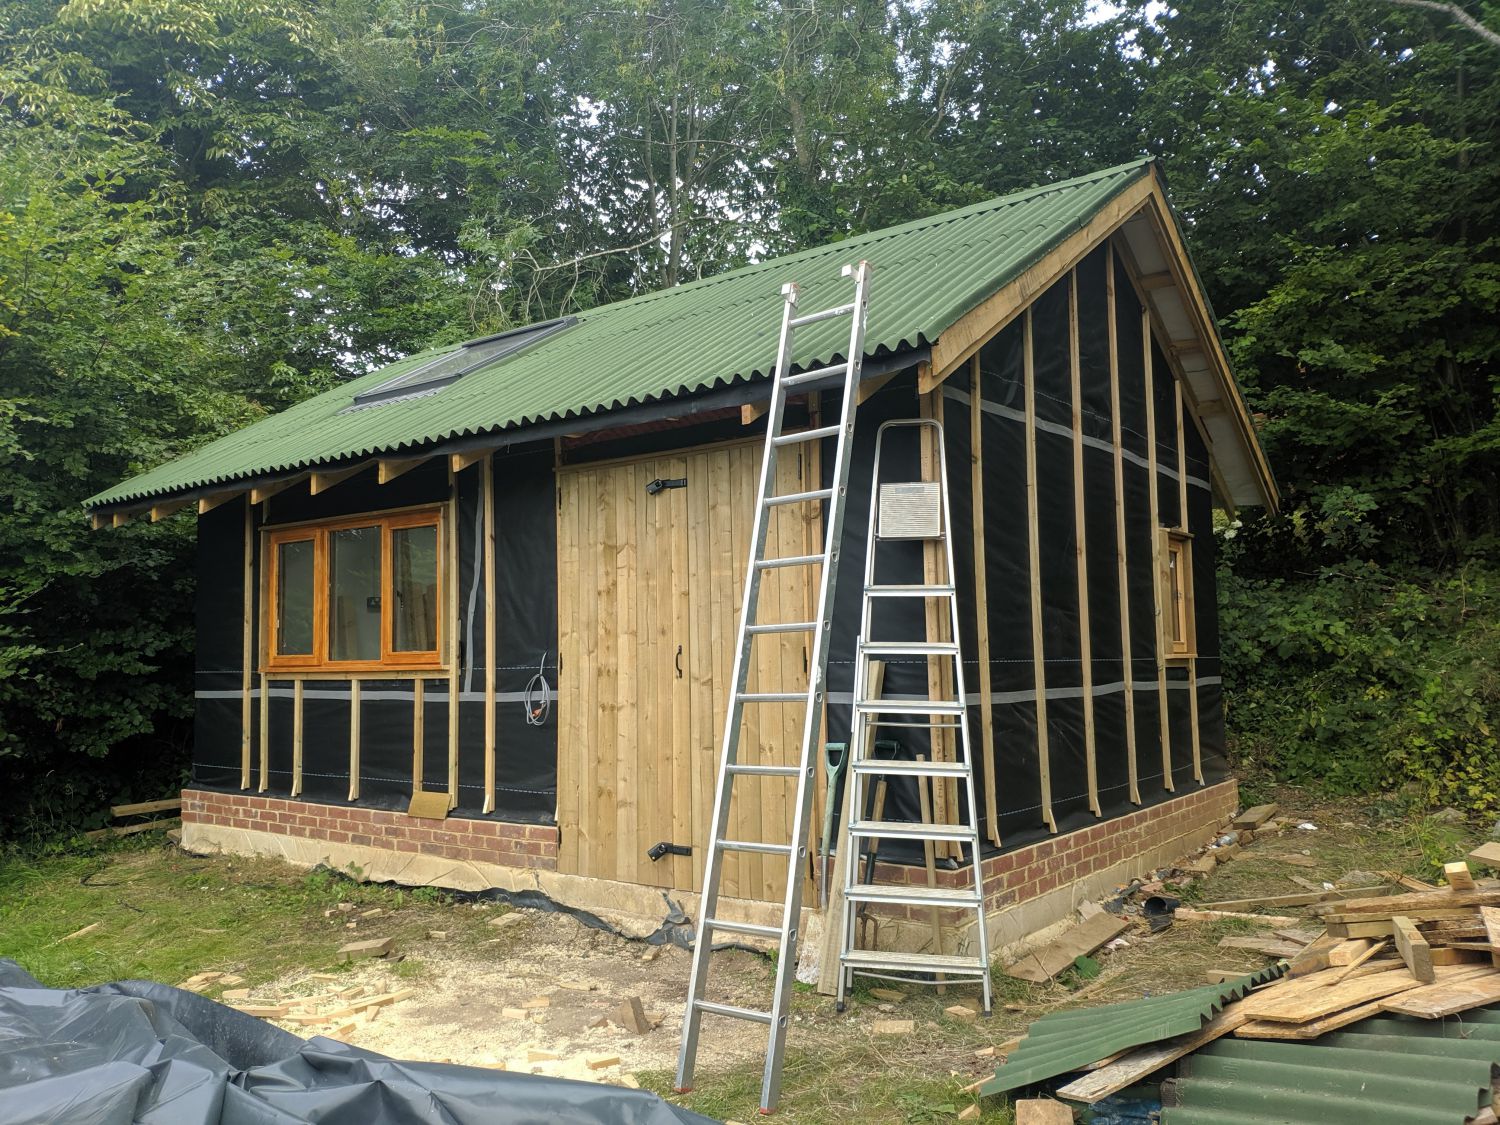
Conclusion
The cladding was a huge job and if I were ever to do repeat this build I would definitely have bought pre-painted boards. I also might consider buying oak or cedar cladding instead which while more expensive look great and could have been left unpainted.
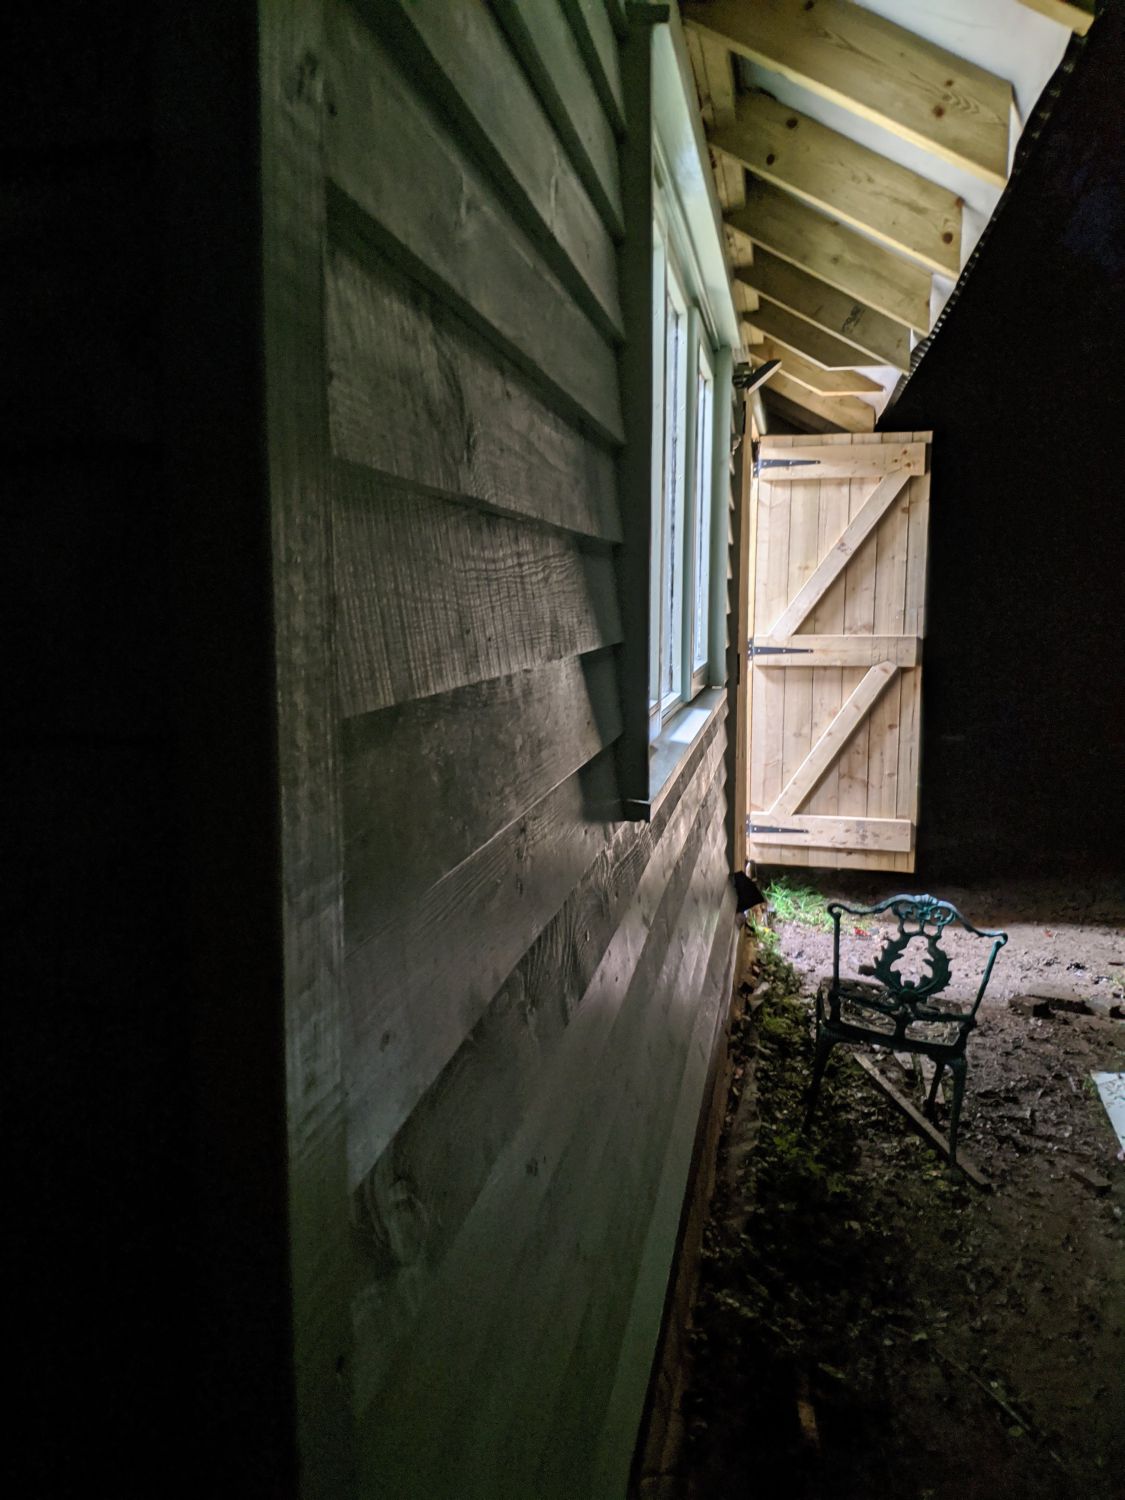
All in all though I am really happy with the result and especially like the feather-edge profile which works well with the traditional shape of the building. Hopefully the attention to detail by coating all sides of every board, ensuring water can run off from all locations and keeping the void ventilated will mean this shed lasts for a very long time.
I still need to do one final coat of paint which should be much faster as the boards are now mounted. I will then remove the (rather ugly) DPC protecting the brickwork.