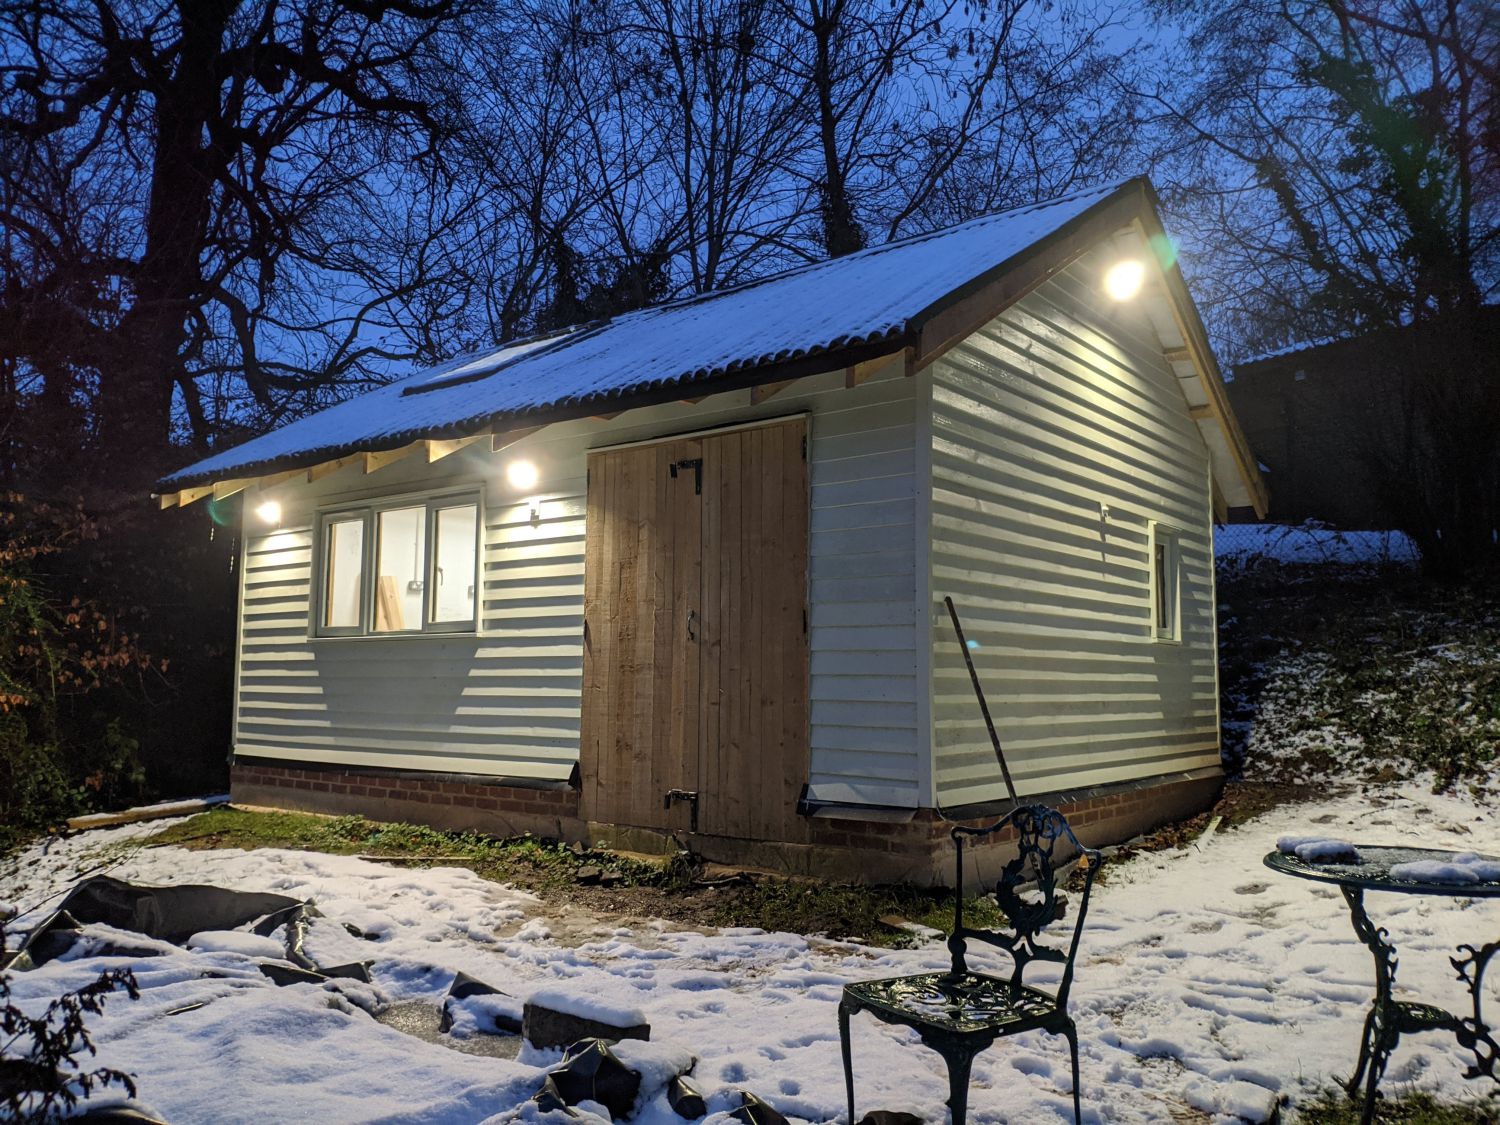
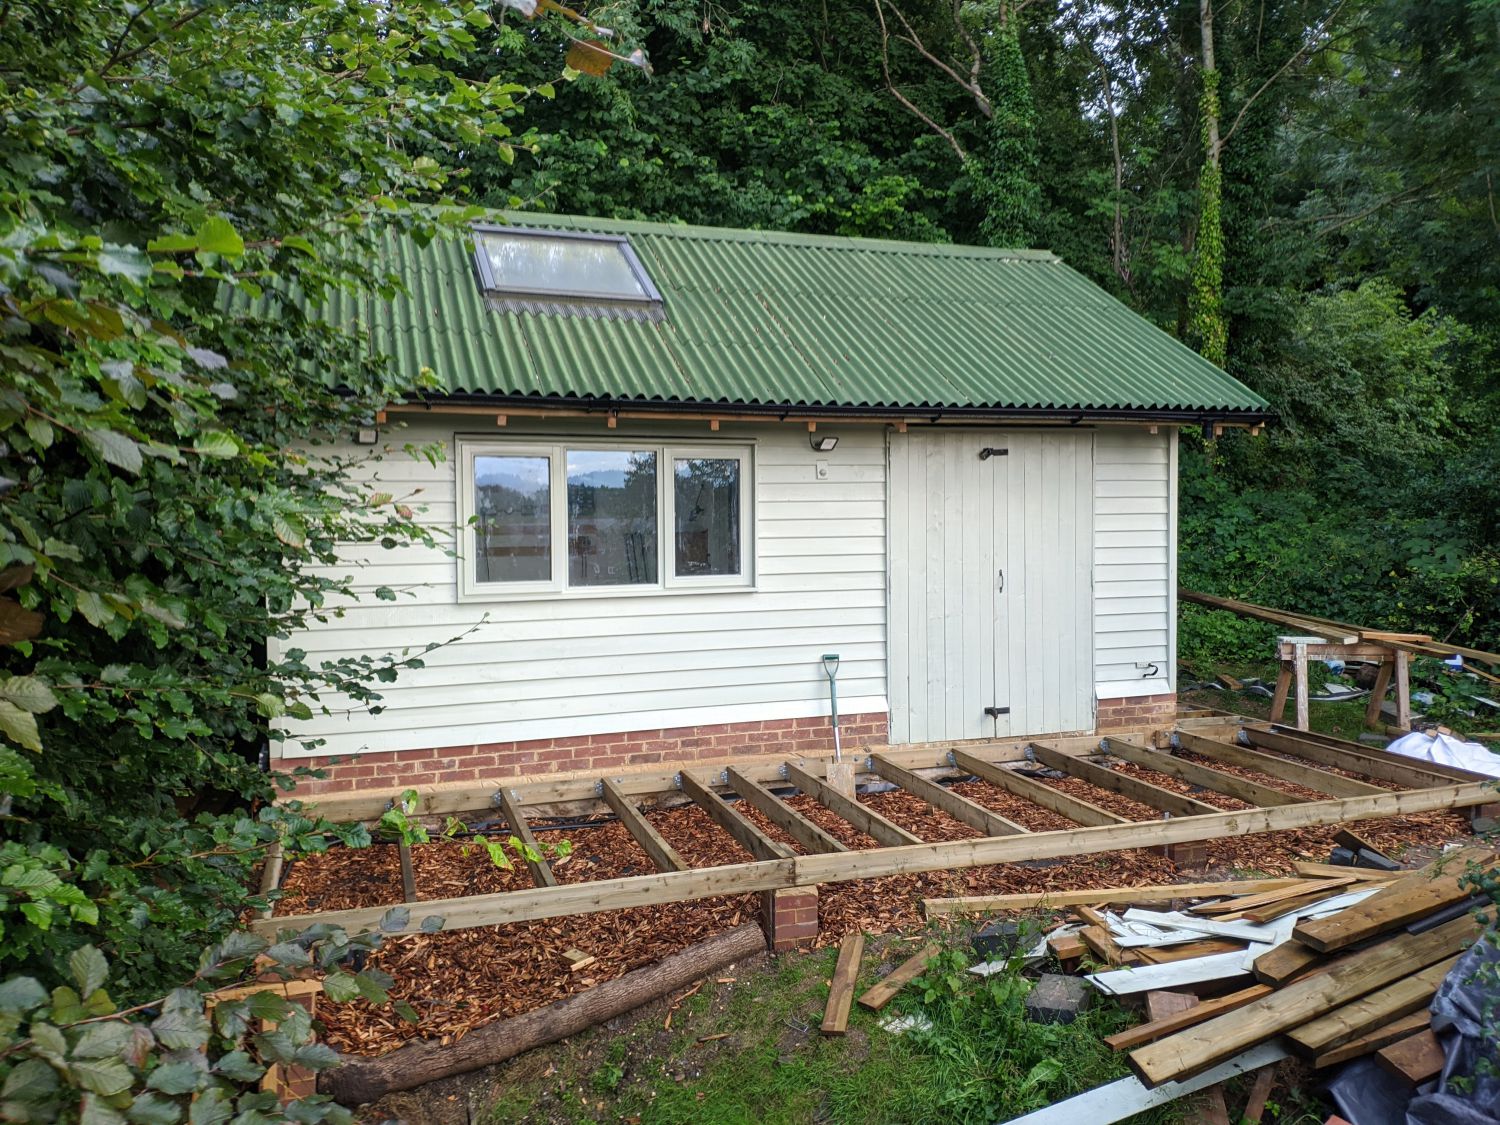
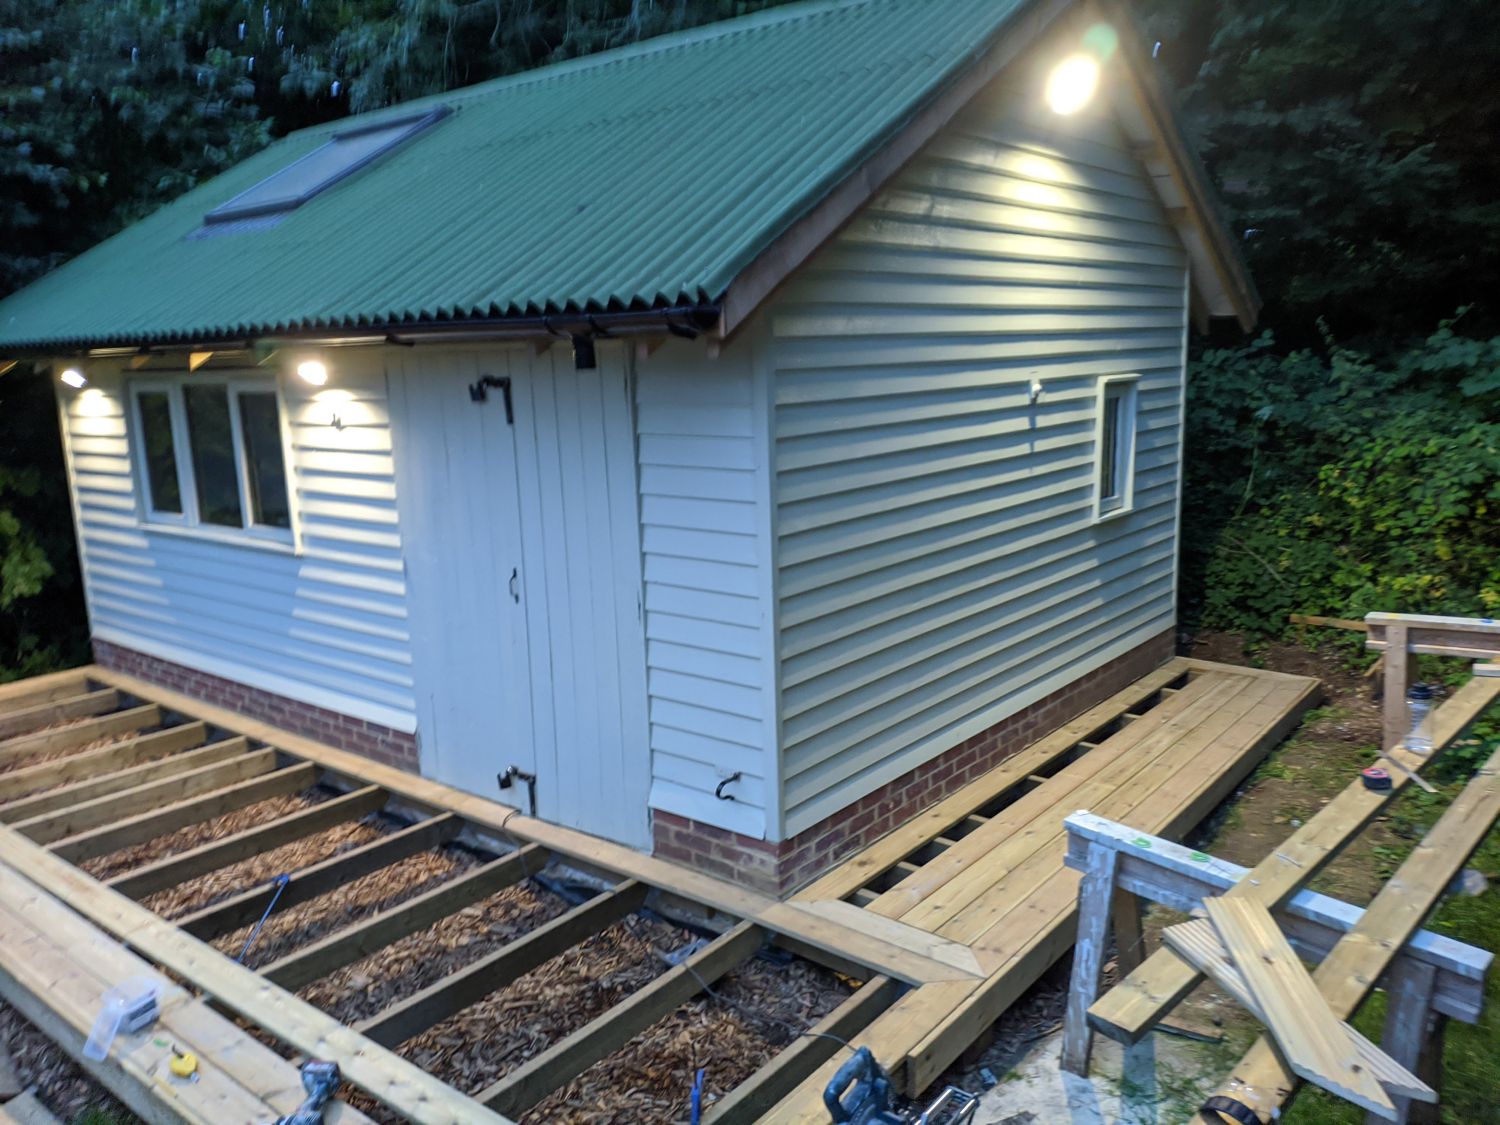
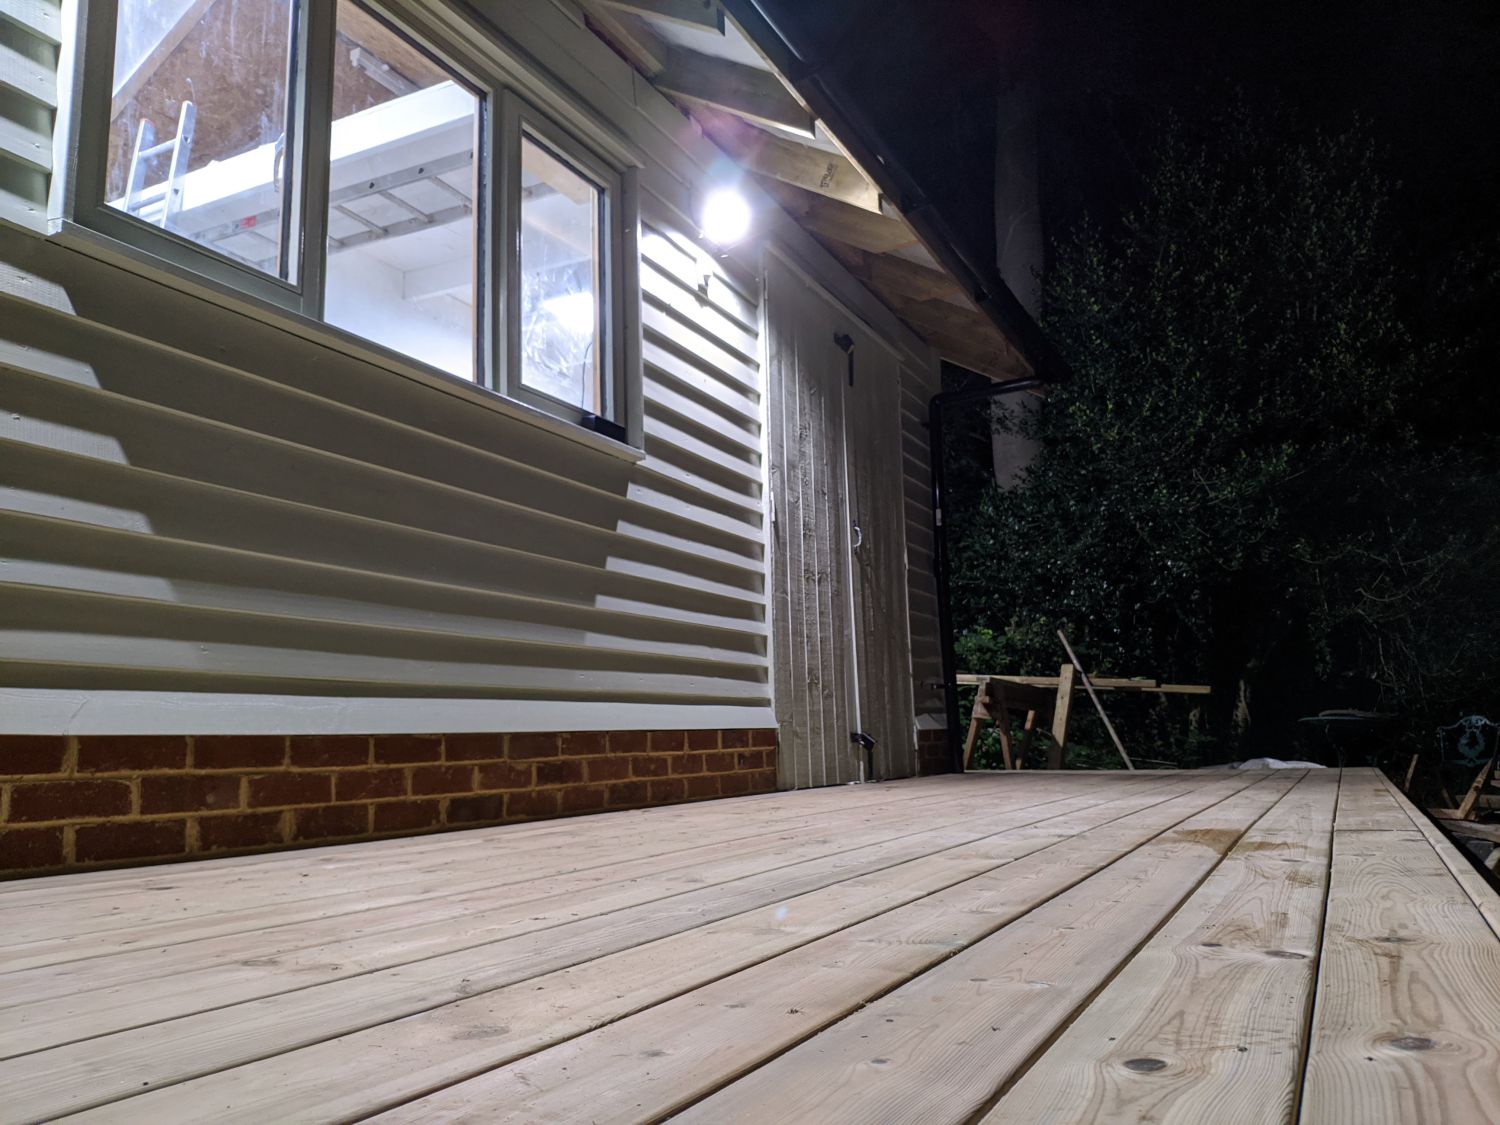
As a finishing touch to the workshop project, and to allow better use of the outdoor space around it, I decided to build a timber deck. This would also serve to hold a water butt and create some outdoor seating with views over the town.
Planning
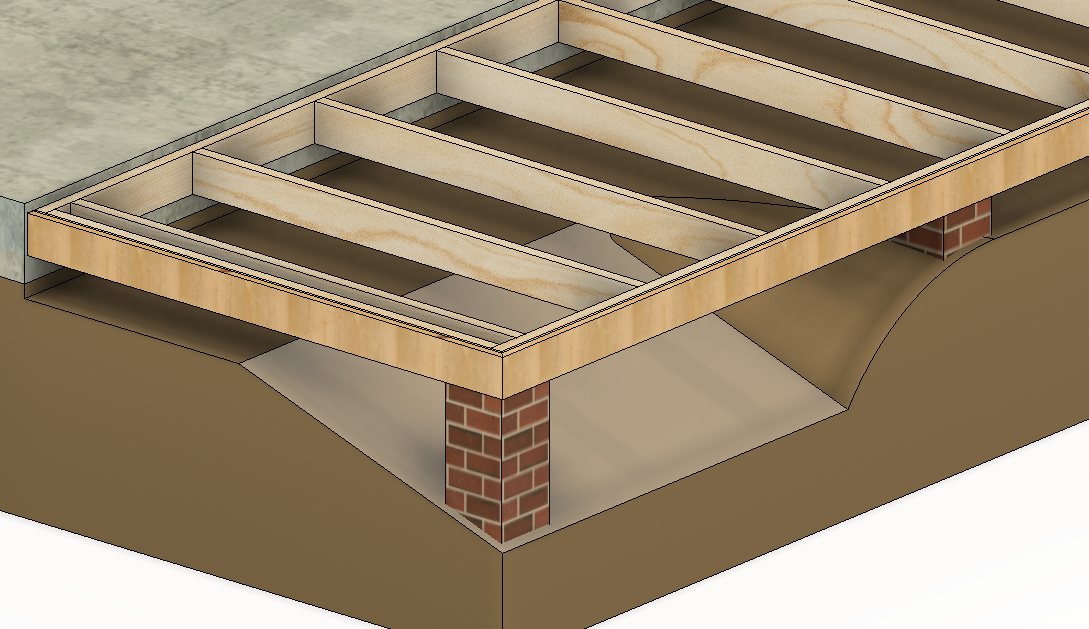
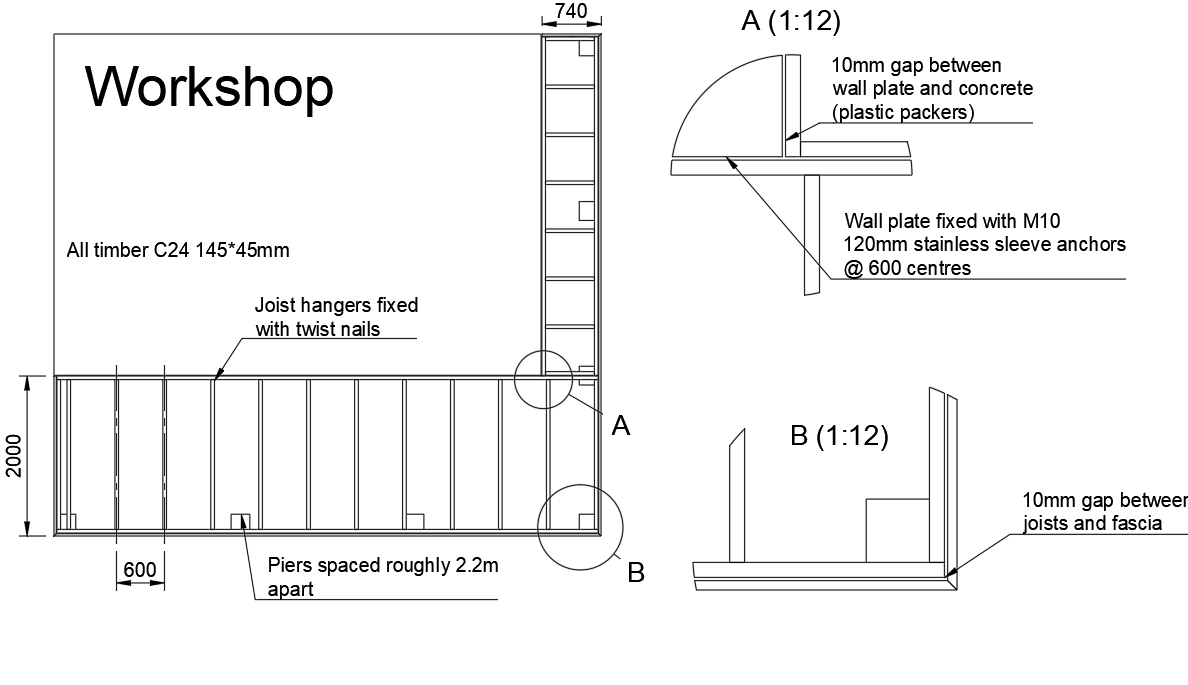
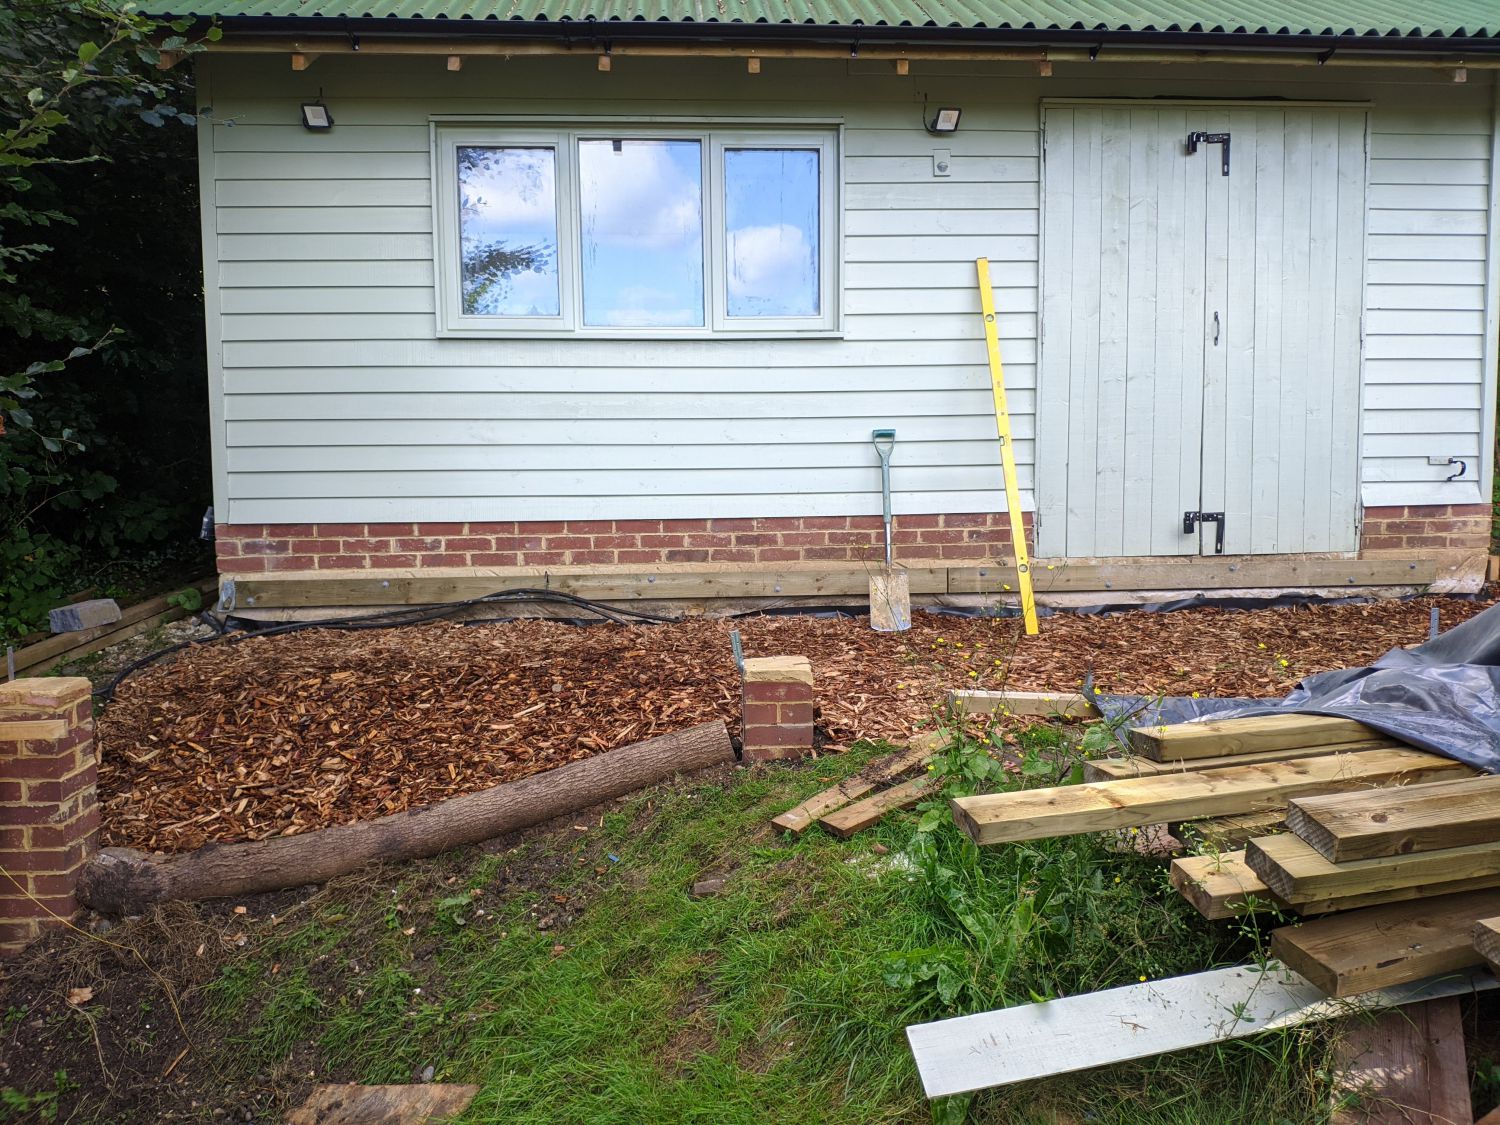
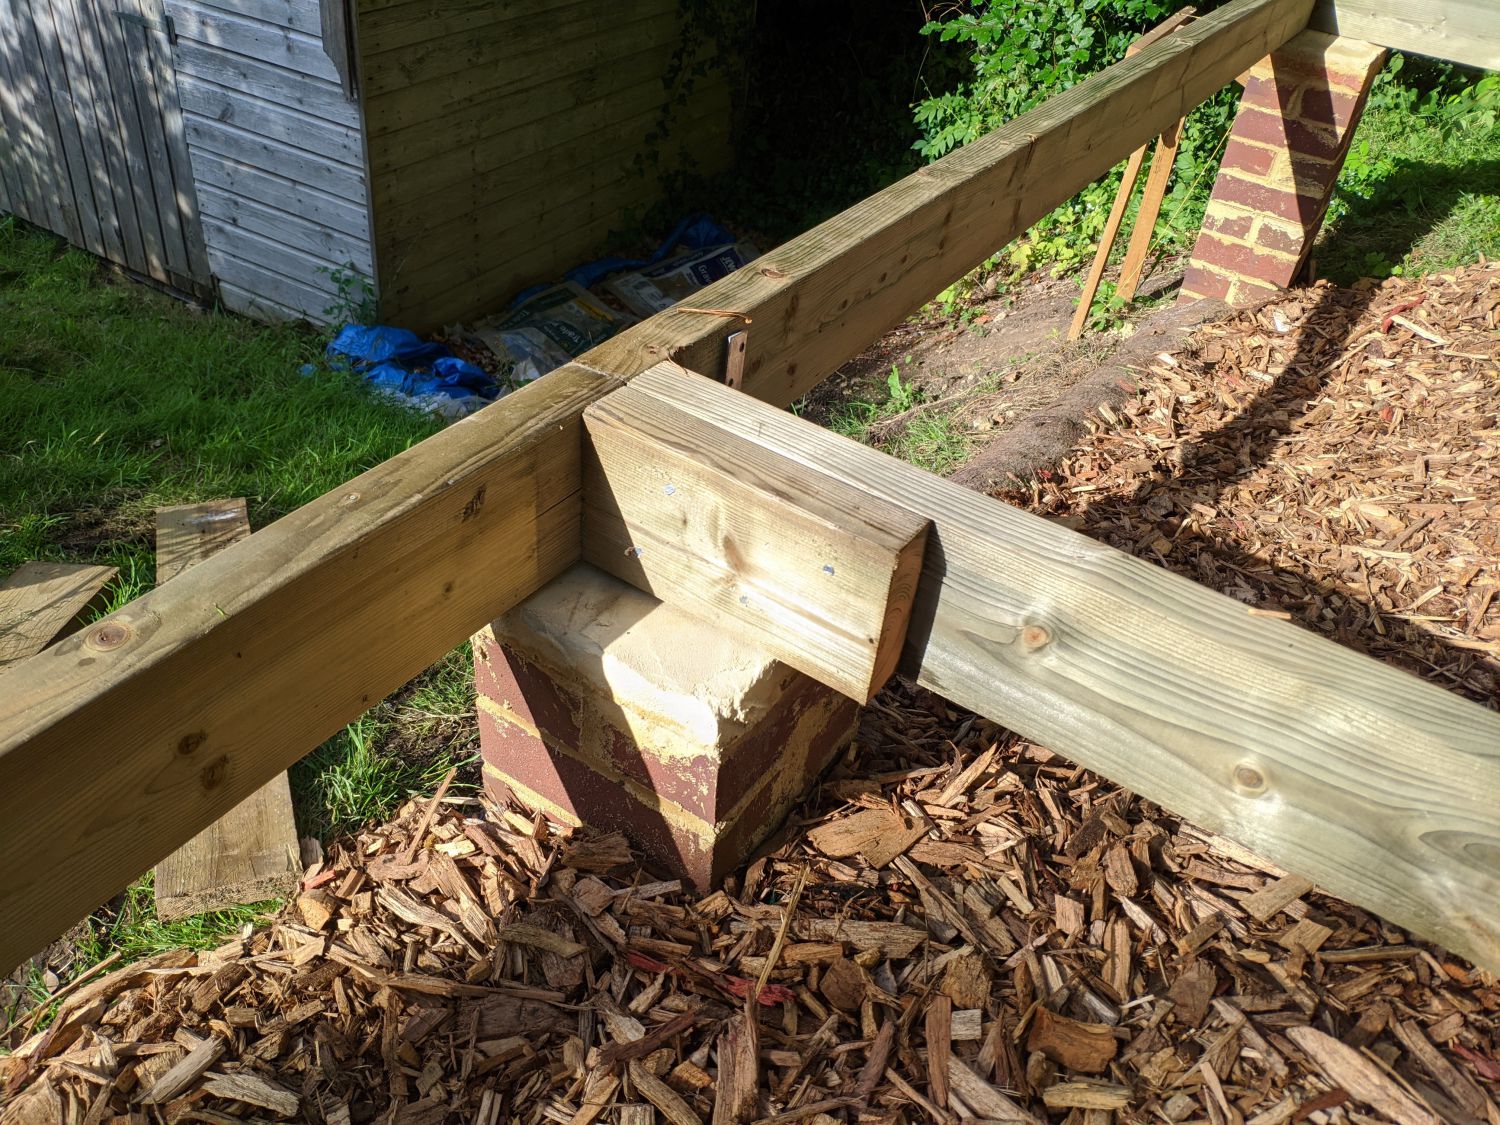
In order to maximuse deck longevity I specified that all timbers were at least 300mm off the ground. This reduces wetting from rain splashing and allows for ventilation below the wood to dry it out quickly. Many decks use softwood posts cast into postcrete to support their frames but this will eventually rot and fail. Instead I decided to use brick piers built on concrete pads; a DPC between the piers and the timber frame prevents rising damp. Bricks make sense here as the height of each pier is different and in some cases they will be visible.
The project fell under permitted development, as at its lowest point, the deck was within 300mm of the previous ground level (some excavation had to be done below to create the ventilation gap).
Once I had a basic idea of what I wanted to achieve, I drew up a plan of the deck structure to get material estimates.
In the end I used 125*45mm timbers. I made sure a fall of ~1:100 was left on each of the two ‘side decks’ away from the building to effectively shed water.
Groundworks
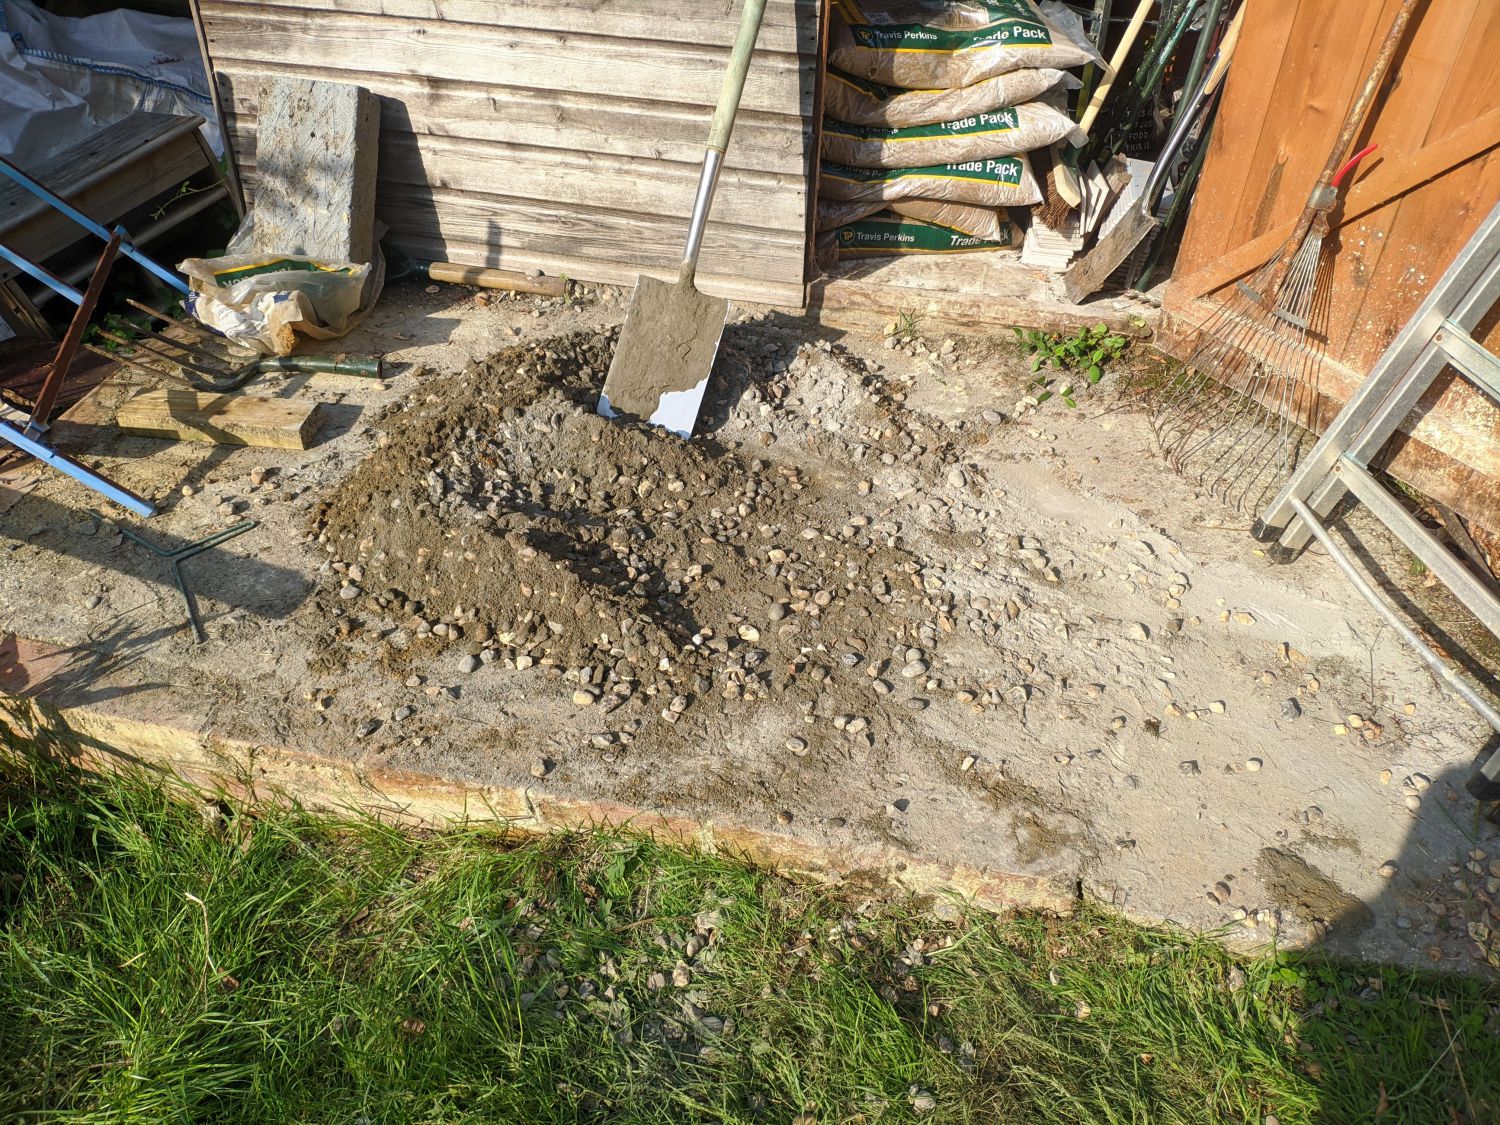
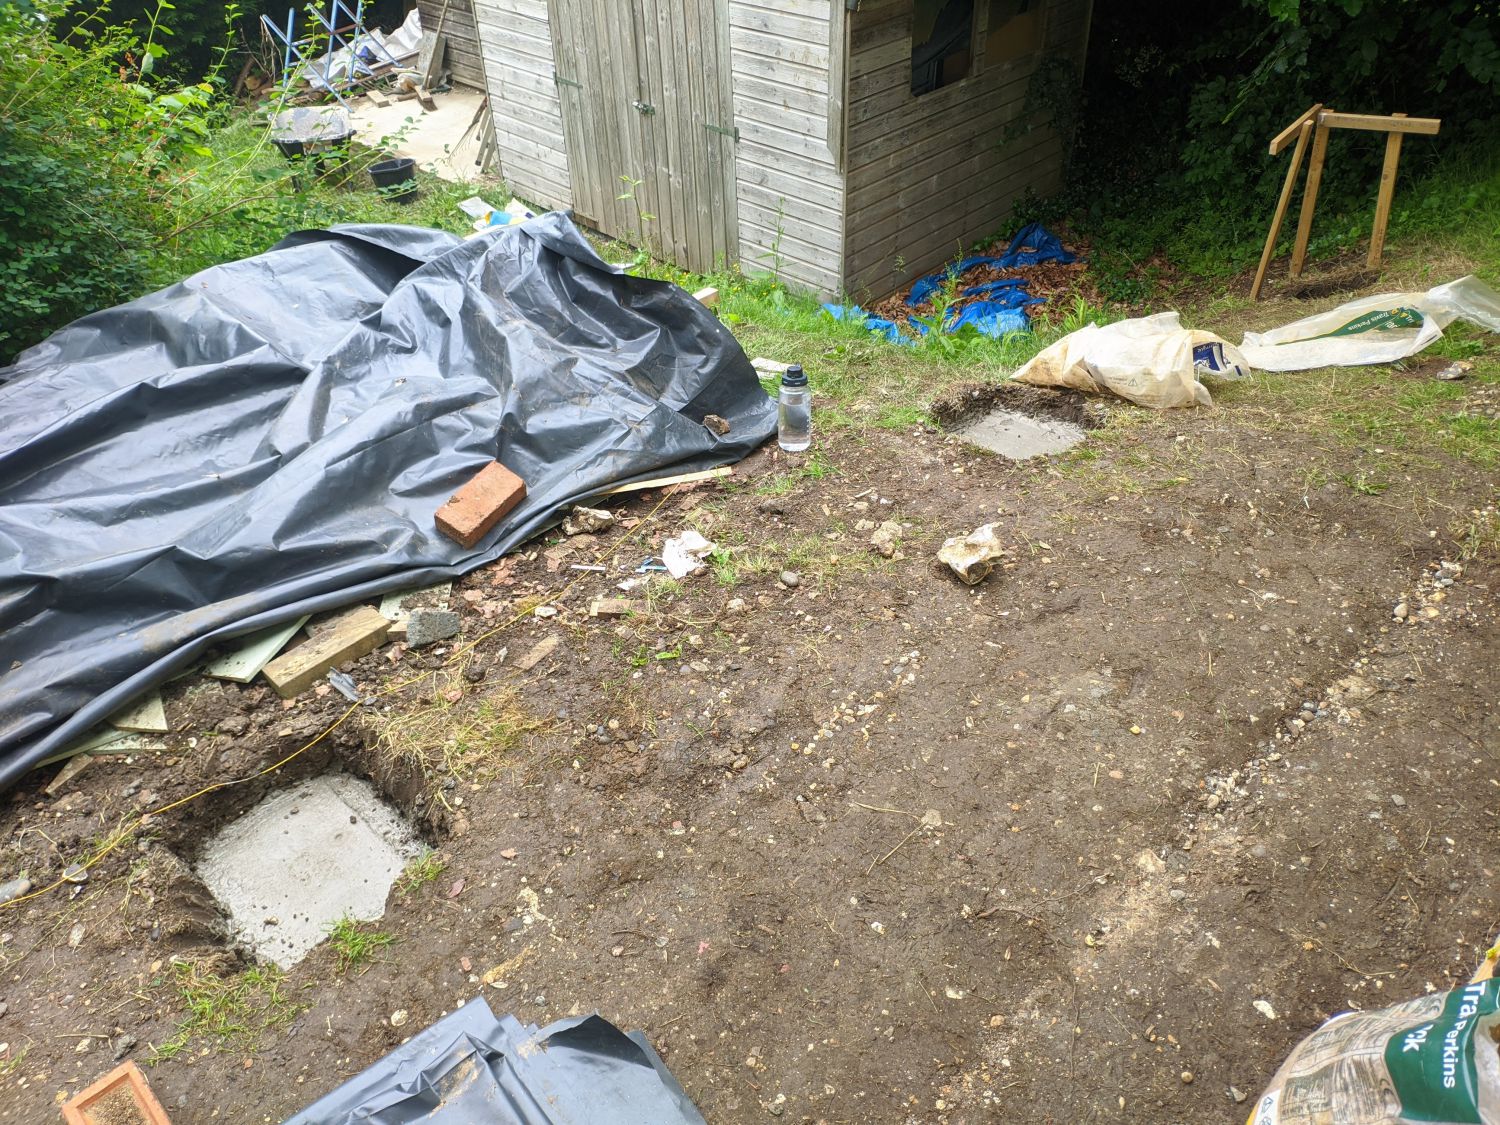
Layout
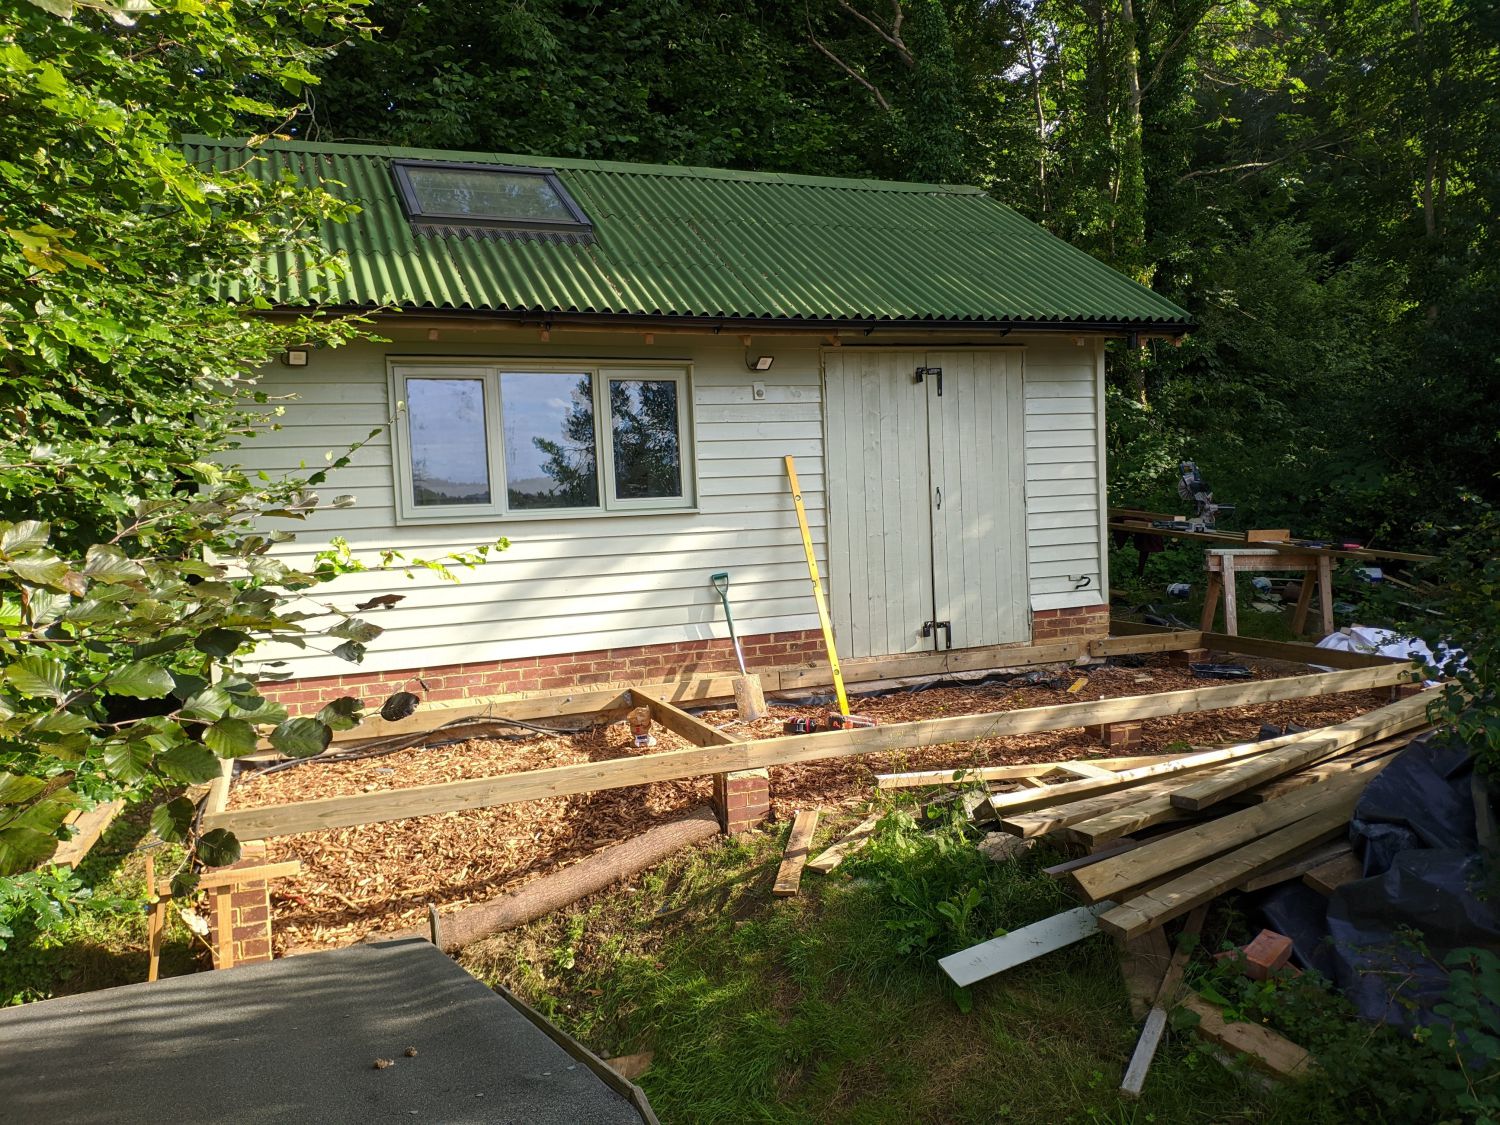
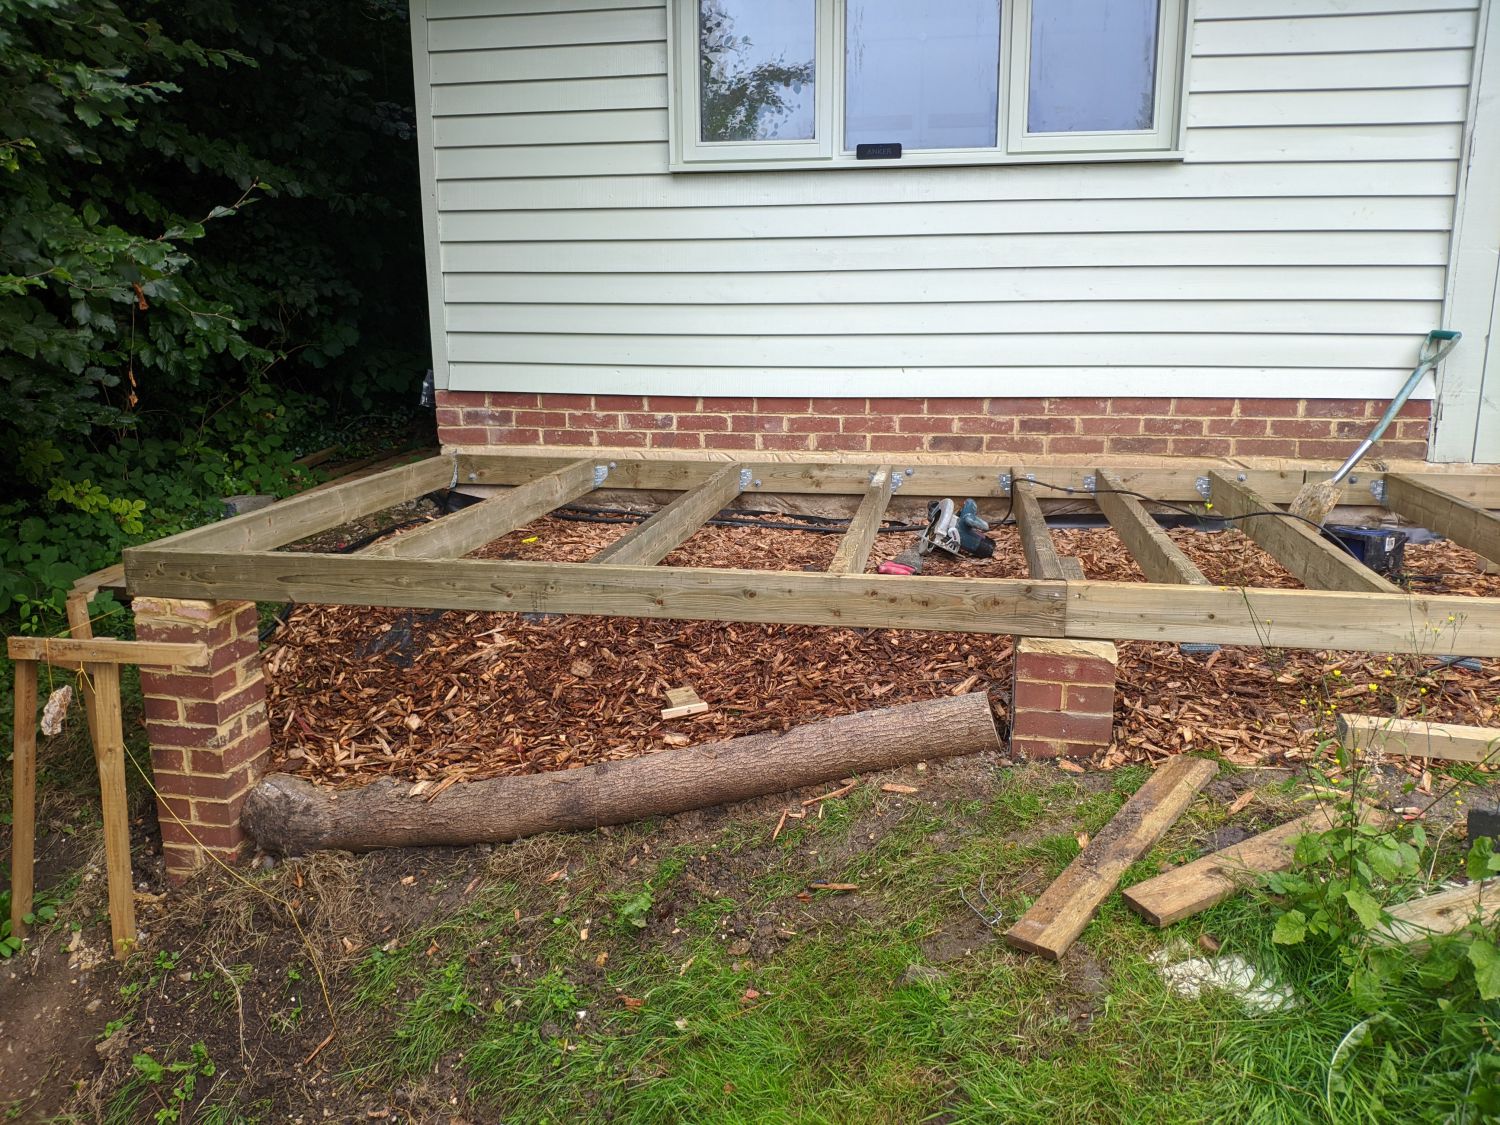
To lay out the site I used builders line and batter boards. Once everything was square I screwed the lines into place and begun digging. The pier foundations are evenly spaced, except at the side where I placed one specifically to sit over the joint between the two deck sections.
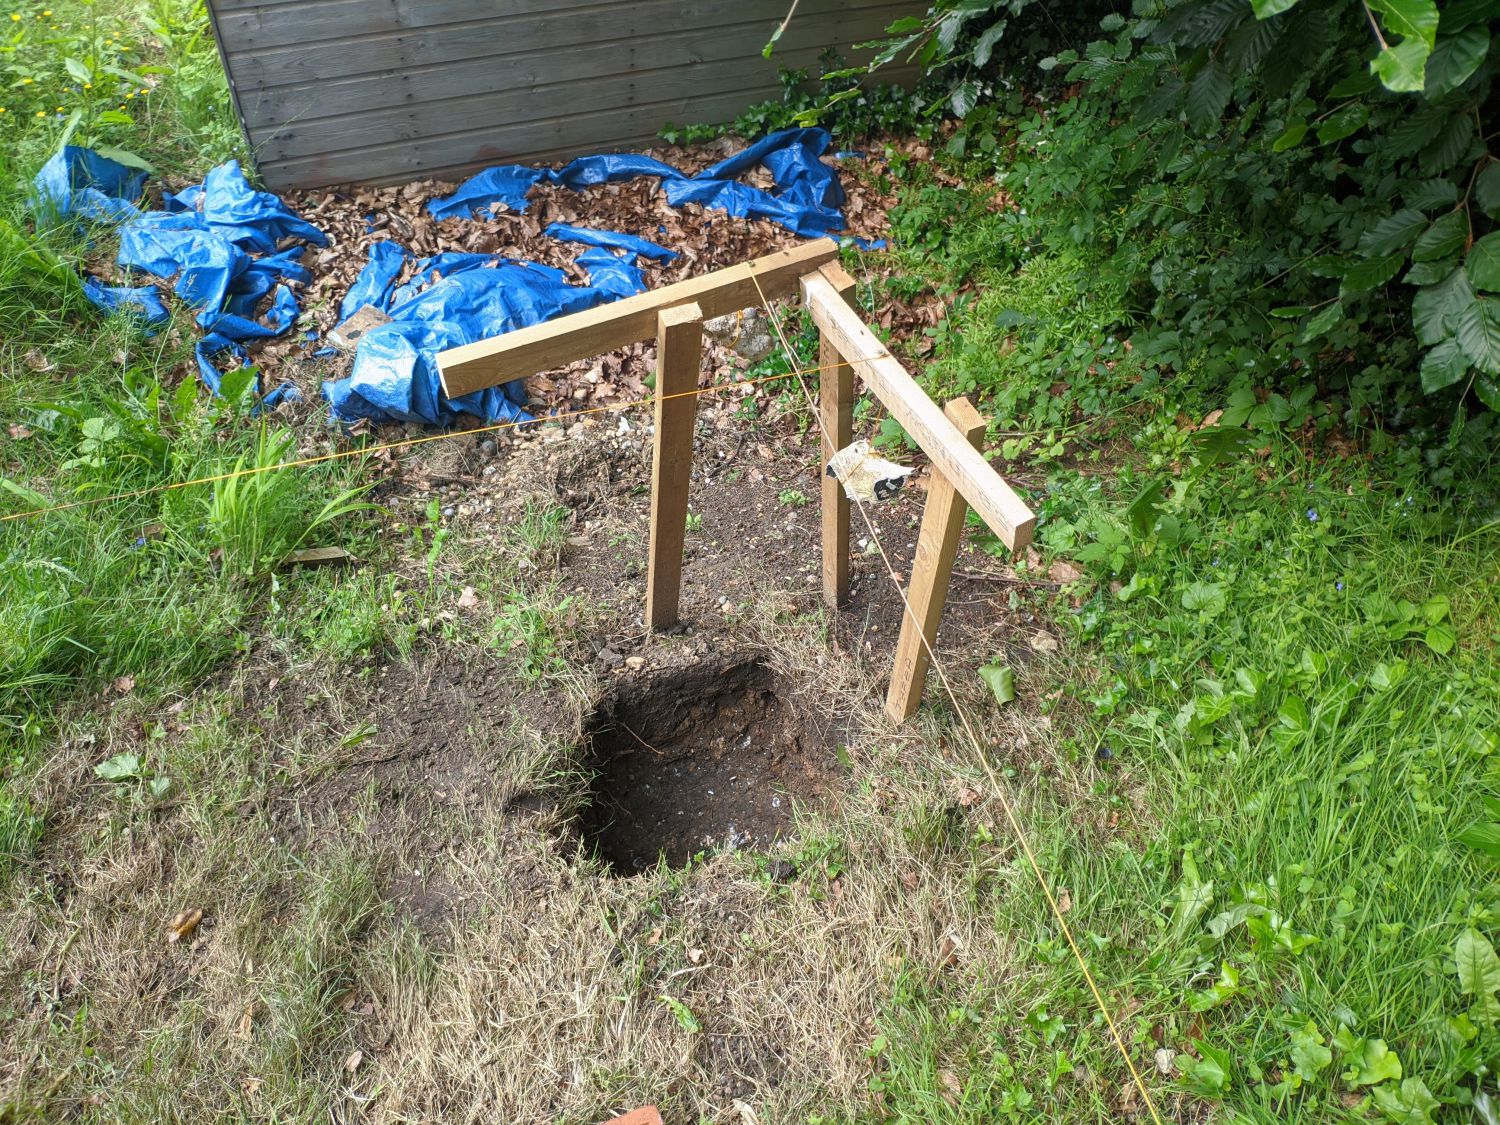
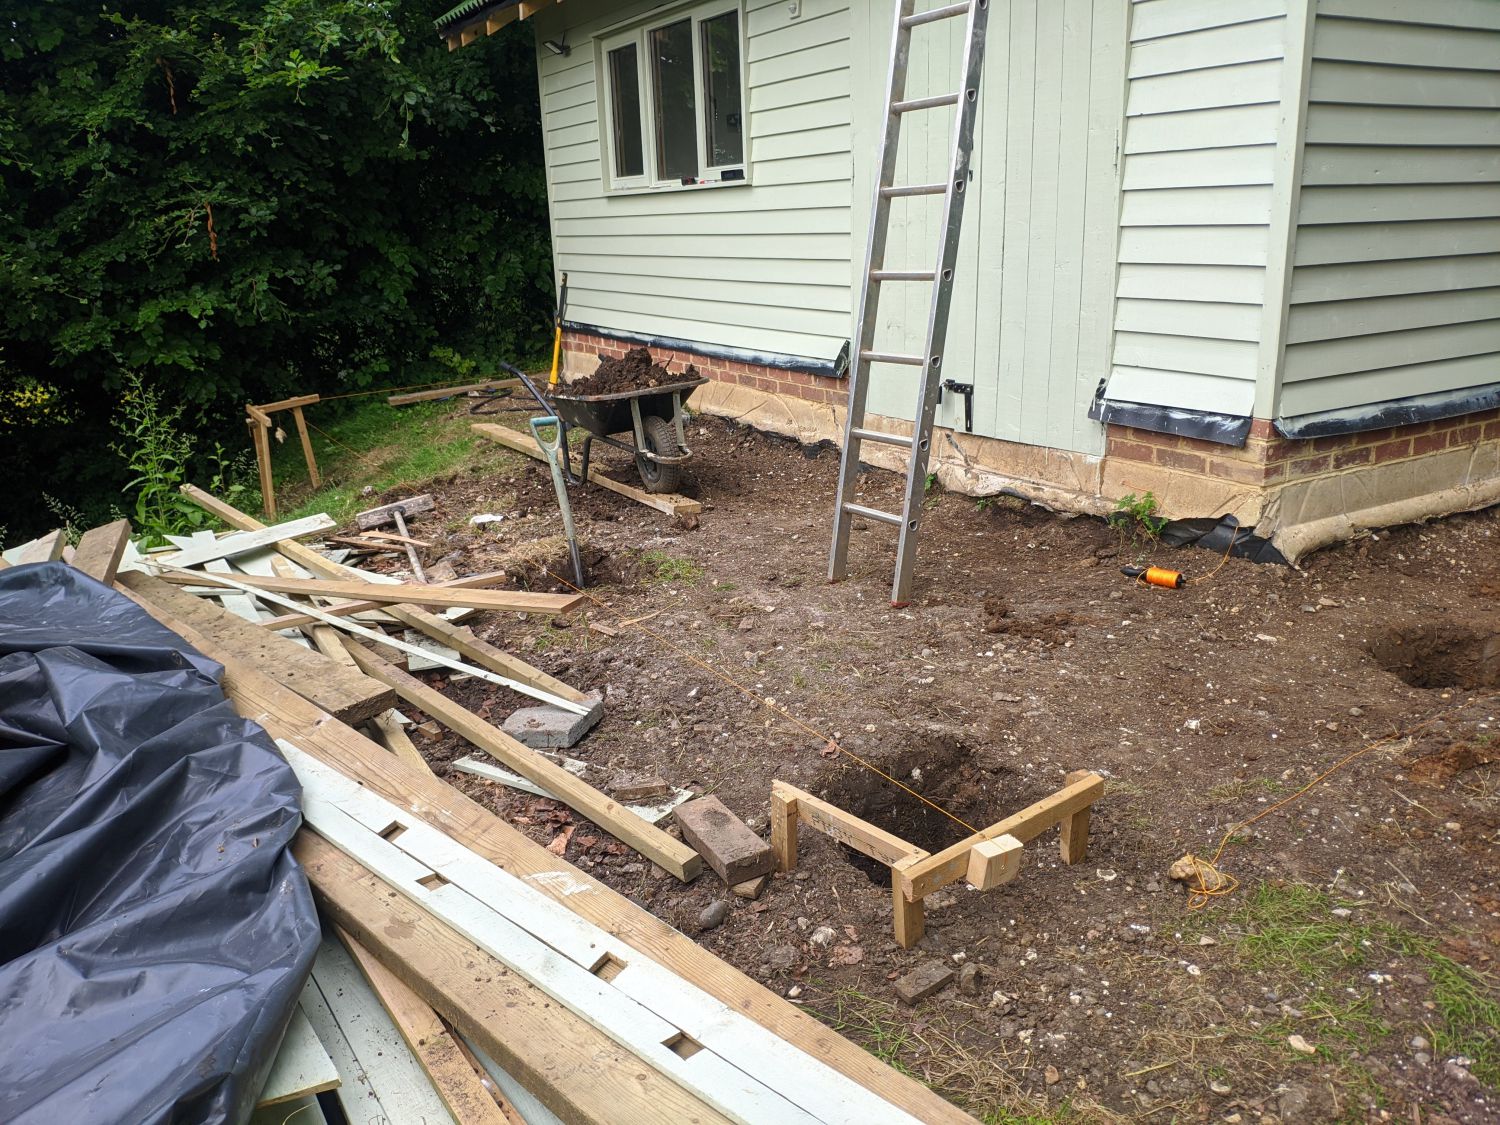
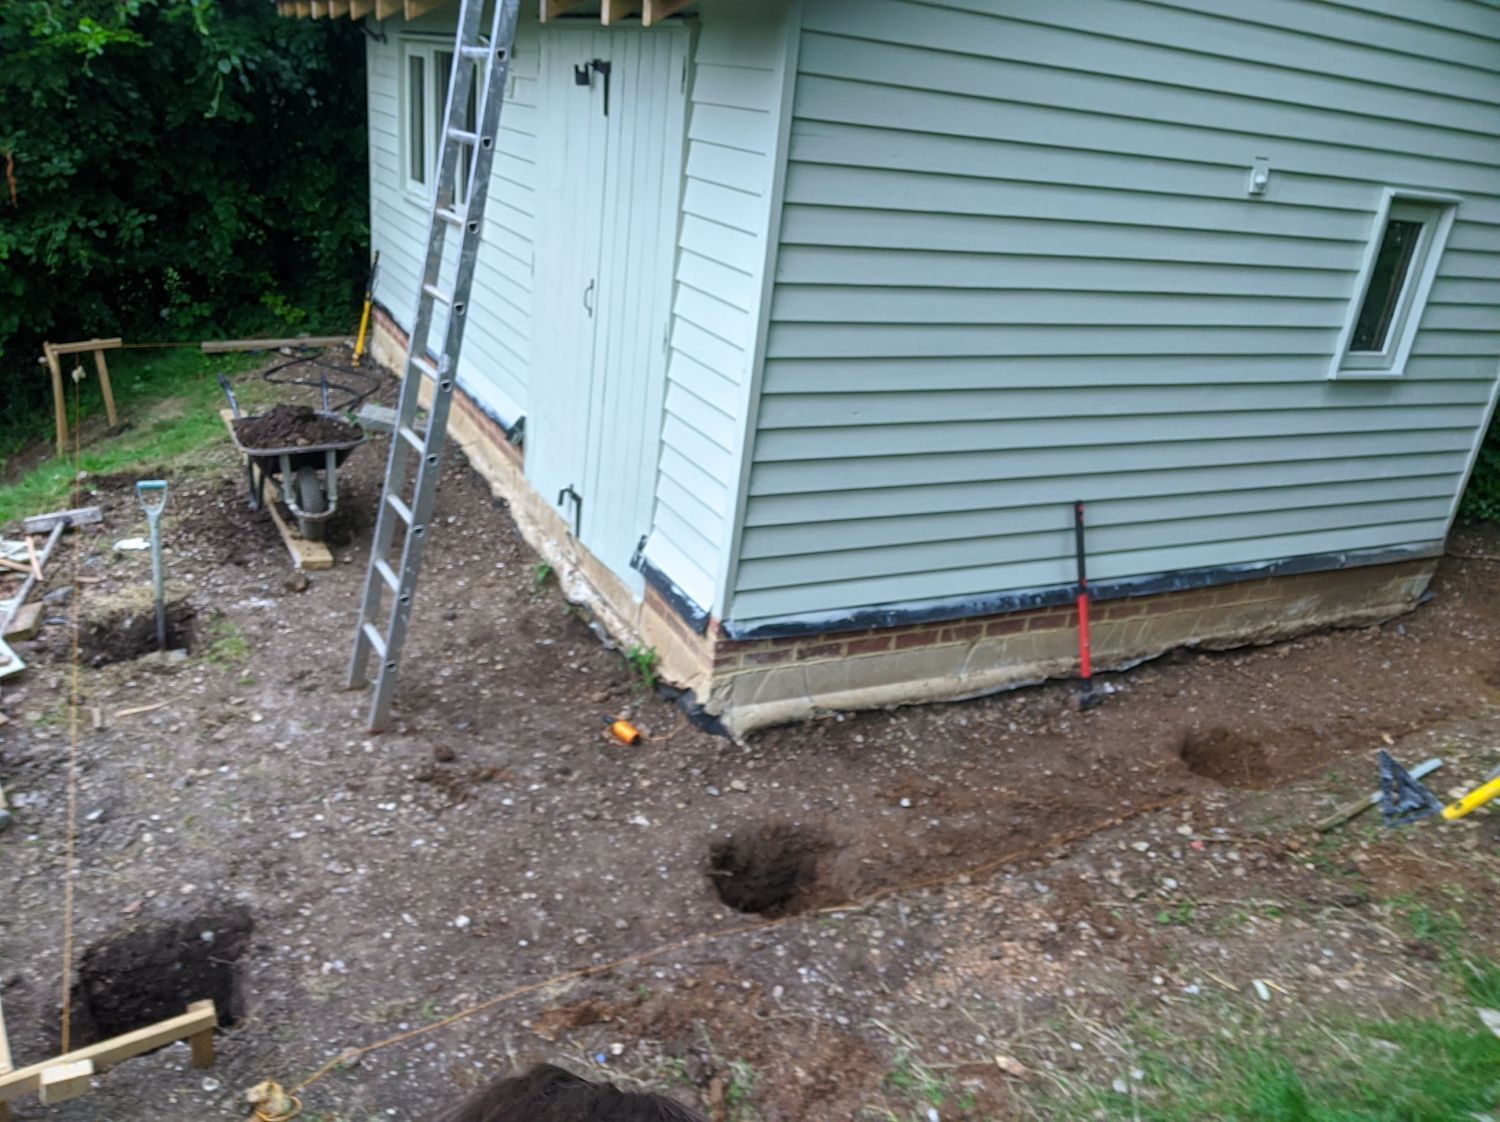
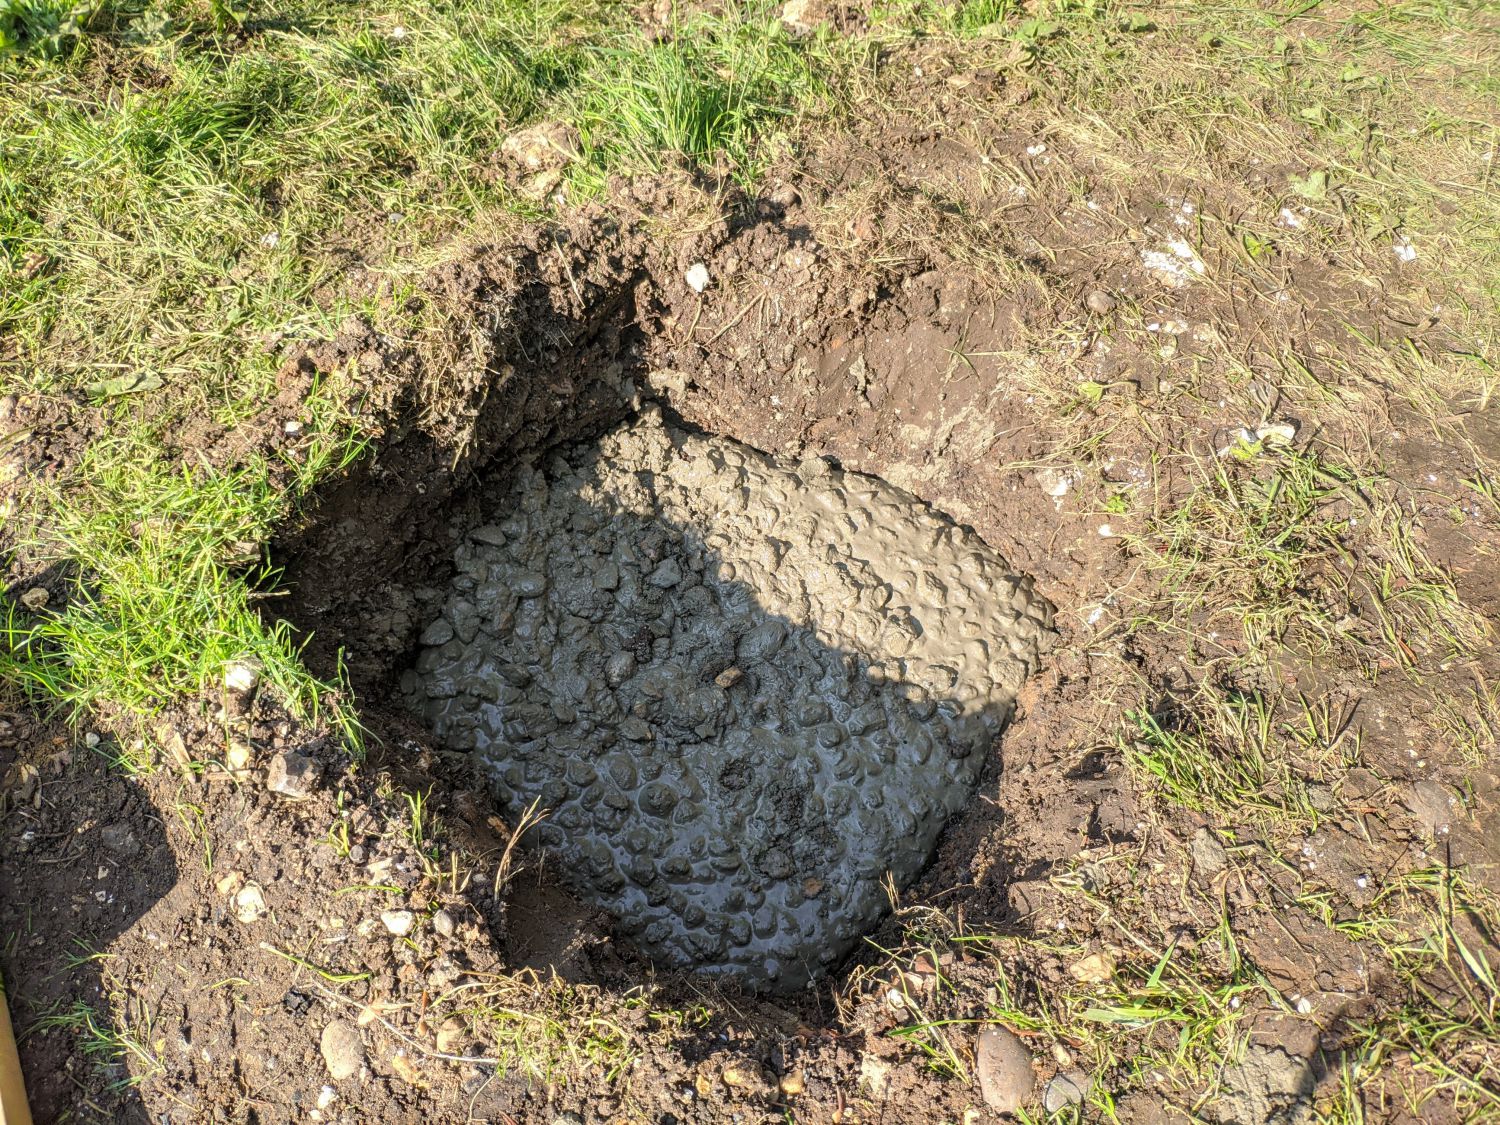
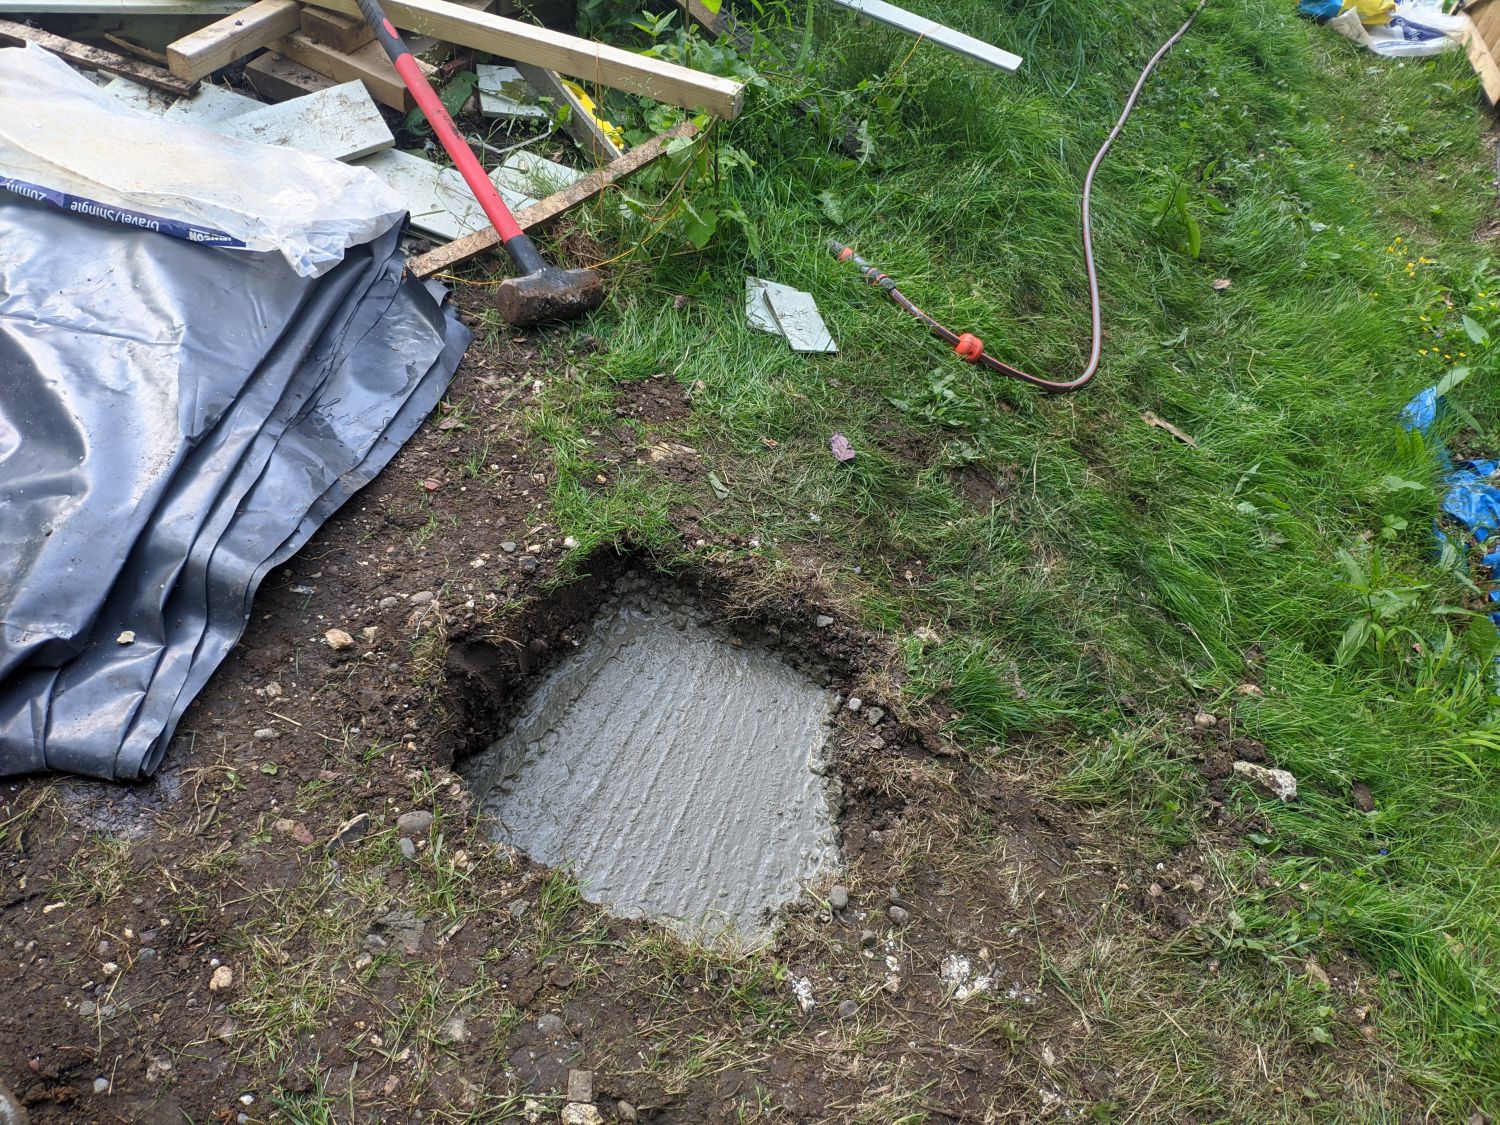
I dug down to subsoil, which in some cases meant the holes were as deep as 600mm.
Concrete pads
When I’d poured concrete for my shed foundation, I had it pumped up the back garden hill directly into the forms. This time around I had no such aid; I carried each 40kg bag of sand, gravel and cement up the hill and manually mixed the ingredients in a ratio of 1:2:4, cement:sand:aggregate (C20).
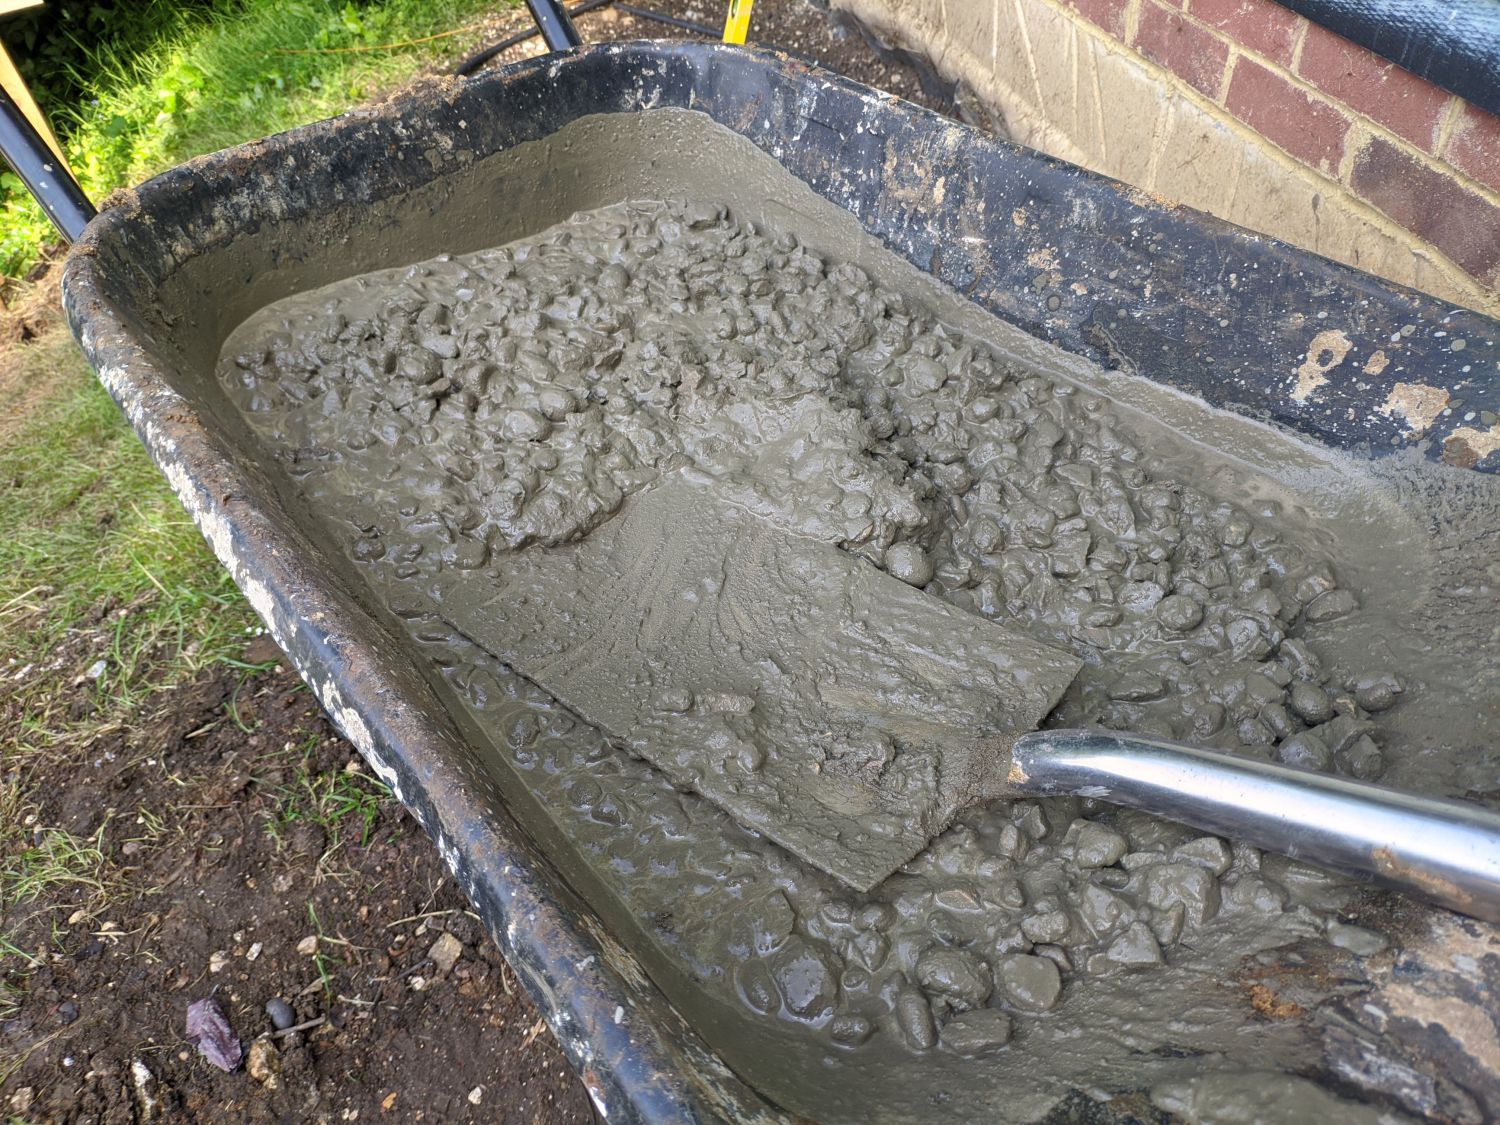
I added water after loading a batch of dry mix into my wheelbarrow: this probably wasn’t the most efficient way to do it as I ended up doing twice the work.
Each pier was filled to ~30mm below ground level at that point. While I could have tried to get them all to specific levels, I found it easier to fix any height variations in the brick piers.
Brick piers
Eager to have another shot at bricklaying after a two year break, it was good to get on to the piers. Once again I had the much needed help from a family friend and former bricklayer.
To begin, we stacked the bricks dry on each concrete pad determing how many would be needed to get them all to the right level. Where the level was too far off to be corrected by thicker mortar joints we used Flettons (London common bricks) split along their length.
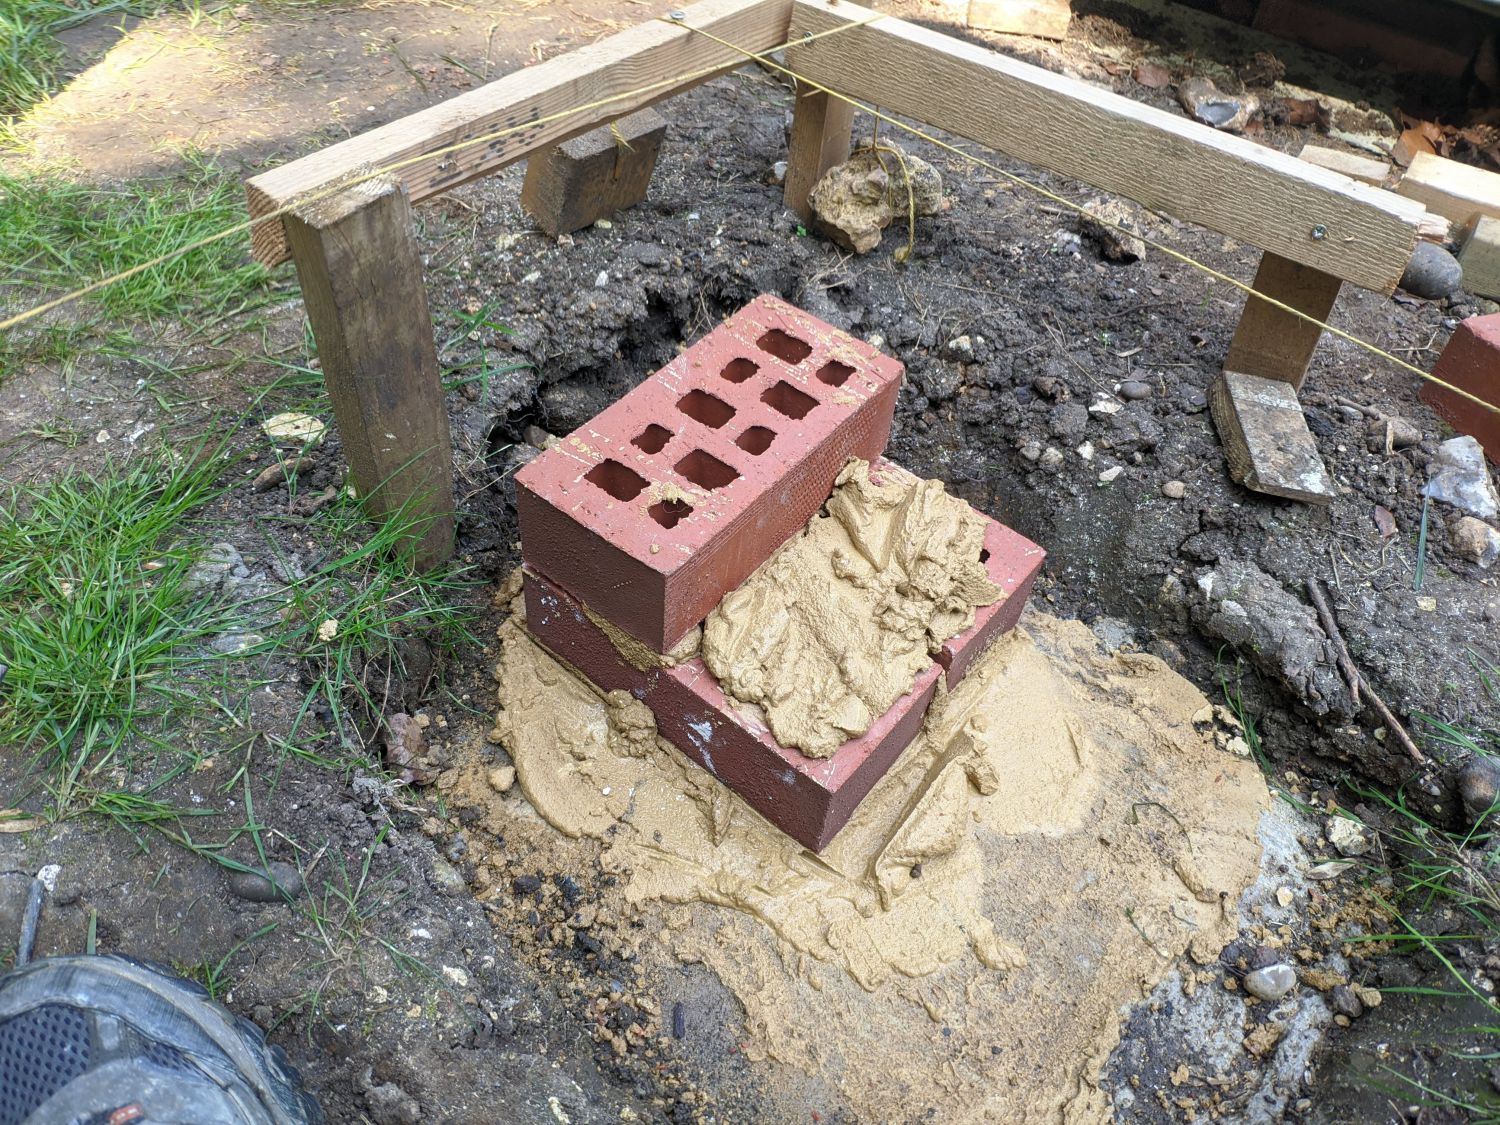

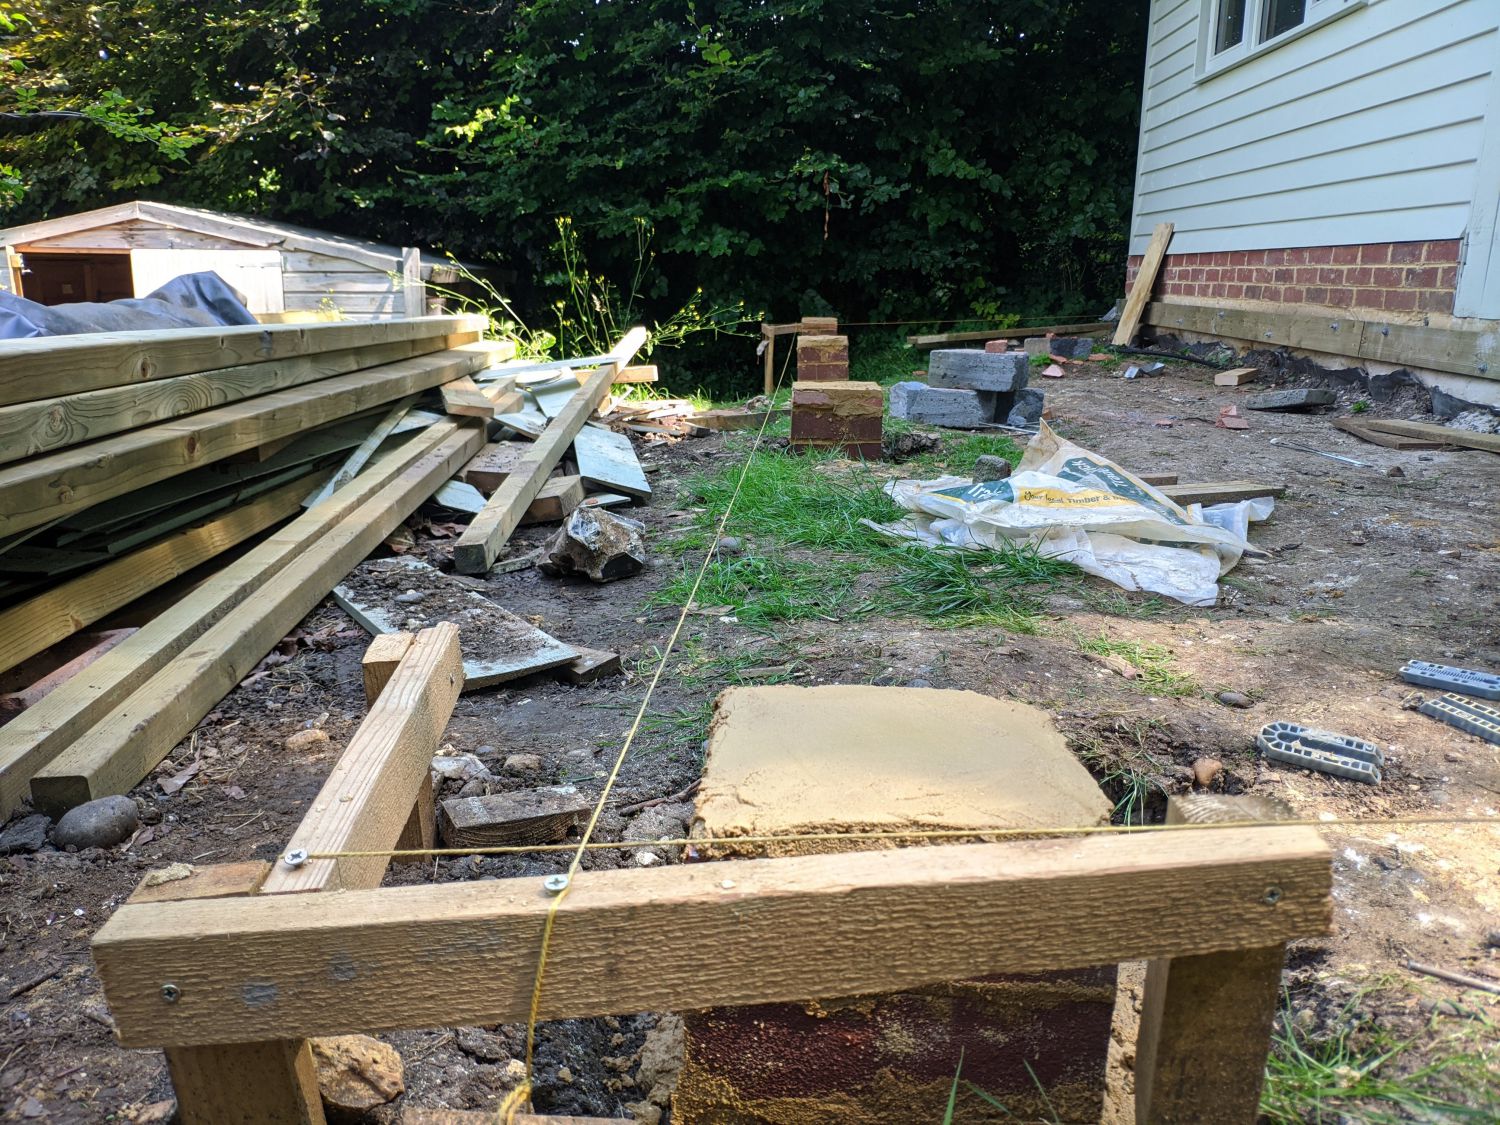
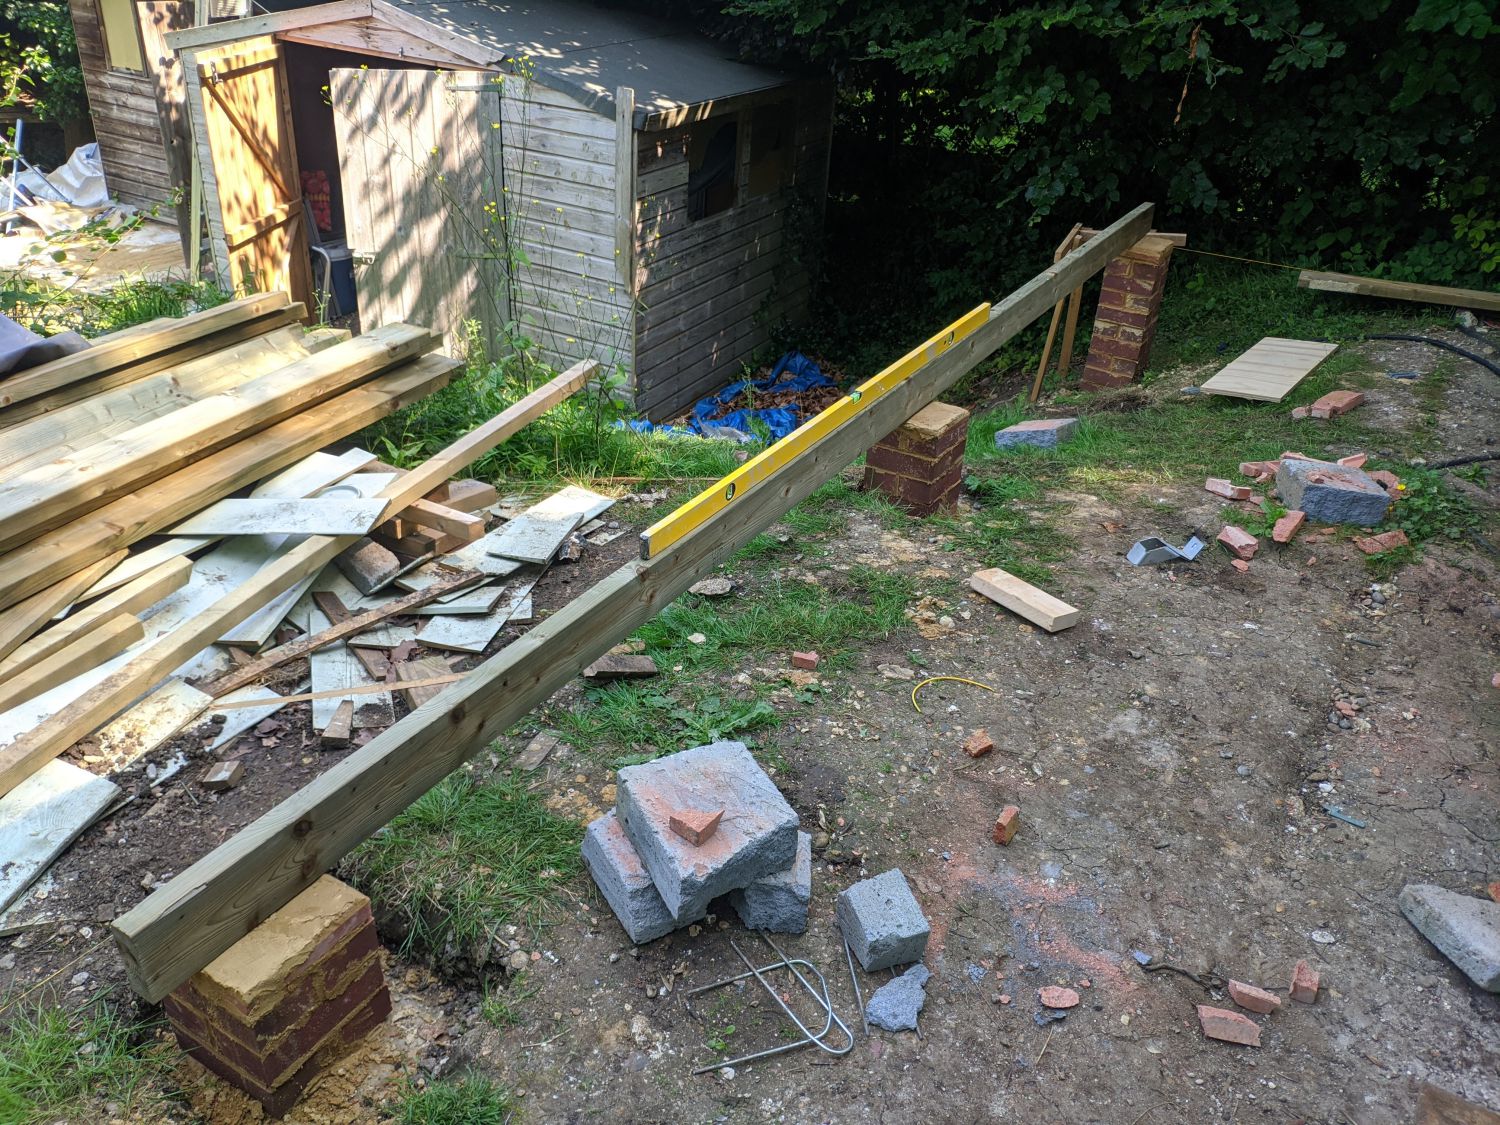
The builders line helped us get the spacing and placement of each pile perfect. These are standard one-brick piers which are acceptable here as they are unlikely to ever experience large lateral forces.
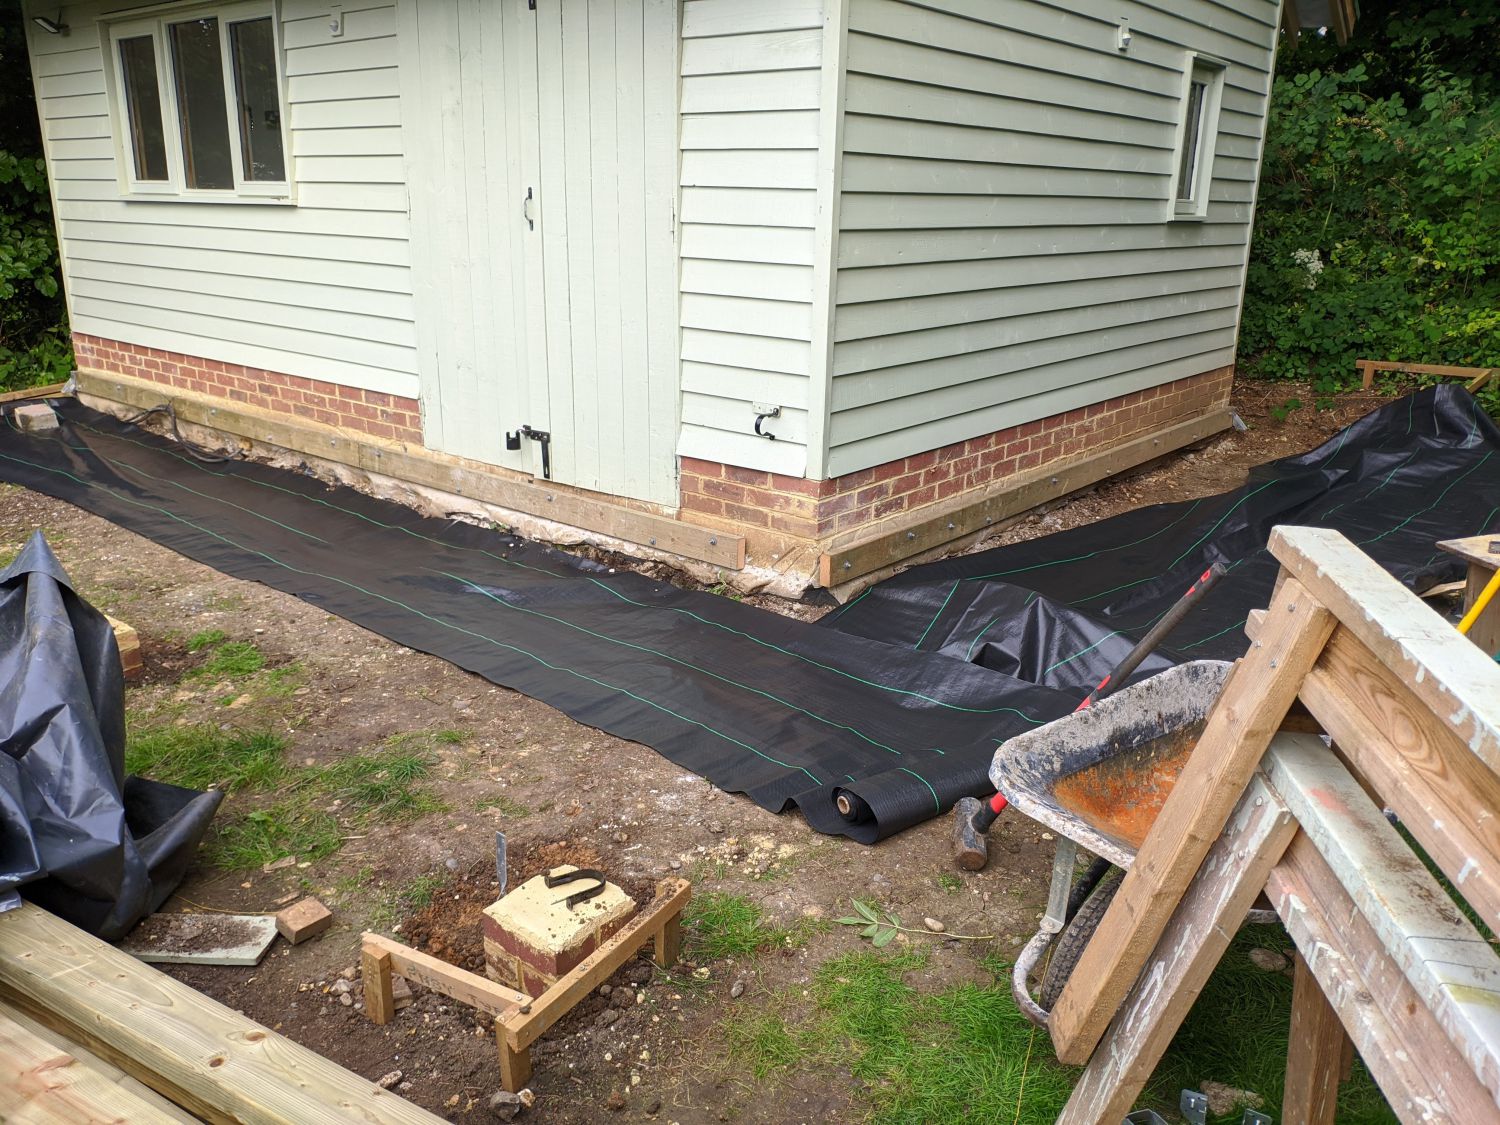
Landscape fabric and bark
To prevent weed growth under the deck I laid down a thick woven landscaping fabric. The fabric works by blocking almost all light.
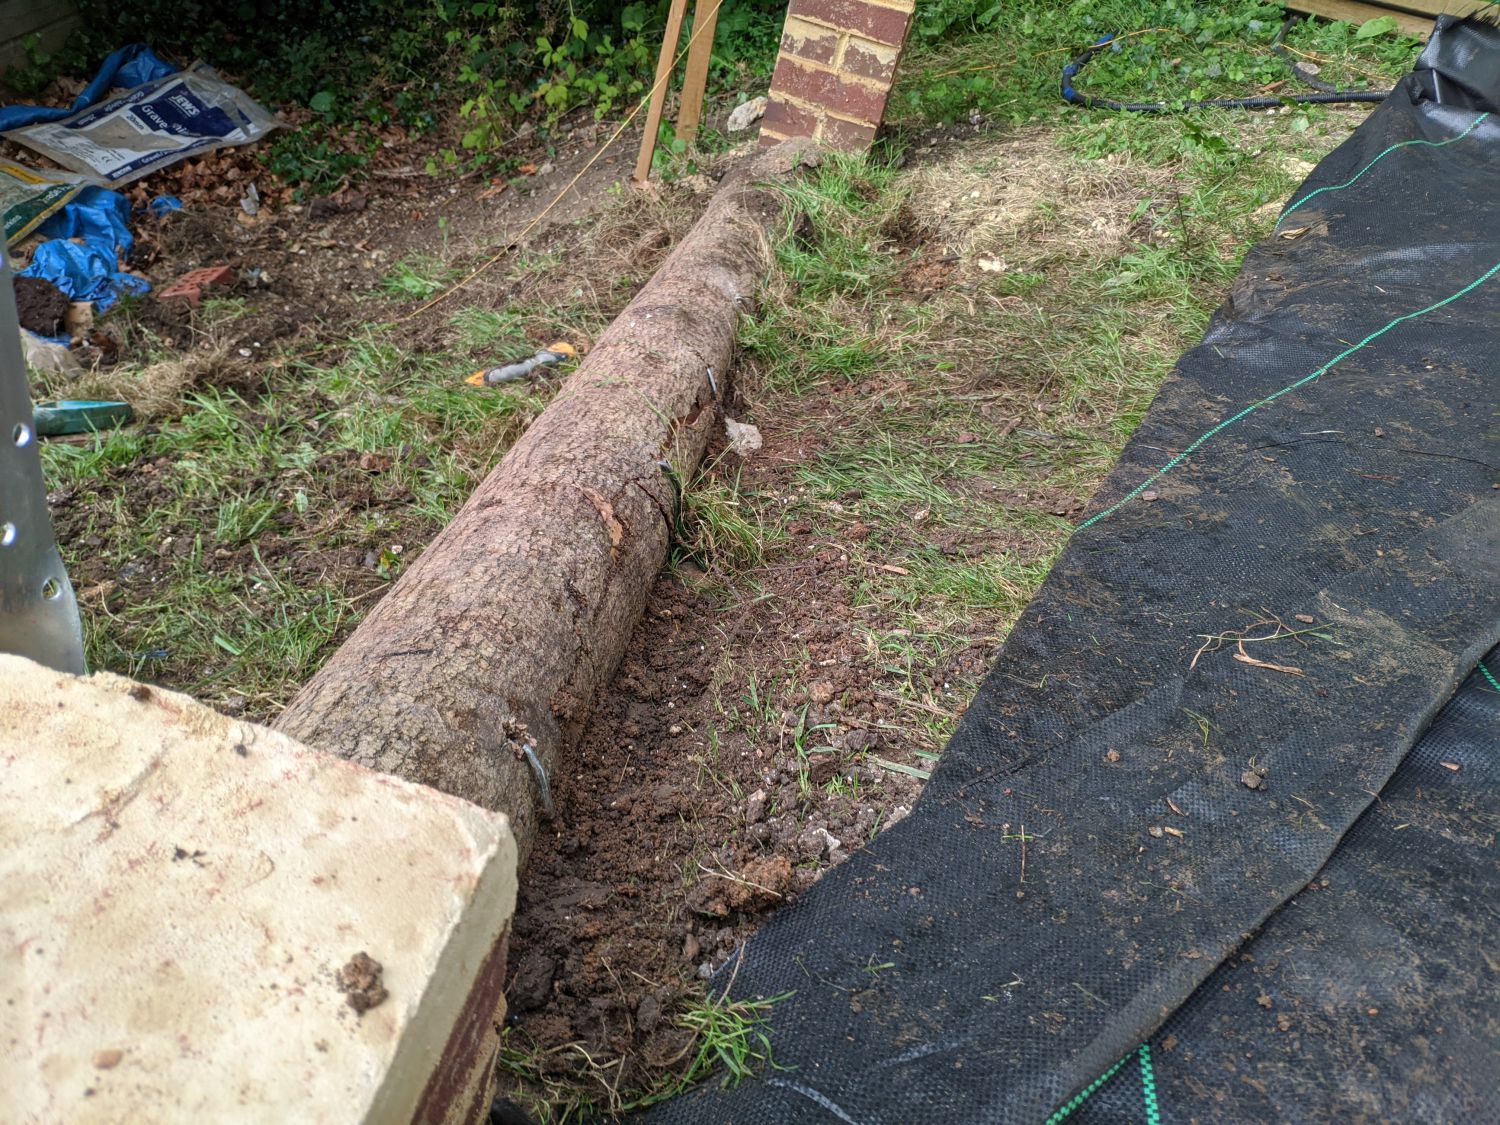
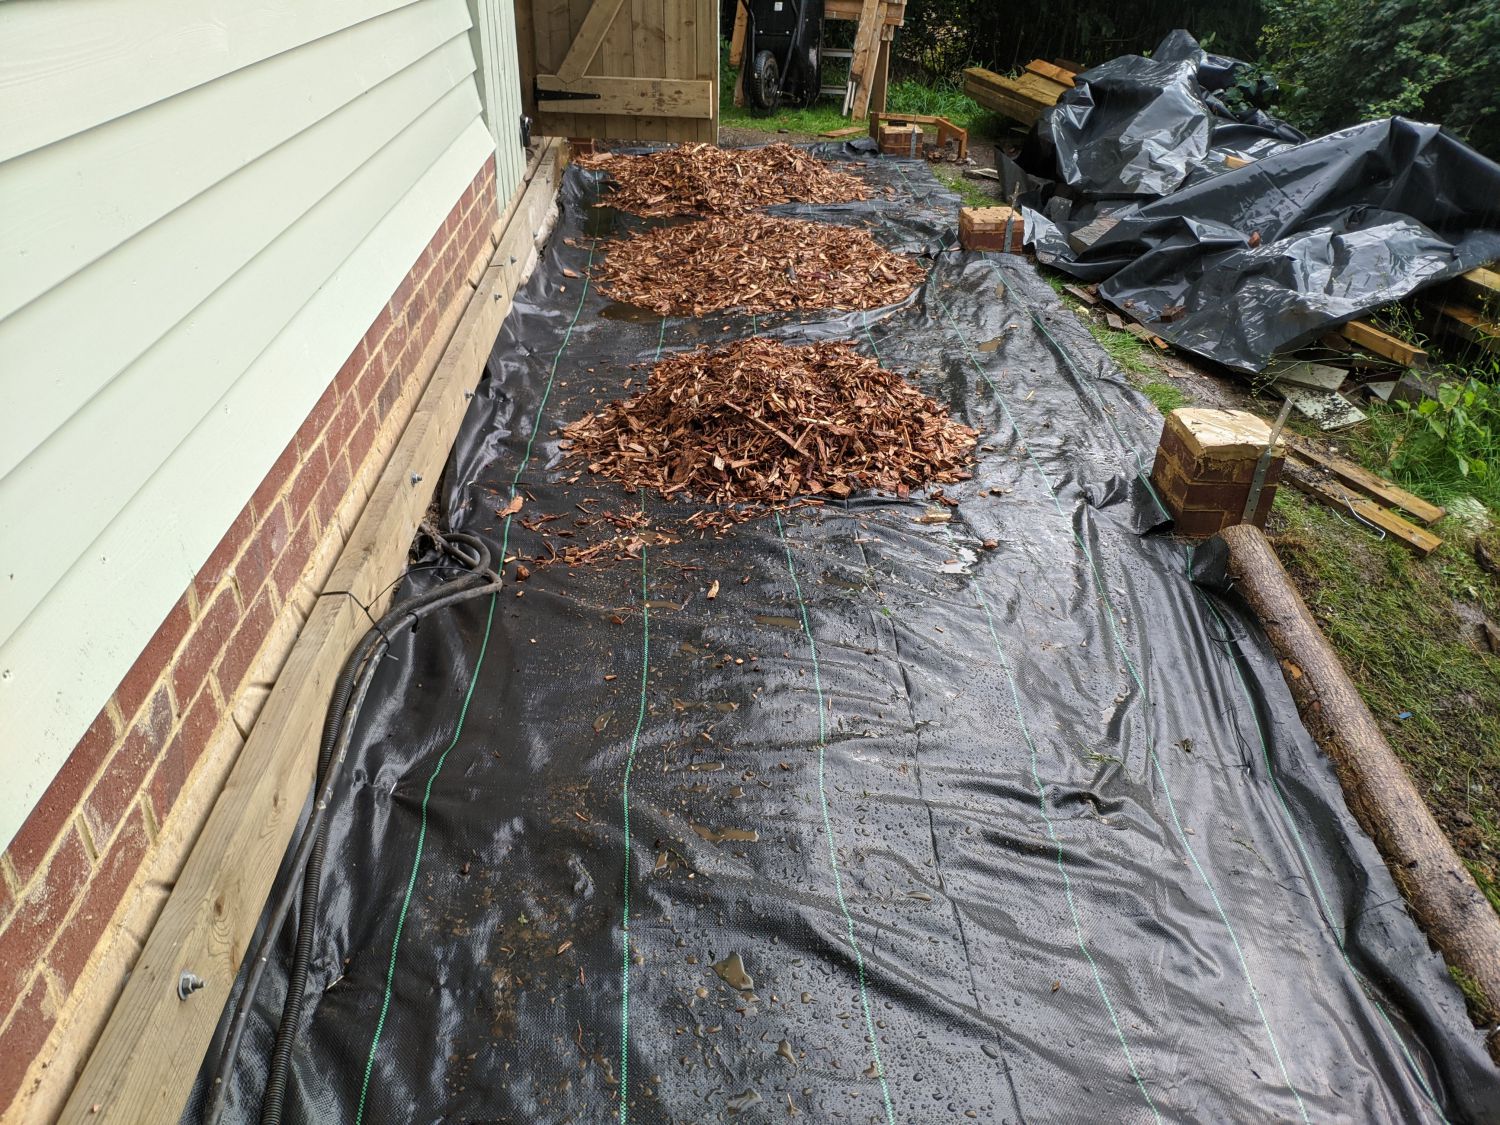
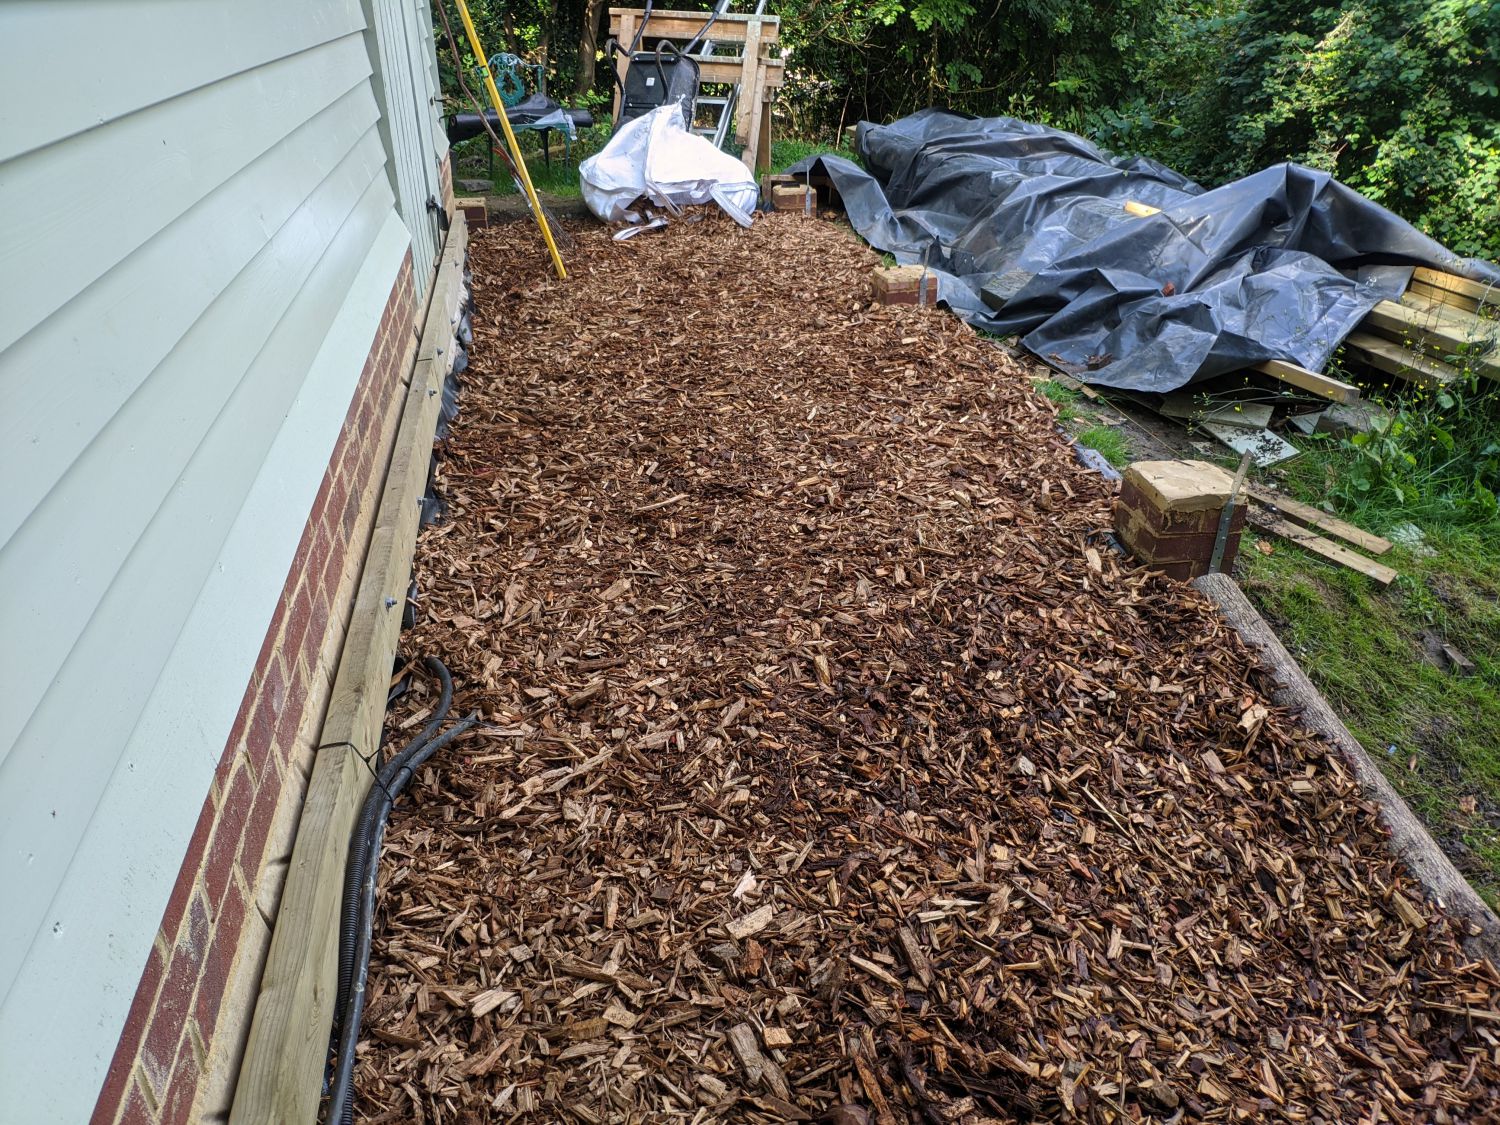
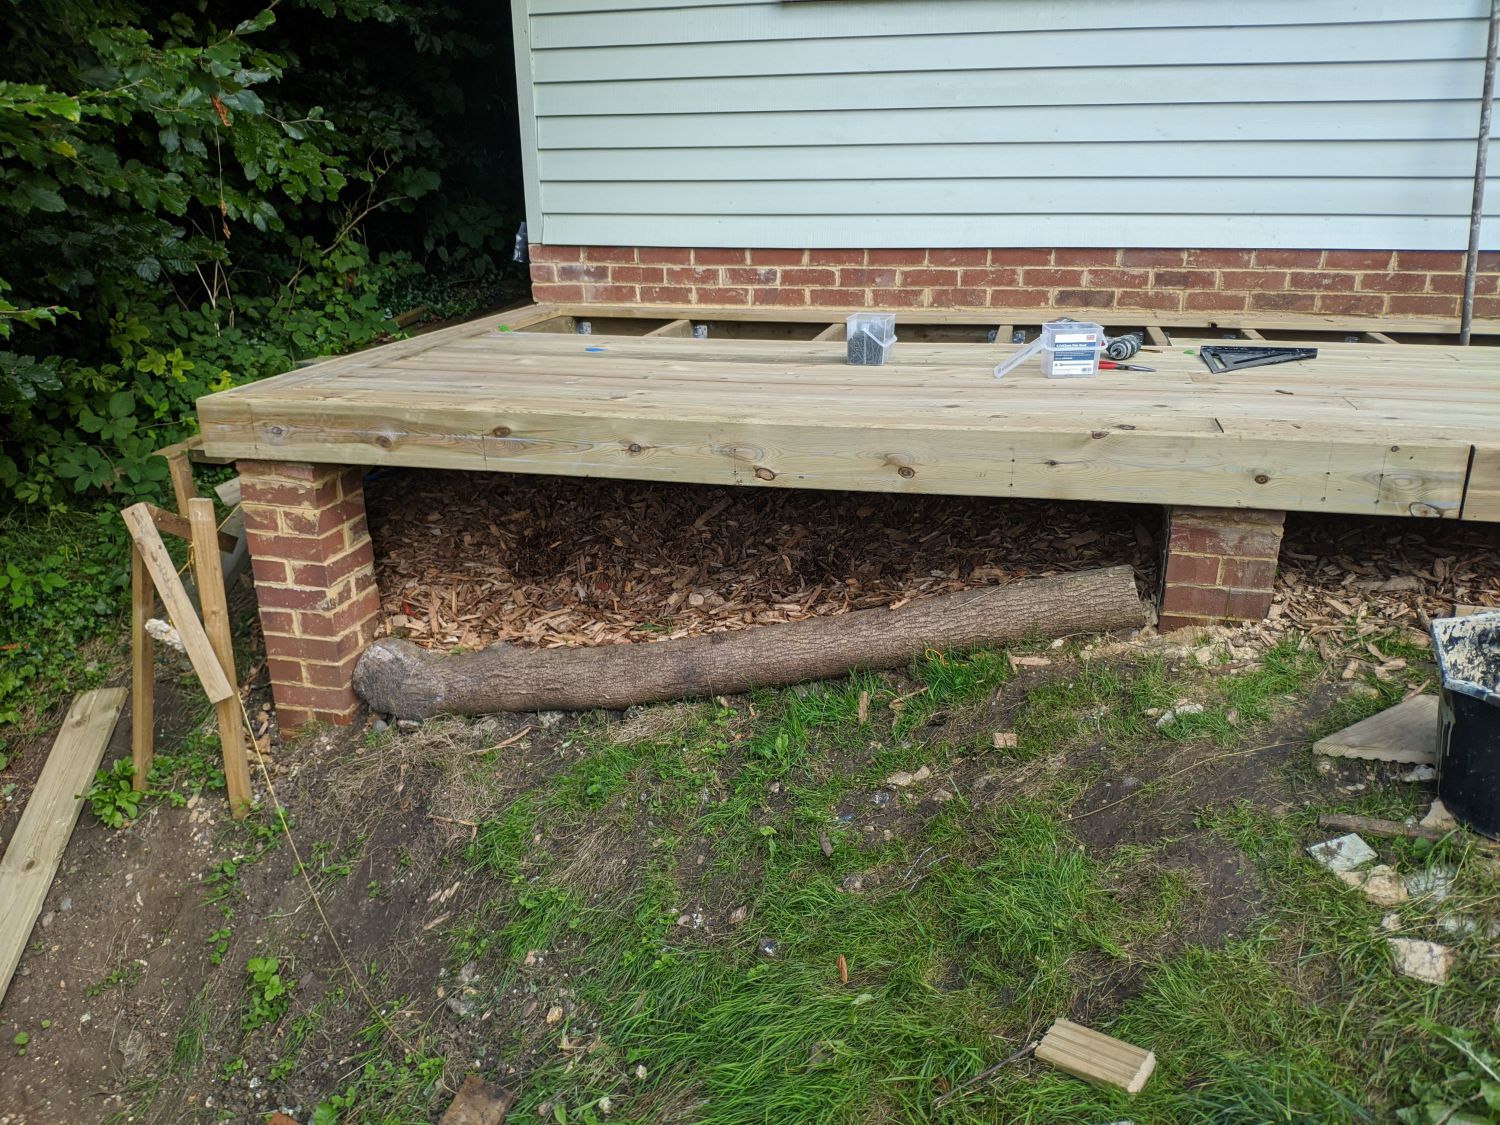
I then dumped ~0.6m2 of woodland bark atop it to block even more light and make the exposed areas under the deck look a bit nicer. To prevent bark rolling down the hill I dug in a log and fixed it in place with galvanised stakes.
Deck structure
Every member of both the deck structure and boarding was cut from treated timber. Whenever I cut an end, I dipped it in wood preserver for at least 3 minutes. This should hopefully ensure the deck lasts for a significant amount of time. Clearly, however, wood preserver cannot match paint, so the building itself will likely outlive the deck.
All metal components of the deck were galvanised.
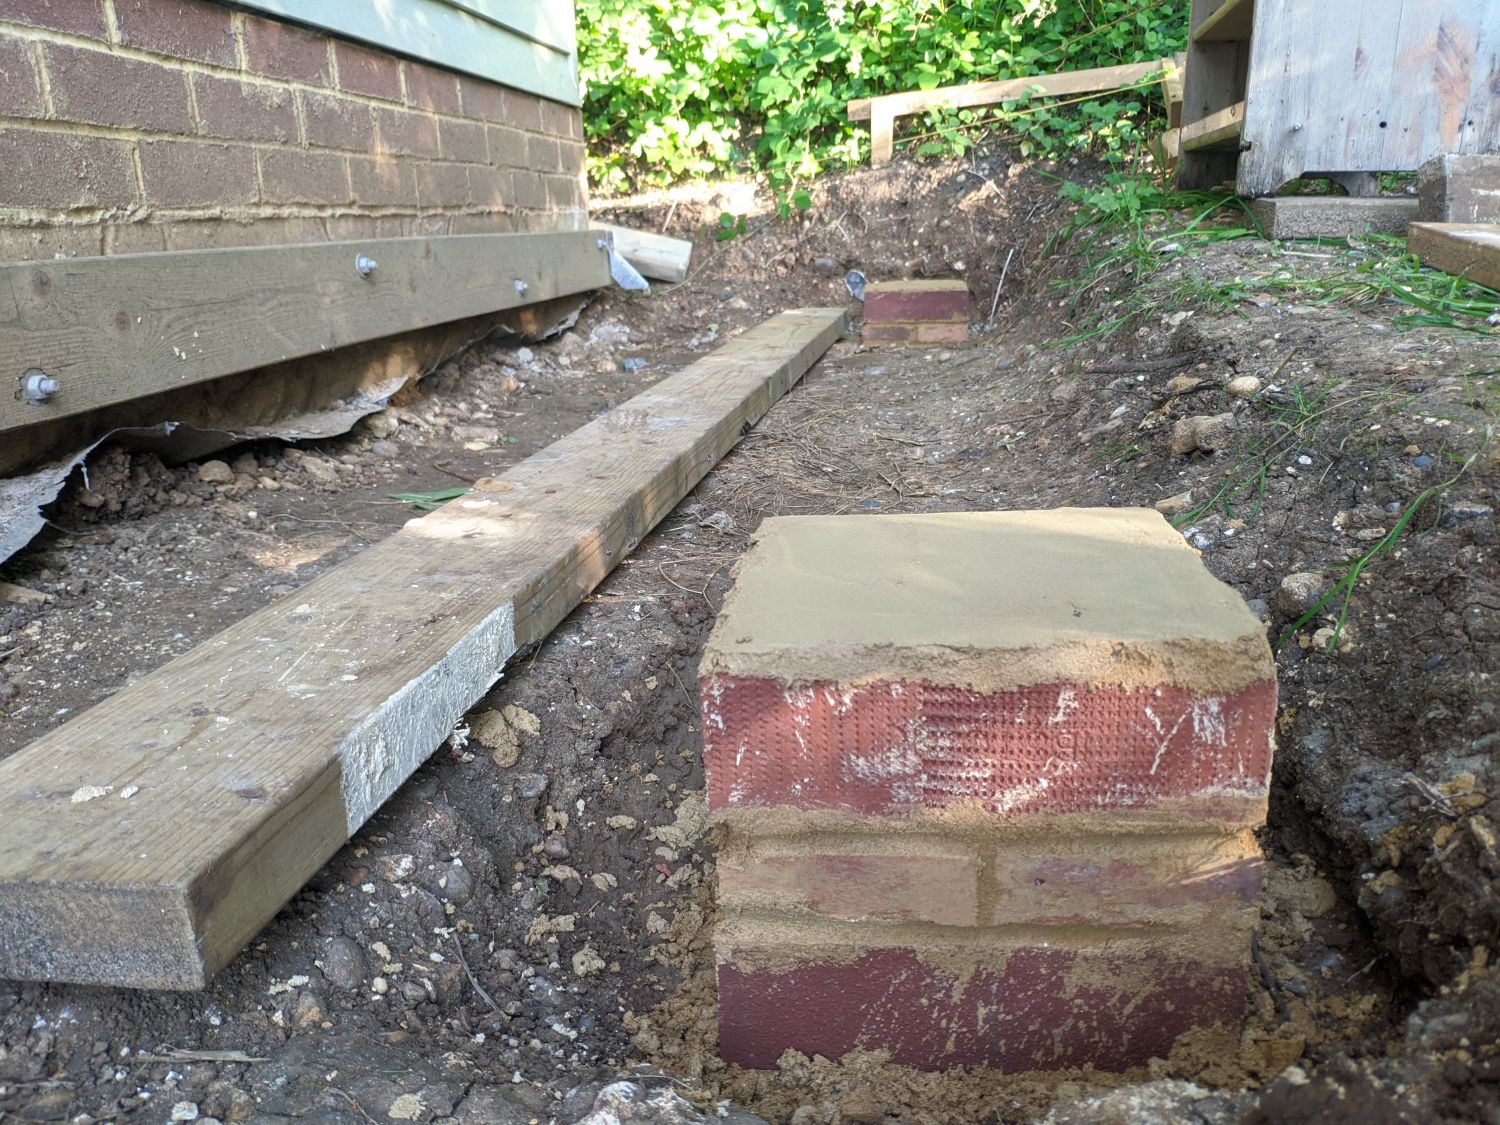
Wall plates
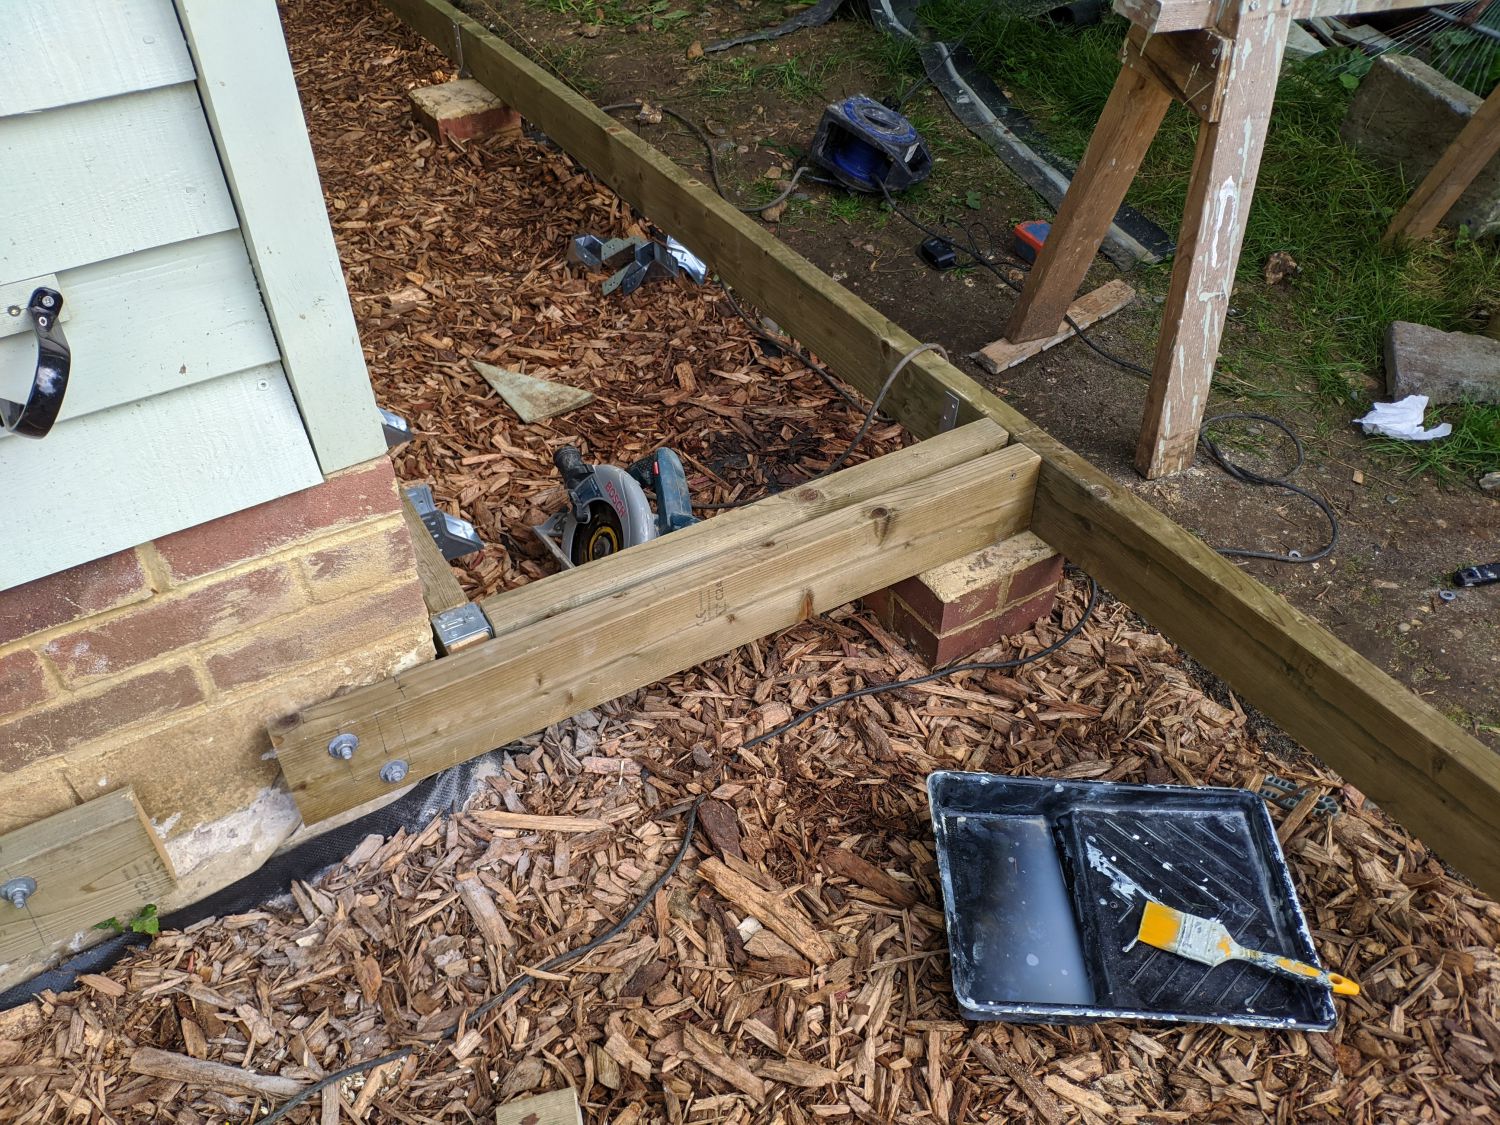
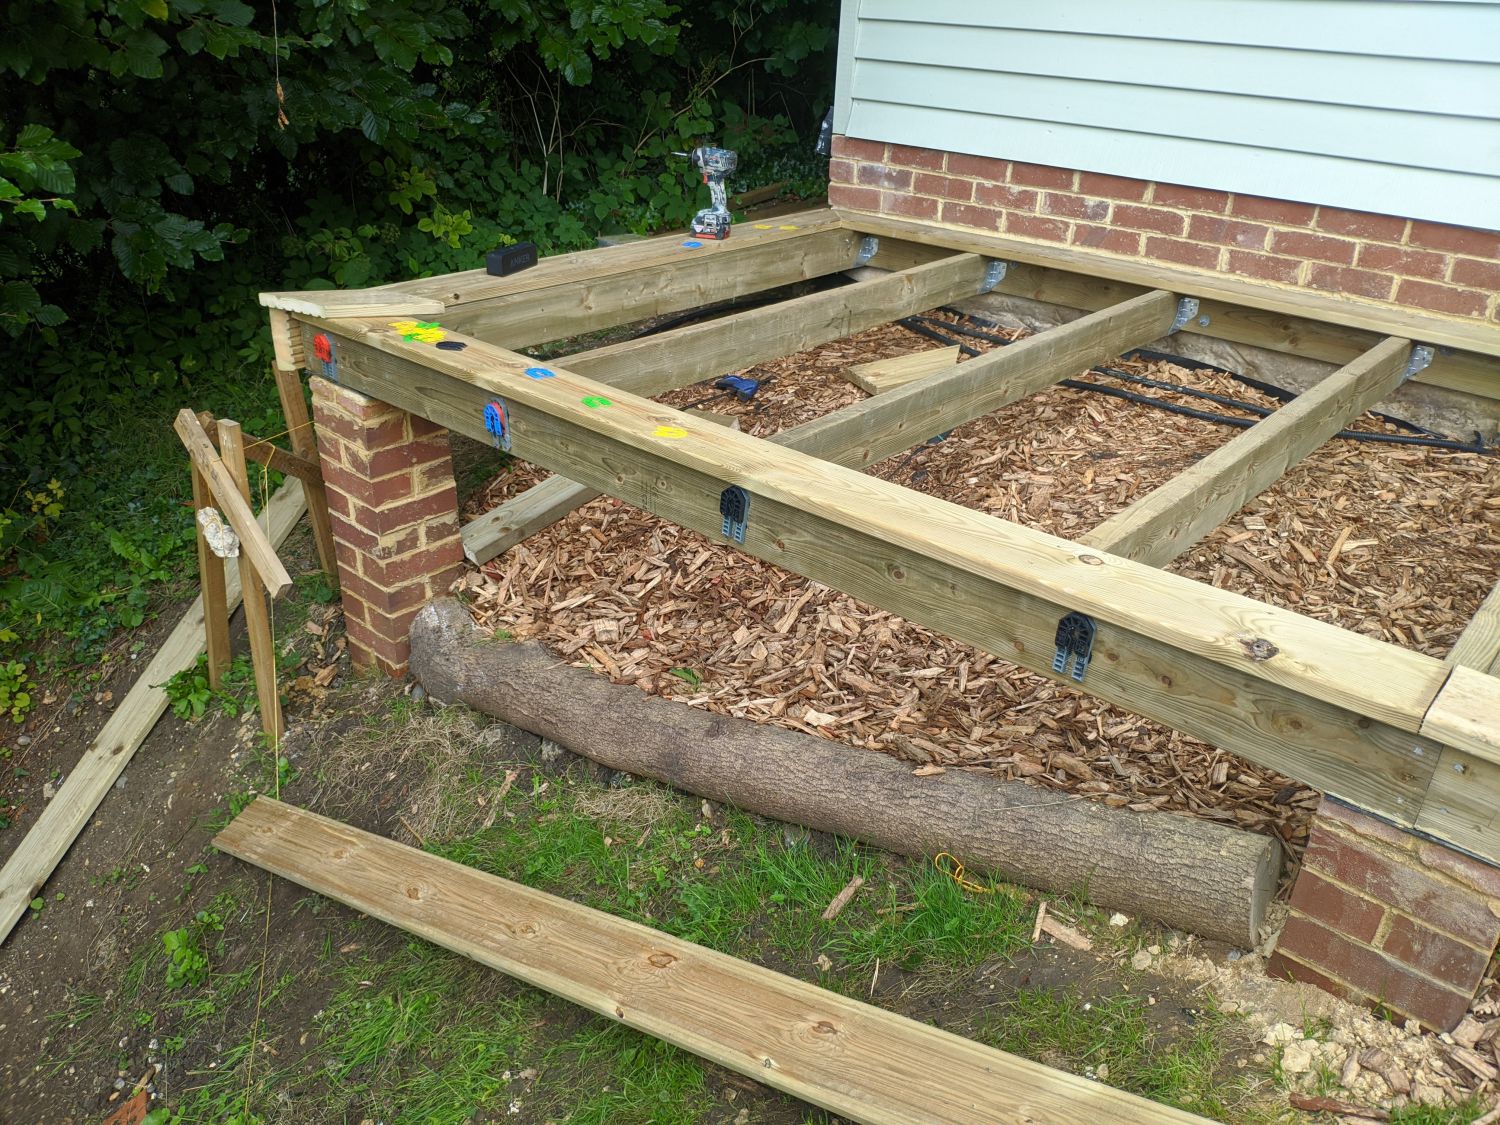
Instead of building additional peirs to support the deck on the shed side, the ‘wall plate’ to which all the joists are hung can be fixed directly to the building. In this case it made sense to fix into the concrete.
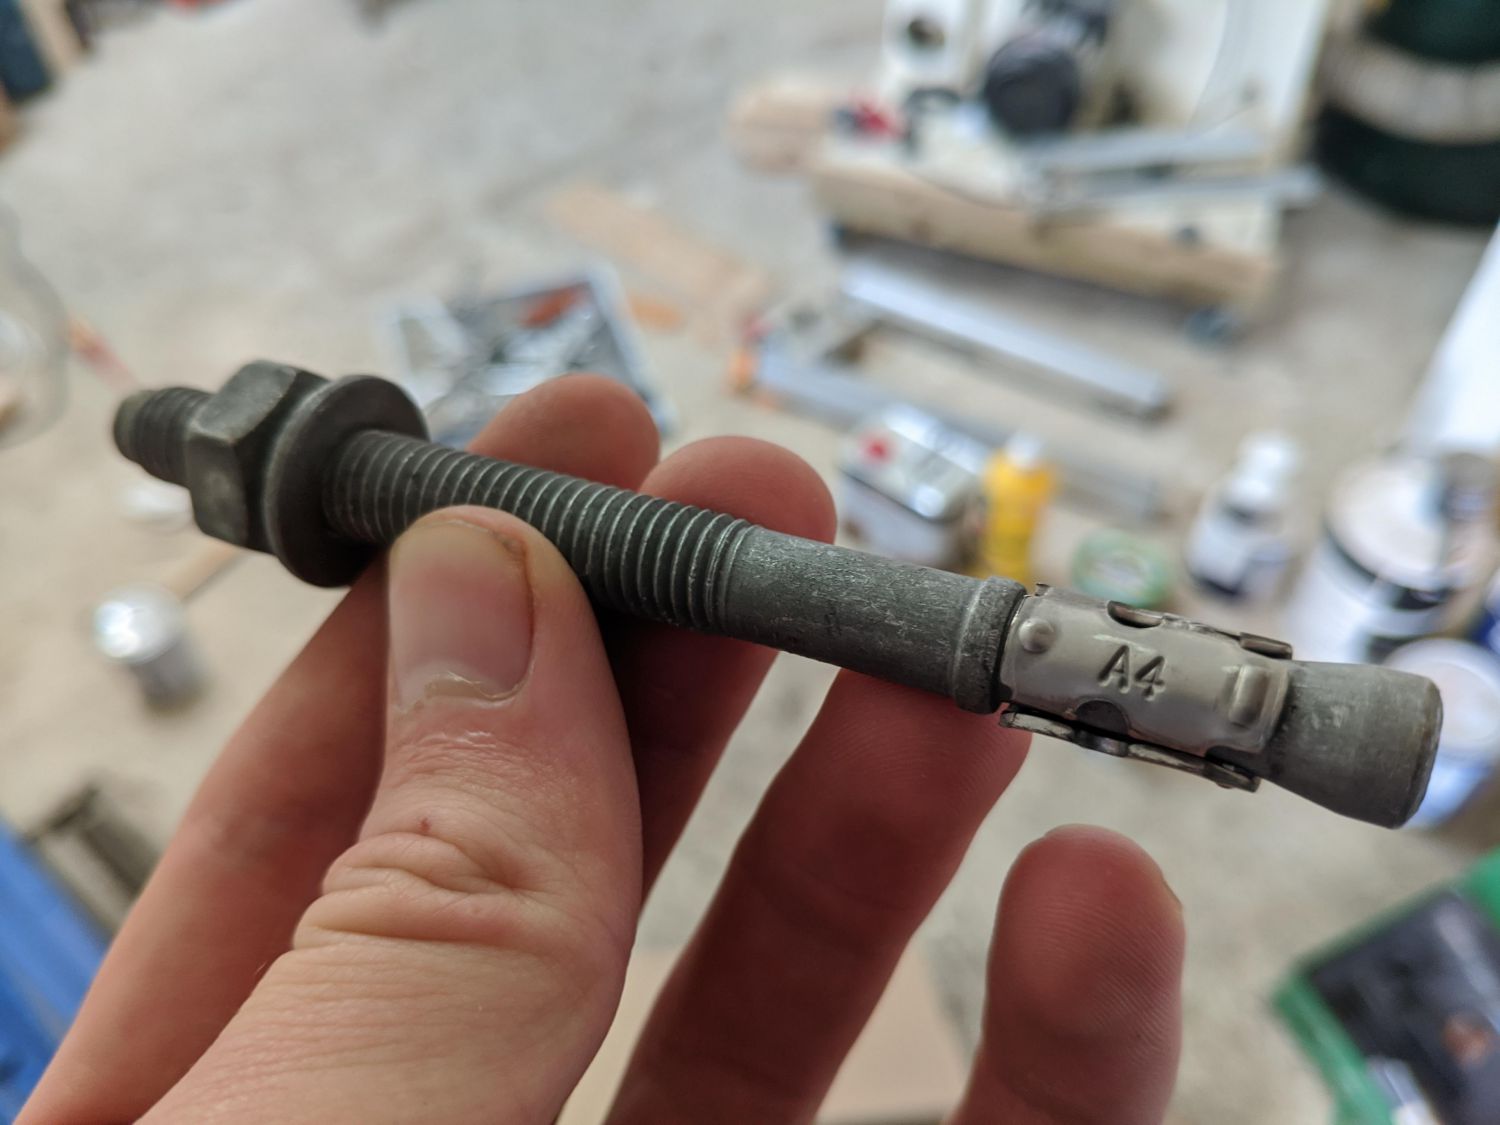
Chemical anchors seem to be the most common choice for fixing to concrete but as I didn’t have the correct dispenser I decided to go for mechanical throughbolts. These feature a cone shaped end with a metal collar. When hammered into a correctly sized hole, the metal collar grips the surrounding concrete. Tightening the bolt pulls the main body outwards and the metal collar, still stuck, is forced outwards by the cone end.
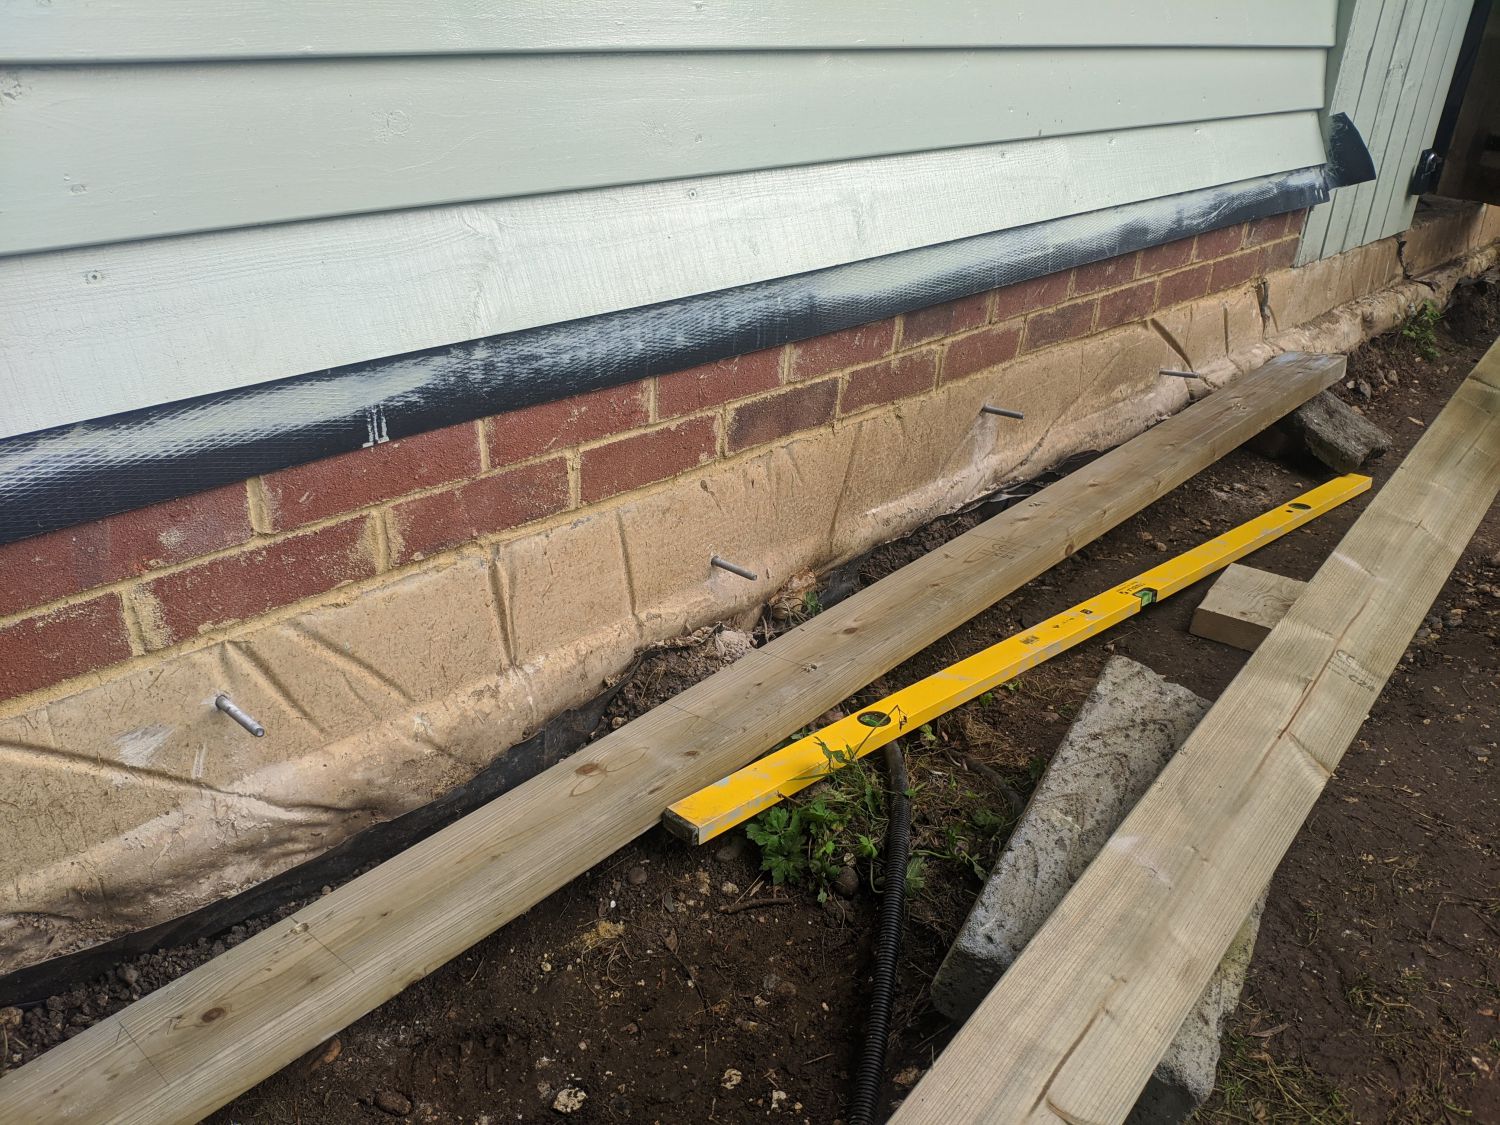
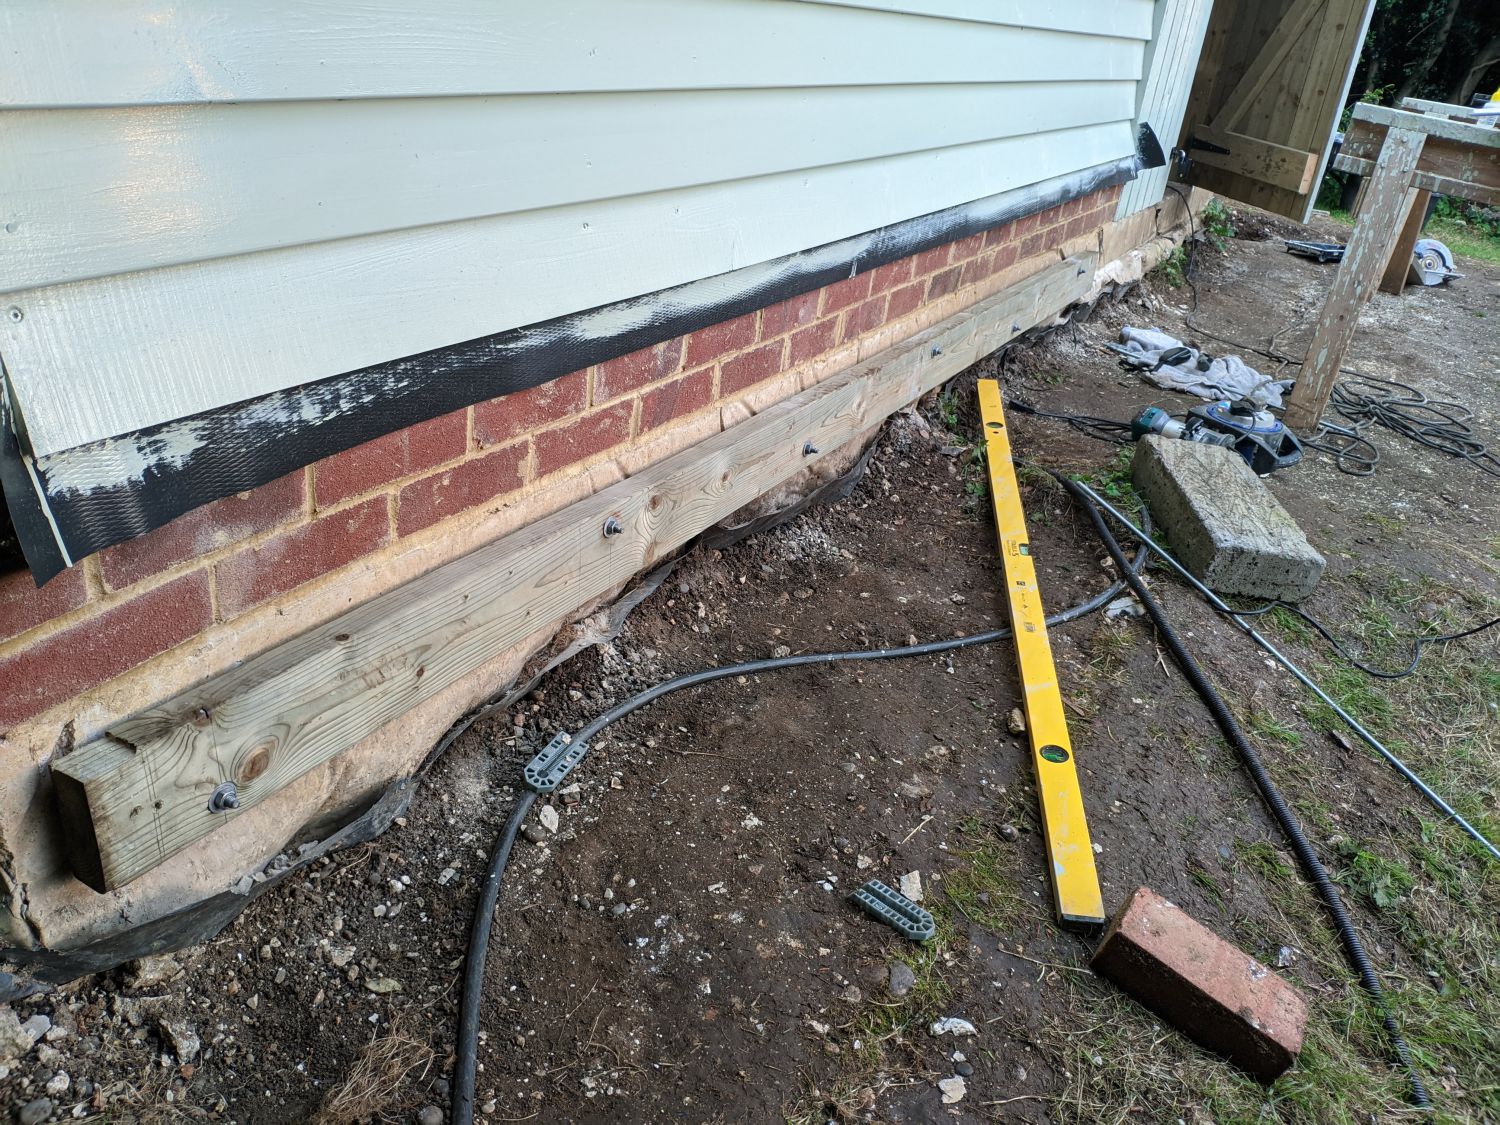
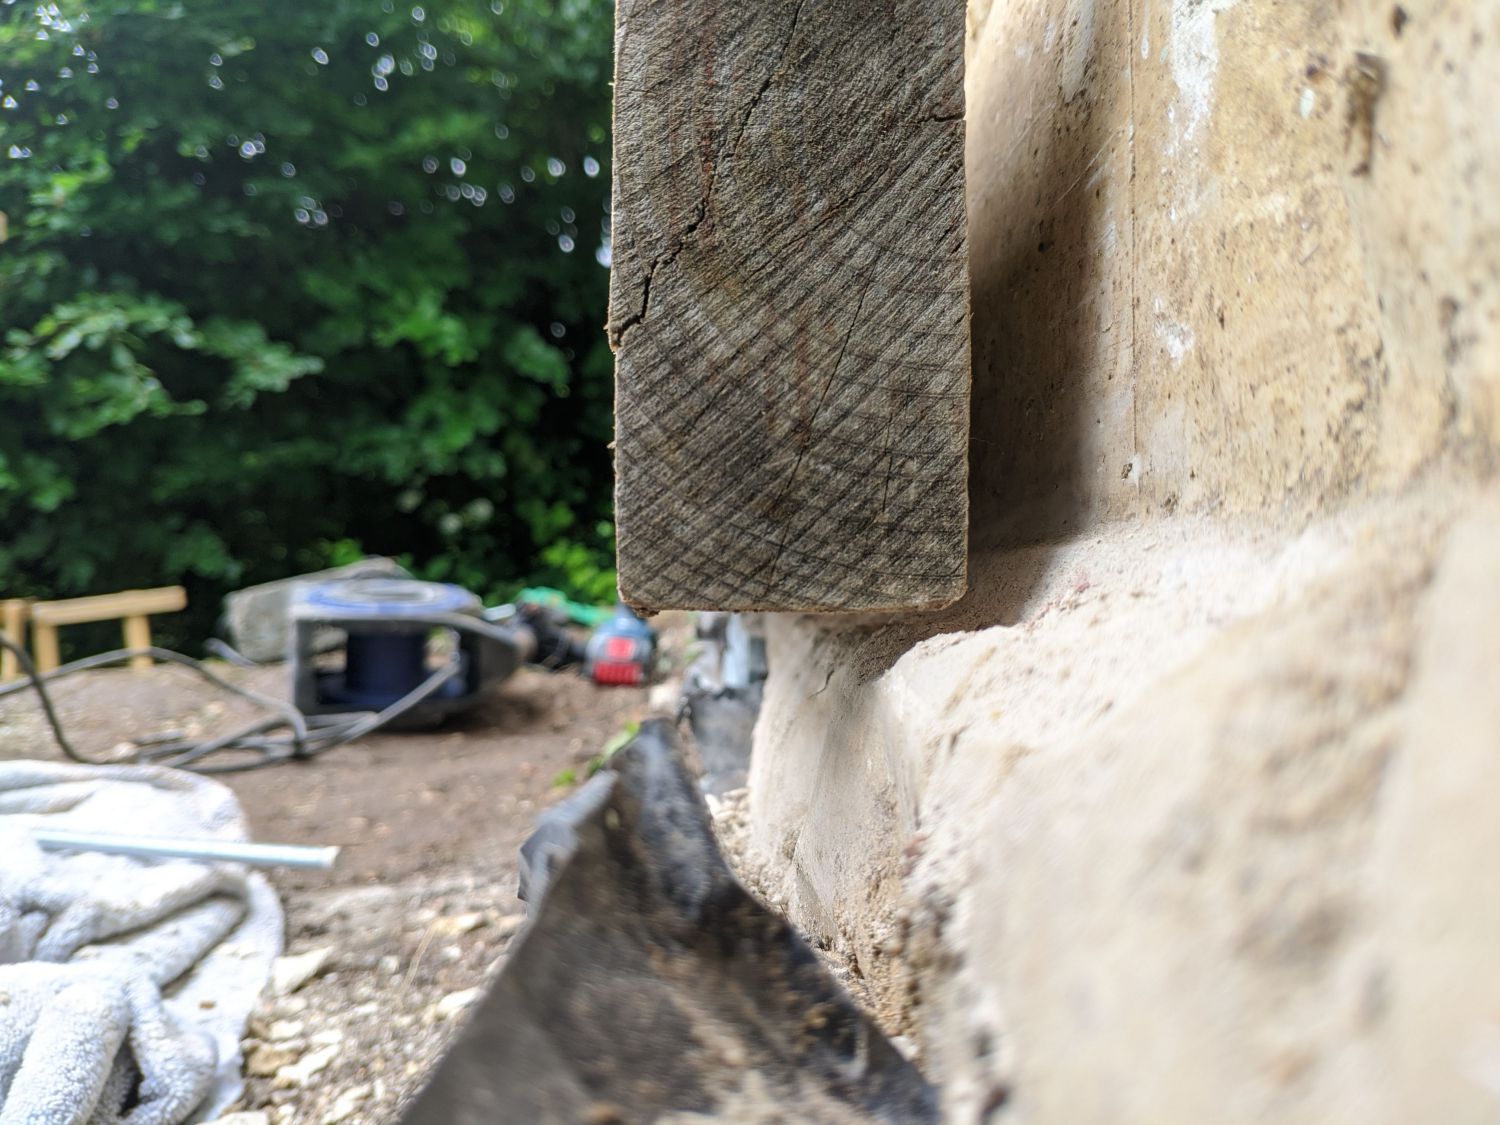
To space the wall plate off the foundation, I used galvanised washers around each throughbolt. In some cases I had to chisel off the lip of the concrete foundation to ensure water could drain freely.
The wall plate is located 30mm below the top of the concrete foundation to allow for a 28mm decking board.
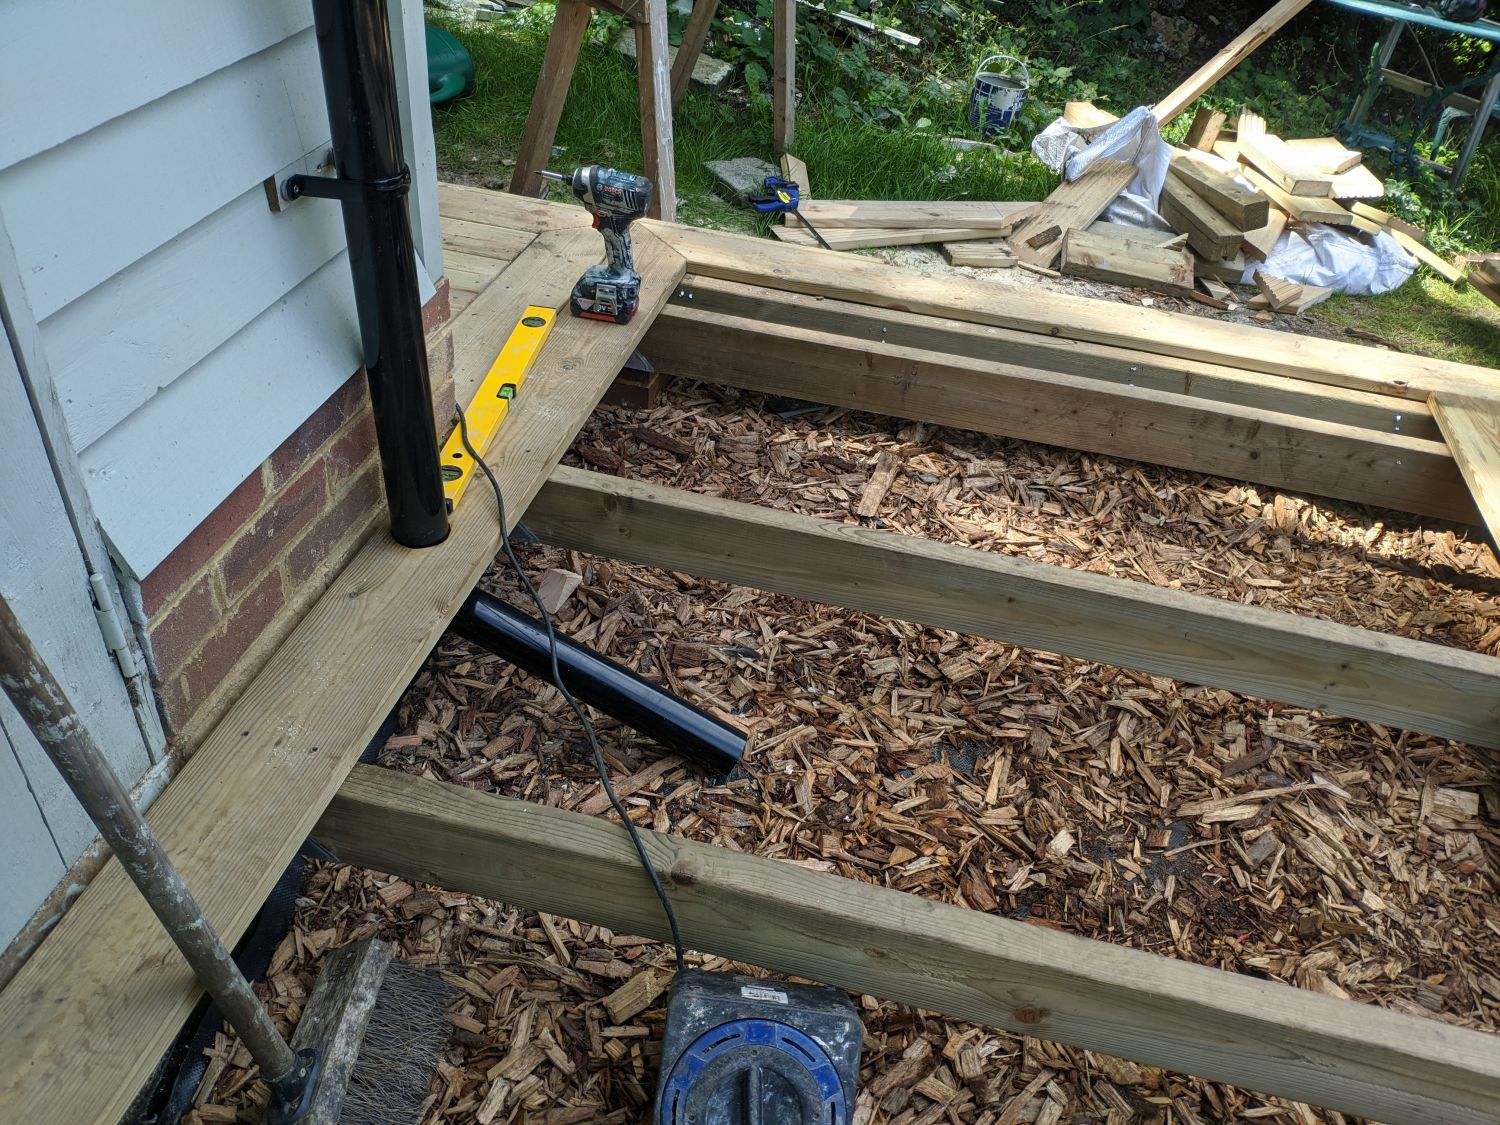
Joists
The joists are laid at 600mm OC. This is acceptable for the joist loading given the span but I later realised that 28mm softwood decking boards should really be supported every 400mm. I did a few jump tests and decided against adding any more but clearly this would be better practice.
To frame the deck I split it into two sub-decks, the side one and the front one. I started by fitting wall plates around the outside and simply resting them on the brick piers. Where a joist-plate connection is floating, joist hangers must be used to properly support the deck; in some cases these were not neccesary as the joints were resting on piers. At corners without hangers I used small right angle brackets
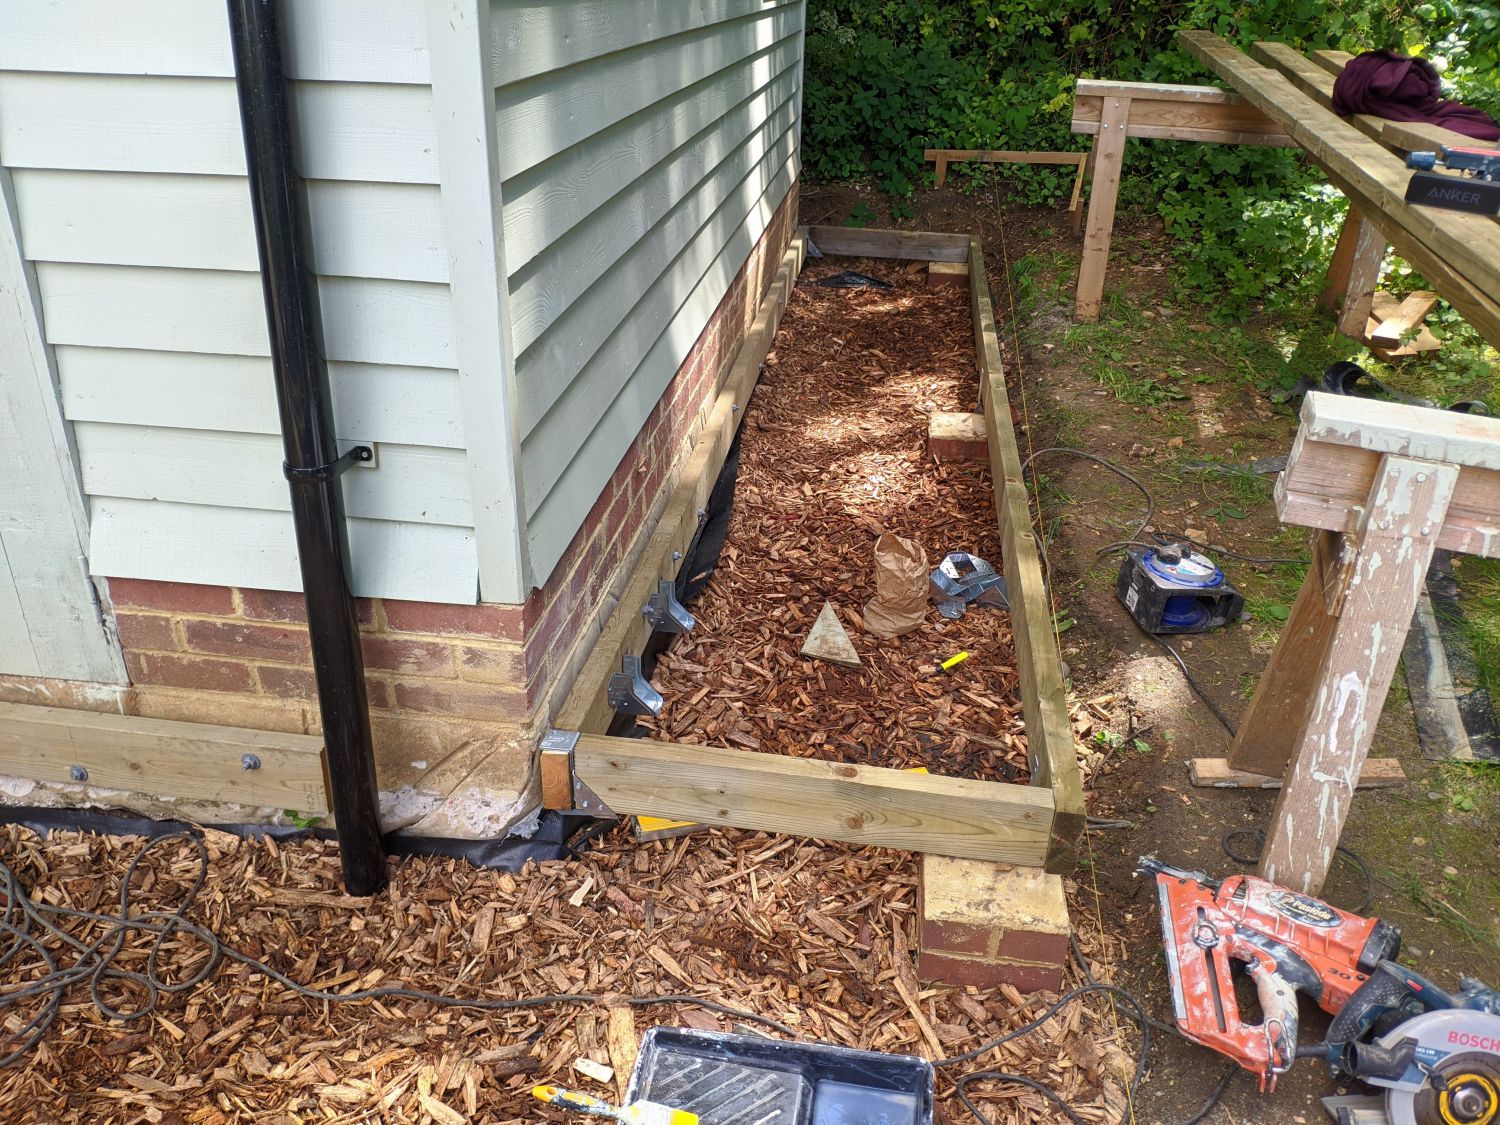
With the outline down I placed all of the joists pretty quickly, using 40mm galvanised square twist nails through THM230/47 hangers to fix them.
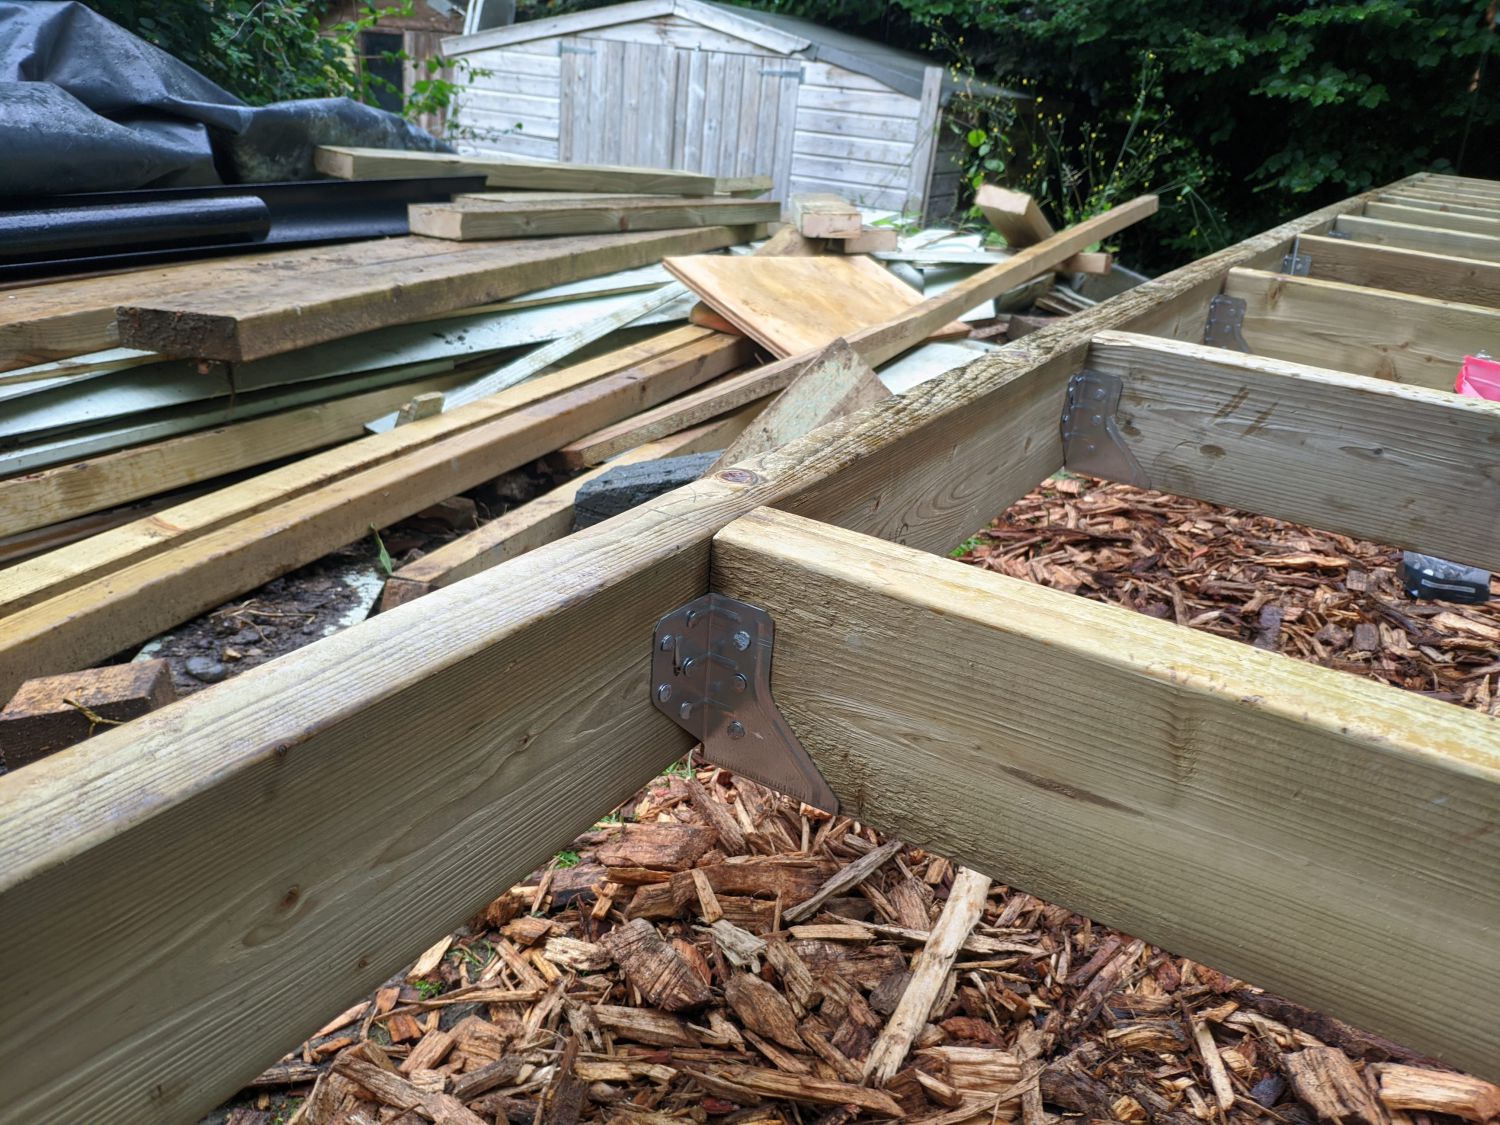
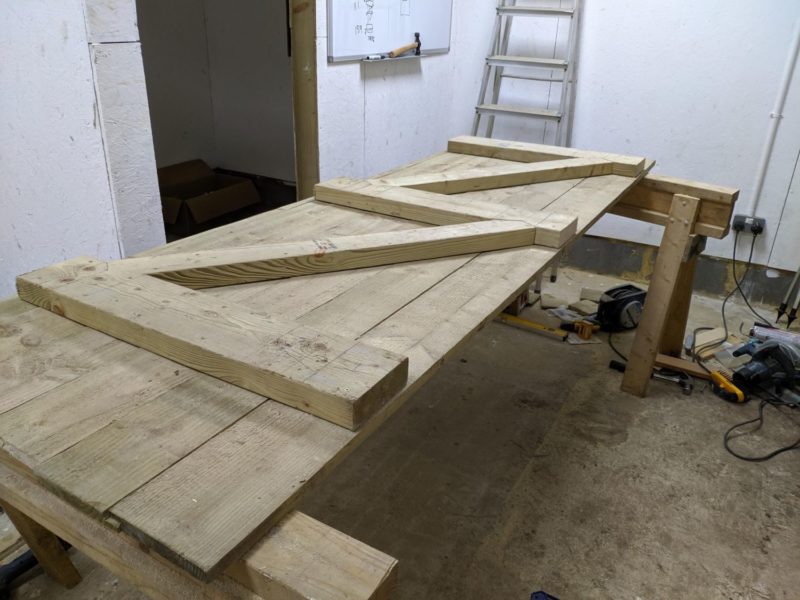
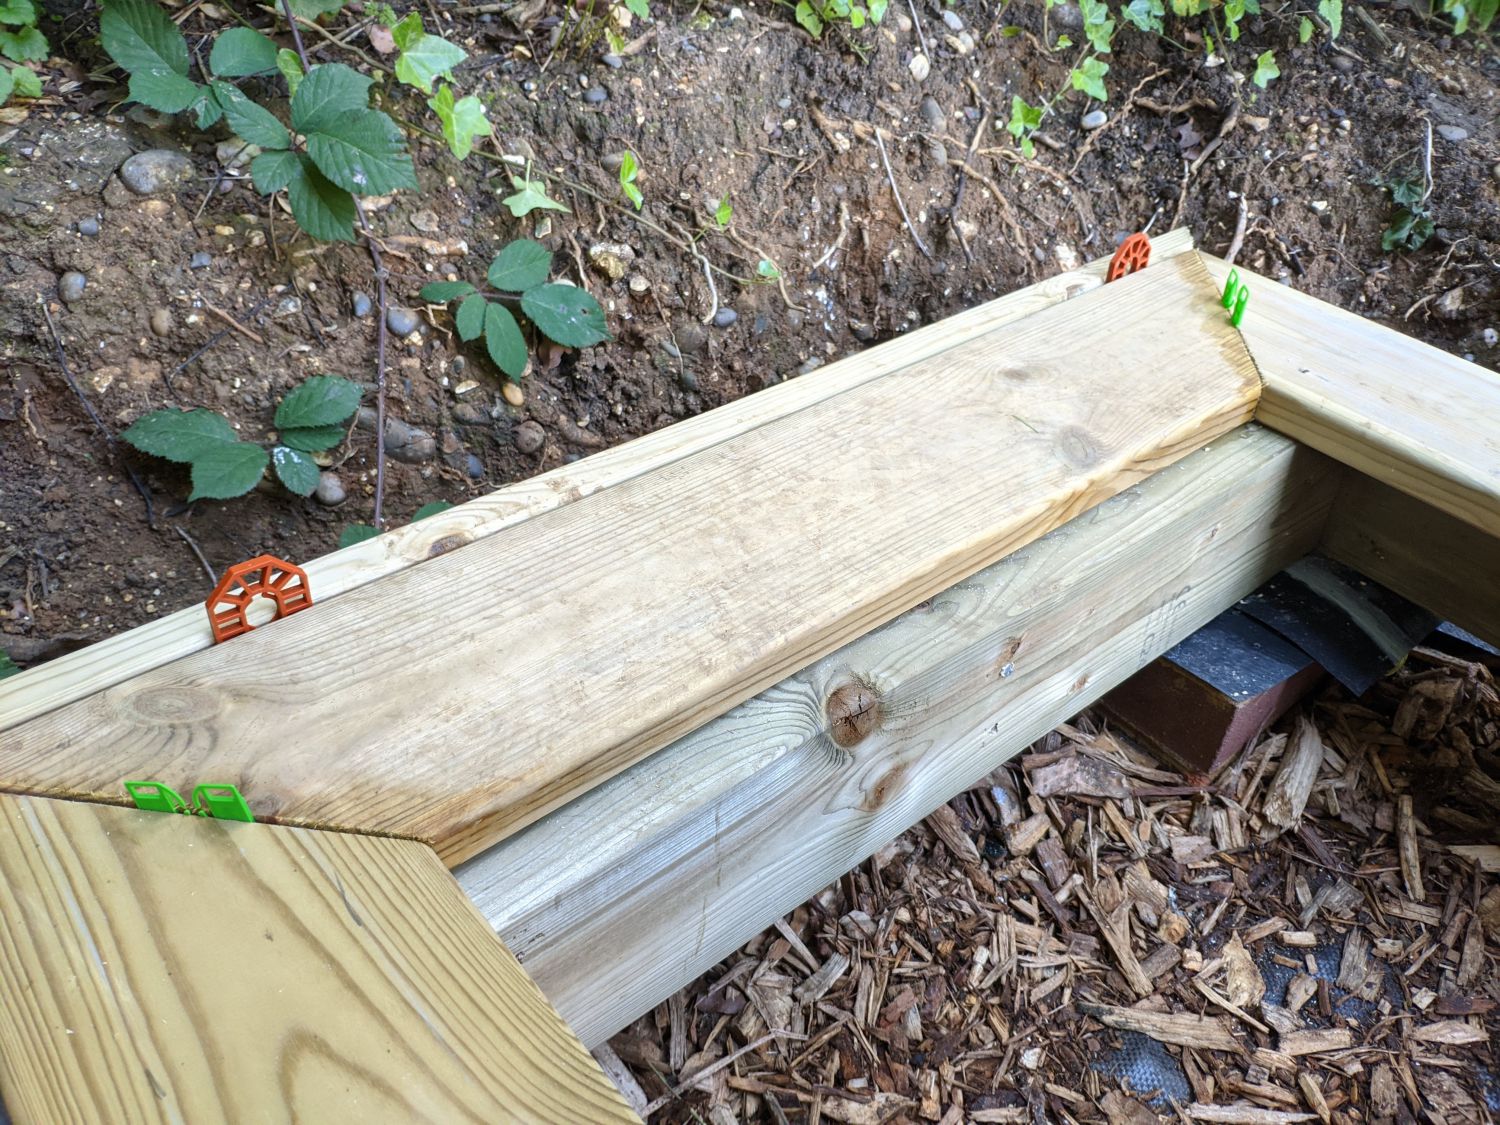
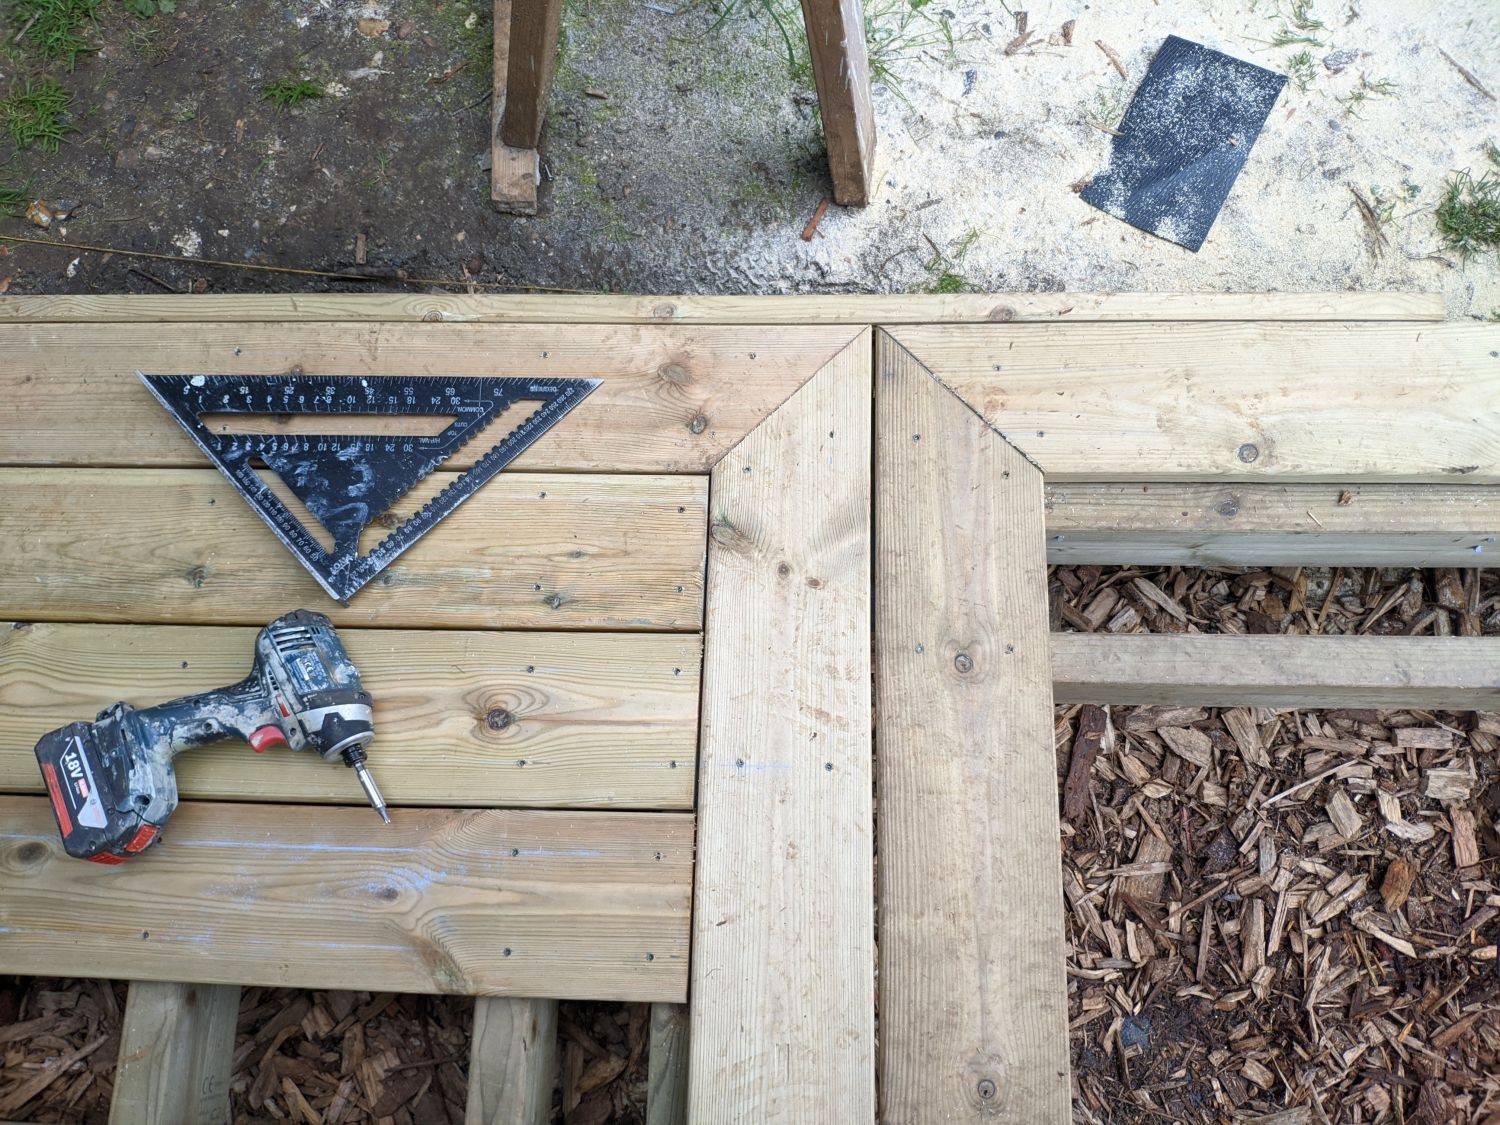
The edges of the frame were a bit complicated, and I actually fixed them completely wrong the first time. Because I wanted a ‘picture frame’ deck pattern I needed to include additional joists near the end of each sub-deck. This was in ordert to support the ends of the timbers perpendicular to the joists (i.e. those within the picture frame).
Tie-downs and DPC
I’m not conviced tie-downs are neccesary on a structure like this but there is potential for wind to blow under the deck so I thought better safe than sorry. The twisted restraint straps are screwed into plugs in the brick piers and nailed to the timber structure. Ideally they would have been screwed into the concrete but the concrete screws I had didn’t work in my mix of concrete.
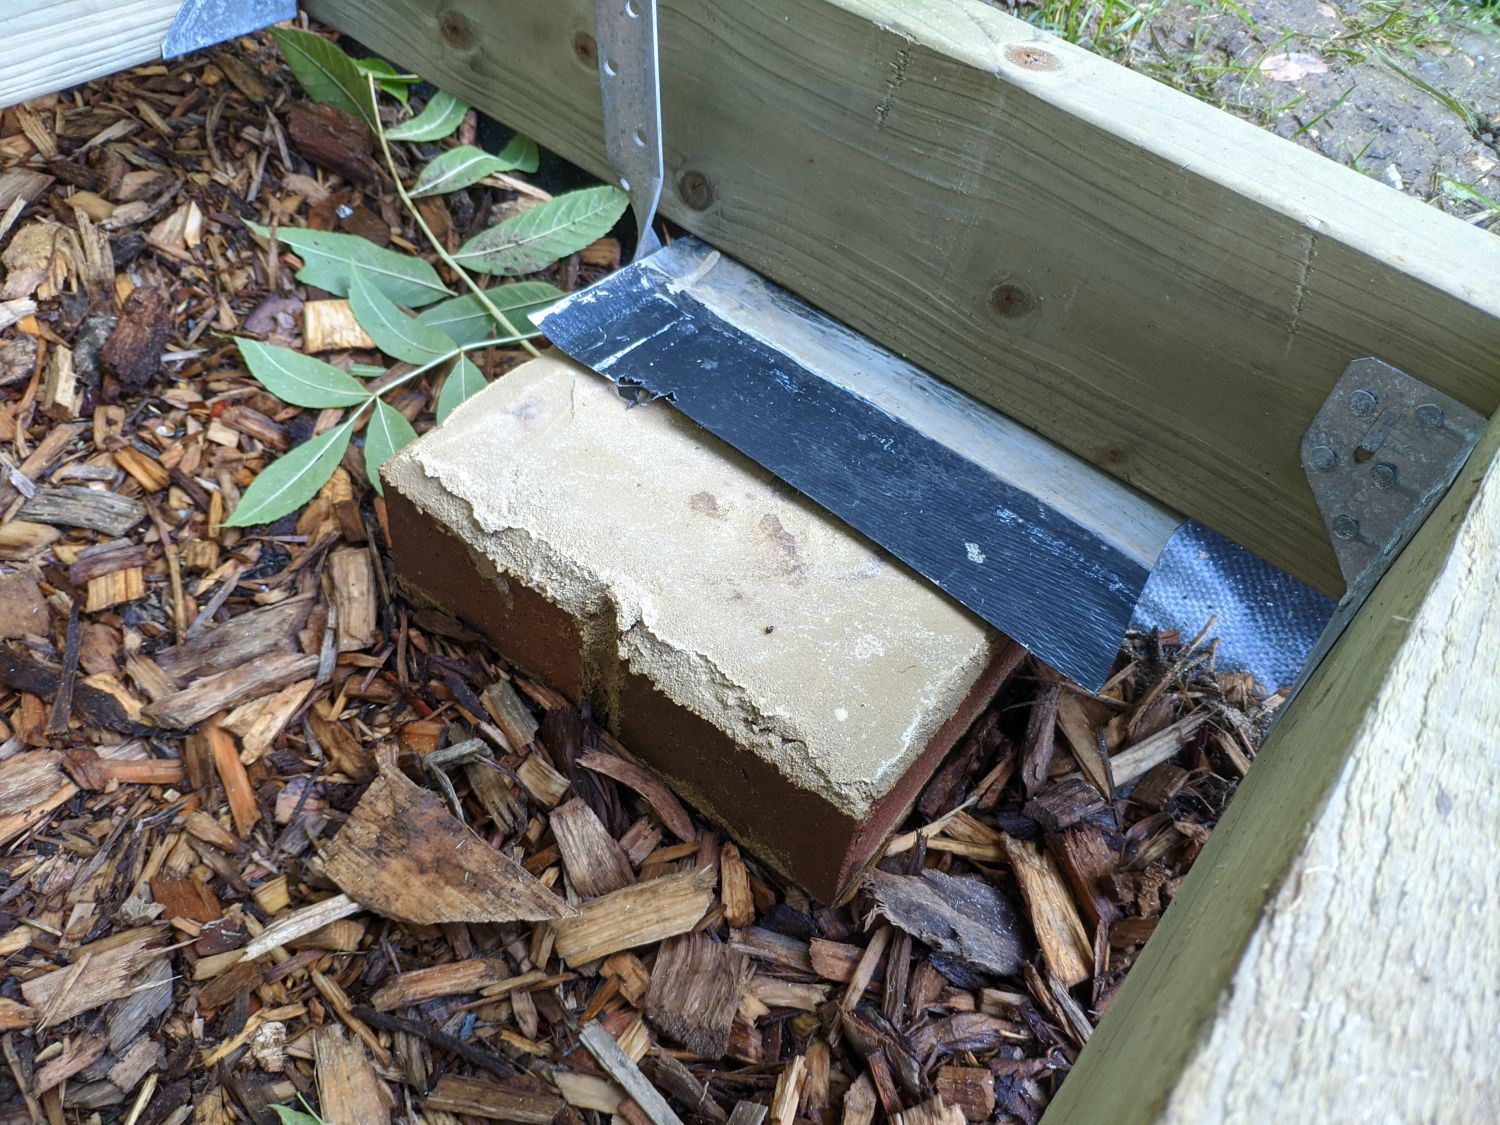
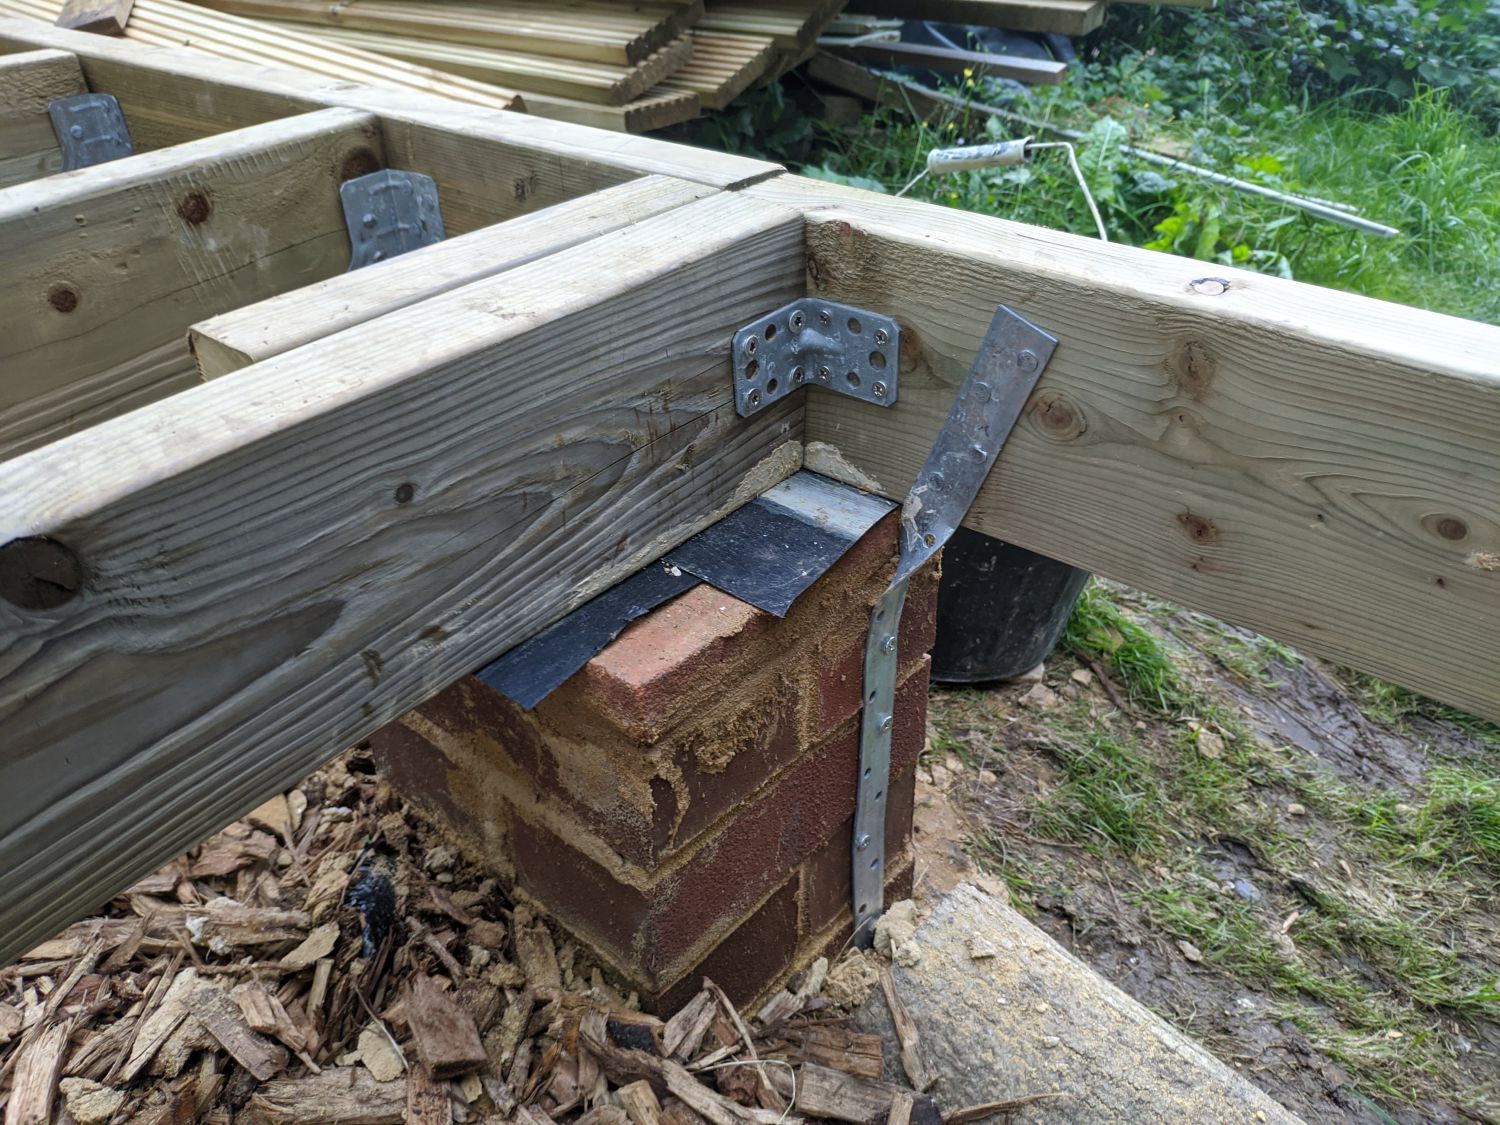
Additionally I added a DPC between all timbers and the brick piers to prevent rising damp.
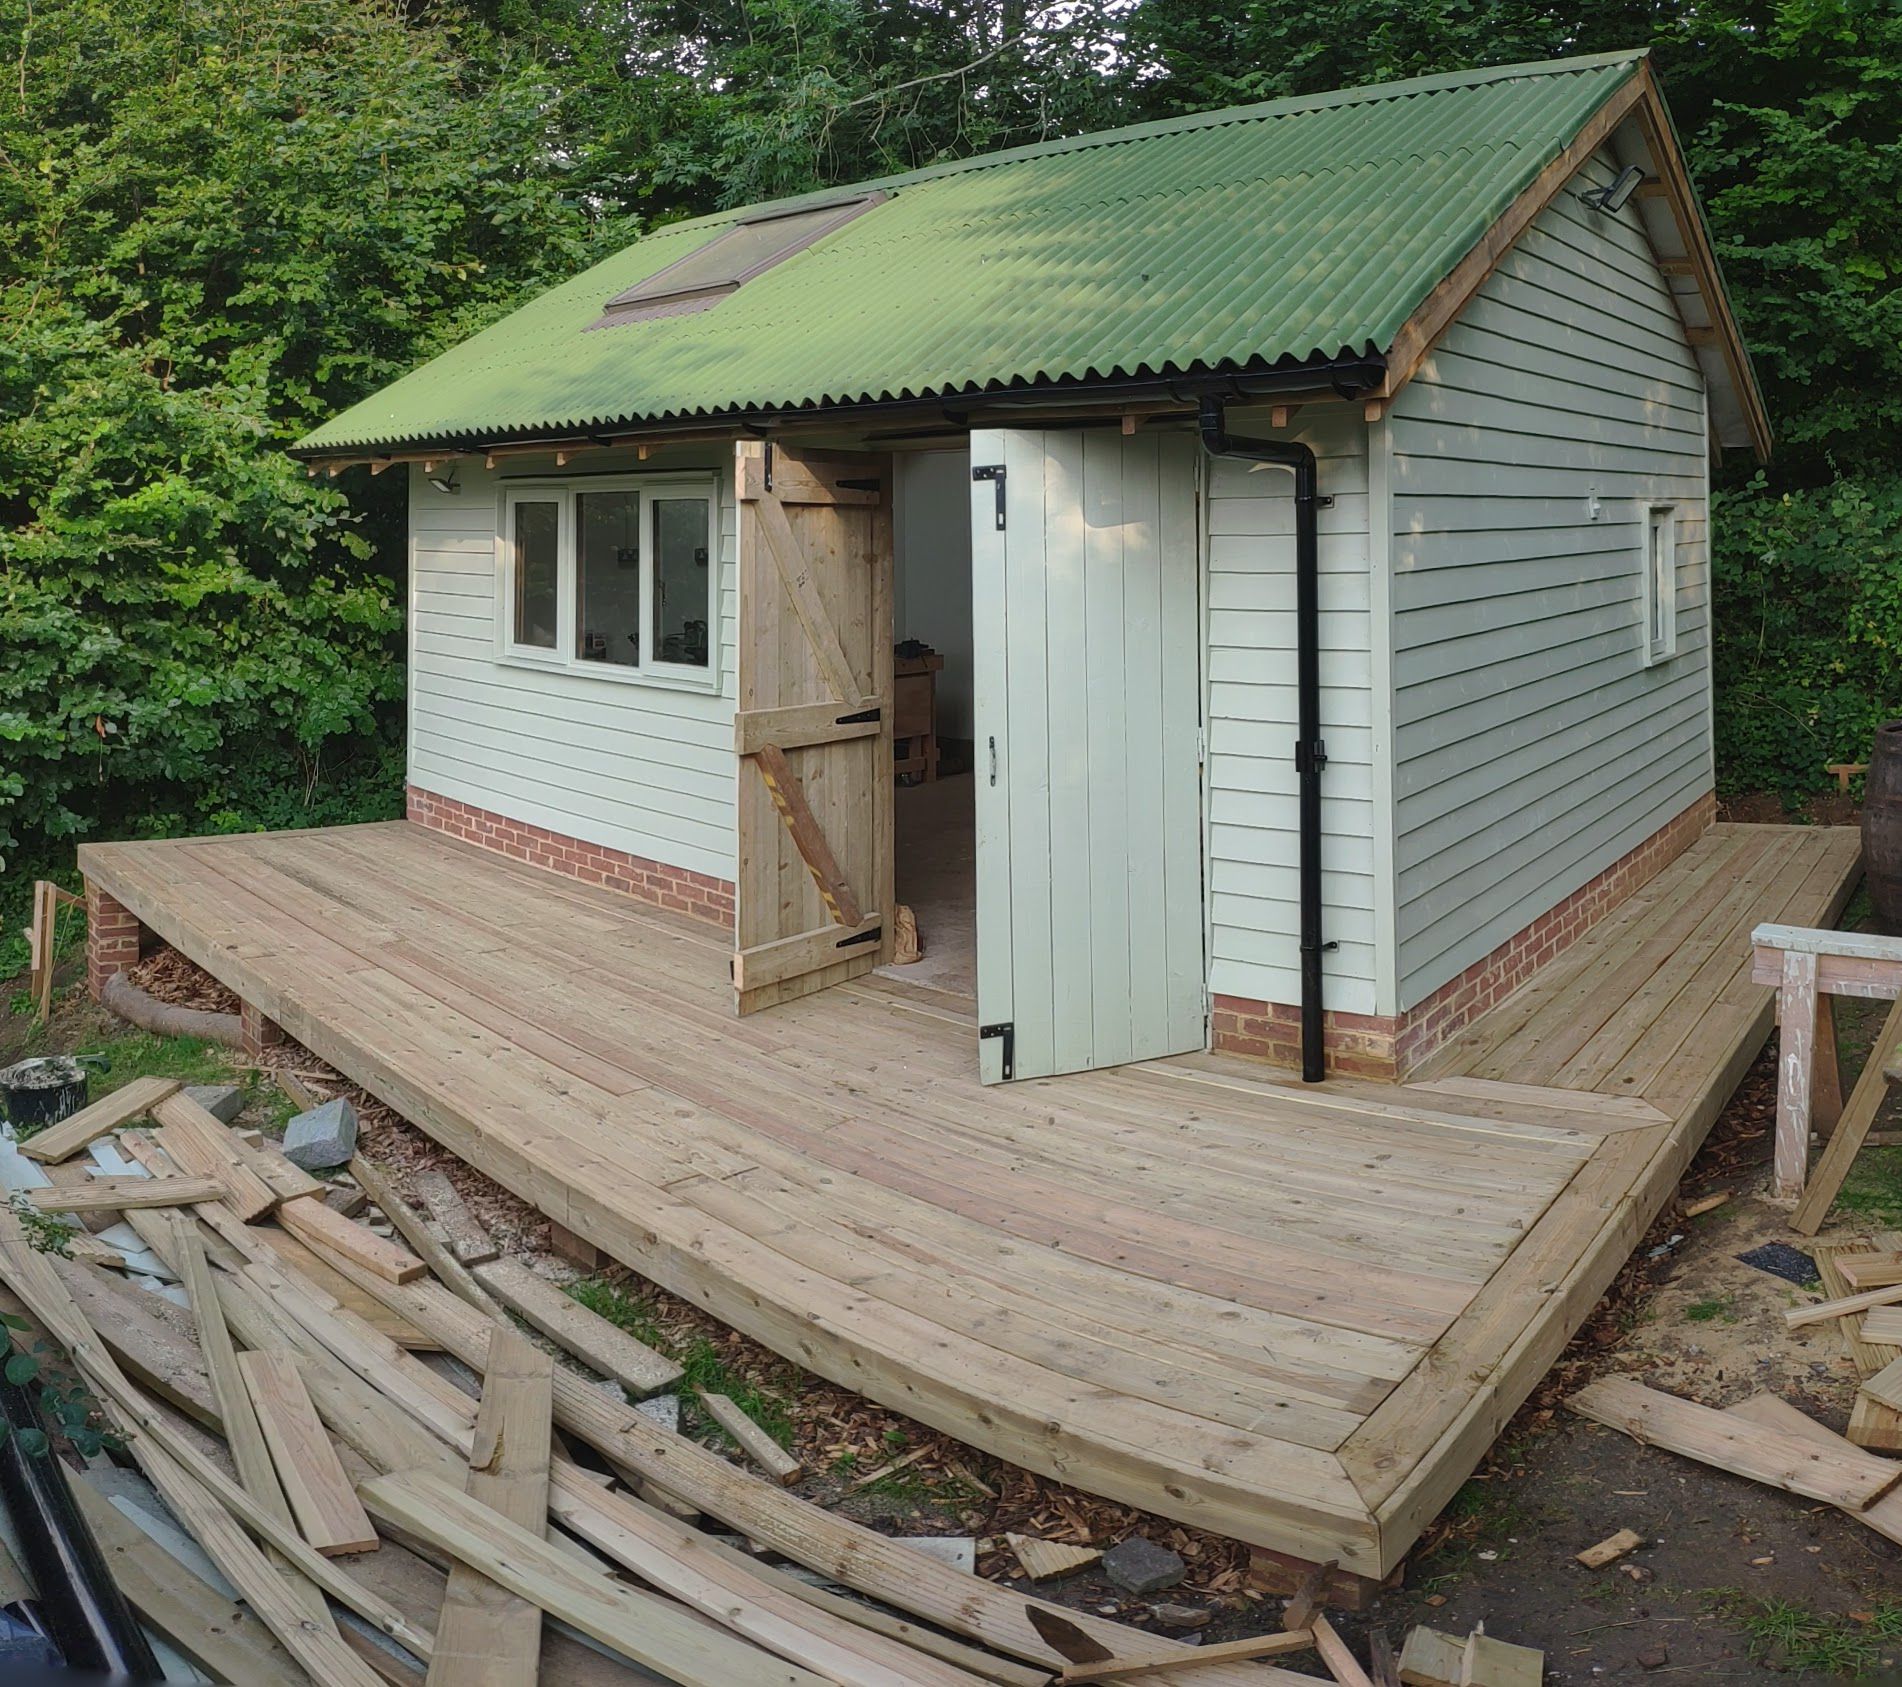
Boarding
To finish, I had finally reached one of the more satisfying stages of the project.
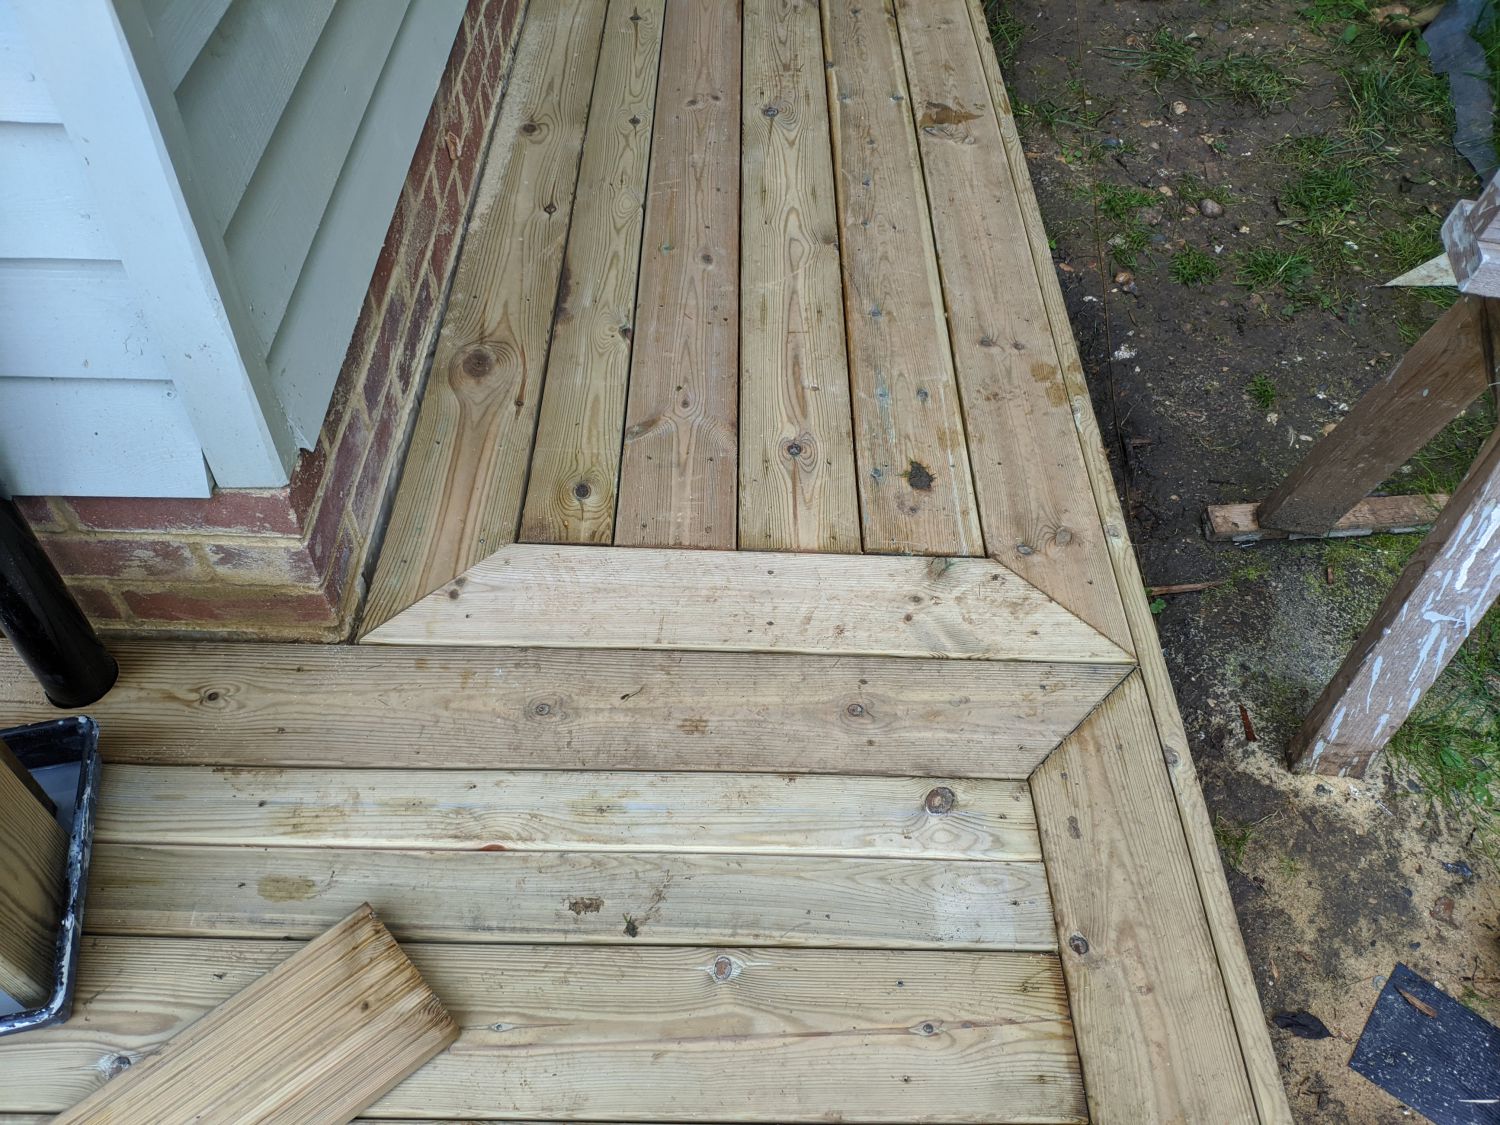
I considered all sorts of patterns and corner interations for the decking boards but in the end decided to stick with a simple ‘picture frame’ style. To match another deck near the site I laid my decking boards with grooves down (arguably better anyway to prevent collection of rainwater).
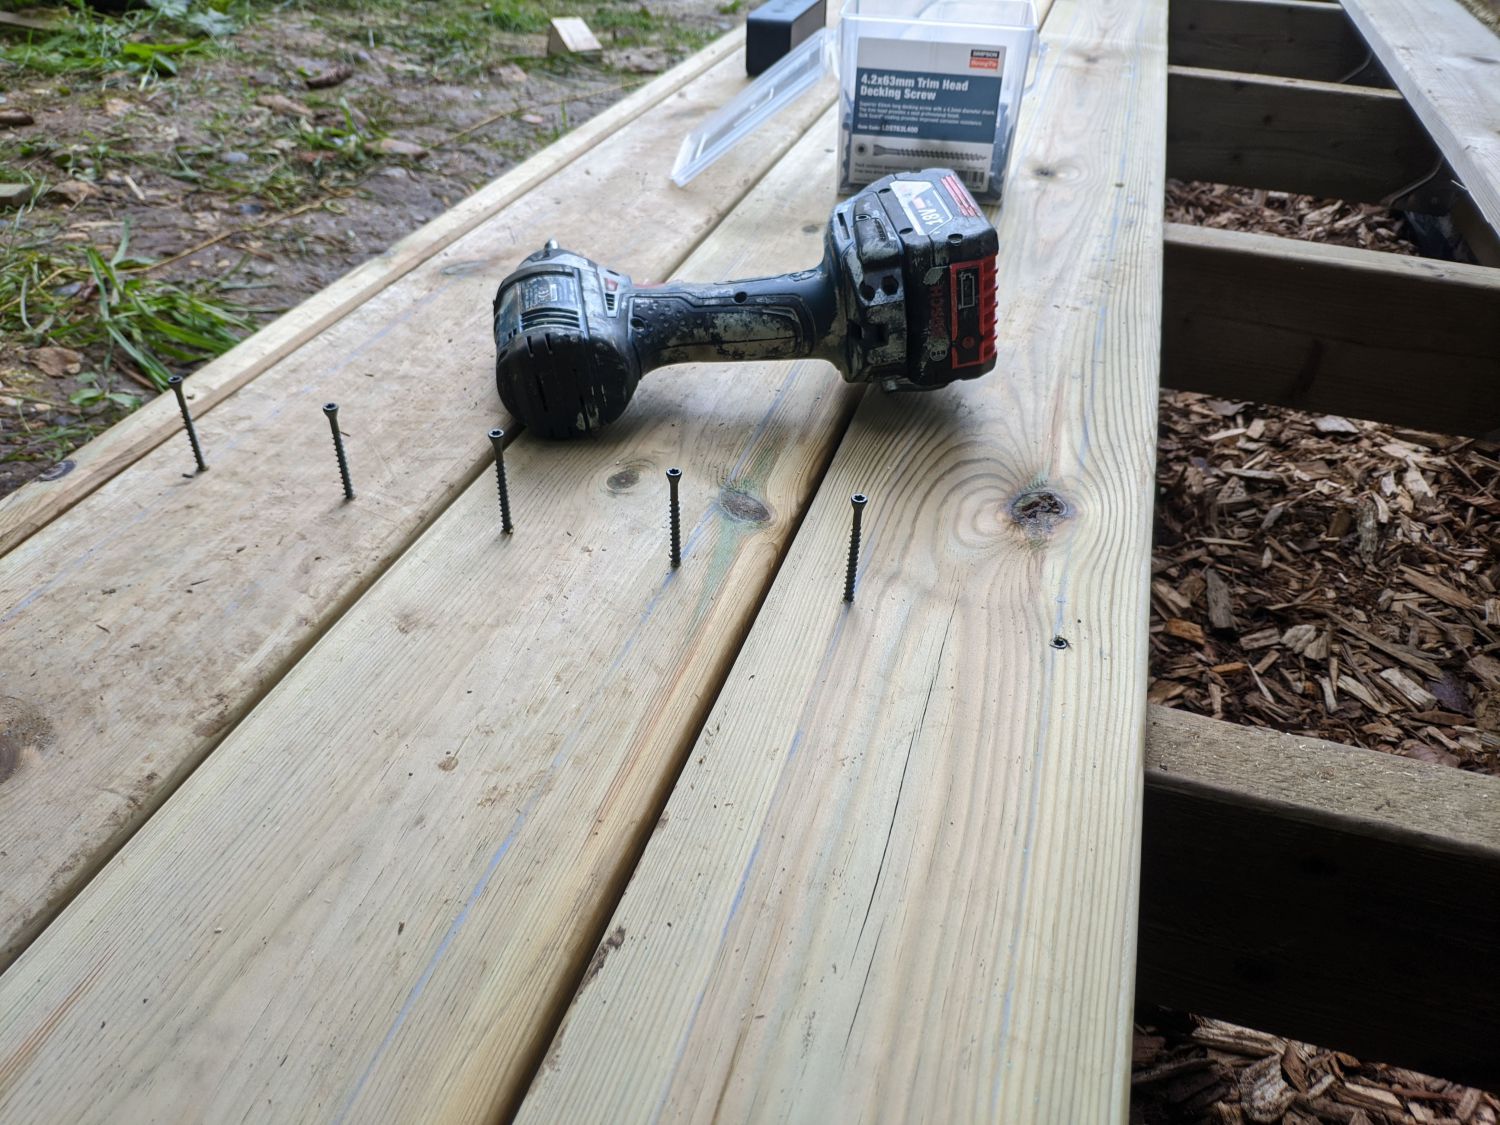
Each board was 28*145*4800mm. I marked in 35mm from each side on every board and snapped a chalk line to ensure all my fixings were consistently spaced from the edges. Between boards I left 3mm, and at butt ends I left 2mm; theses spacings are in aticipation of shrinkage as the boards were still farily wet when I fixed them.
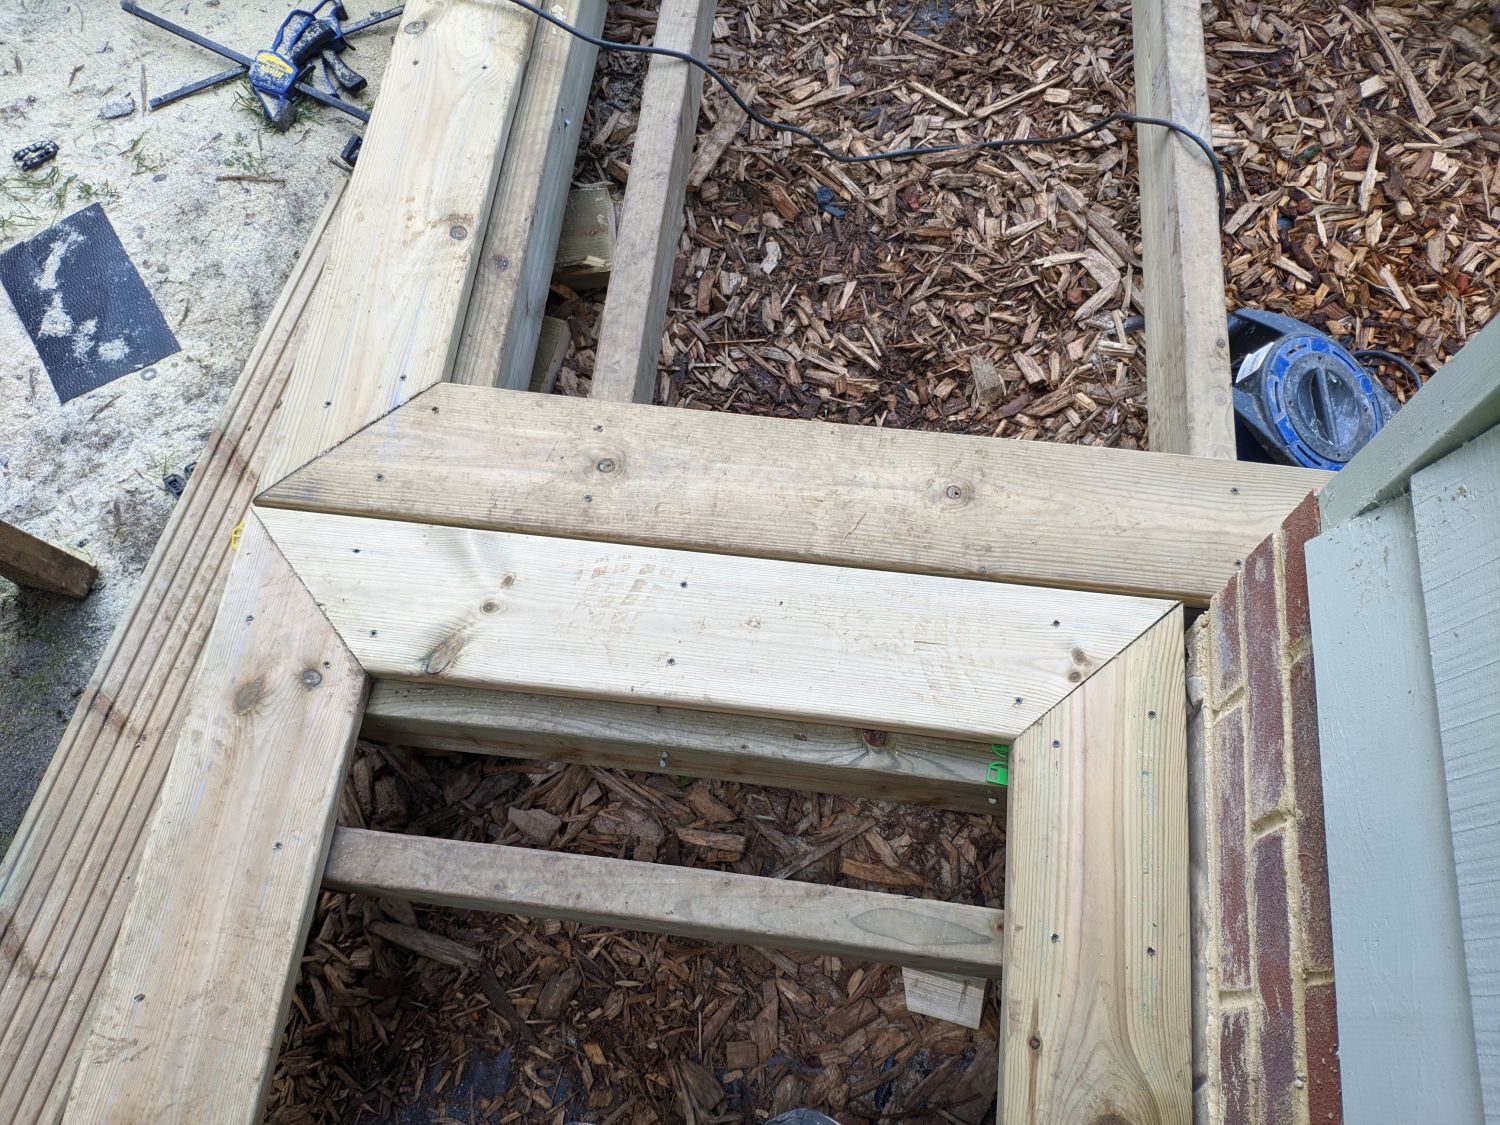
I started by fixing the picture frame and then added the fascia board, using packers to ensure it was perfectly parallel with the front of the building. In some cases this led to a gap of up to 20mm.
All boards were fixed with LDST63 screws at every joist, on each chalk line. This is a coated screw so will rust eventually, but hopefully not before the boards themselves deteriorate.
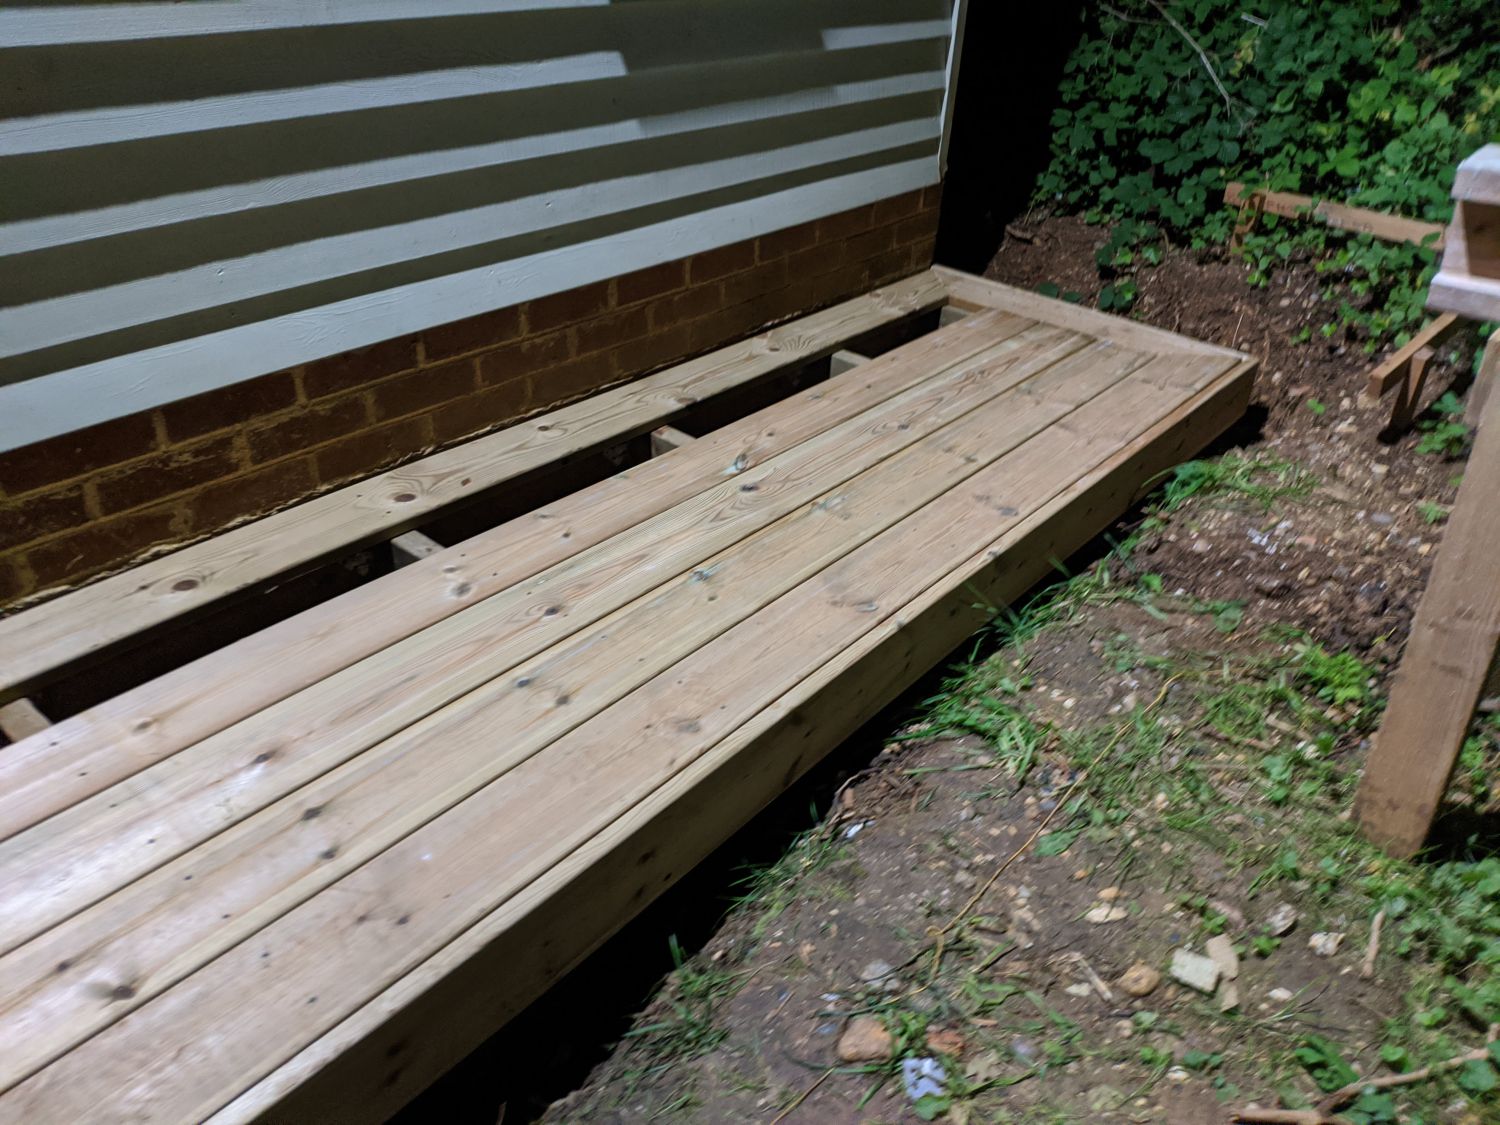
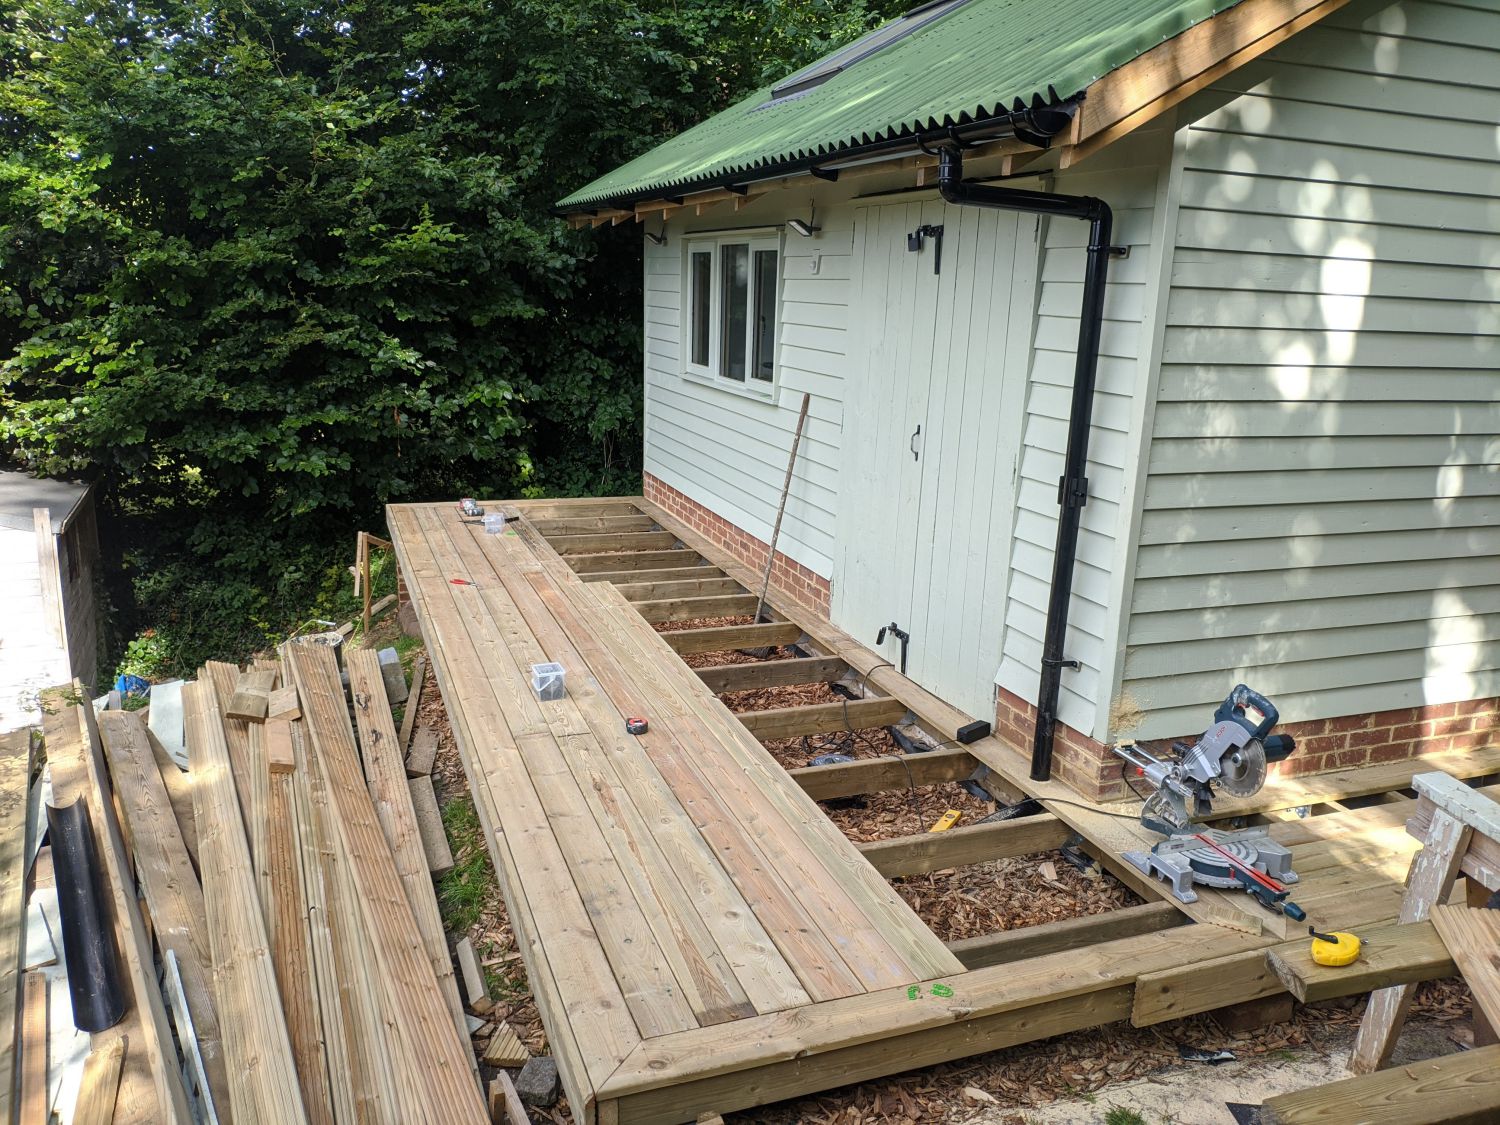
The gutter runs directly under the deck which I determined to provide sufficient drainage, even during heavy rain. Eventually this will be hooked up to a water butt which should reduce water running under the deck anyway. When boarding the front area I staggered the joints to hide the cuts.
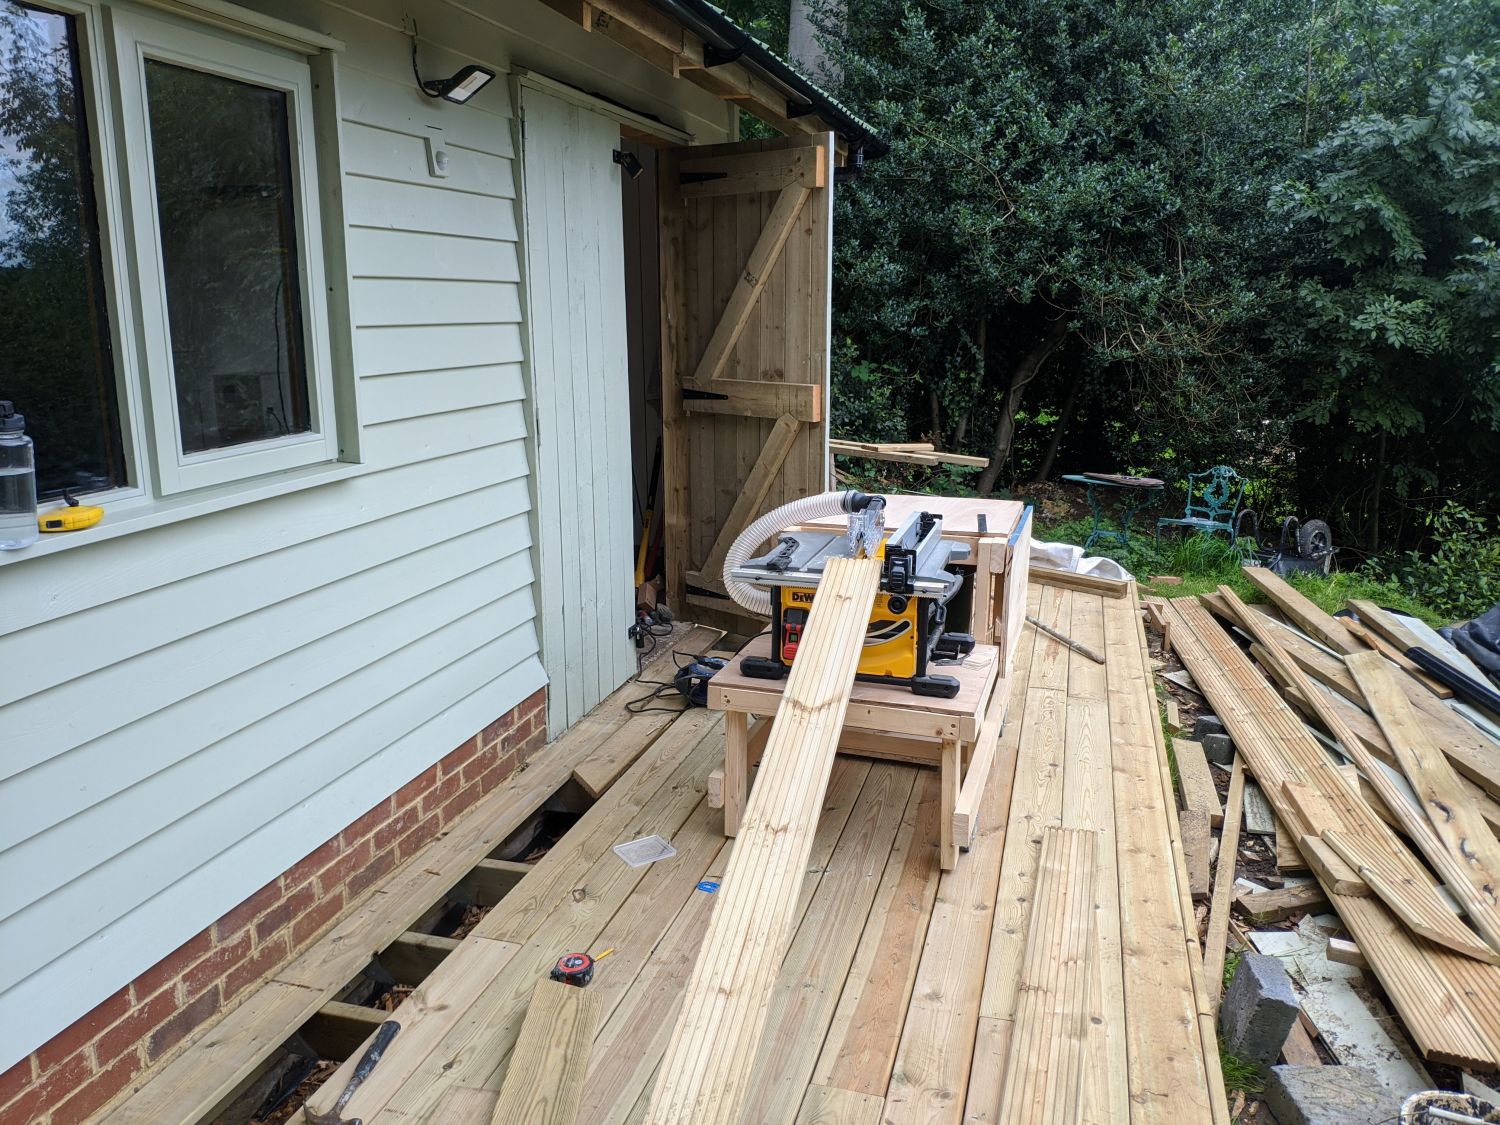
For the last two boards I ripped down timbers and rounded over the edges to create narrower decking boards which fit perfectly in the remaining space.
Conclusion
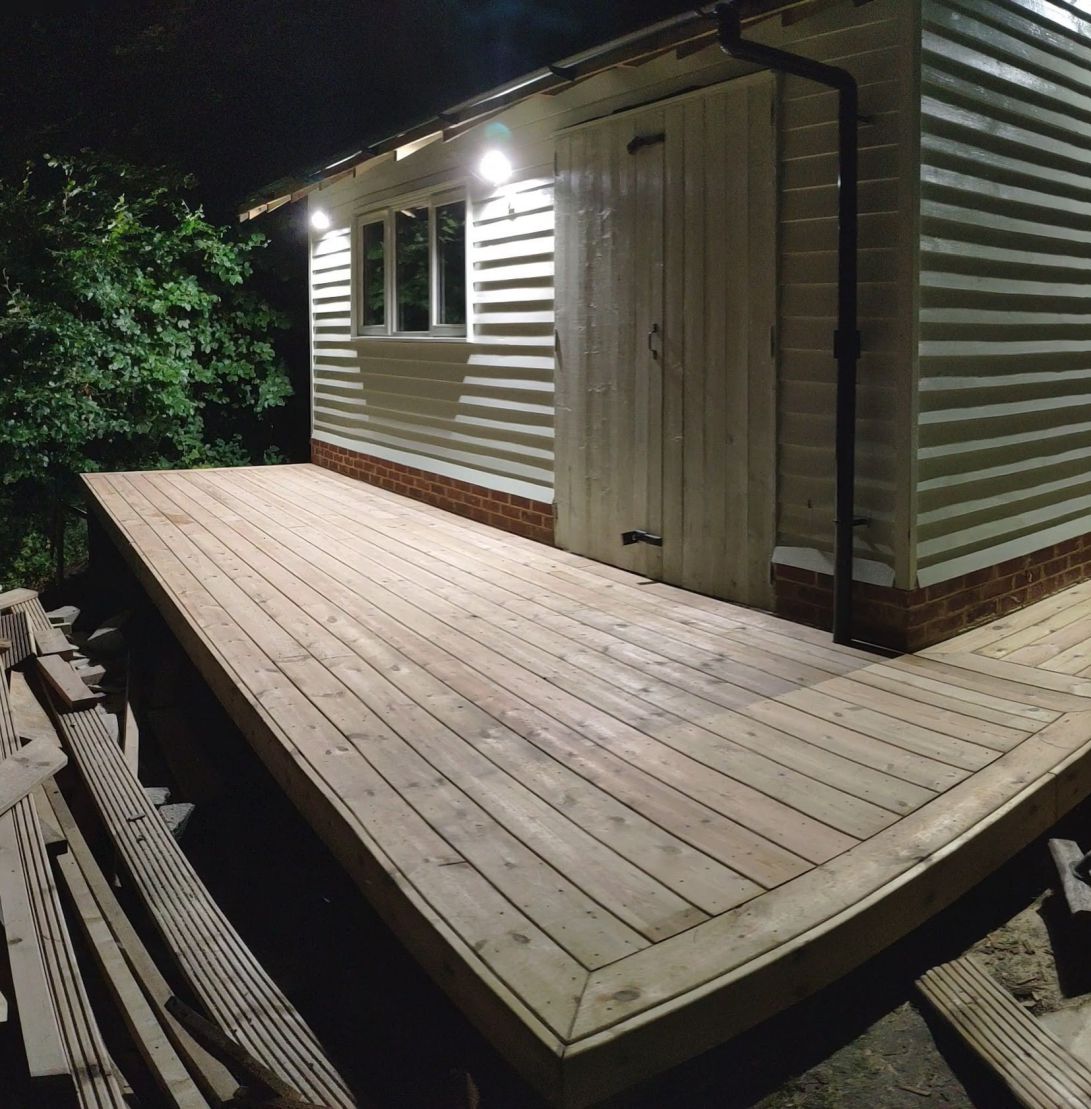


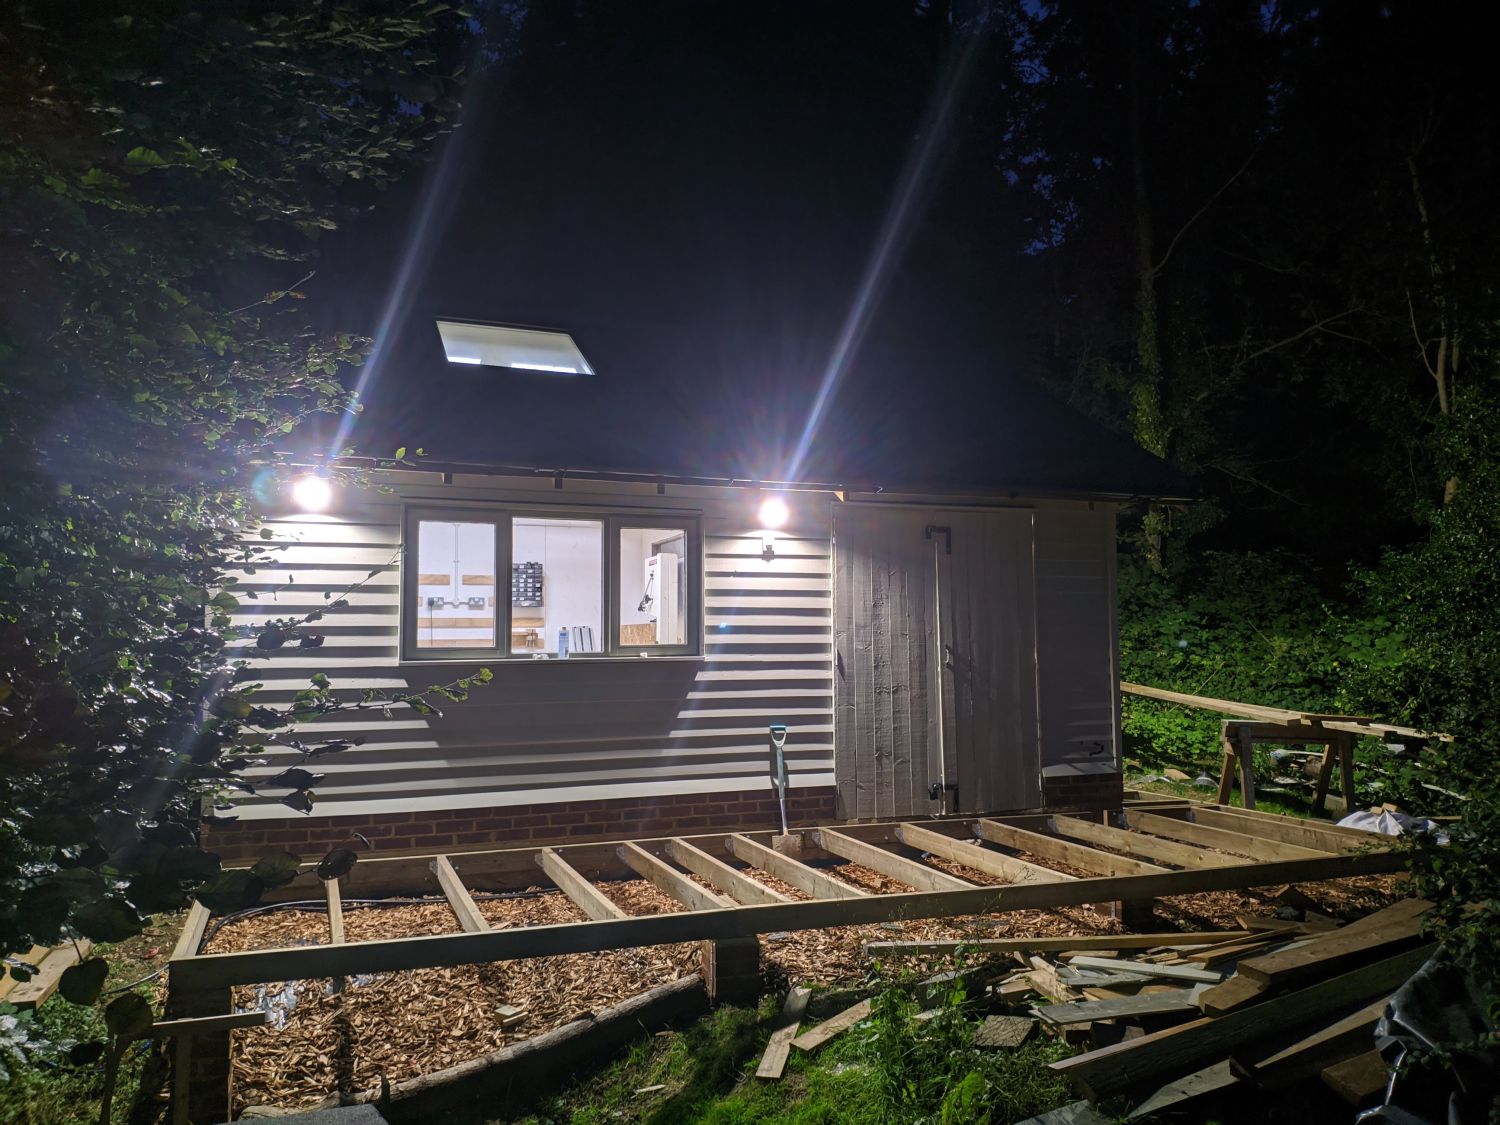
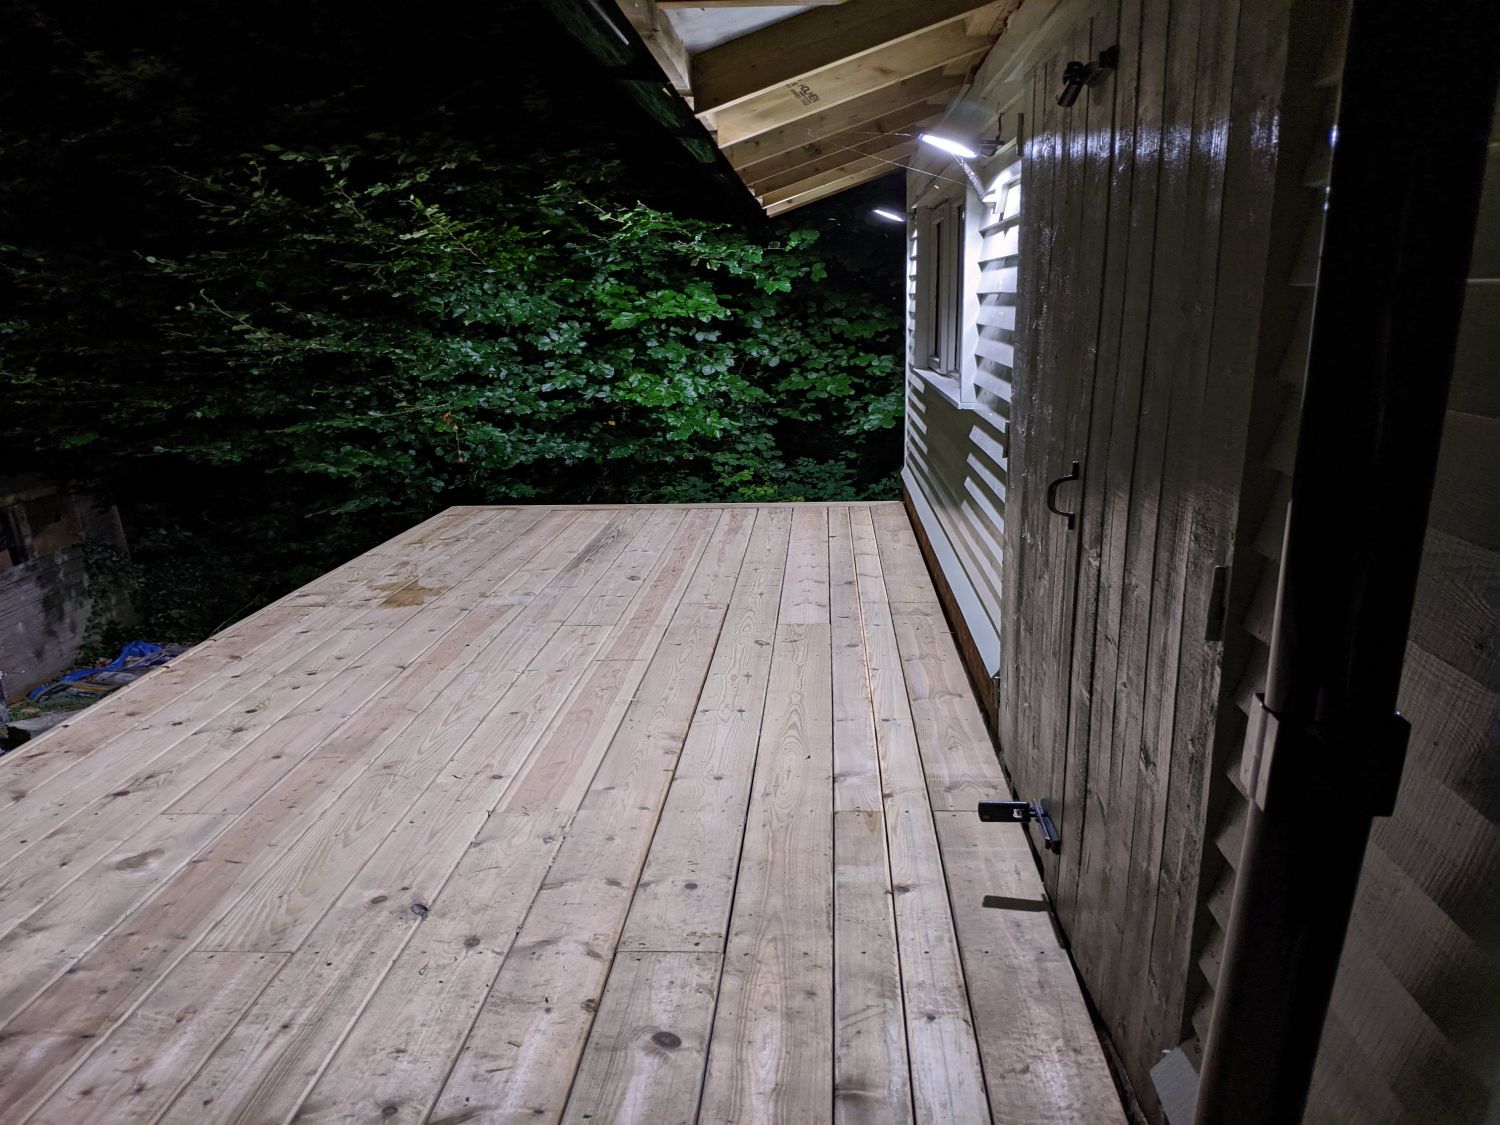
The finished deck provides a smart way to hide the concrete foundation and makes it much nicer to move things in and out of the workshop. Paired with the outdoor lighting, it creates a huge amount of working space, even at night.