About a year ago, I moved from one room to another, and the new space proved unsuitable for my old pair of desks. A chance to put my workshop to good use I thought!
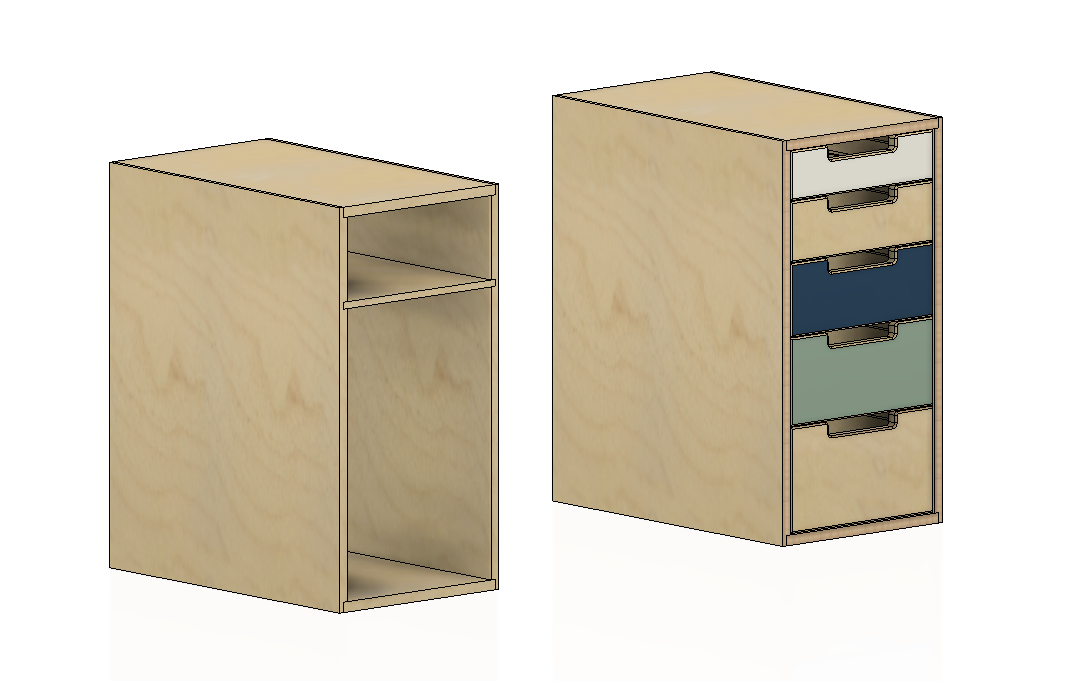
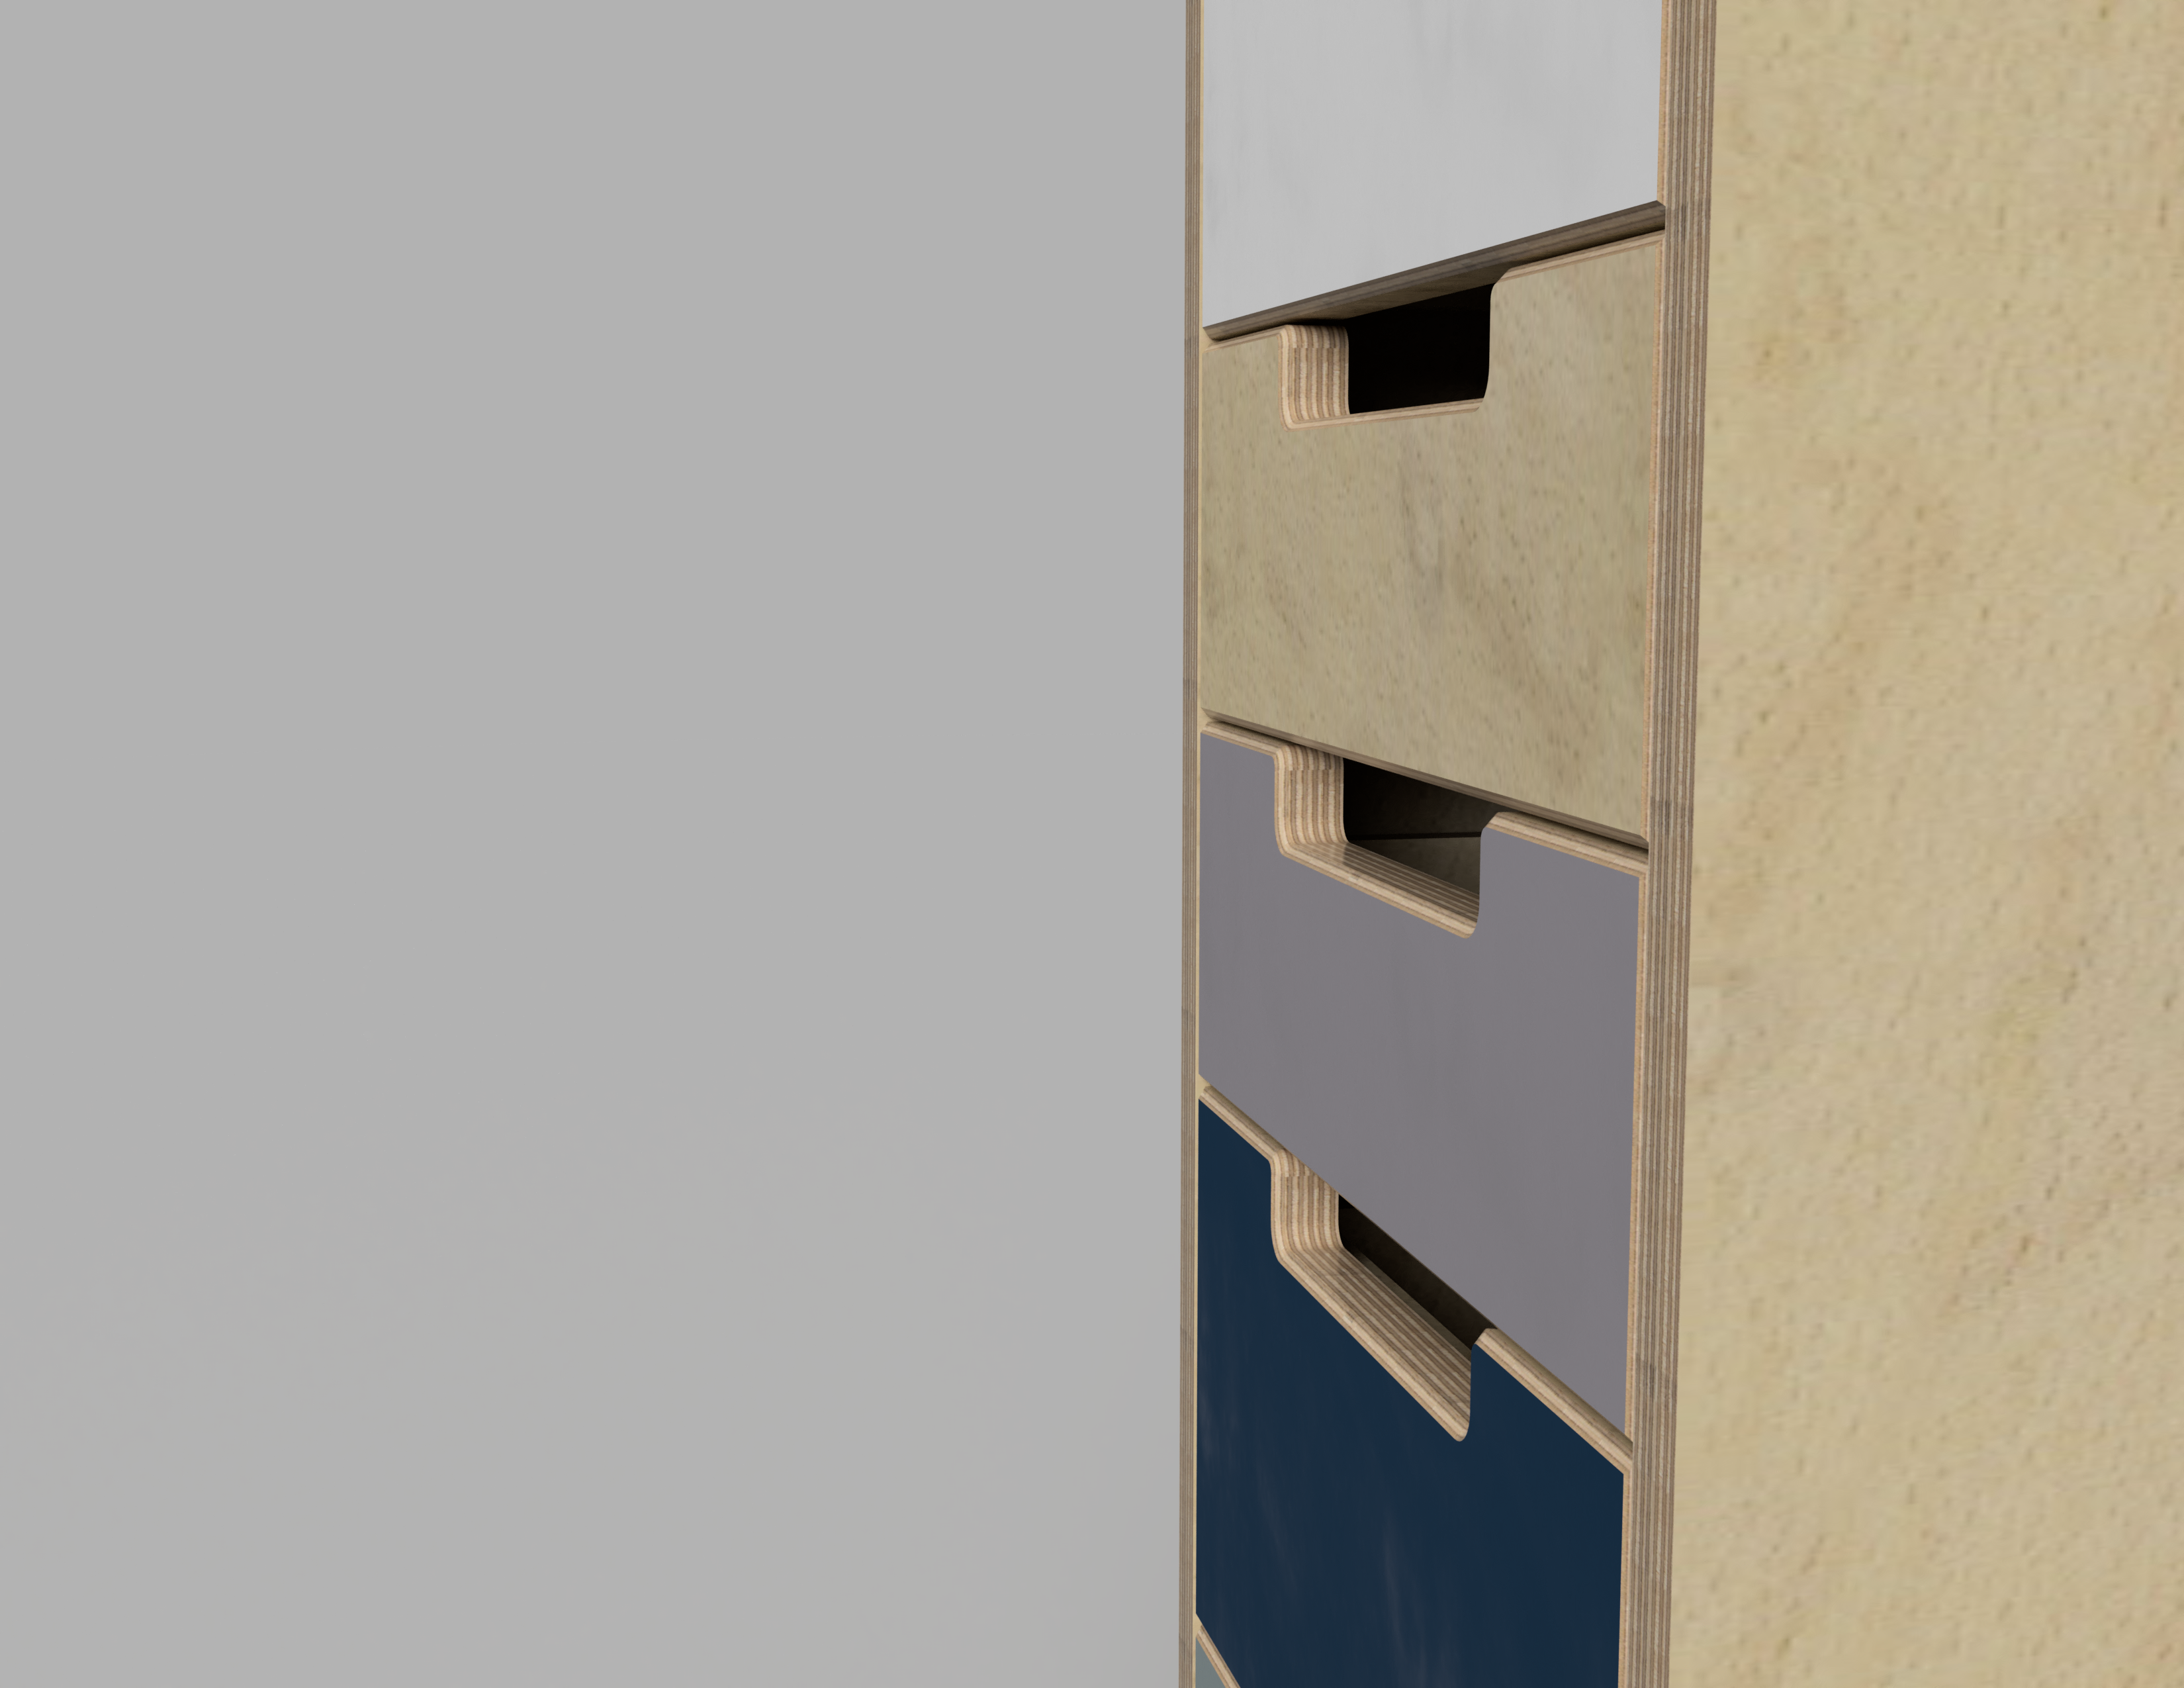
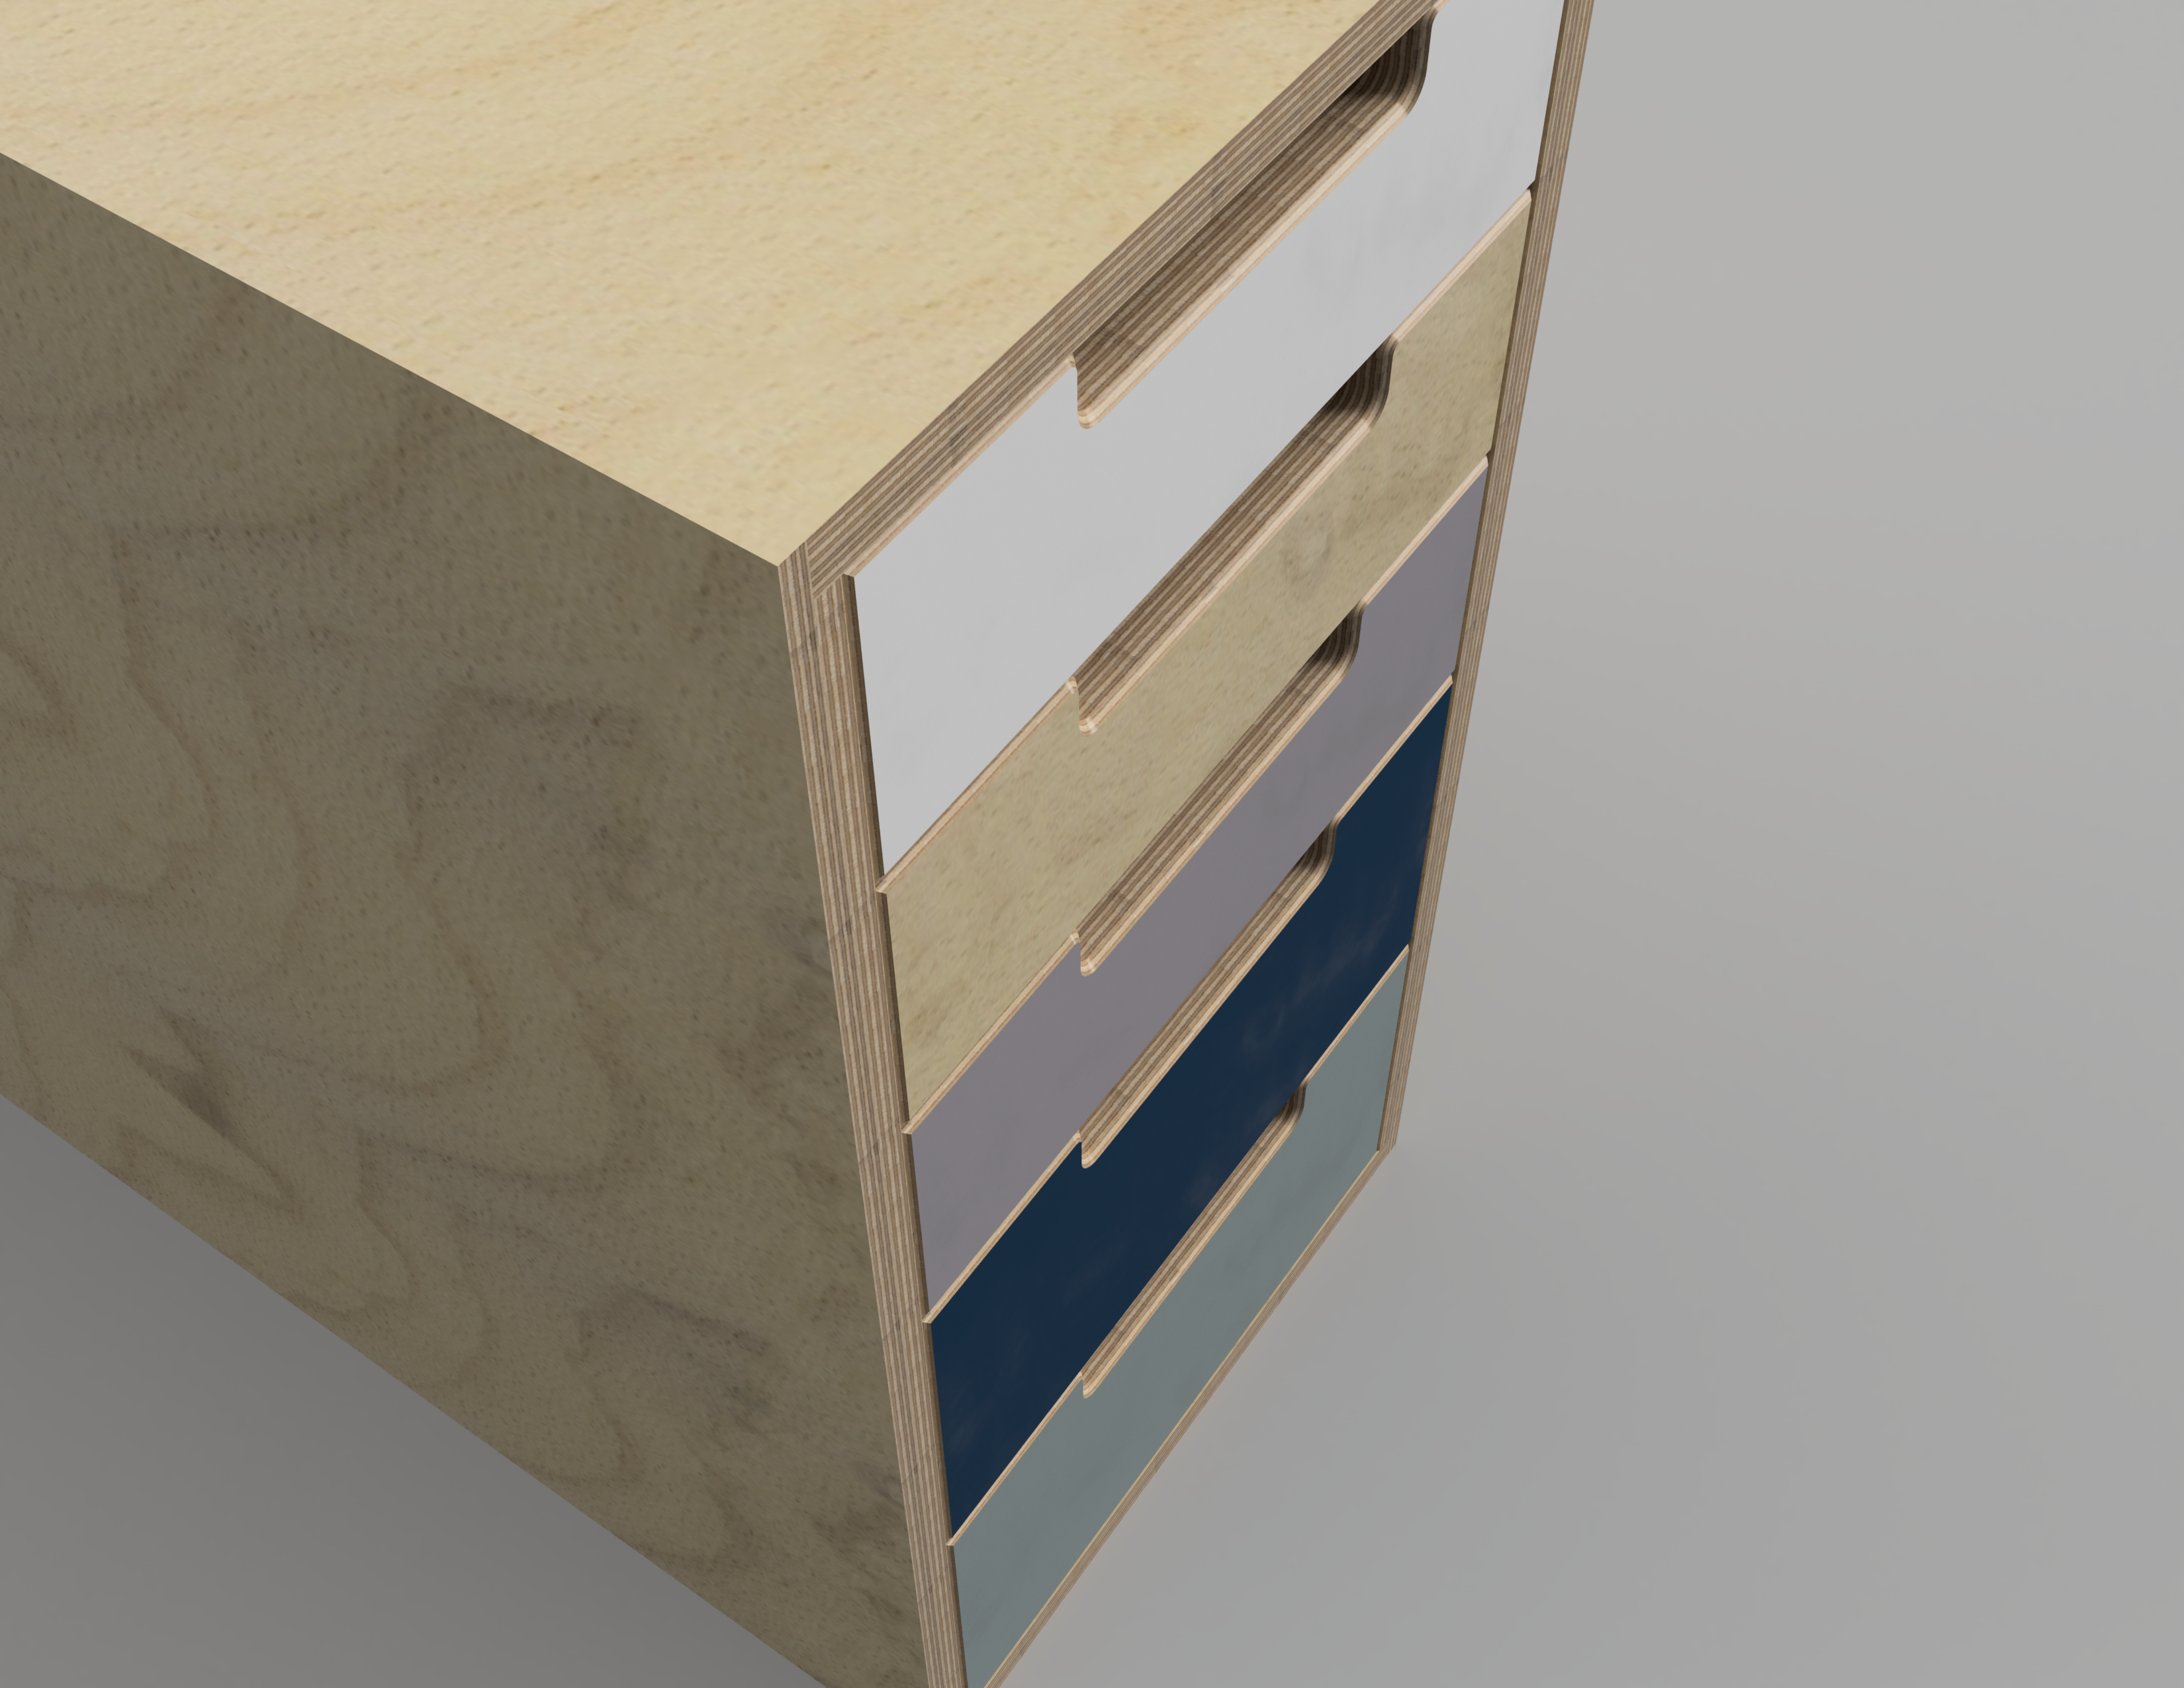
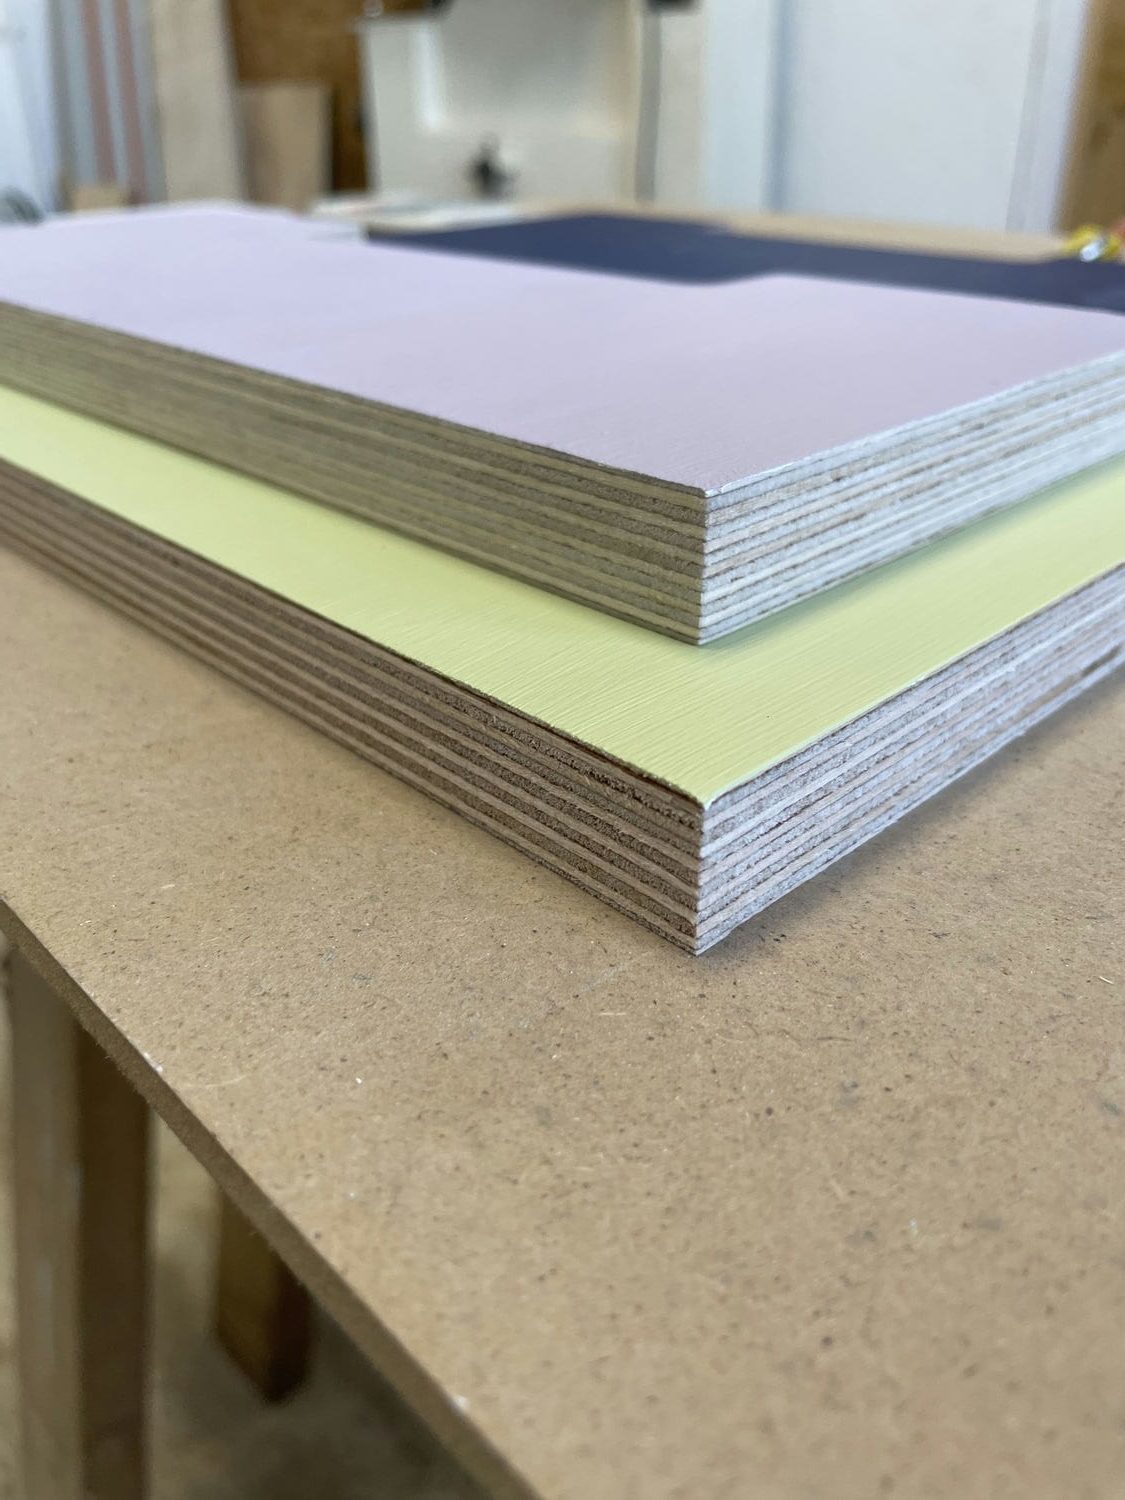
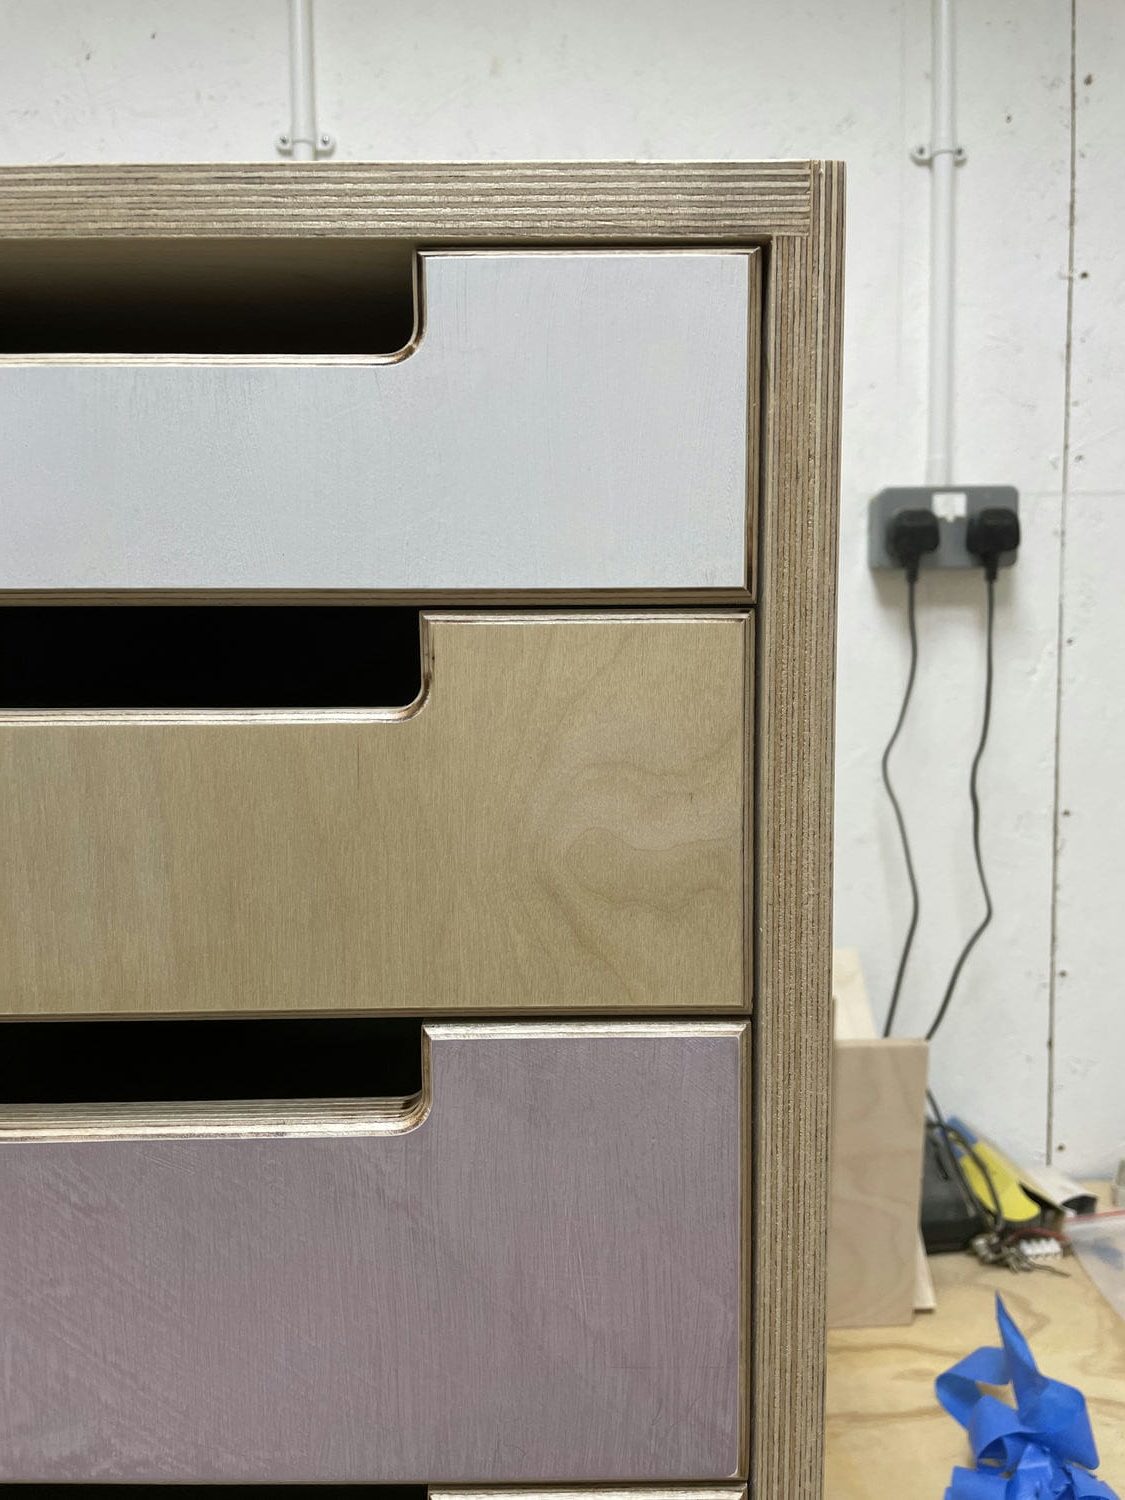
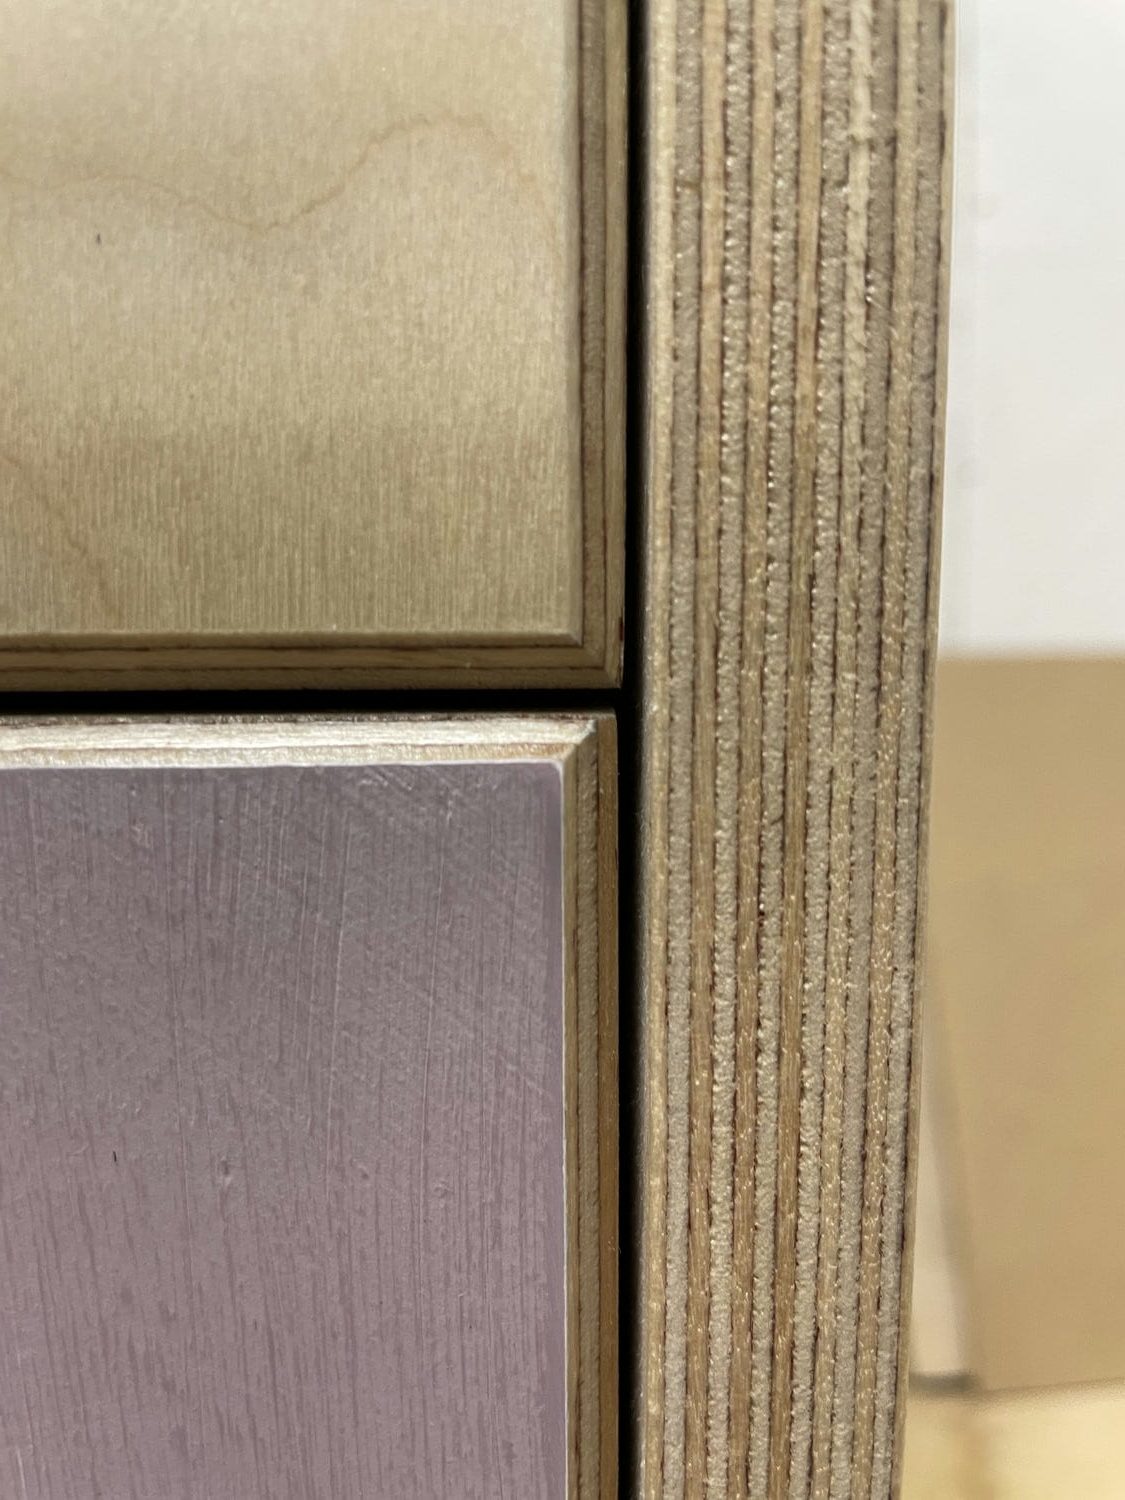
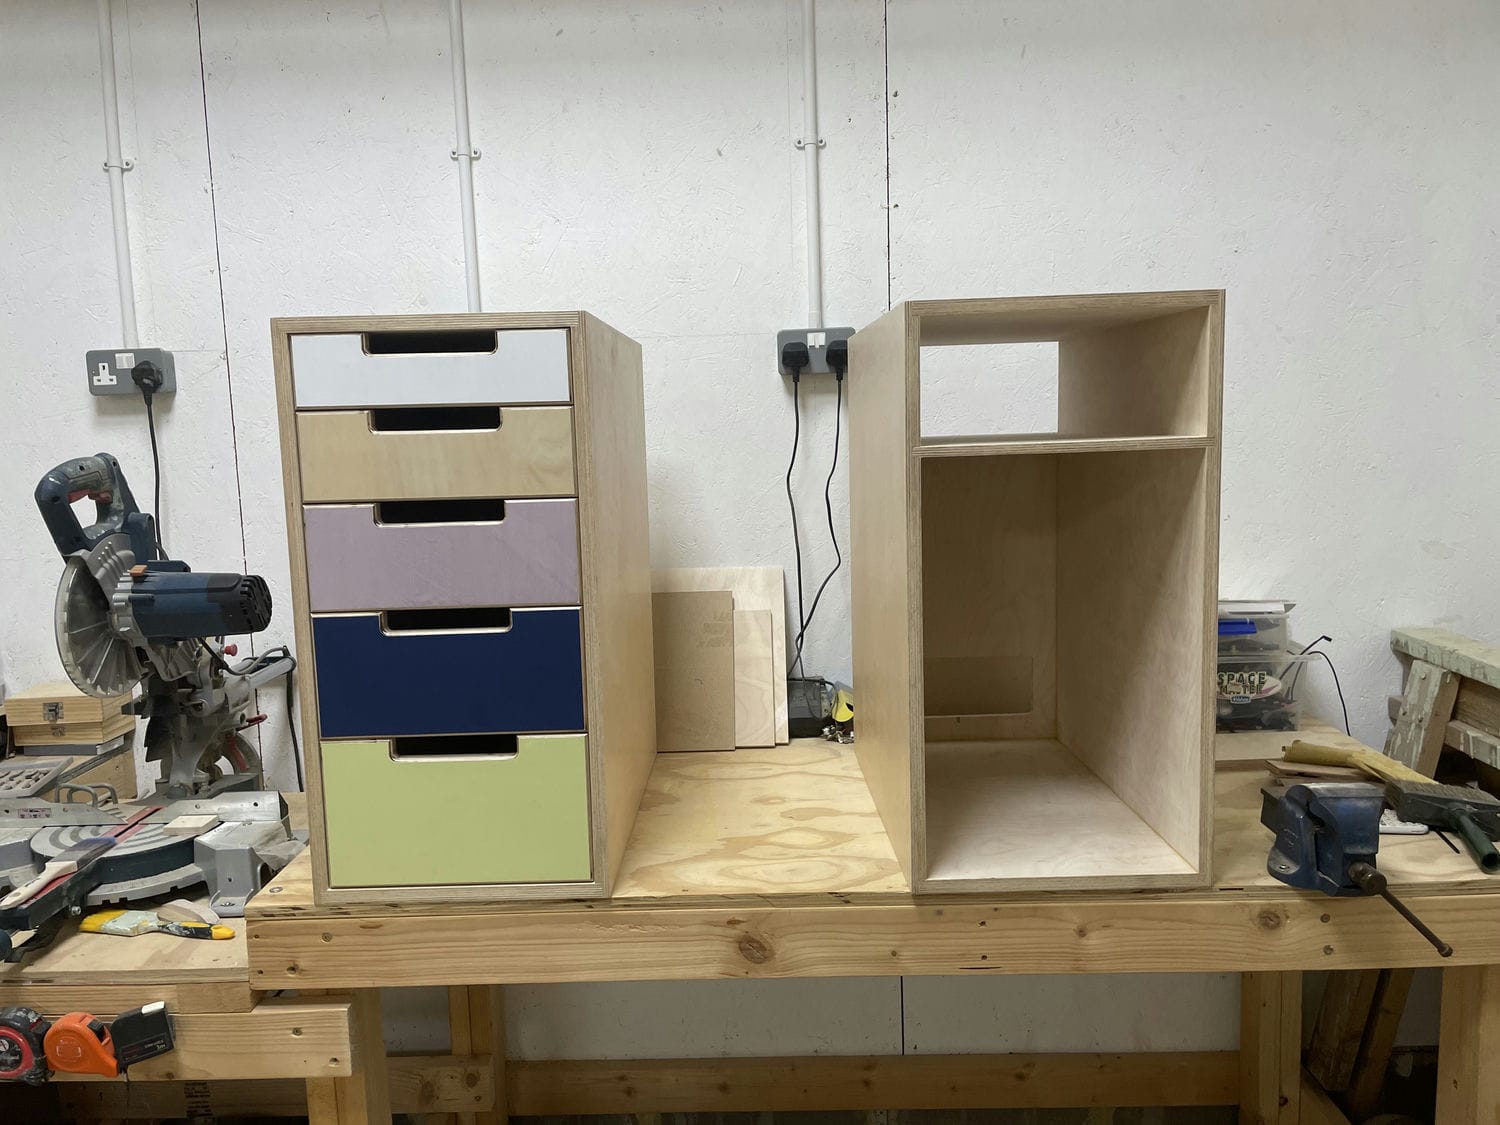
I wanted storage space in addition to desk space so decided to build two cabinets, one containing drawers and one to house my PC. Inspired by design studios like Lozi and “truth to material” ideas, I ended upon a birch plywood construction, with exposed edge-grain revealing the layers of veneer. Colourful inset drawer fronts provide a modern and playful finish.
CAD and material sourcing
The first step was to get the whole thing designed in CAD – as usual I used Fusion 360. It was a bit fiddly to get edge-grain textures setup but it definitely made experimenting with aesthetics and visualising the final design much easier. This is where I decided on the chamfered edges and radiused drawer pulls, both of which really add to the design.
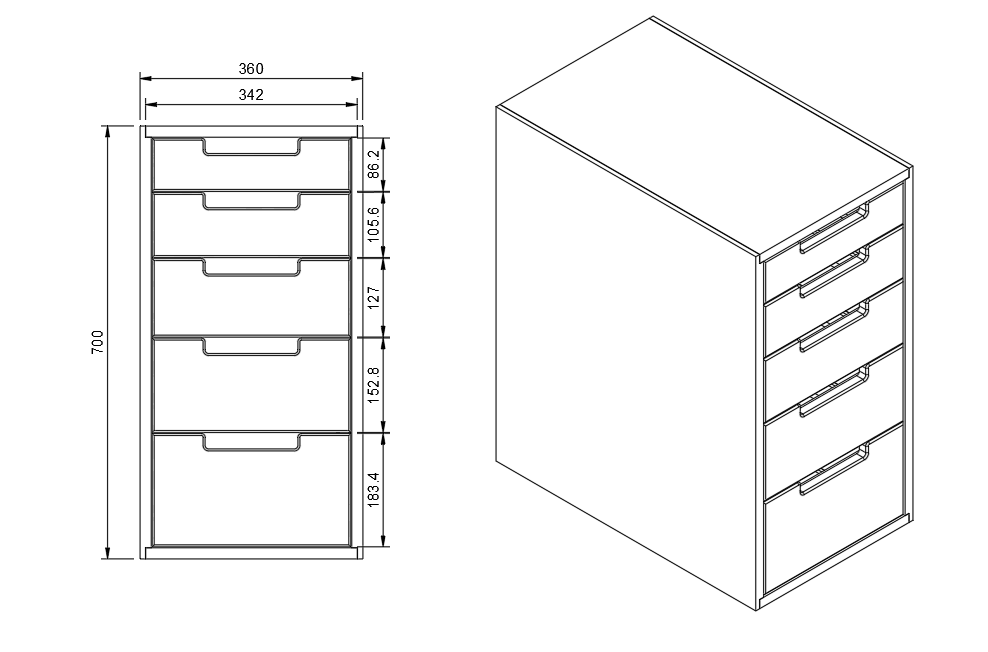
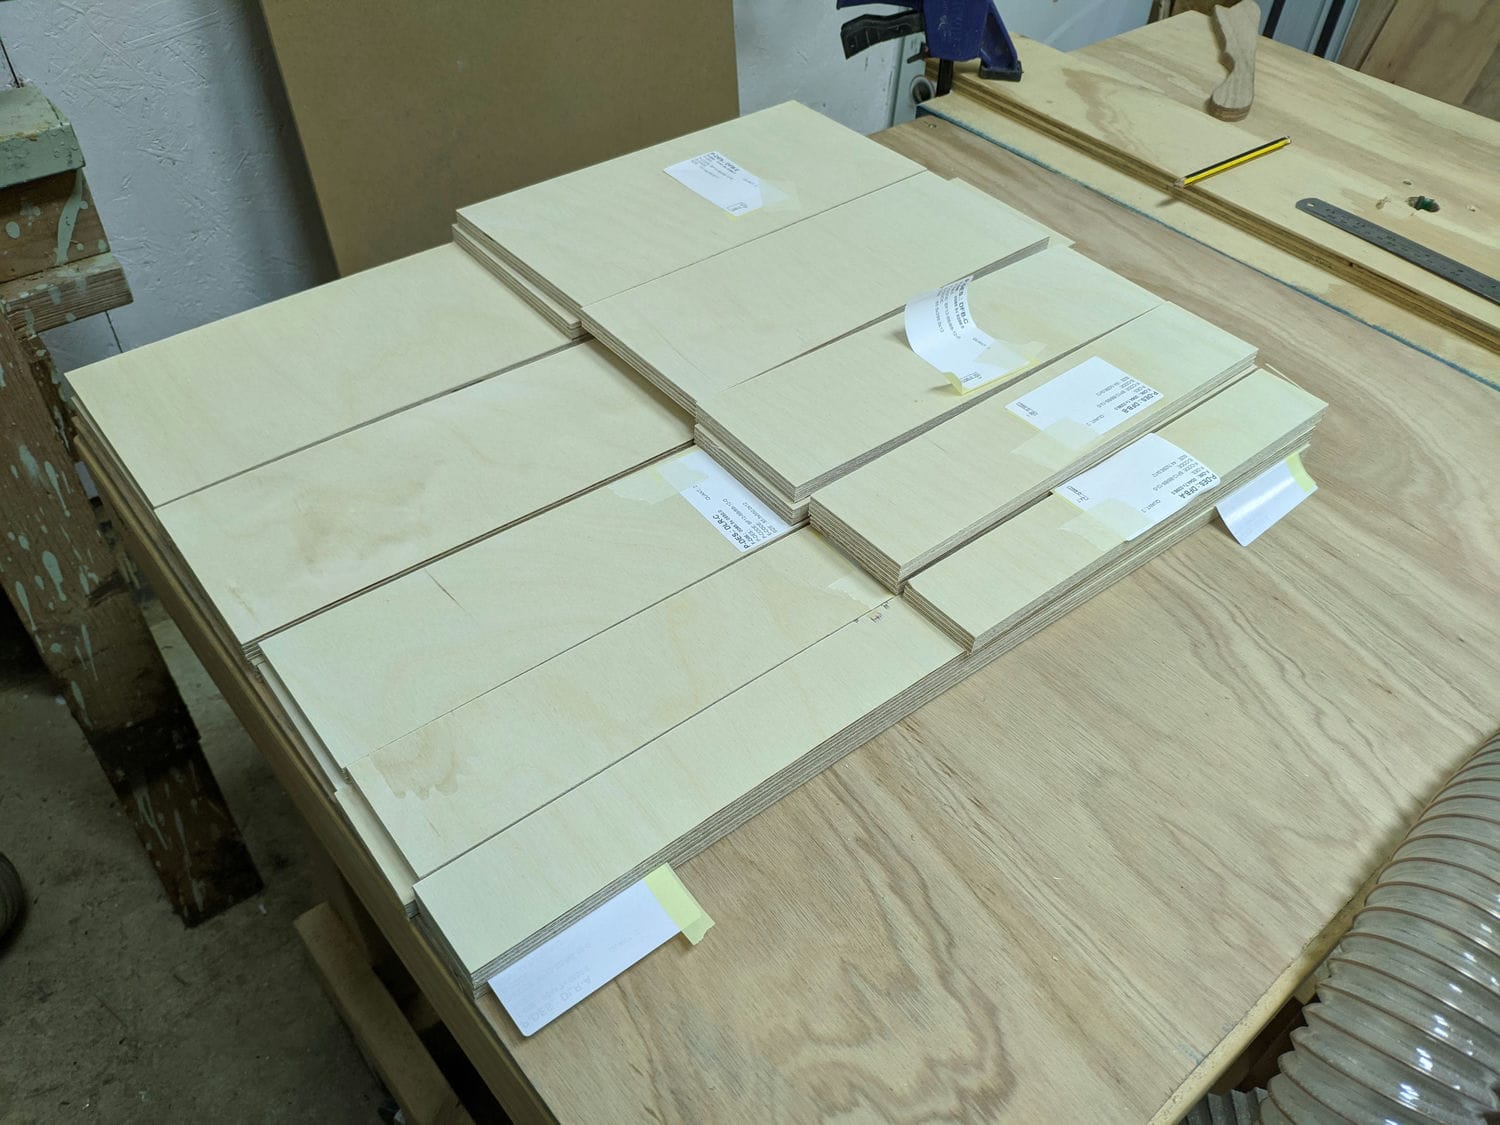
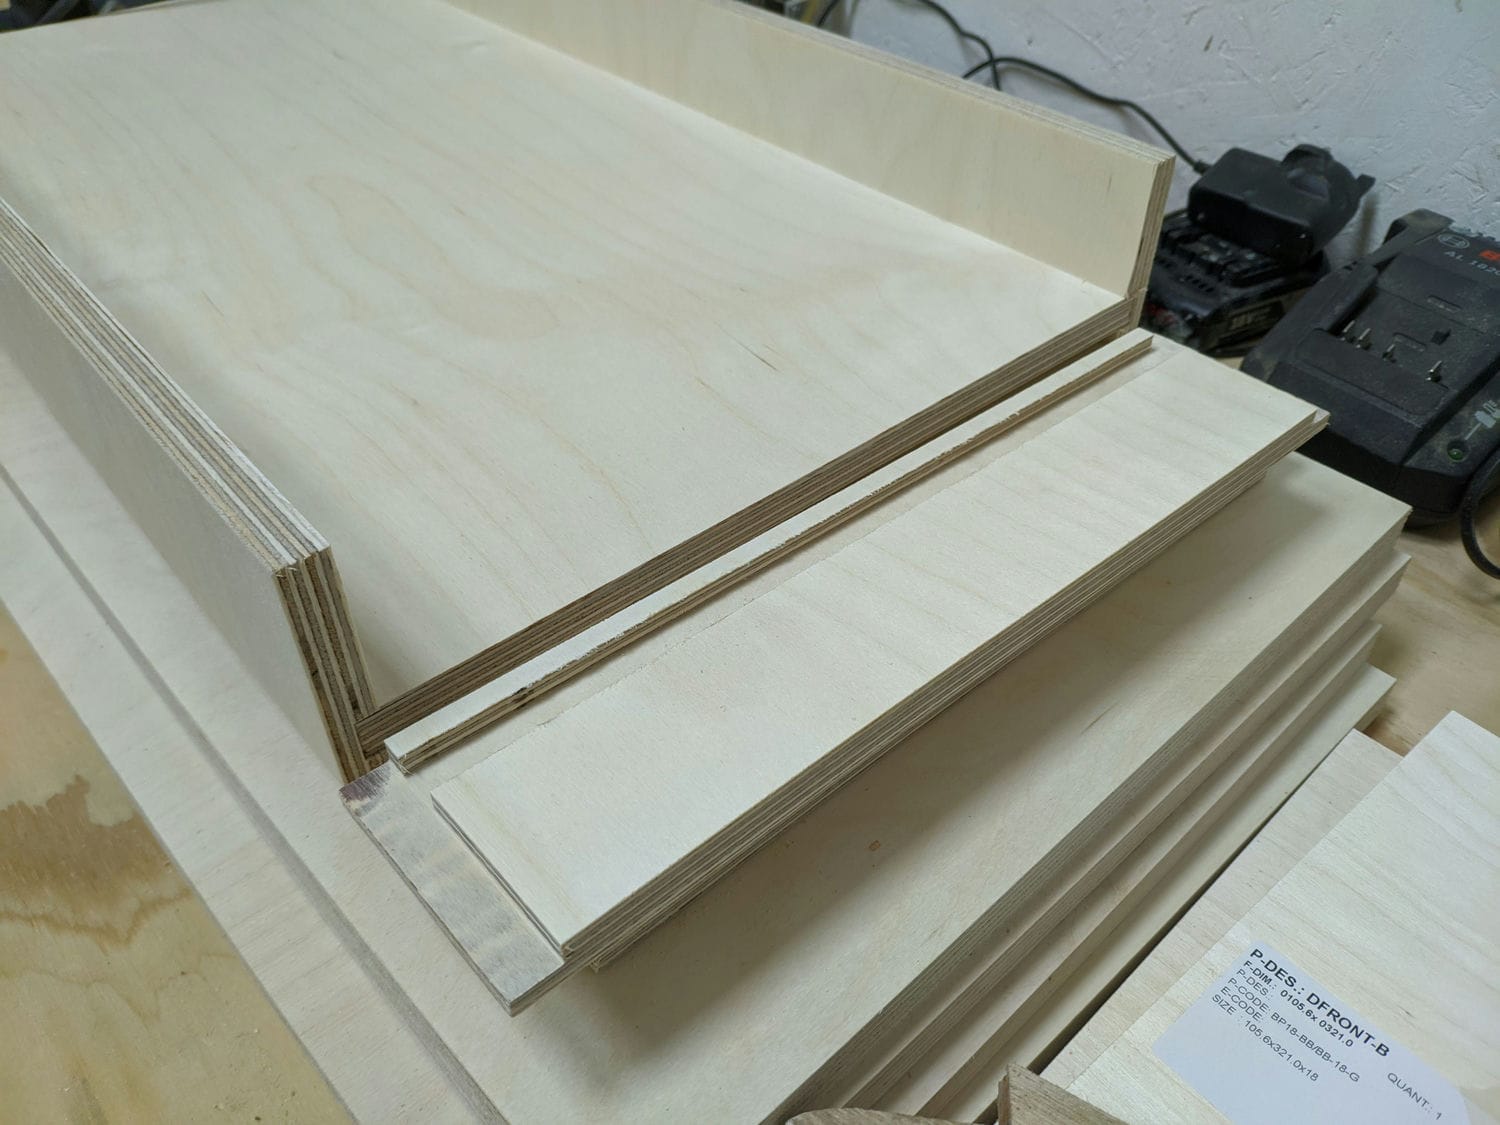
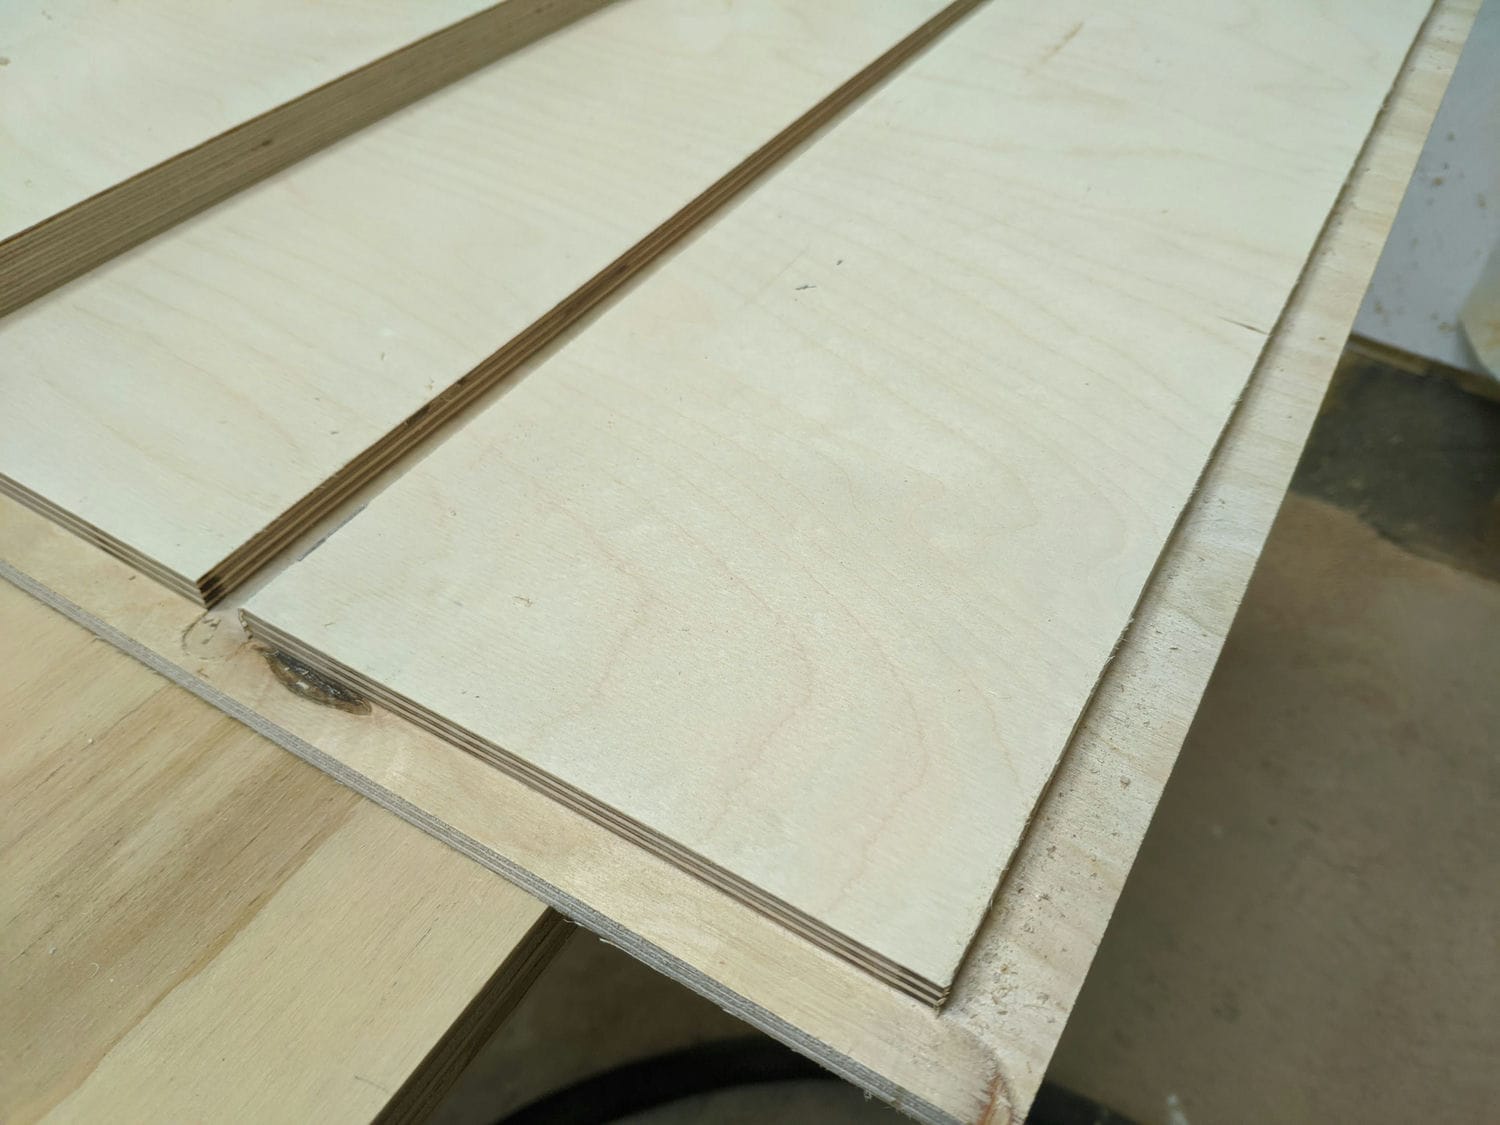
Birch plywood is typically sold based on veneer quality. I went for BB/BB which has sound facing veneers with some plugs, but overall definitely presentable enough. To save time I decided to get a local company to provide everything cut to size – this didn’t cost much more and meant all my boards were perfectly square and labelled up for me. The unit frames use 18mm plywood and the drawers are mostly 12mm.
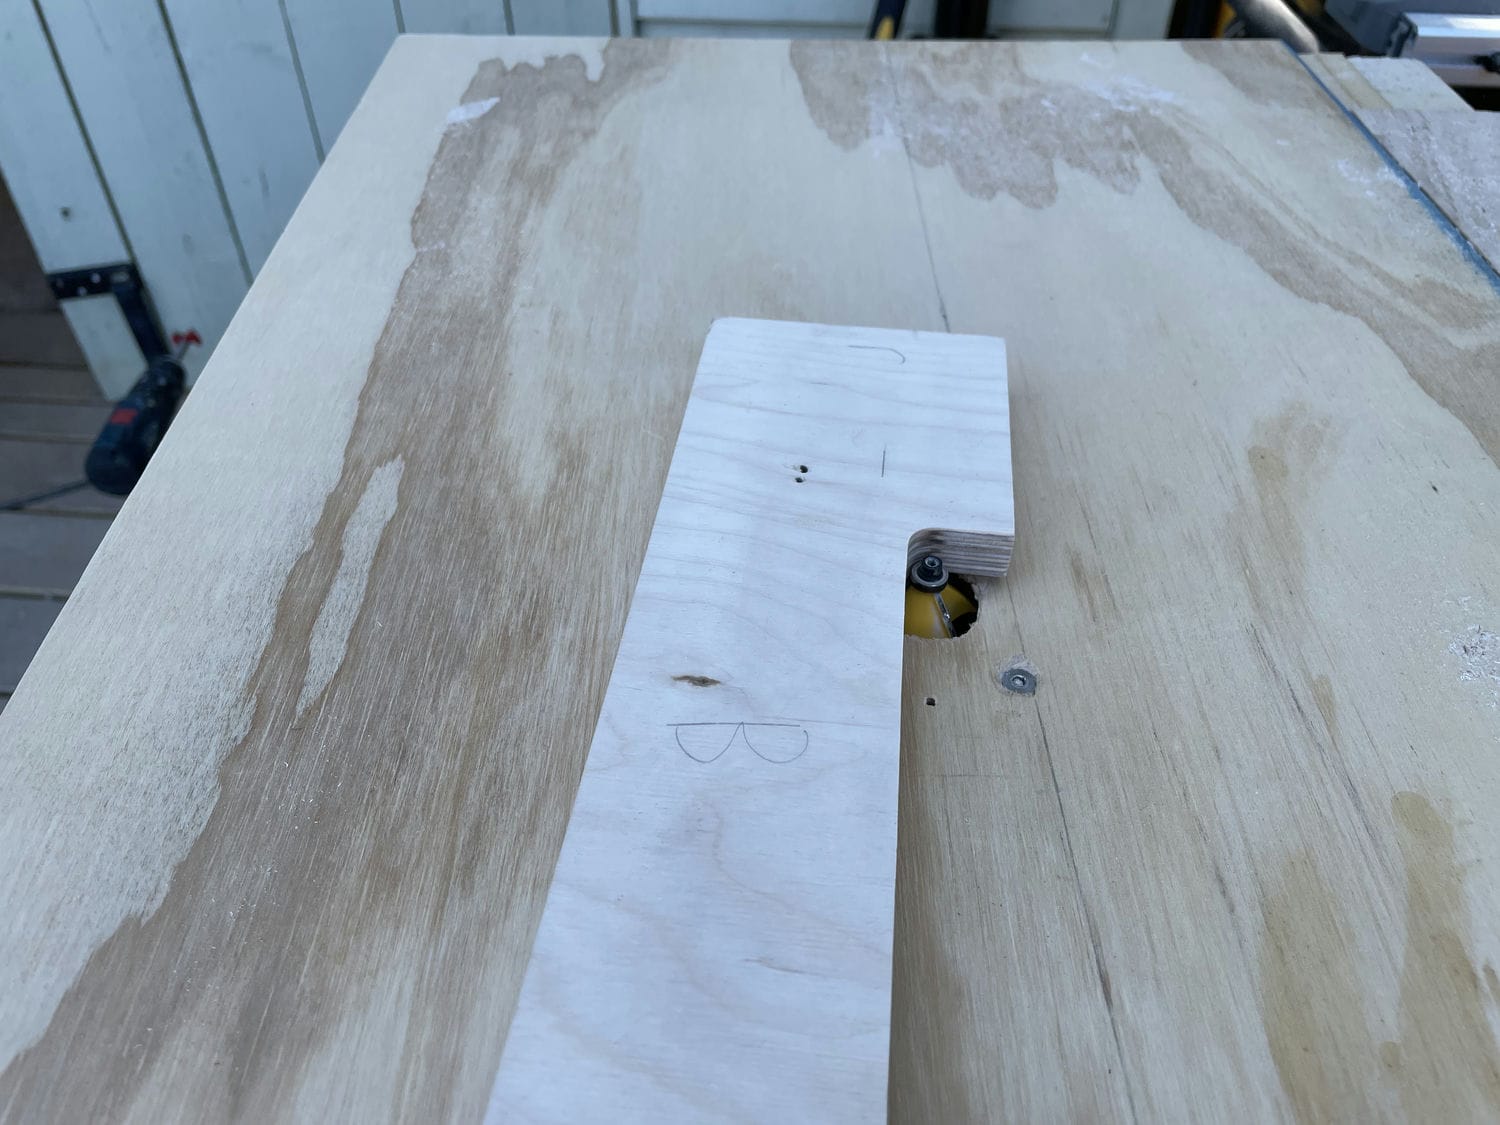
Drawer routing and assembly
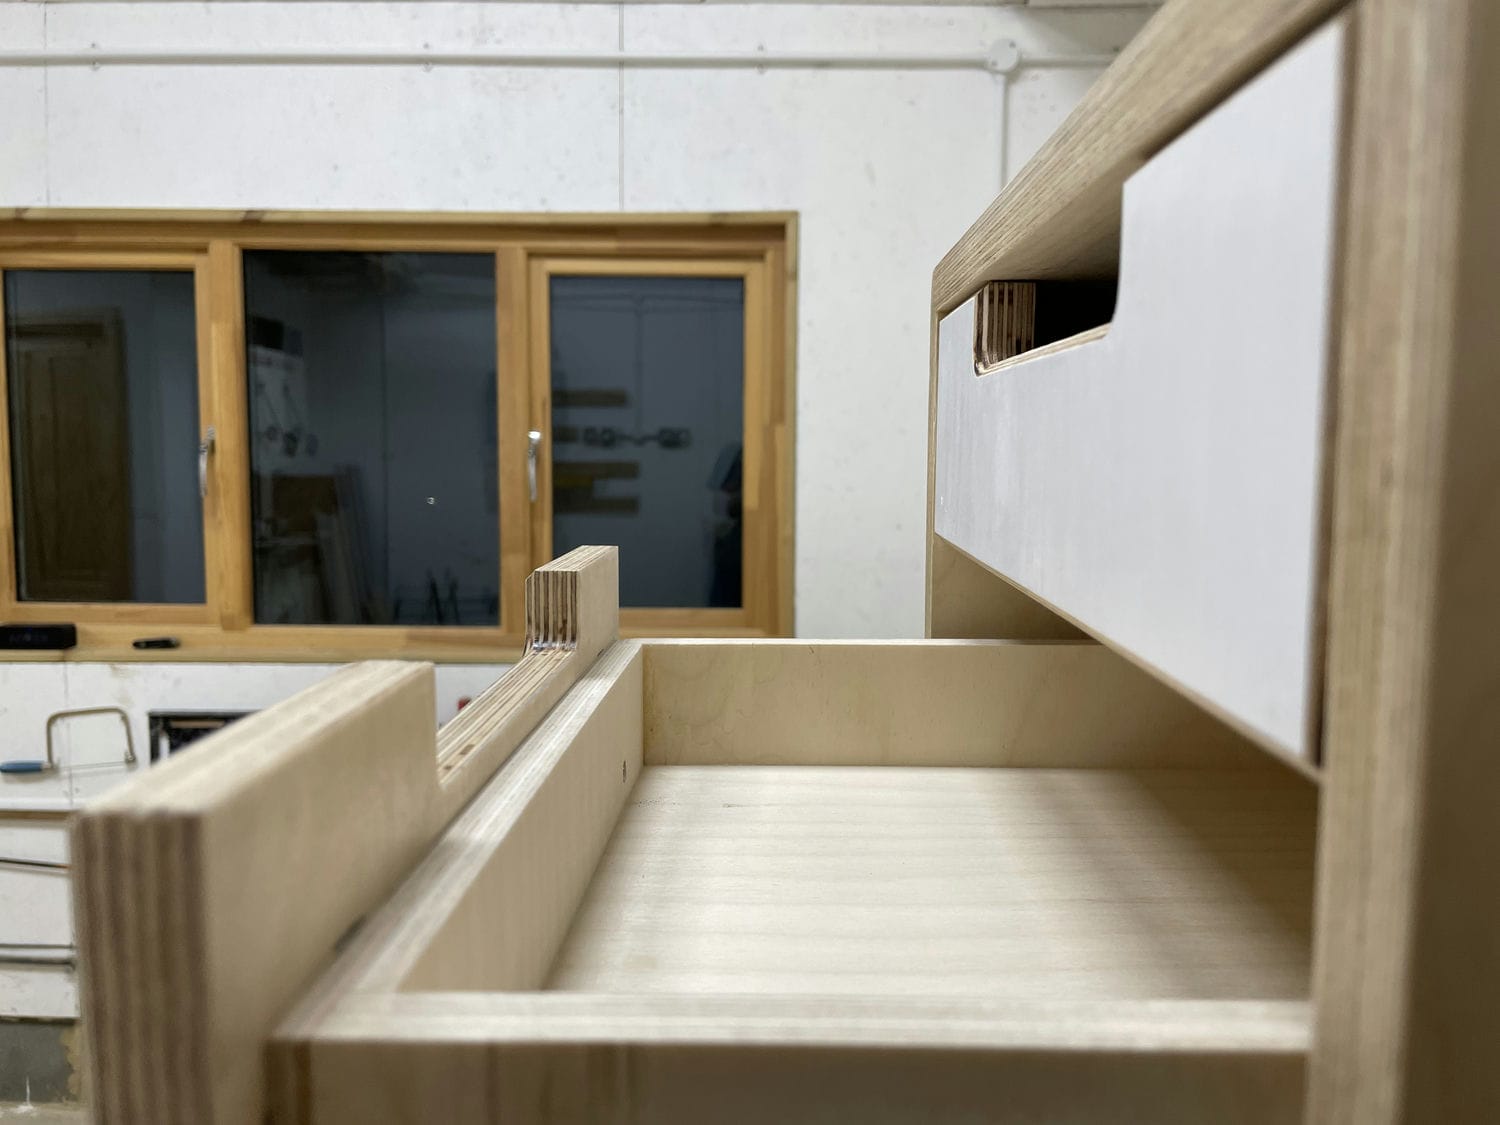
The drawers use half-lap joints and feature captured drawer bottoms to prevent sagging – this meant I had lots of routing to do. Using a home-made “router table”, an upside down router screwed into a sheet of plywood, I made all necessary cuts.
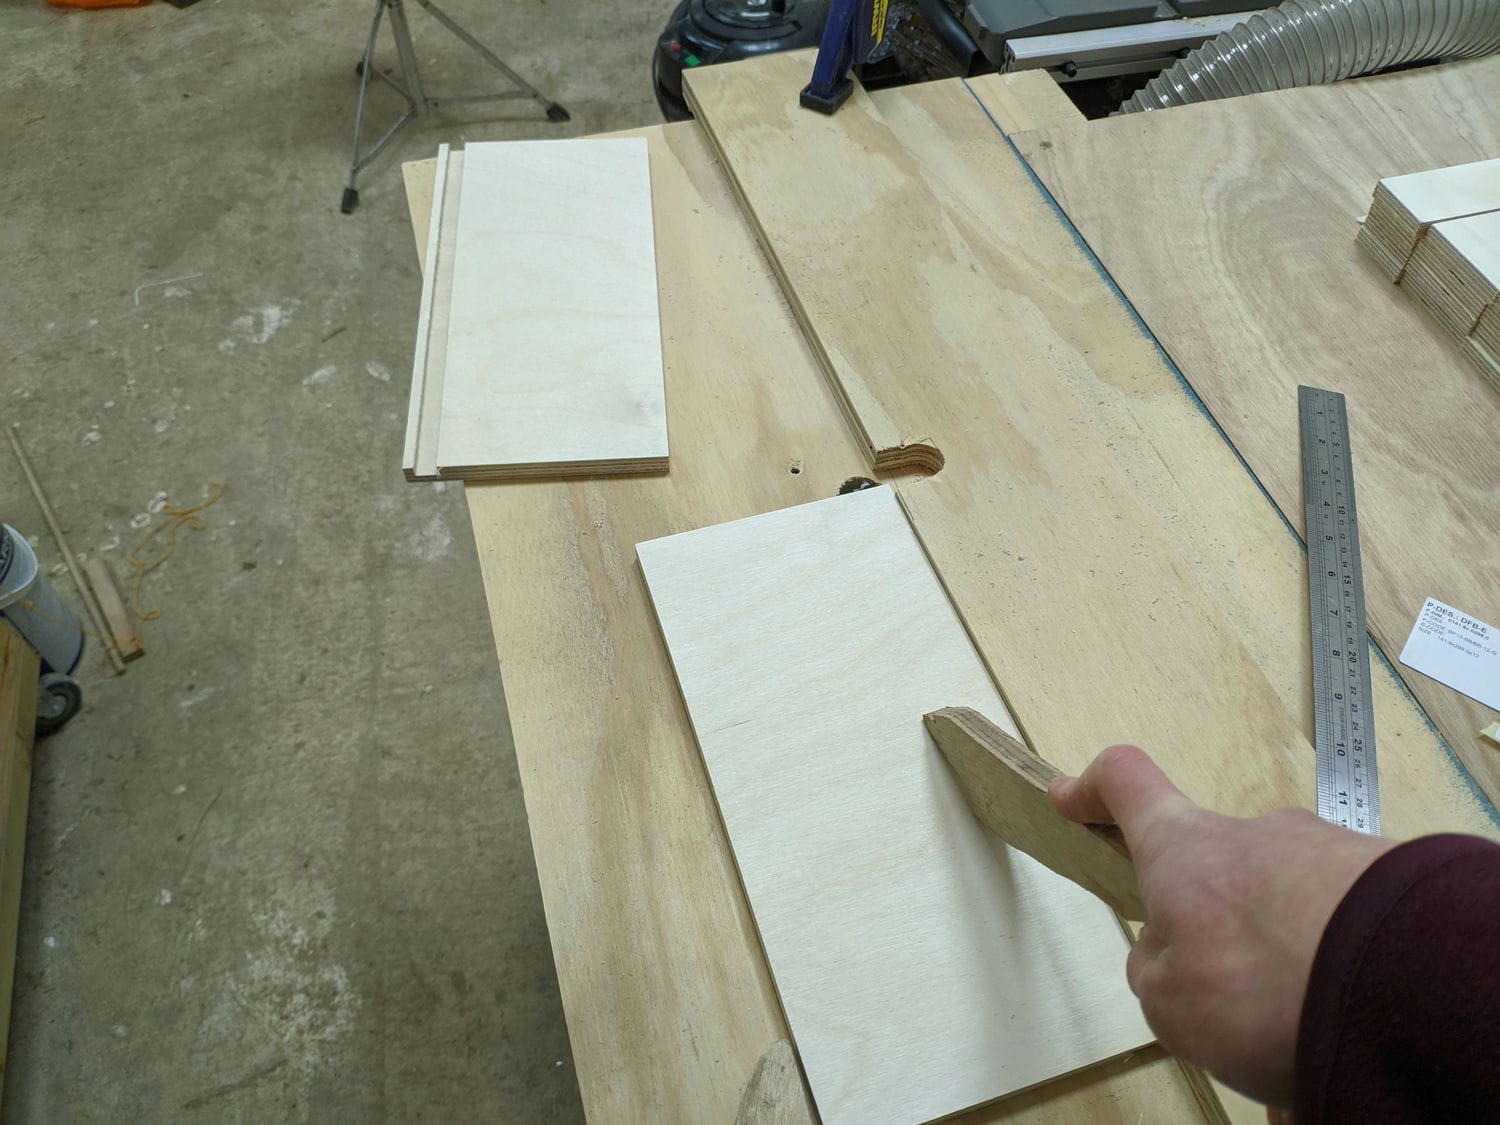
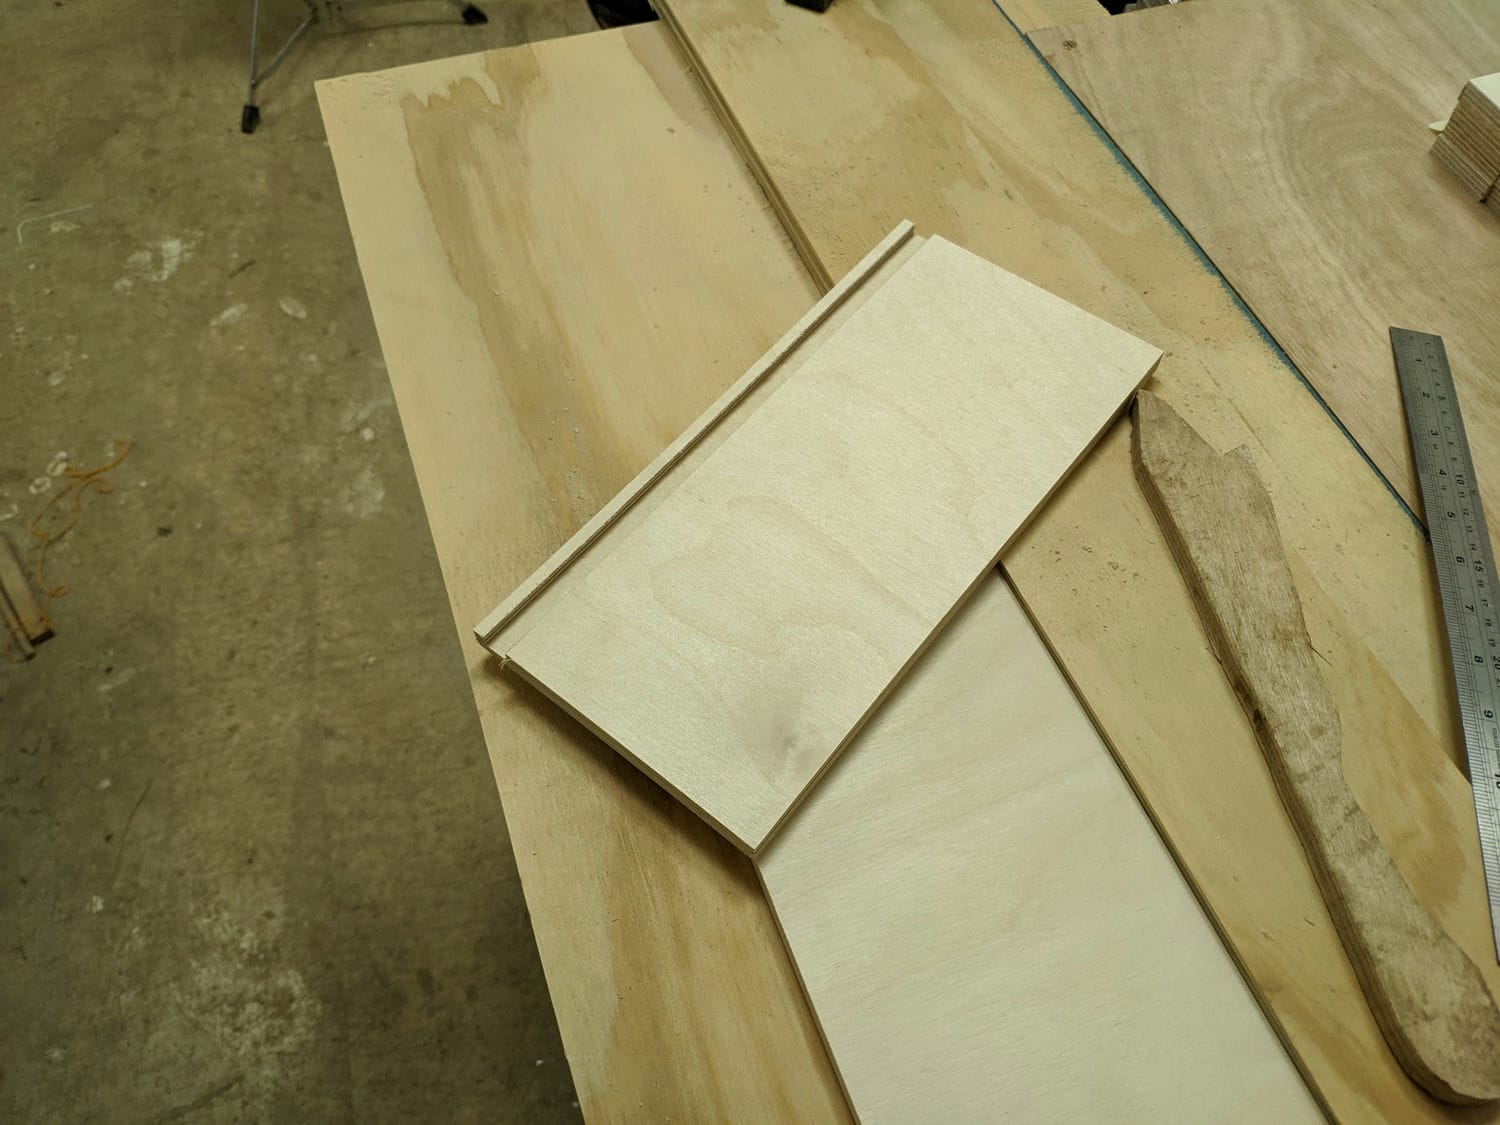

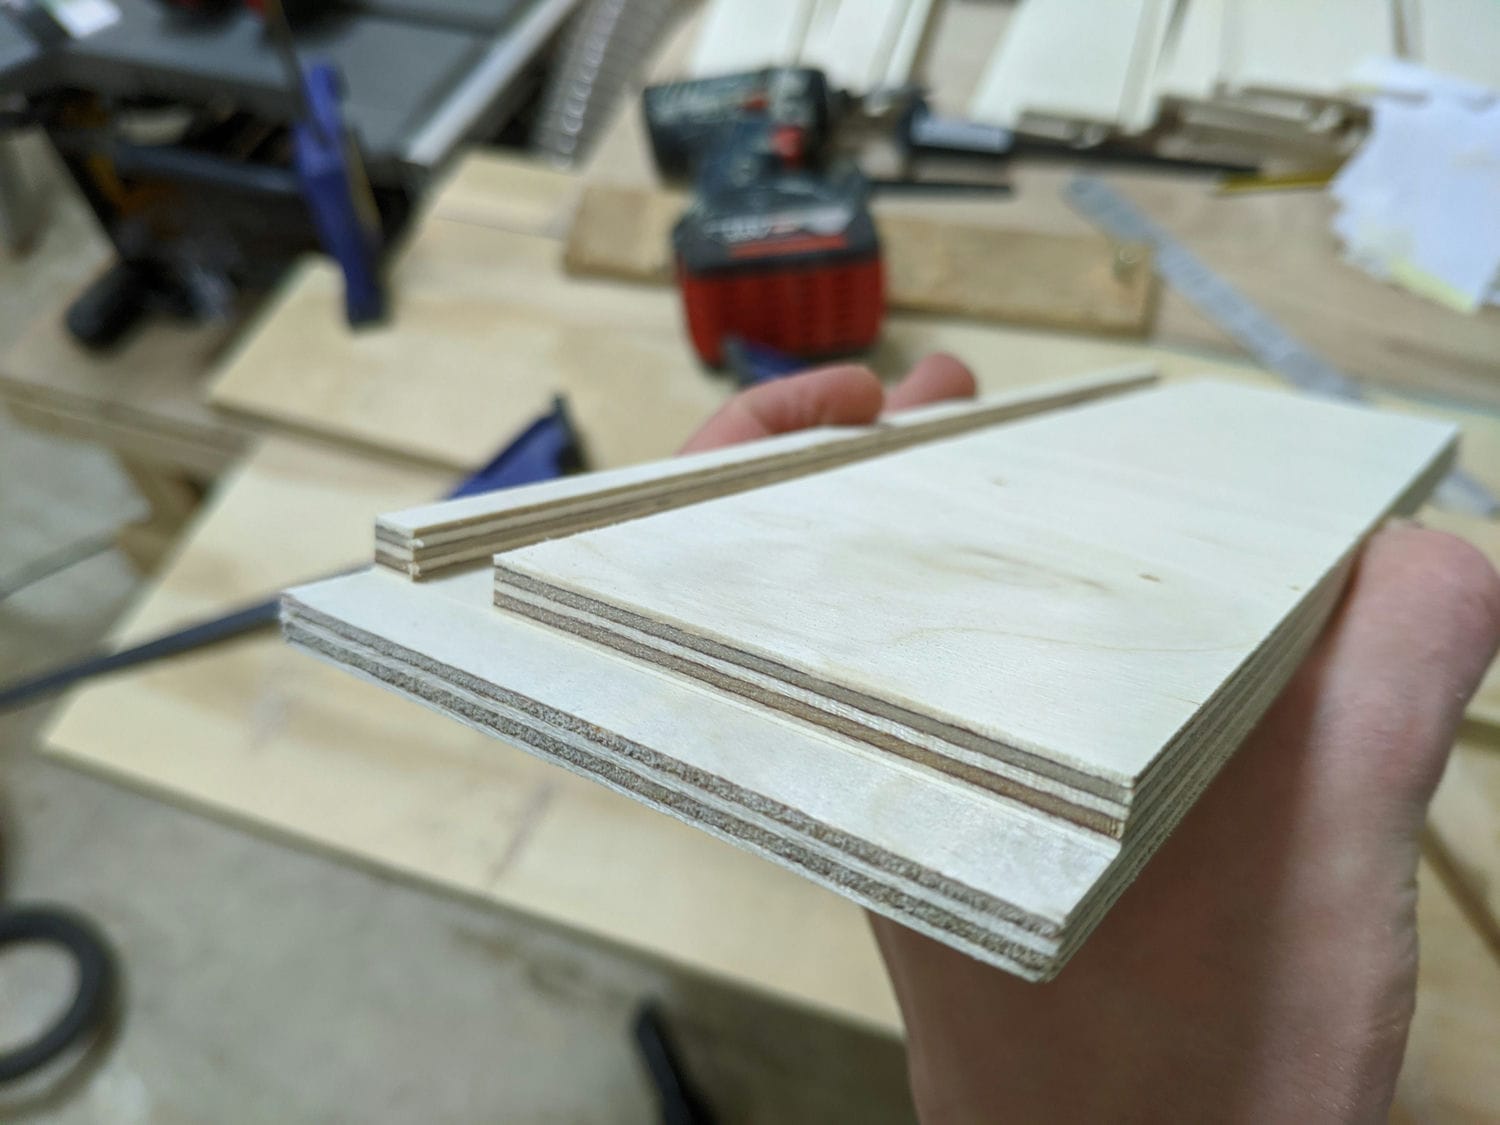
Pushing the material through the cutter means easy accurate cuts and is much faster than clamping down individual pieces. Given my setup was “slightly sketchy”, I made sure to use multiple push-sticks and cut against the cutter. I’ve started to purchase good quality router bits as I need them which means safer and cleaner cutting. Working with good quality plywood is also totally different to cheaper stuff – I found it far easier to get accurate and clean cuts without tearout.
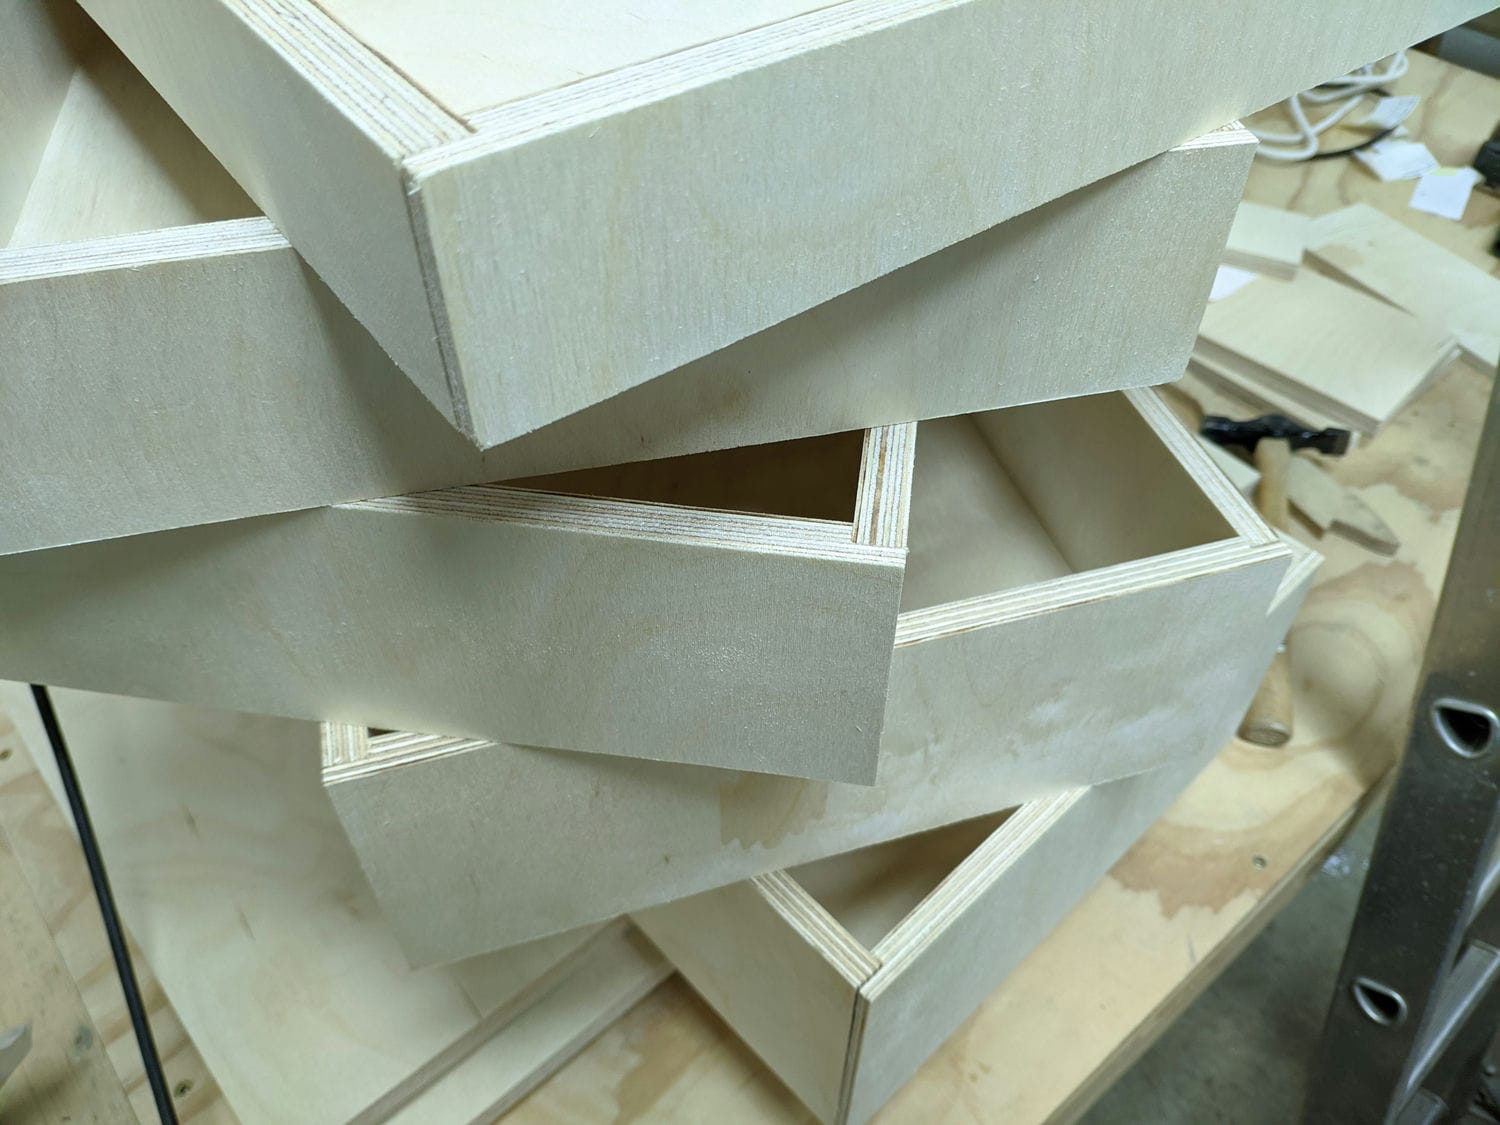
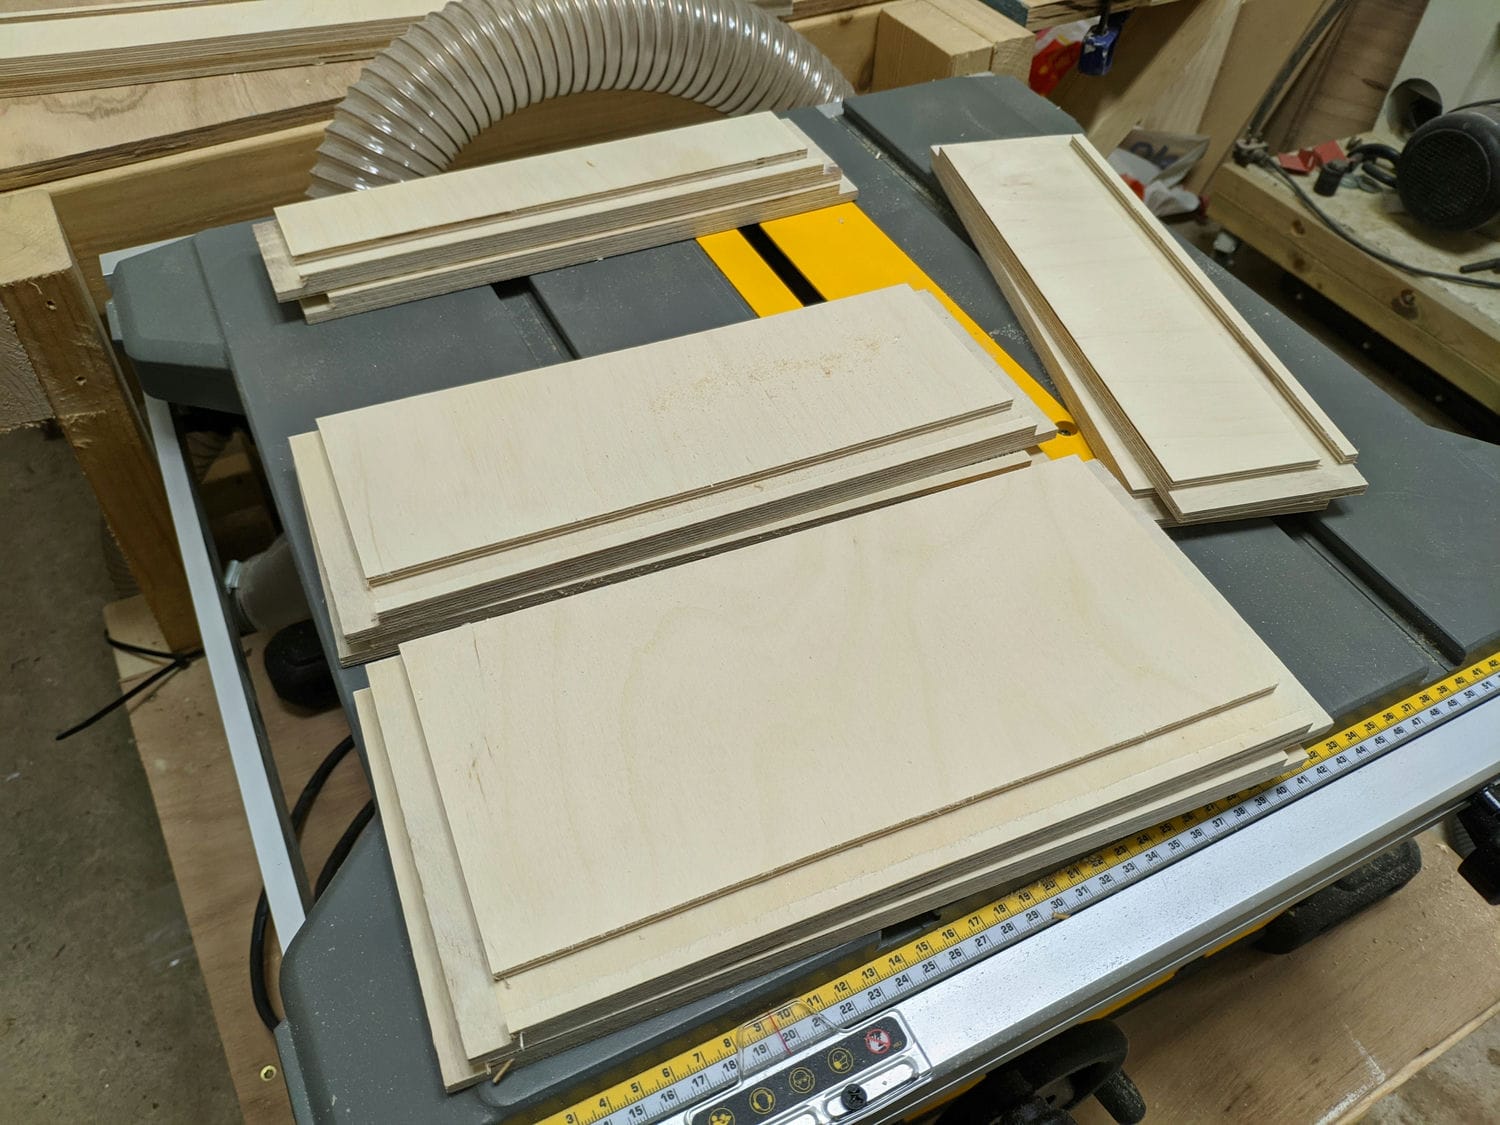
With all the pieces cut I did a dry-fit, then glued.

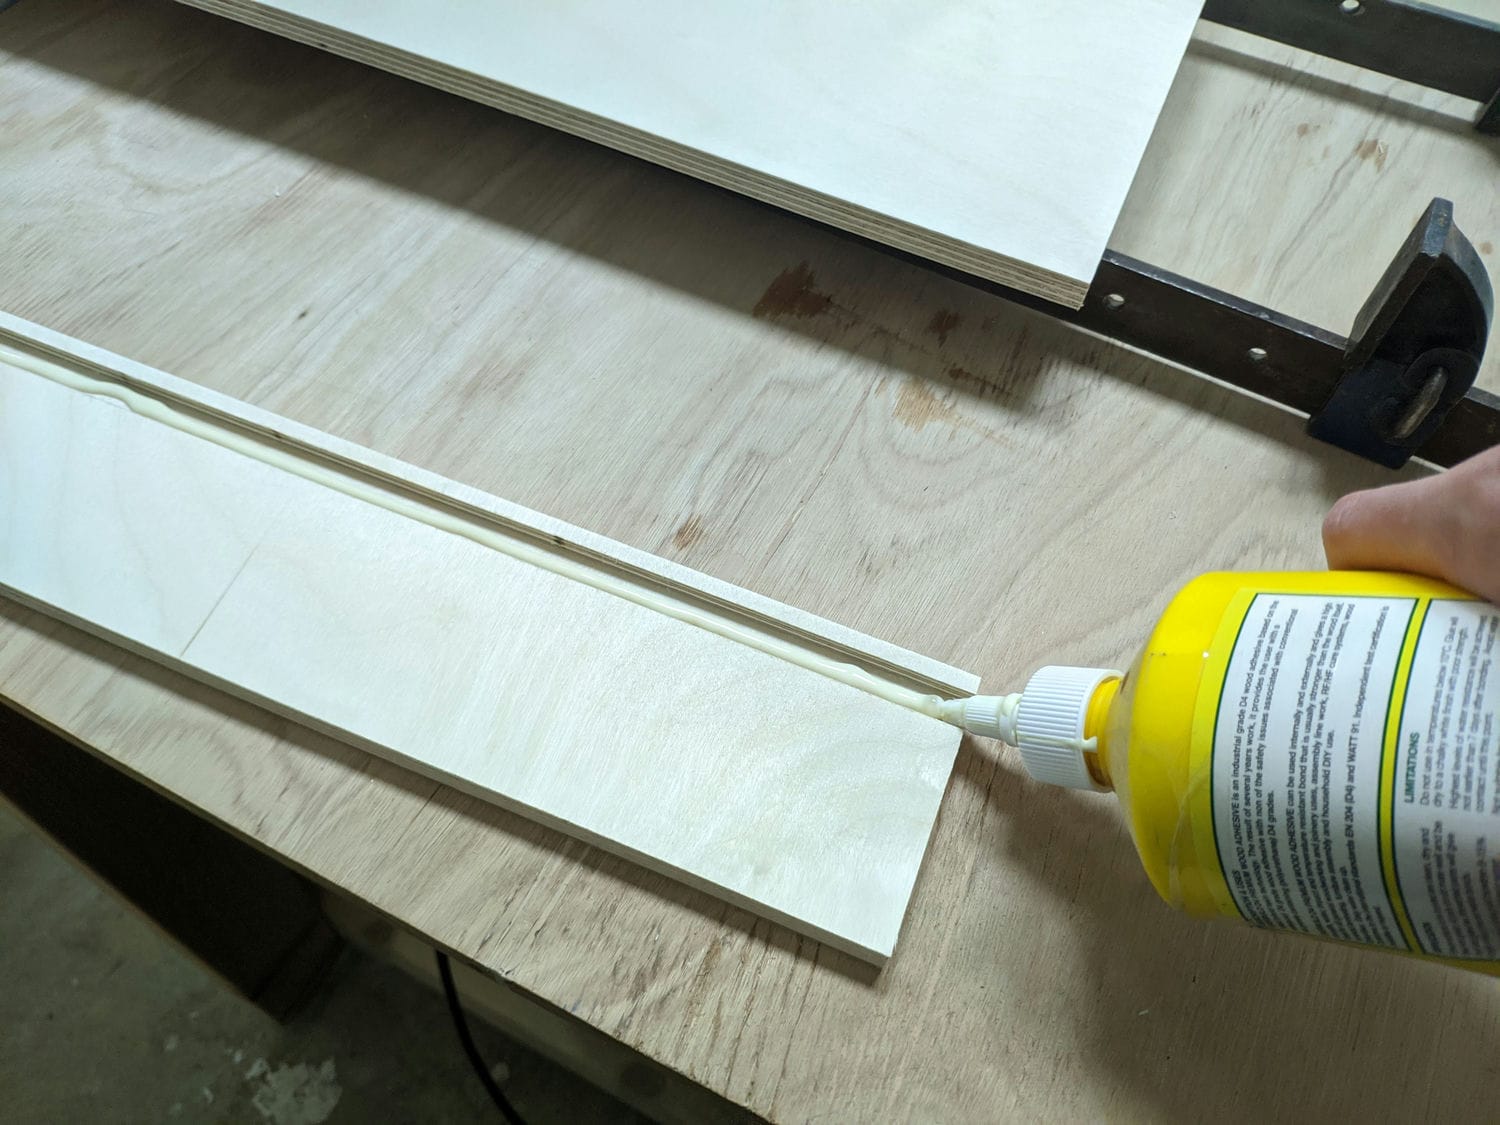
These came together really well with all the joints finishing pretty flush and the drawer bottoms firmly captured by the sides.
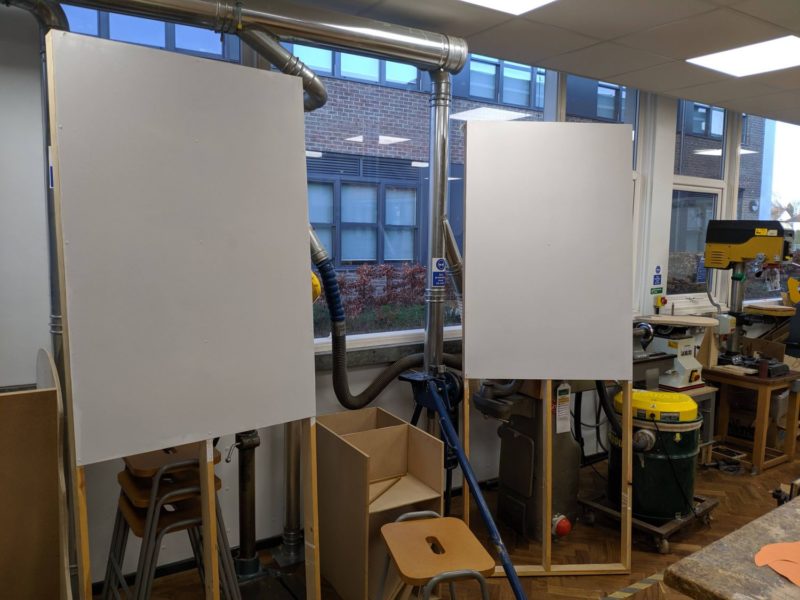
Cabinets
I followed a similar process to assemble the cabinets, just on a larger scale. Because the sheets were much larger and harder to handle I took the router off the table for these cuts.
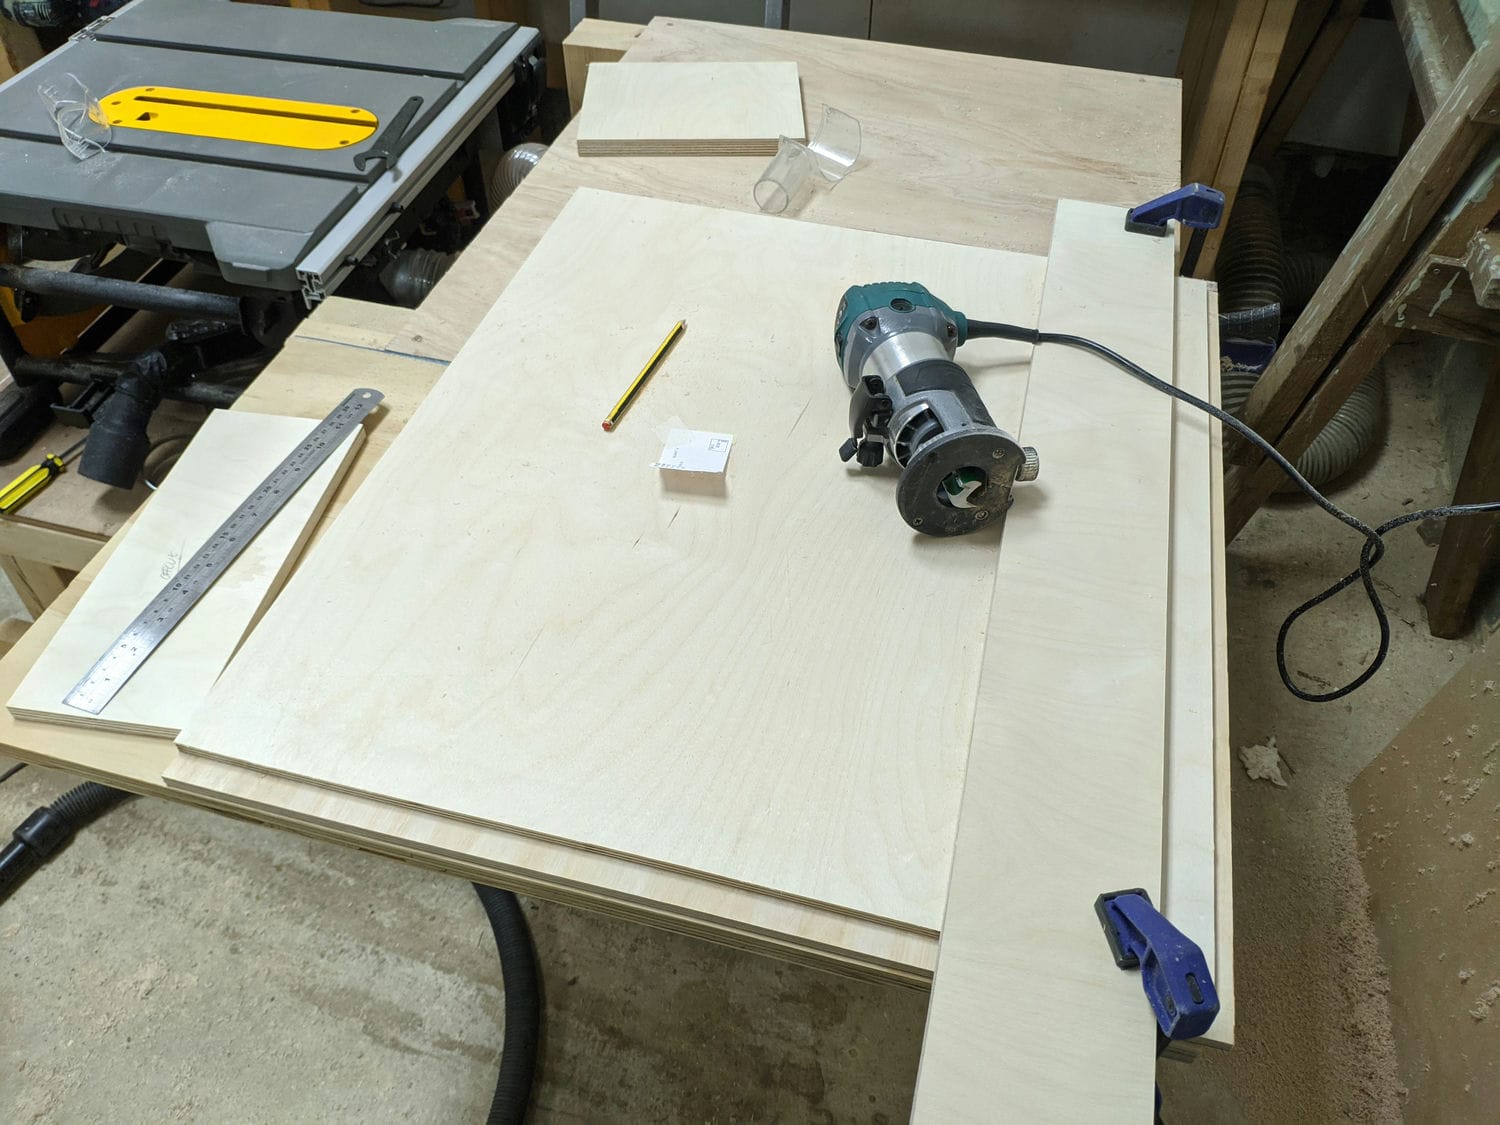
The AV shelf in the computer cabinet is suspended in a housing cut across each side. I used a router bit with a diameter equal to the plywood thickness (12mm) which achieved a perfect fit.
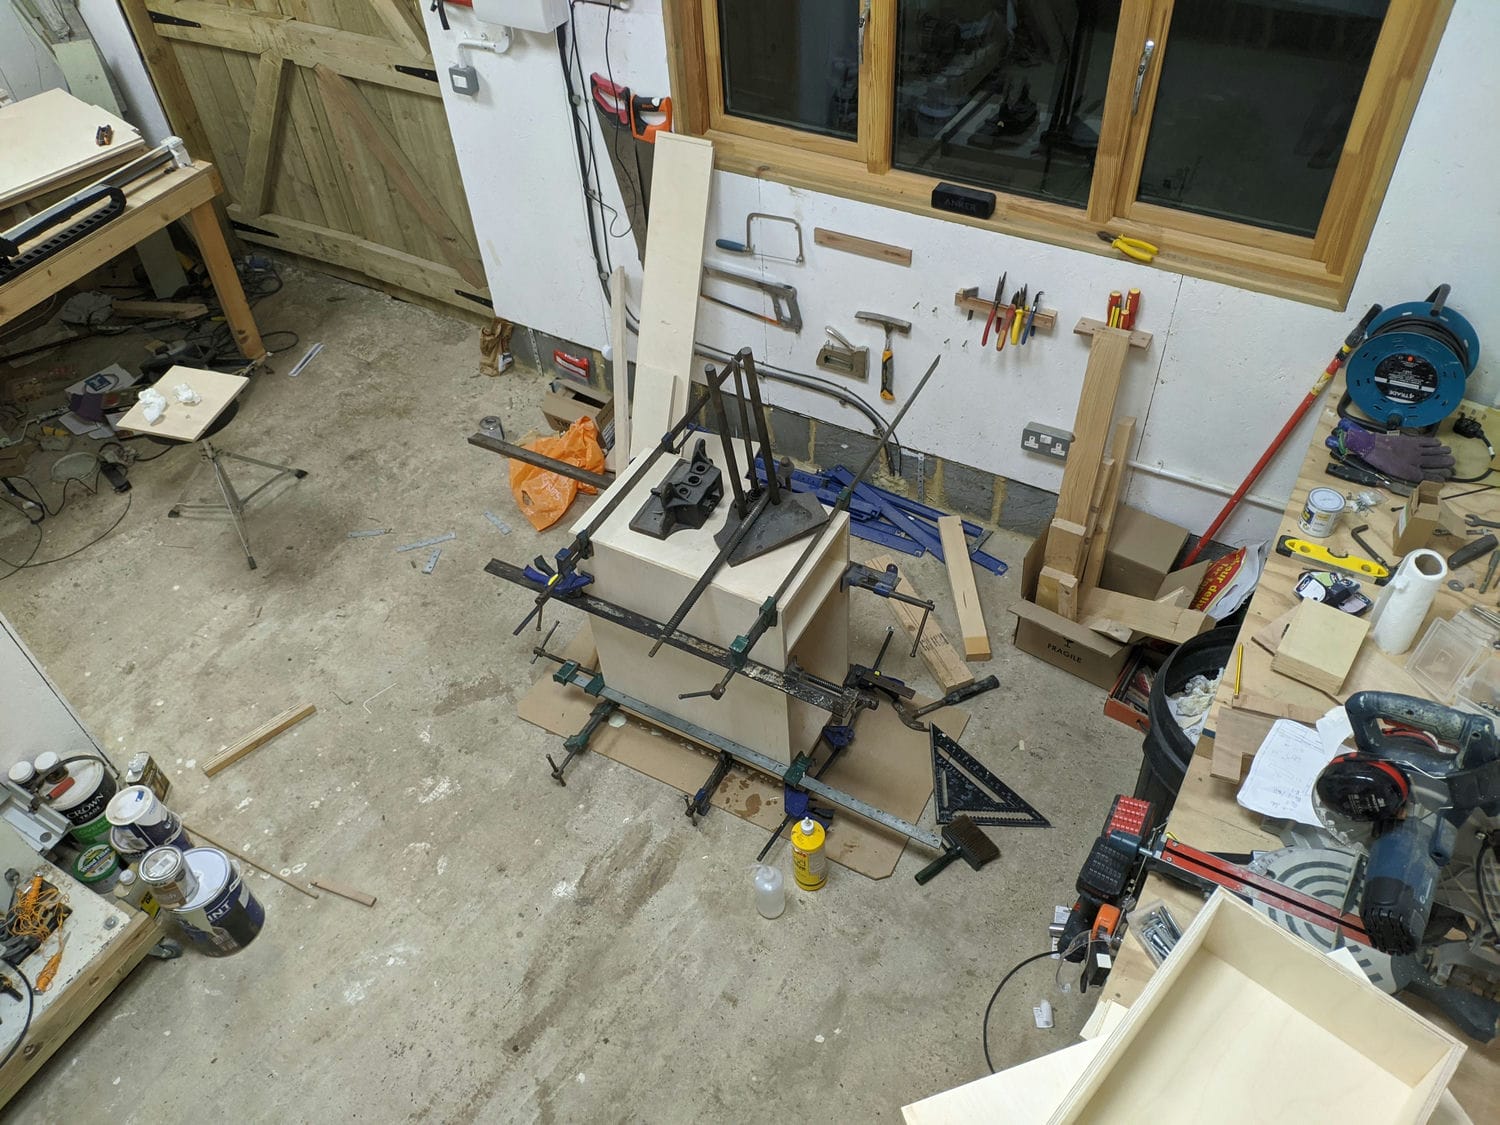
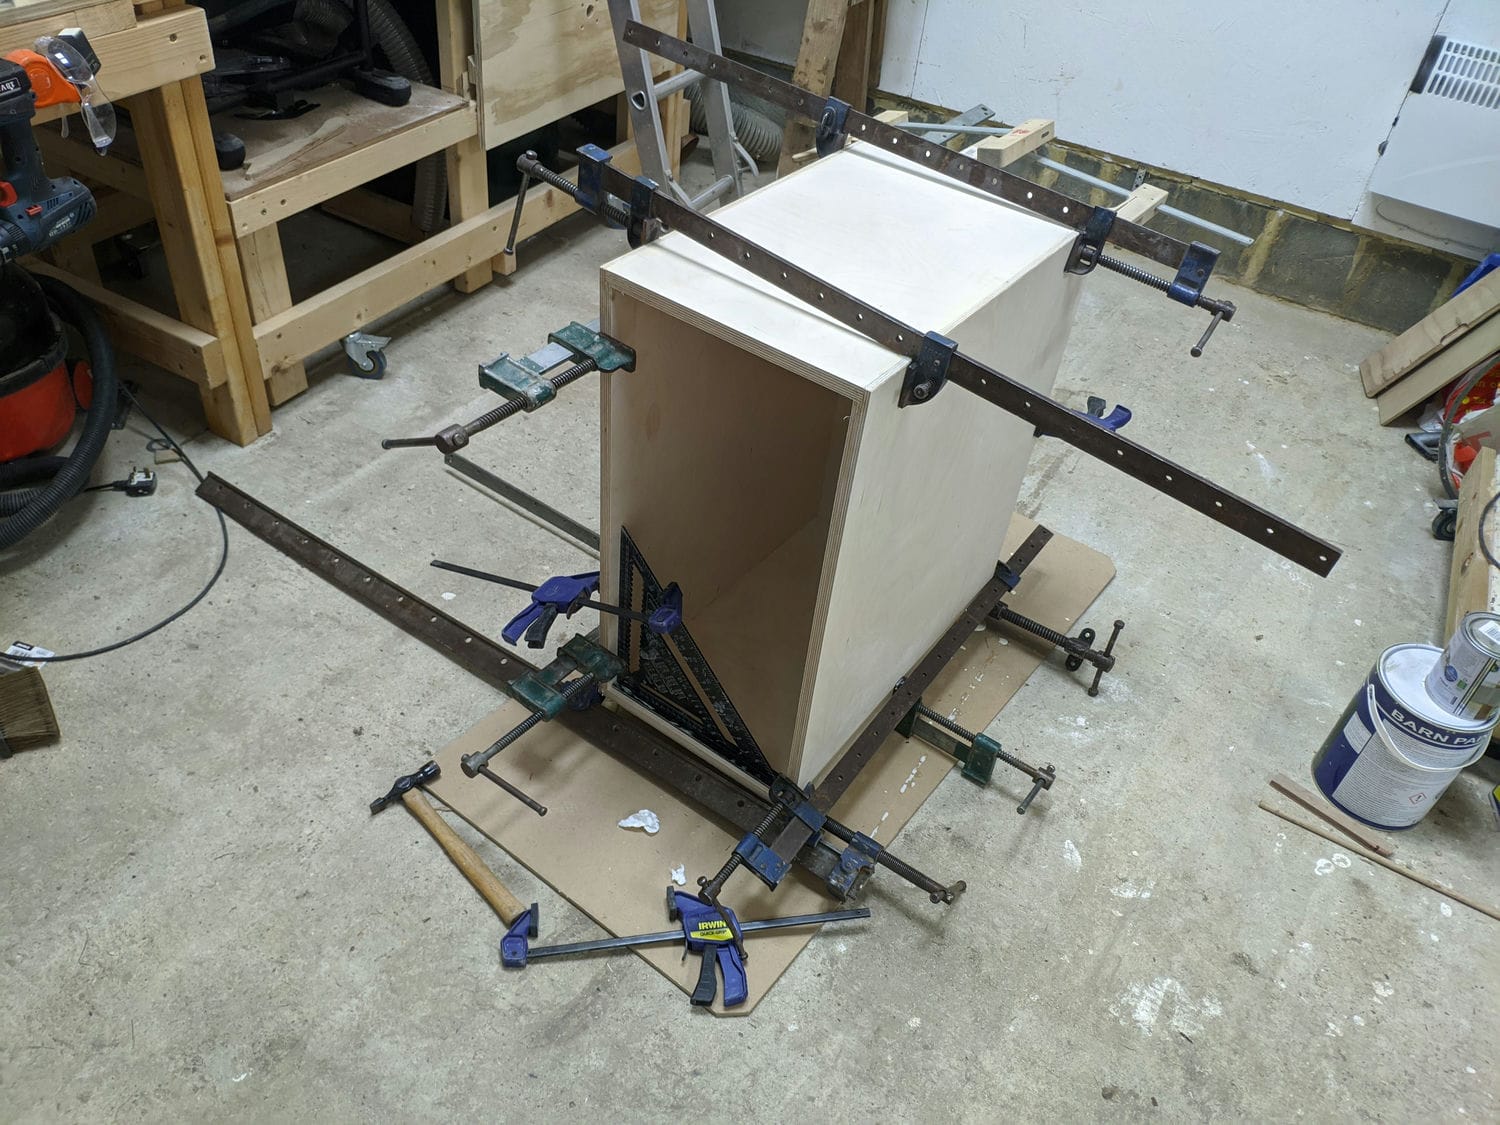
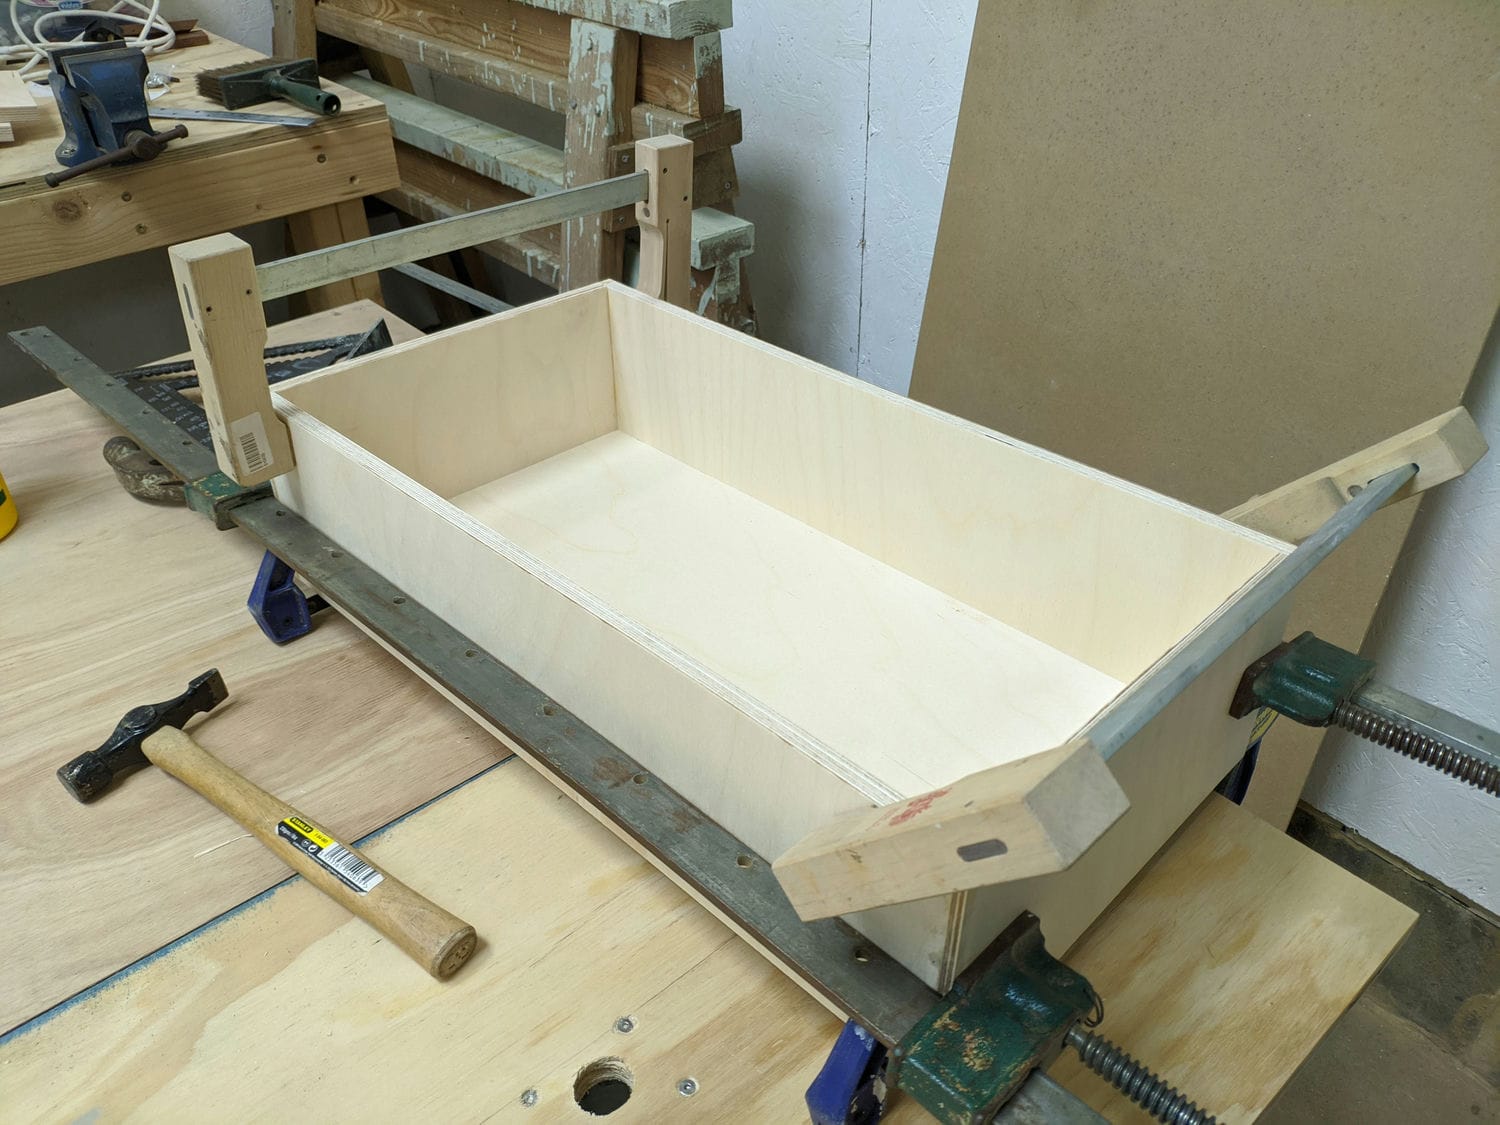
For the final glue up I used almost all the clamps I could get my hands on. It took much longer than I’d been hoping to get everything parallel, and I was slightly concerned that the glue was beginning to set. I used my framing square as a reference and measured diagonals to confirm right angles. By changing the contact points of the sash clamps I could make small changes to the shape of the units until they were perfect.
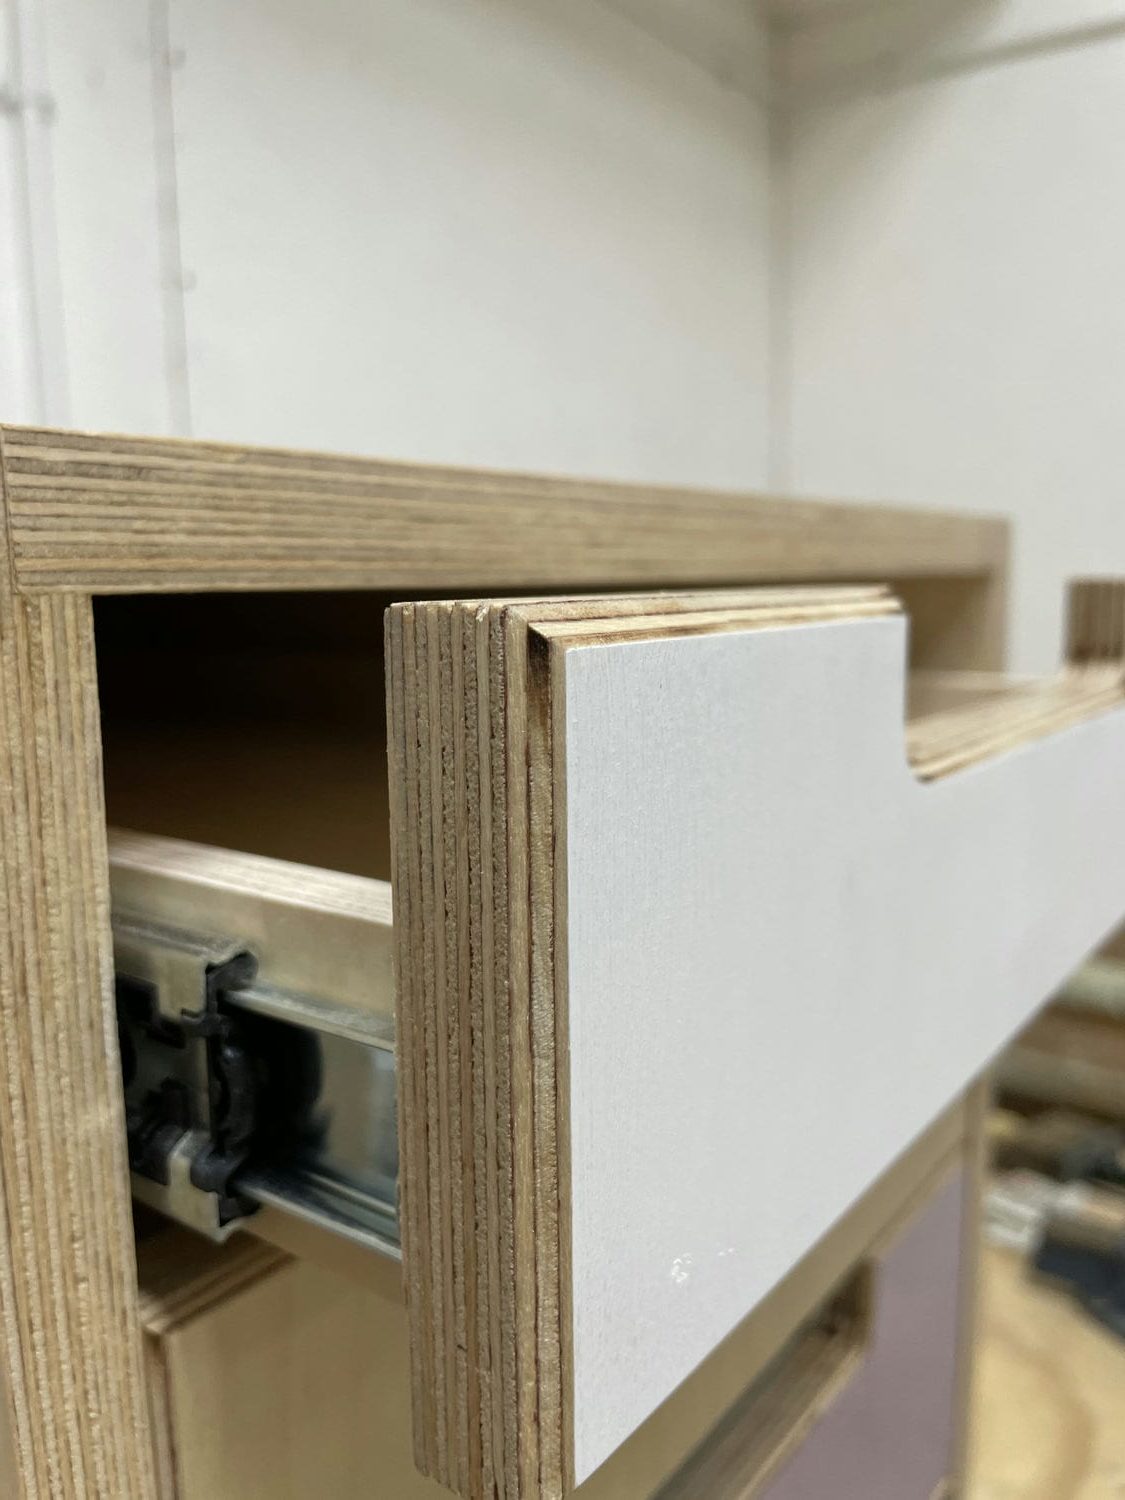
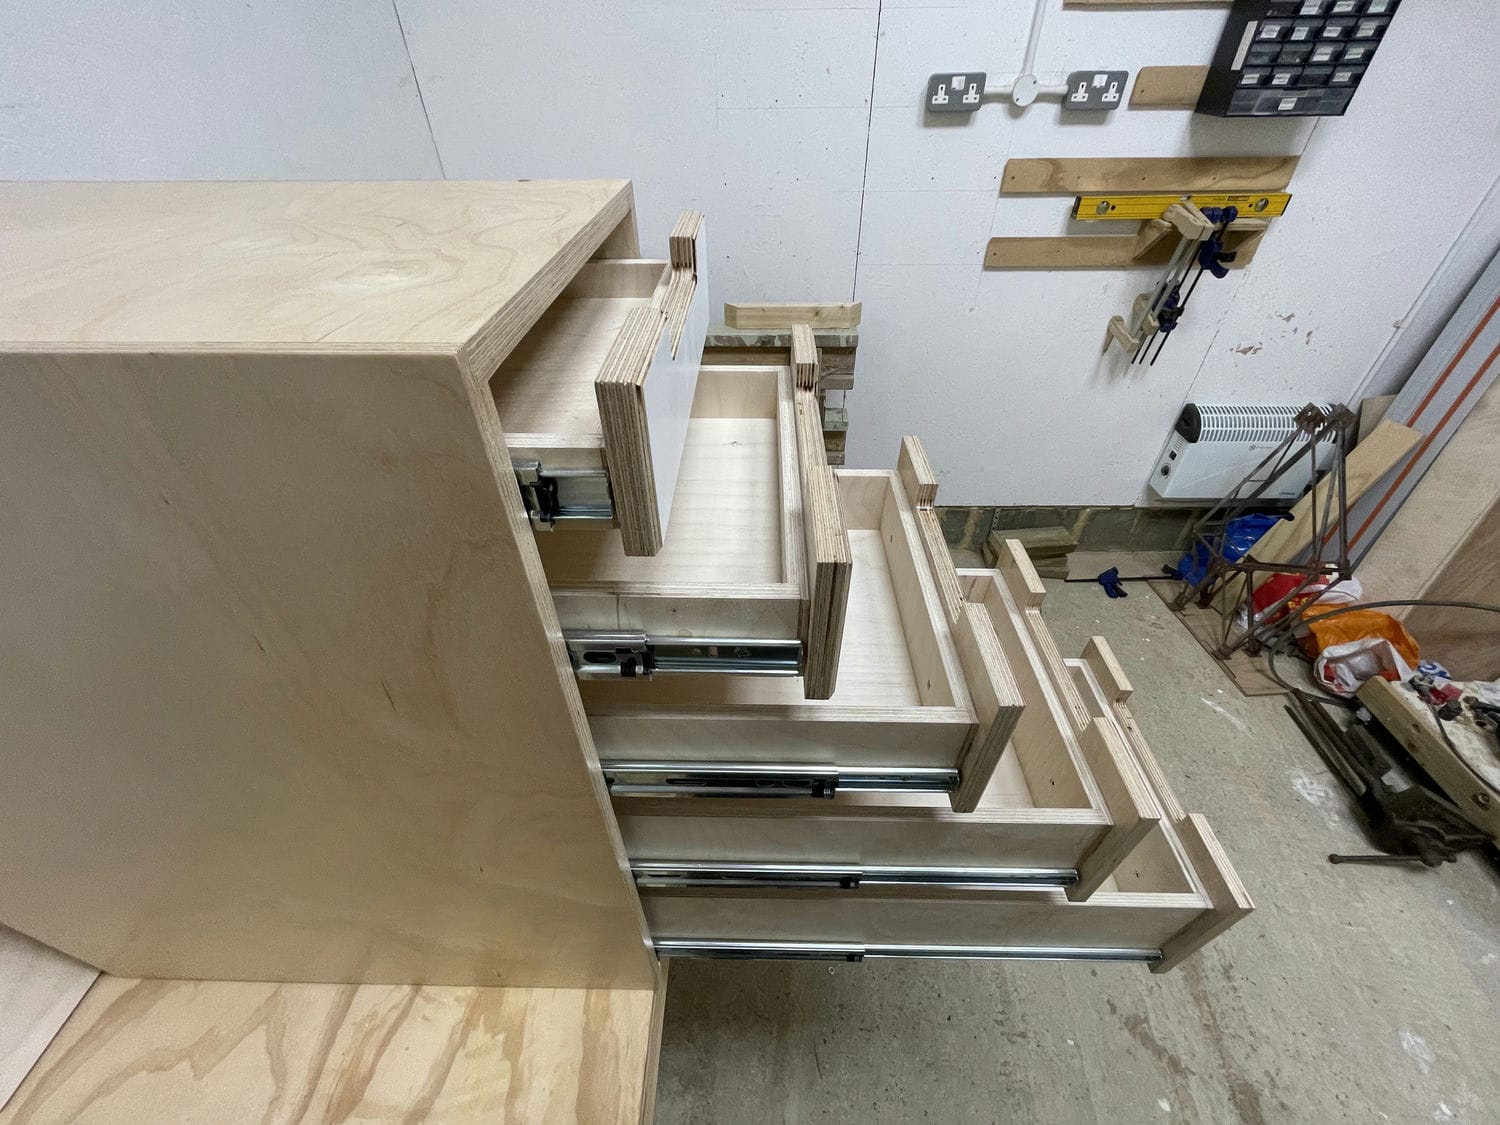
Drawer and runner installation
With the frames constructed I moved on to the drawer install – this finally took place roughly 8 months after the glue up! I decided (earlier, hence correct spacing) to use full extension drawer slides; this makes the entire drawer accessible. Various installation methods seemed to be recommended online but I found that measuring, marking then mounting worked well here.
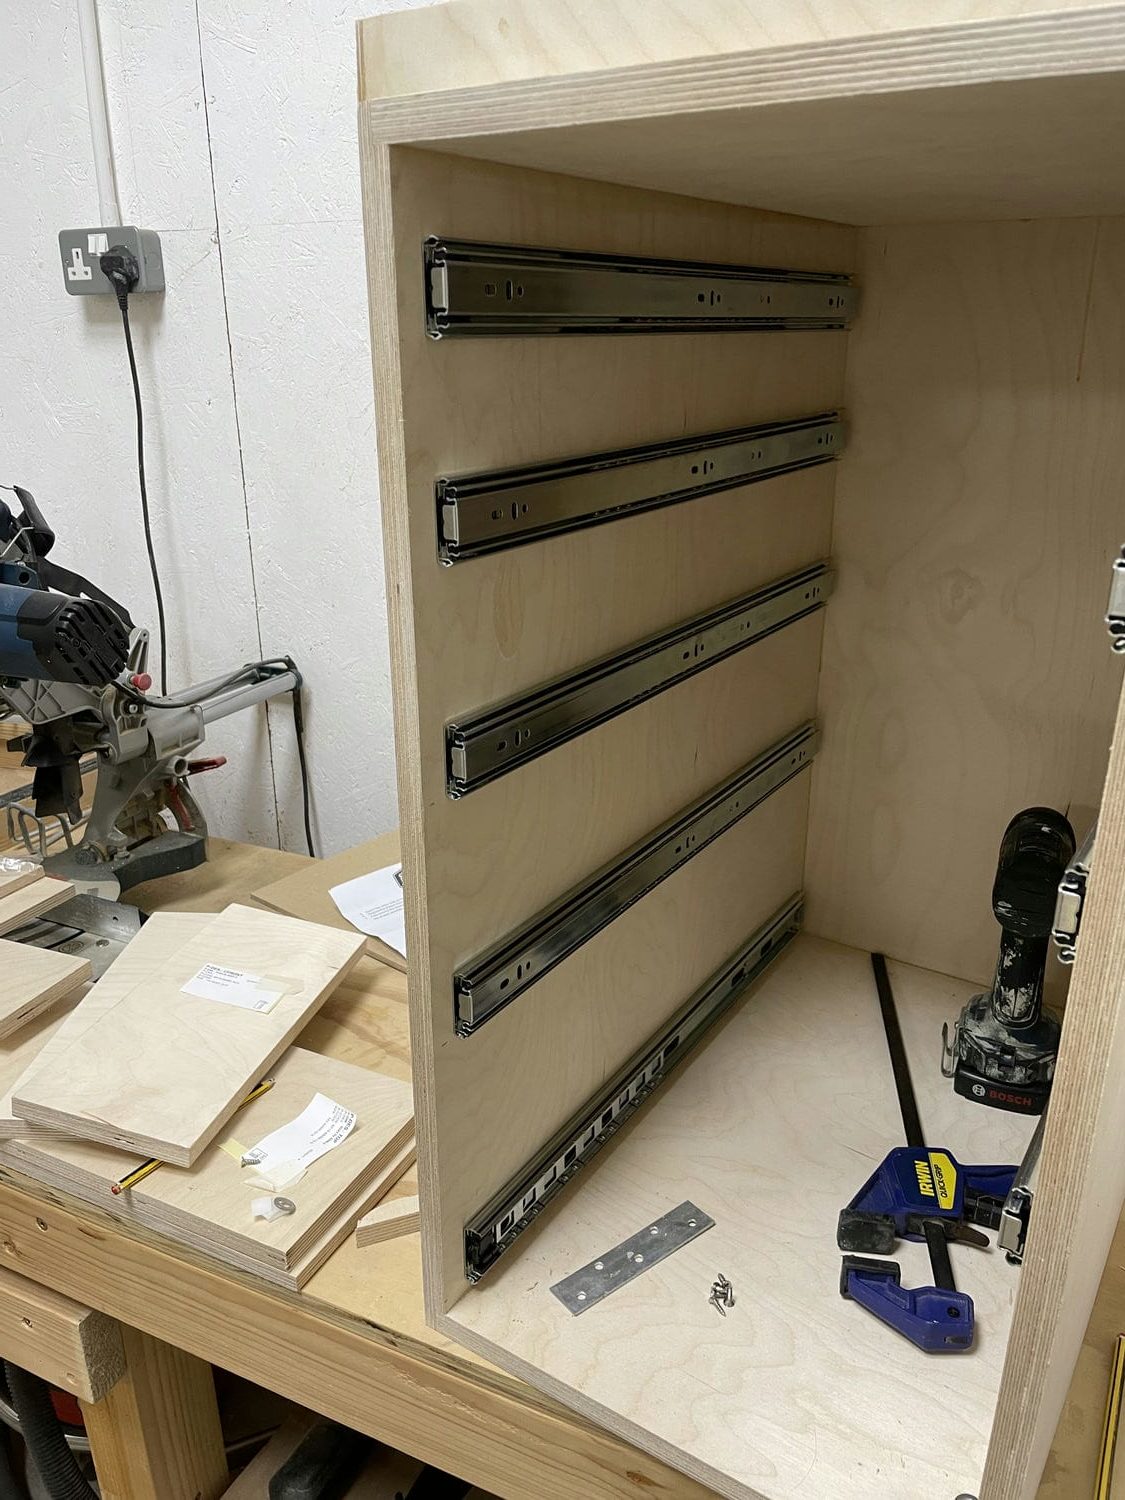
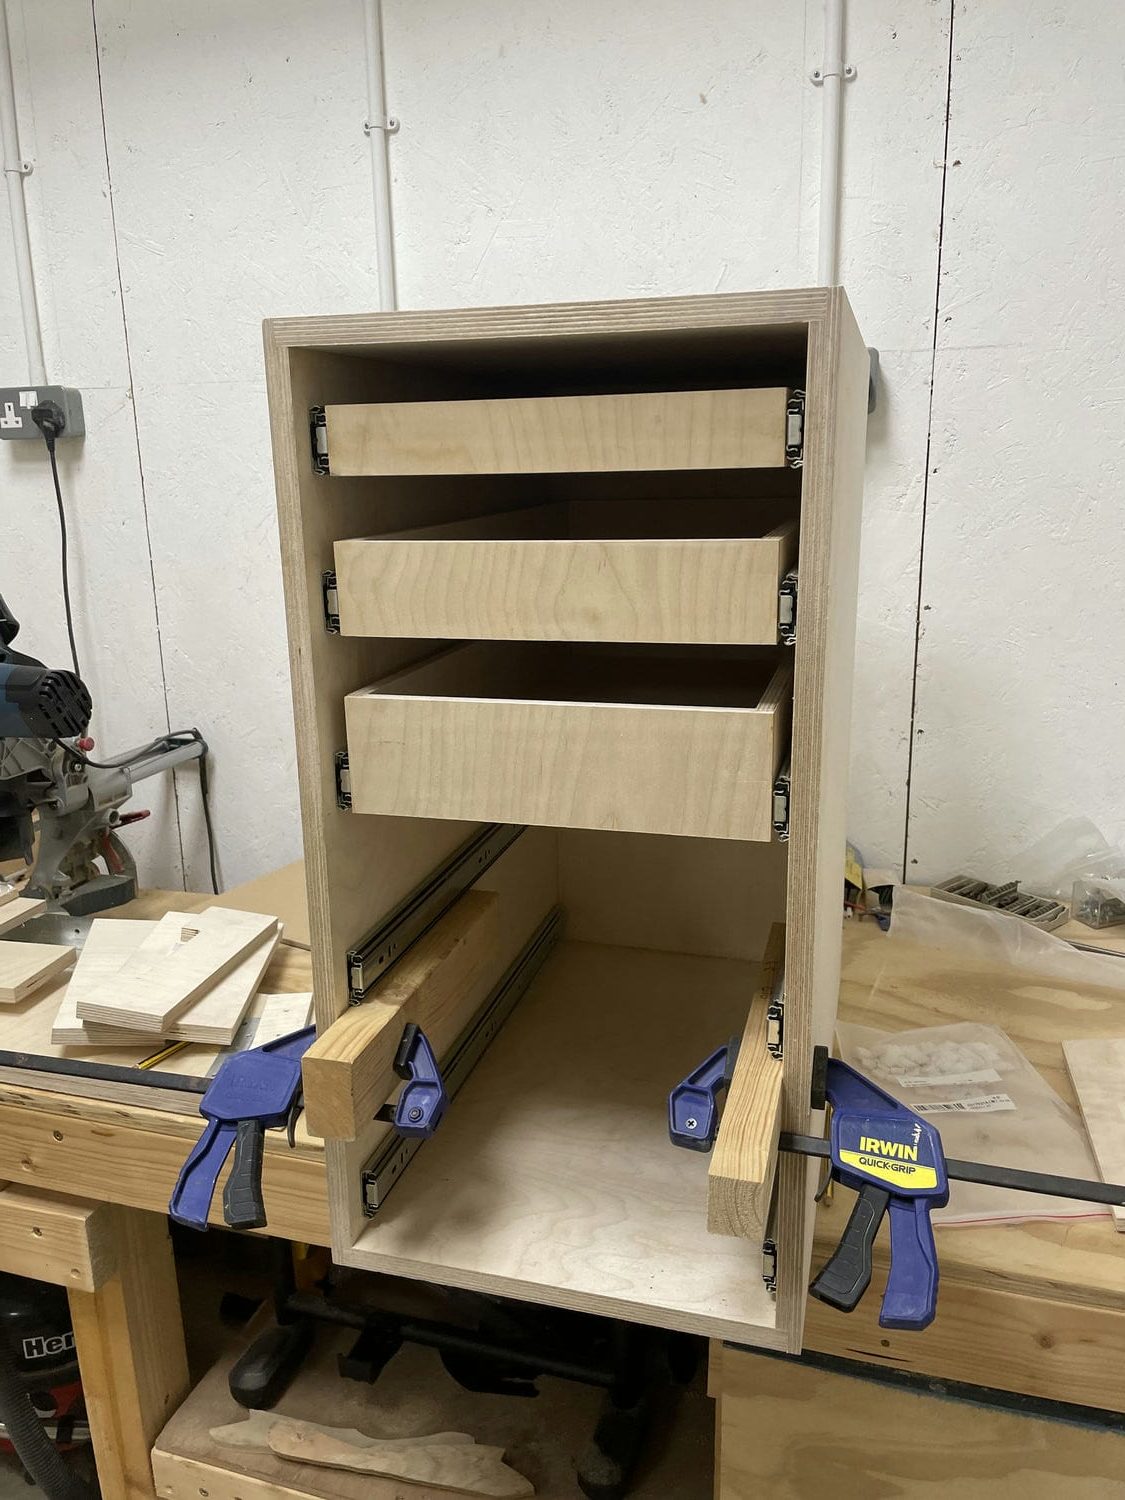
I measured referencing against my CAD model working down from the top of the cabinet and marked the correct heights with a pencil. For each mark, I then clamped a straightedge to the side of the cabinet in line, squaring it with my framing square. I sat the back of the slide atop the straightedge and screwed it in place.
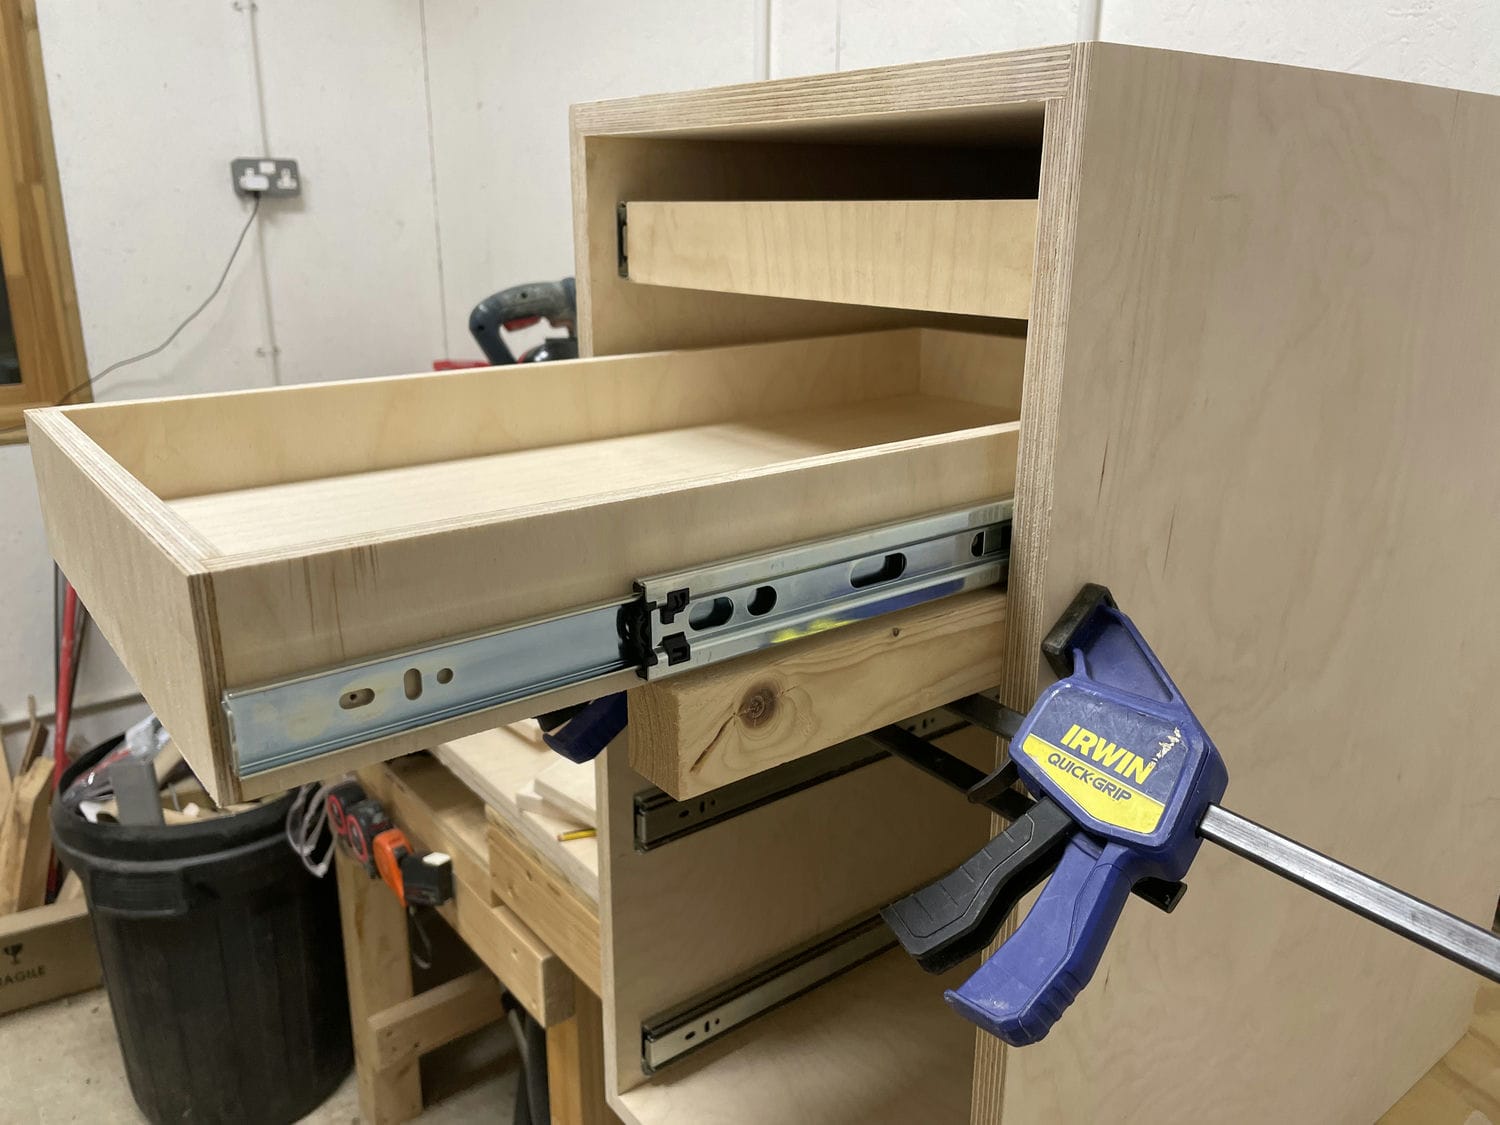


To attach the outer section of the slides to each drawer I used the straightedges still clamped at level, and sat the drawers on them. This platform relative to the fixed slide backs ‘set’ the vertical offset. I used a rough estimate to get the back/forward displacement and screwed into the slot shaped holes to allow for later back/forward adjustment.
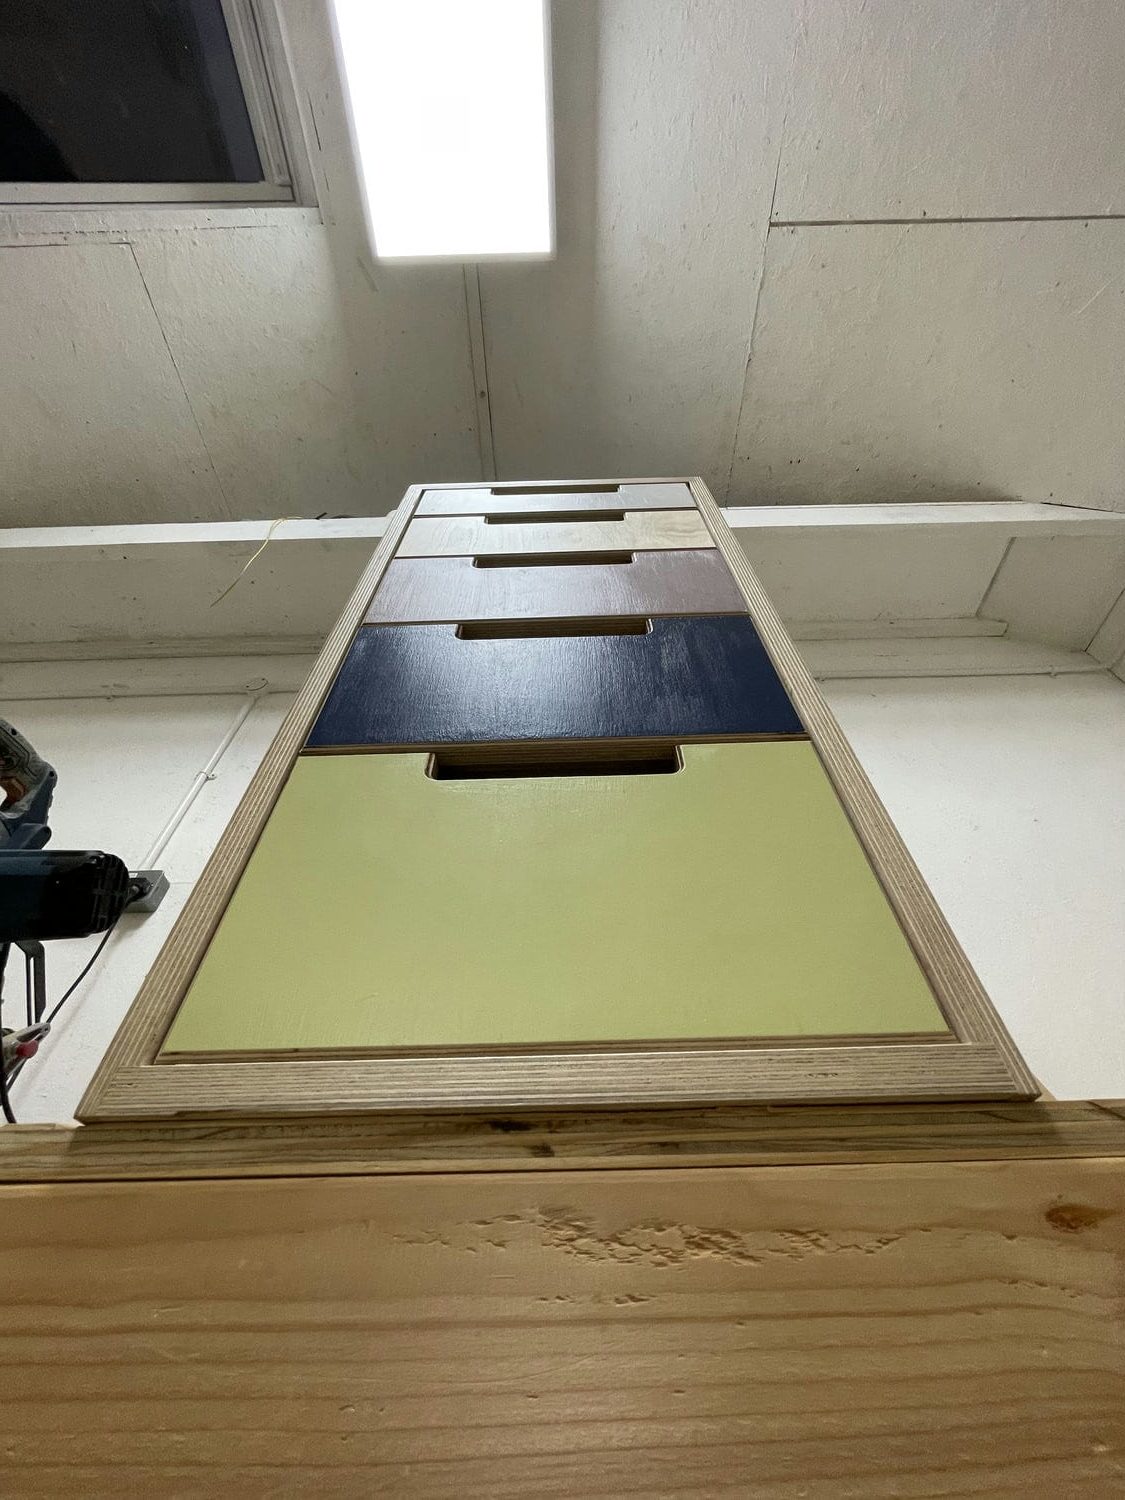
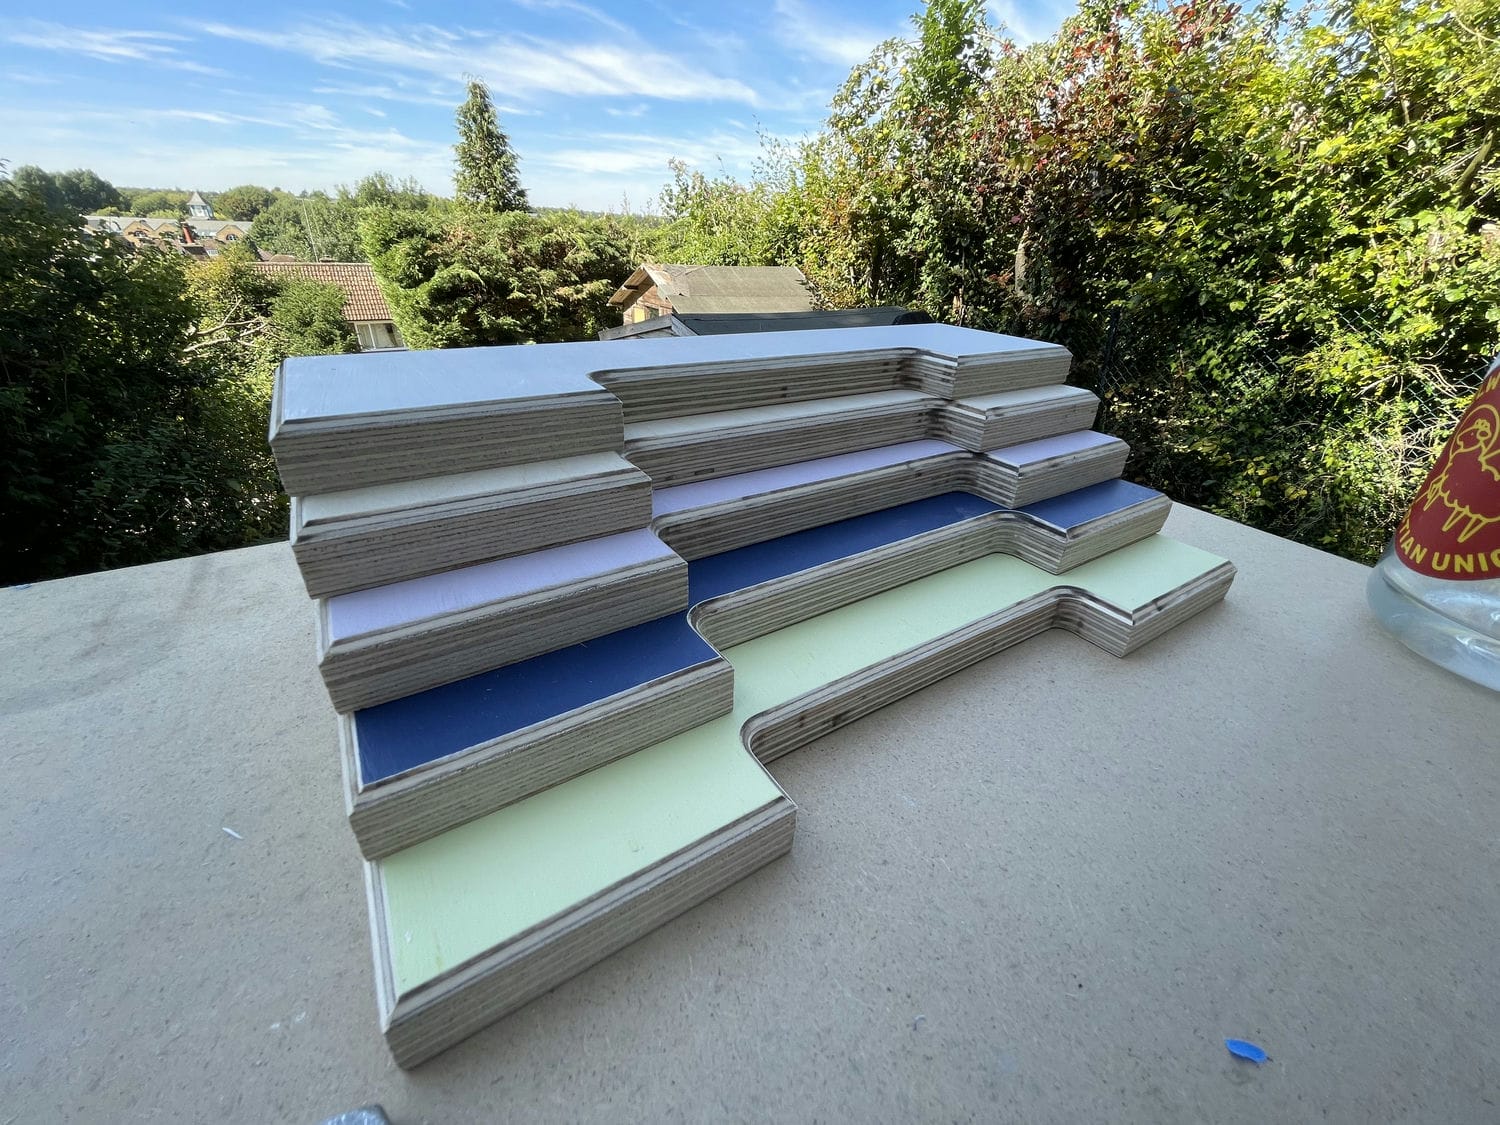
Drawer fronts
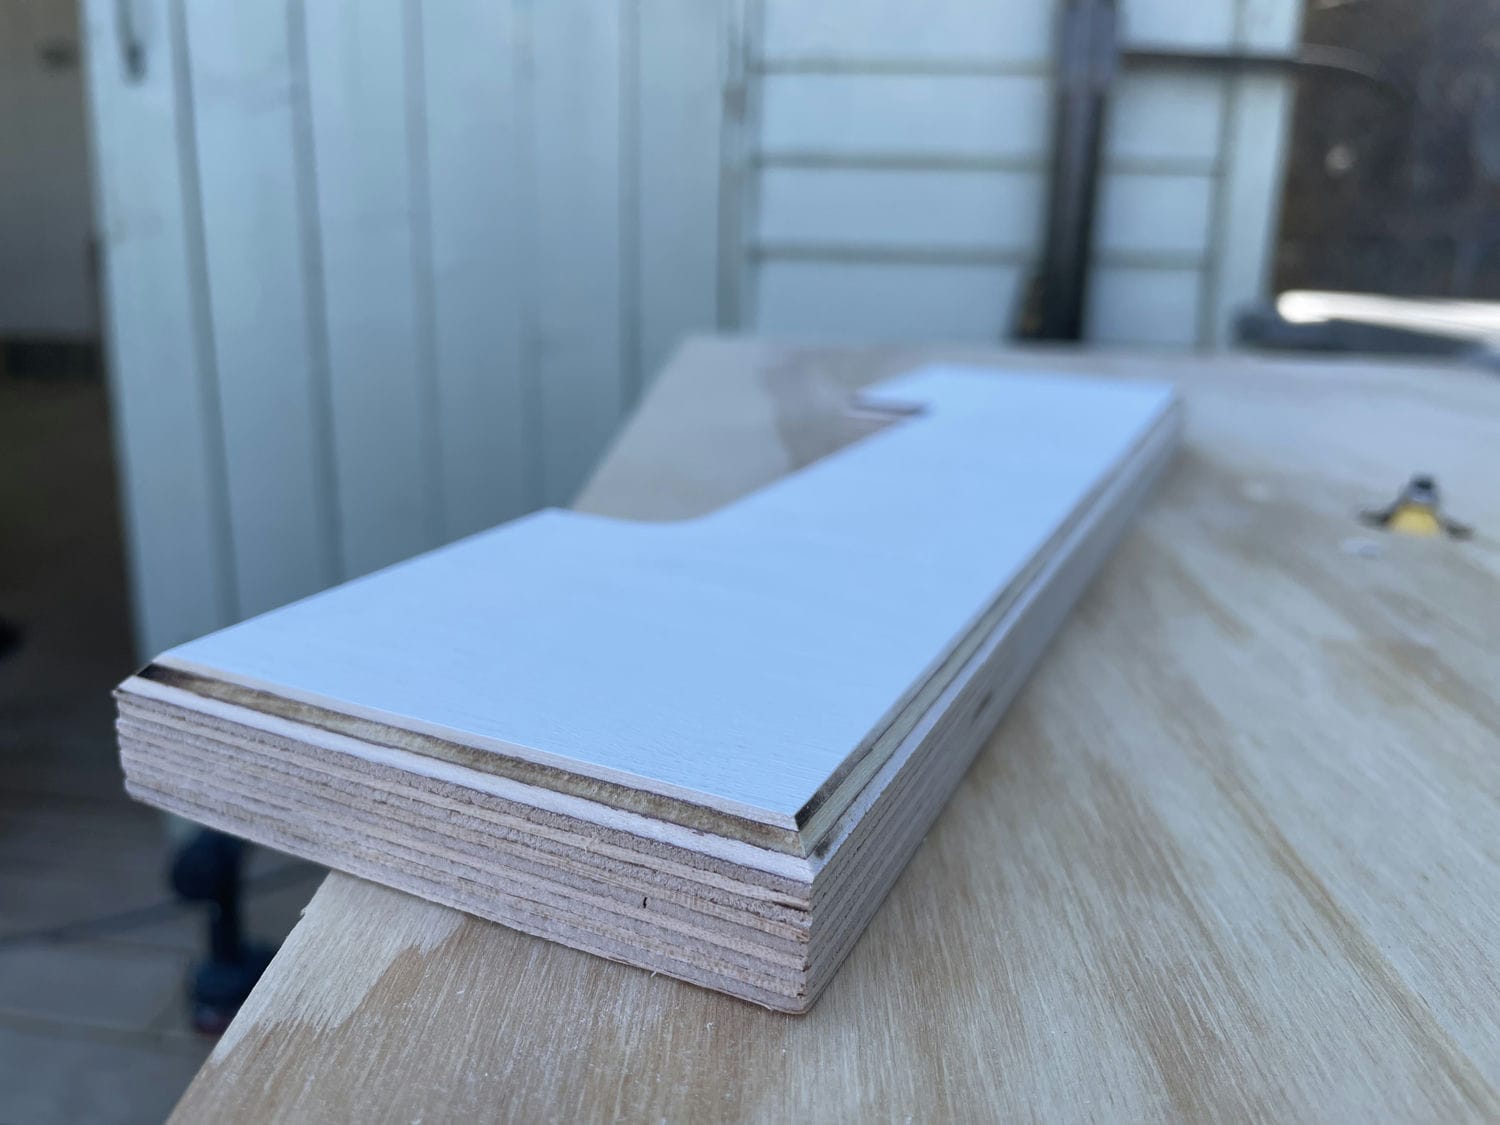
Technically the drawers were now “functional” but the critical finishing touch was the fronts. Each had been cut to size by the company, however they lacked handles, so I cut out a template and used a top-bearing straight bit to duplicate this pattern to all fronts. Initially, I had planned on a radius at both the top and bottom corners of the handles but to save time decided to leave the top square.
All the cut fronts were sanded to 220 grit, and were brushed with two coats of white primer/undercoat. I masked off the edges for this step to protect the layered edge-grain.
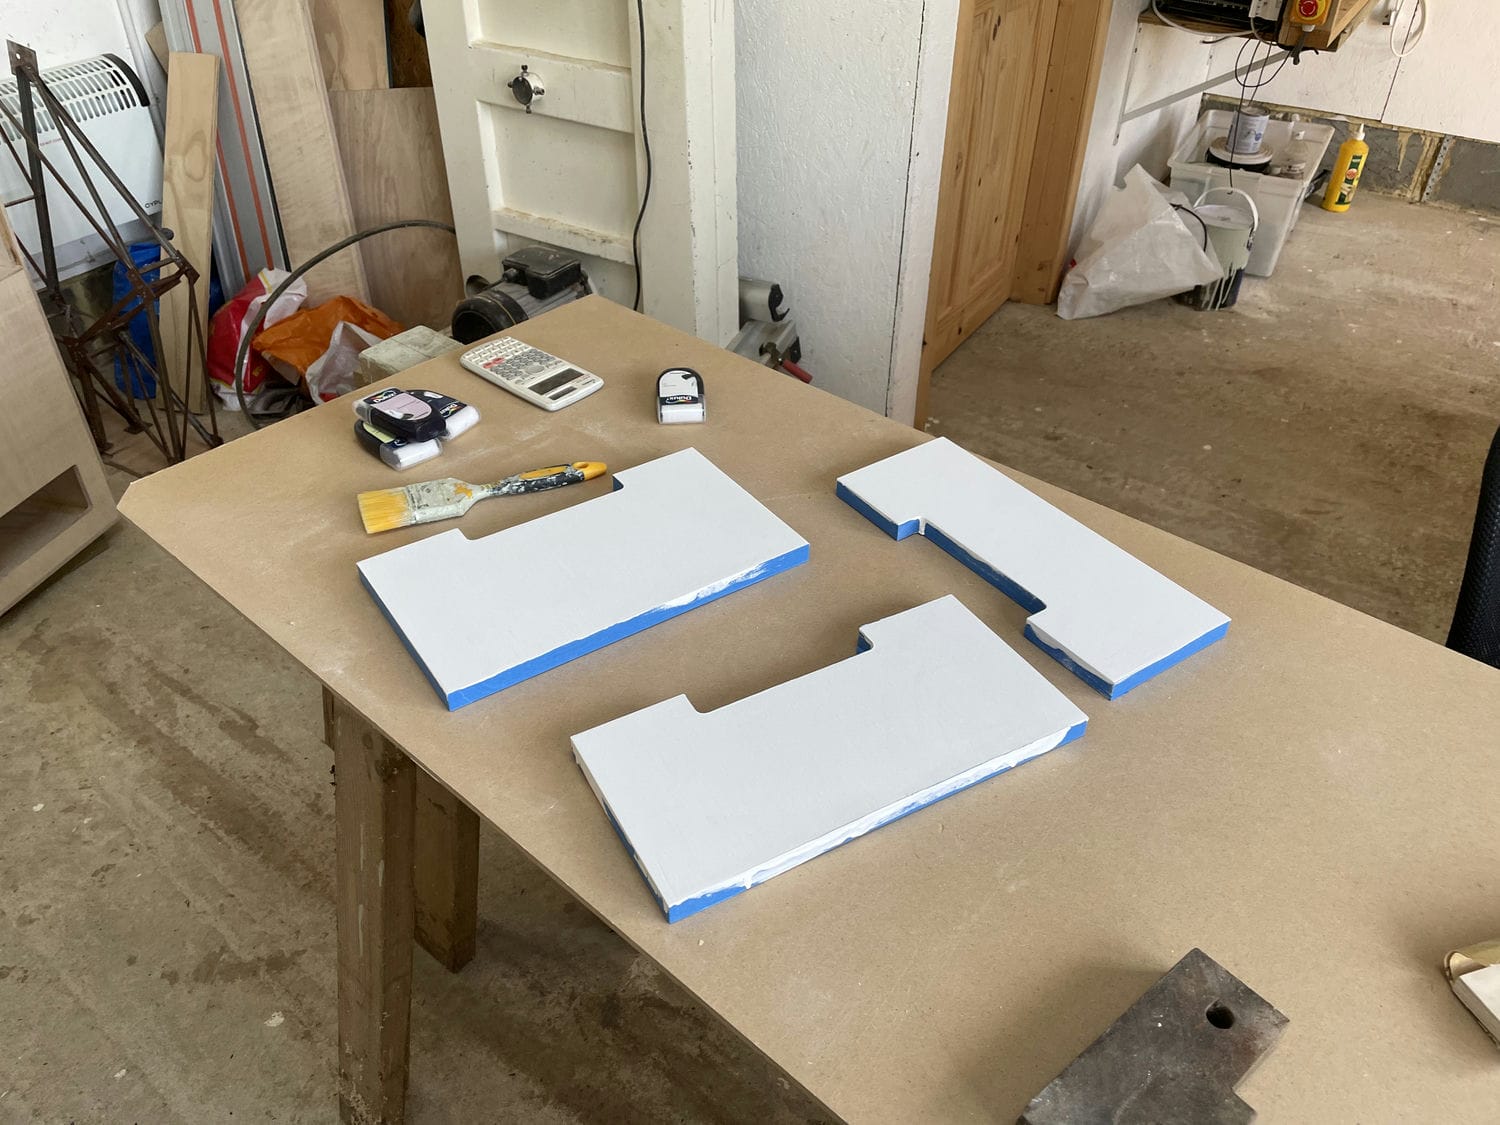
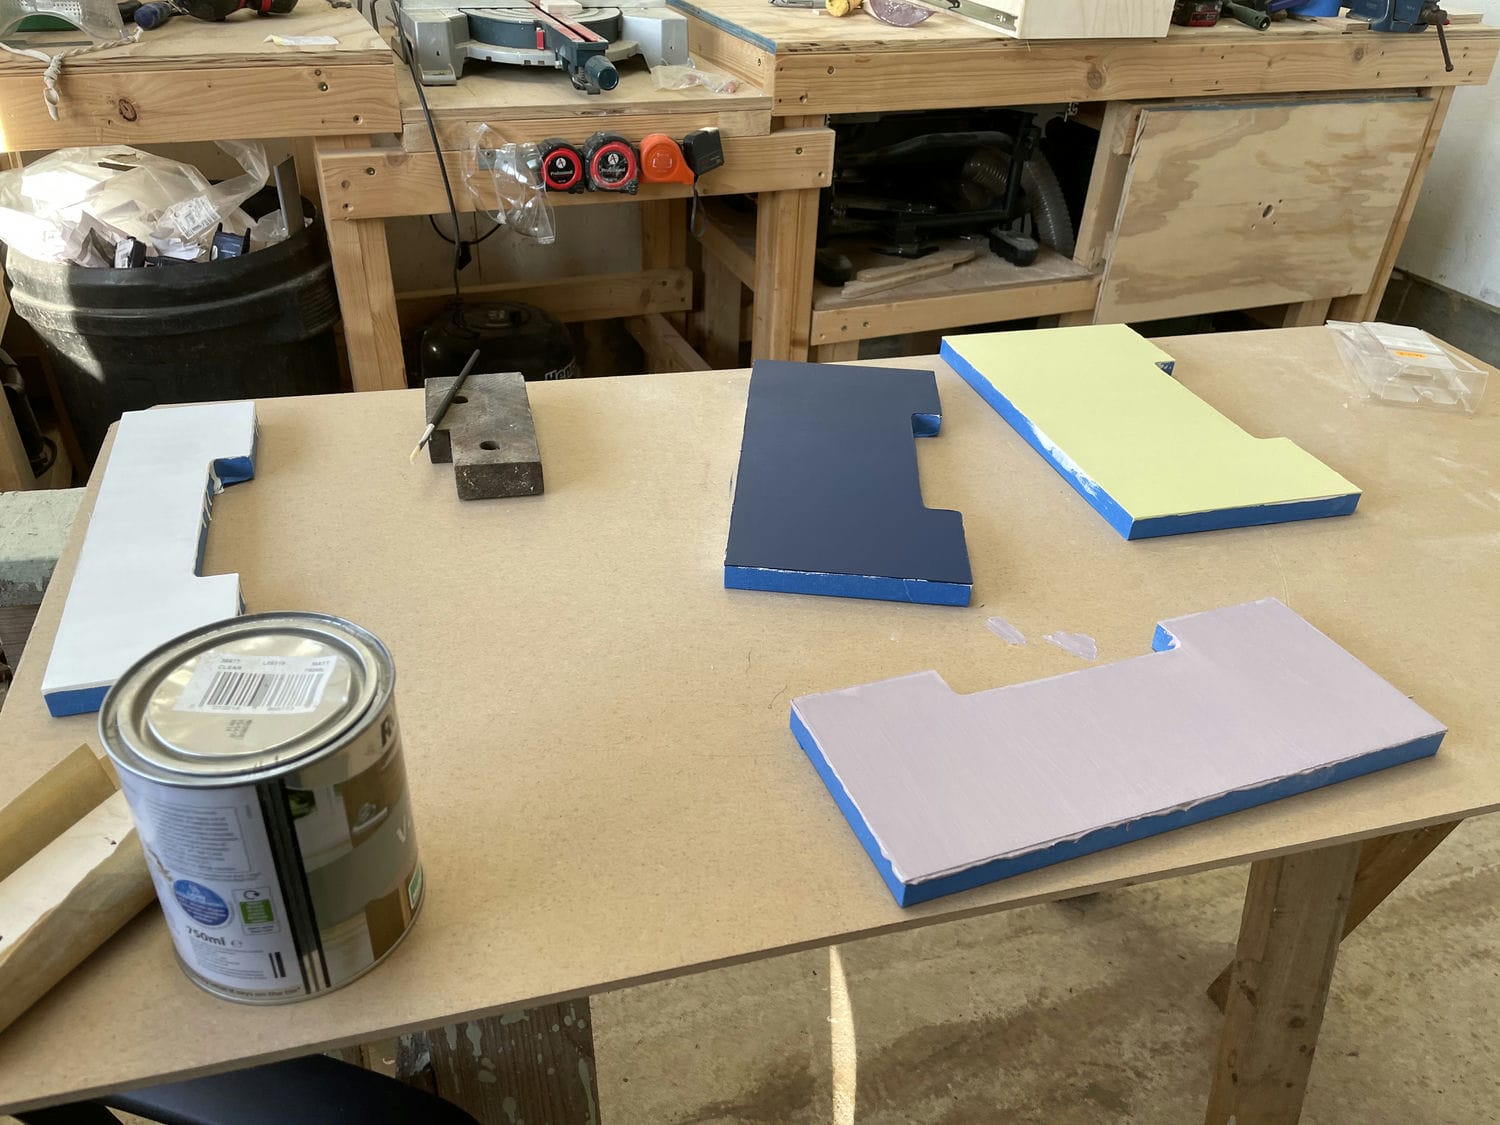
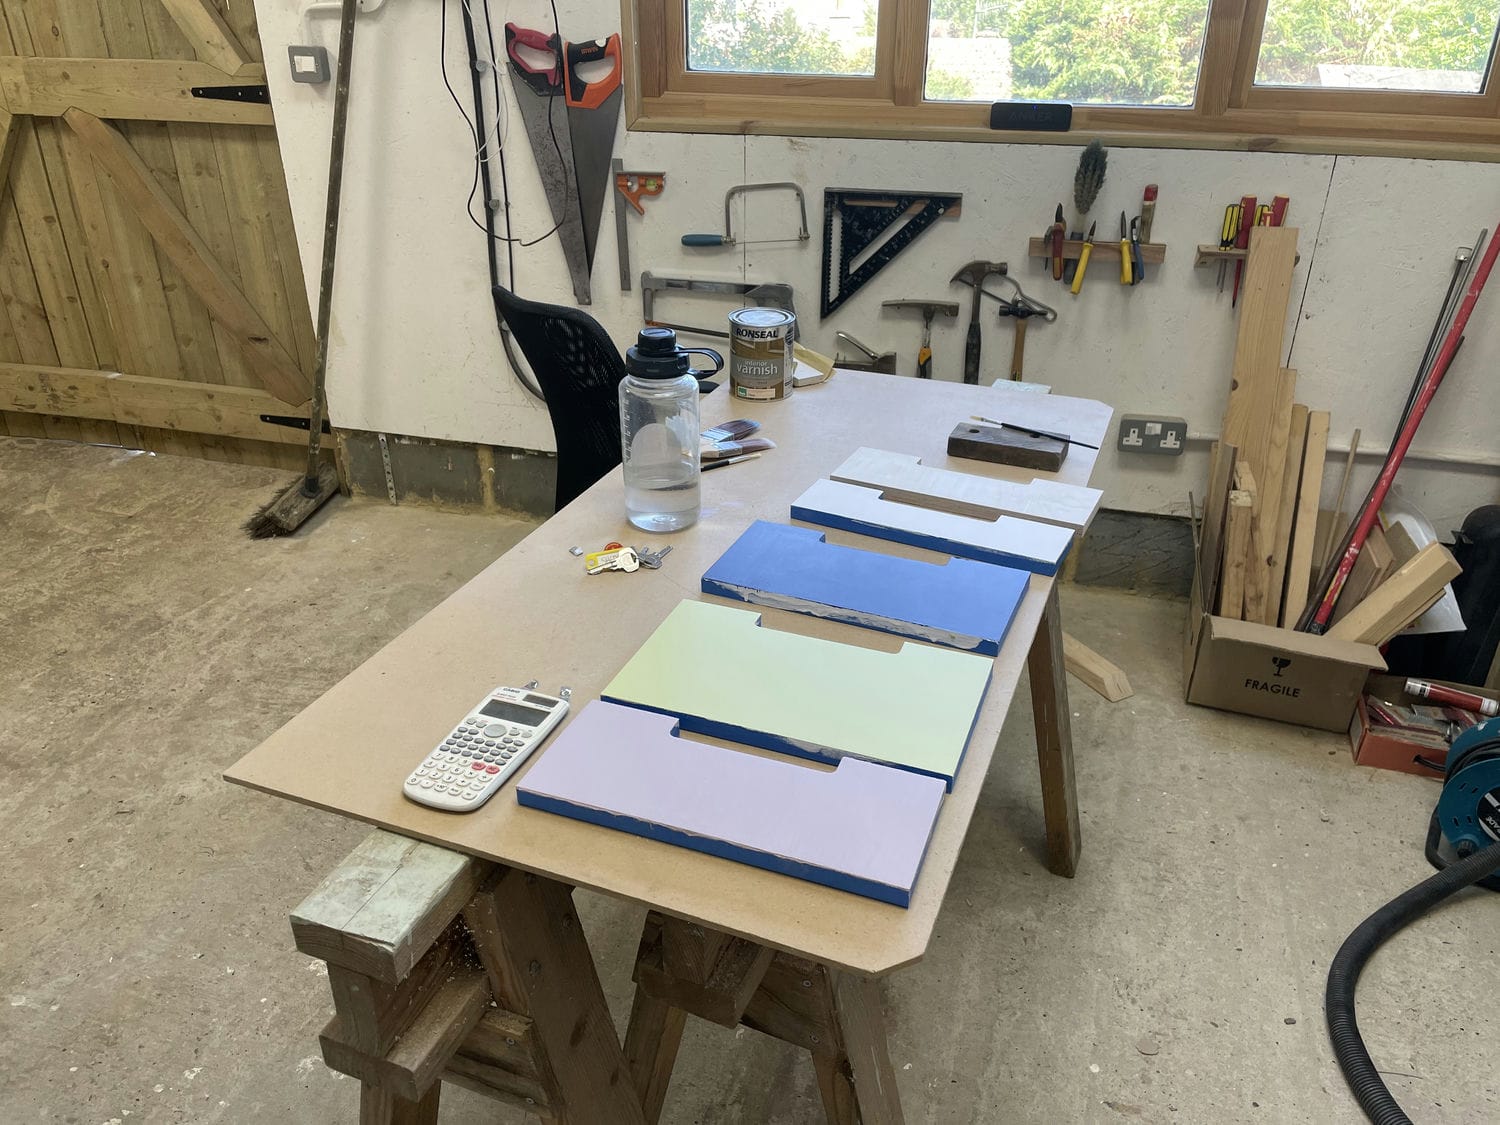
To minimise cost I used Dulux sample rollers for the colours – each one had plenty of paint in it and I simply pulled off the foil seal and squeezed it out. I found a brush gave a much better surface finish than the included roller. A run around the router with a chamfer bit was the finishing touch needed to show off the birch veneers.
My manufacture of these was imperfect, and there are definitely some burn marks but overall I don’t think they detract from the final result.
Final assembly and gallery

Surface finishing started with hand sanding down to 220 grit, followed by two layers of brushed on varnish. I only coated directly visible surfaces and drawer internals were left bare.
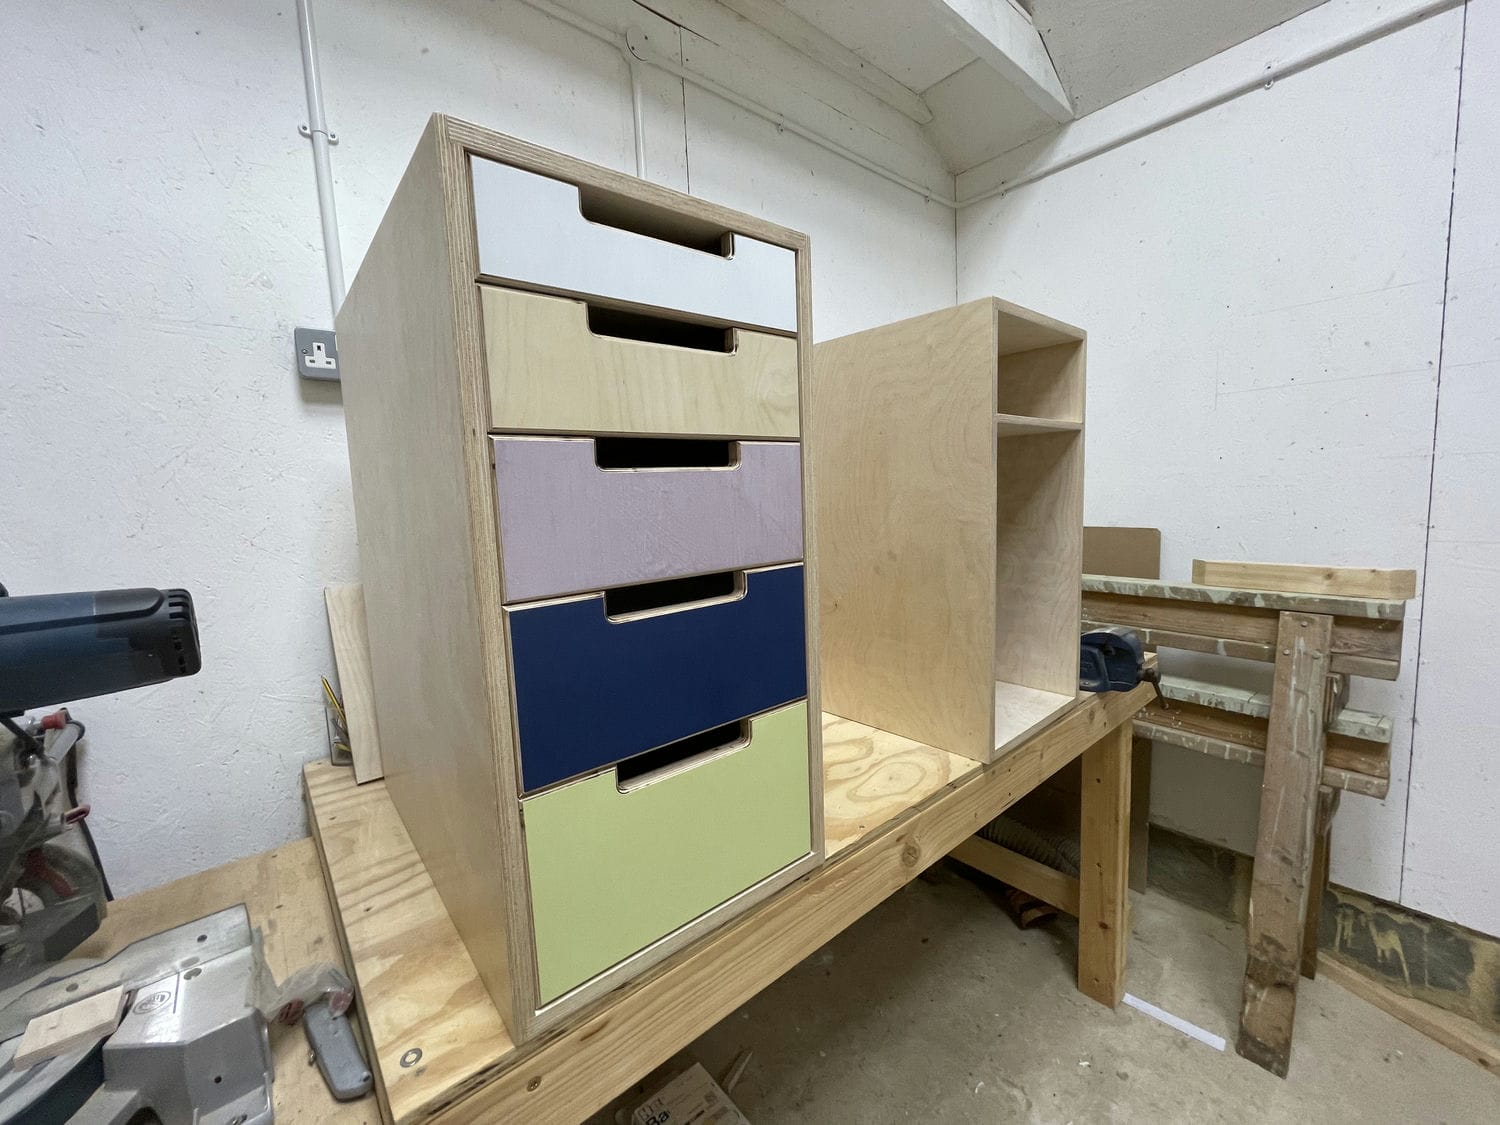
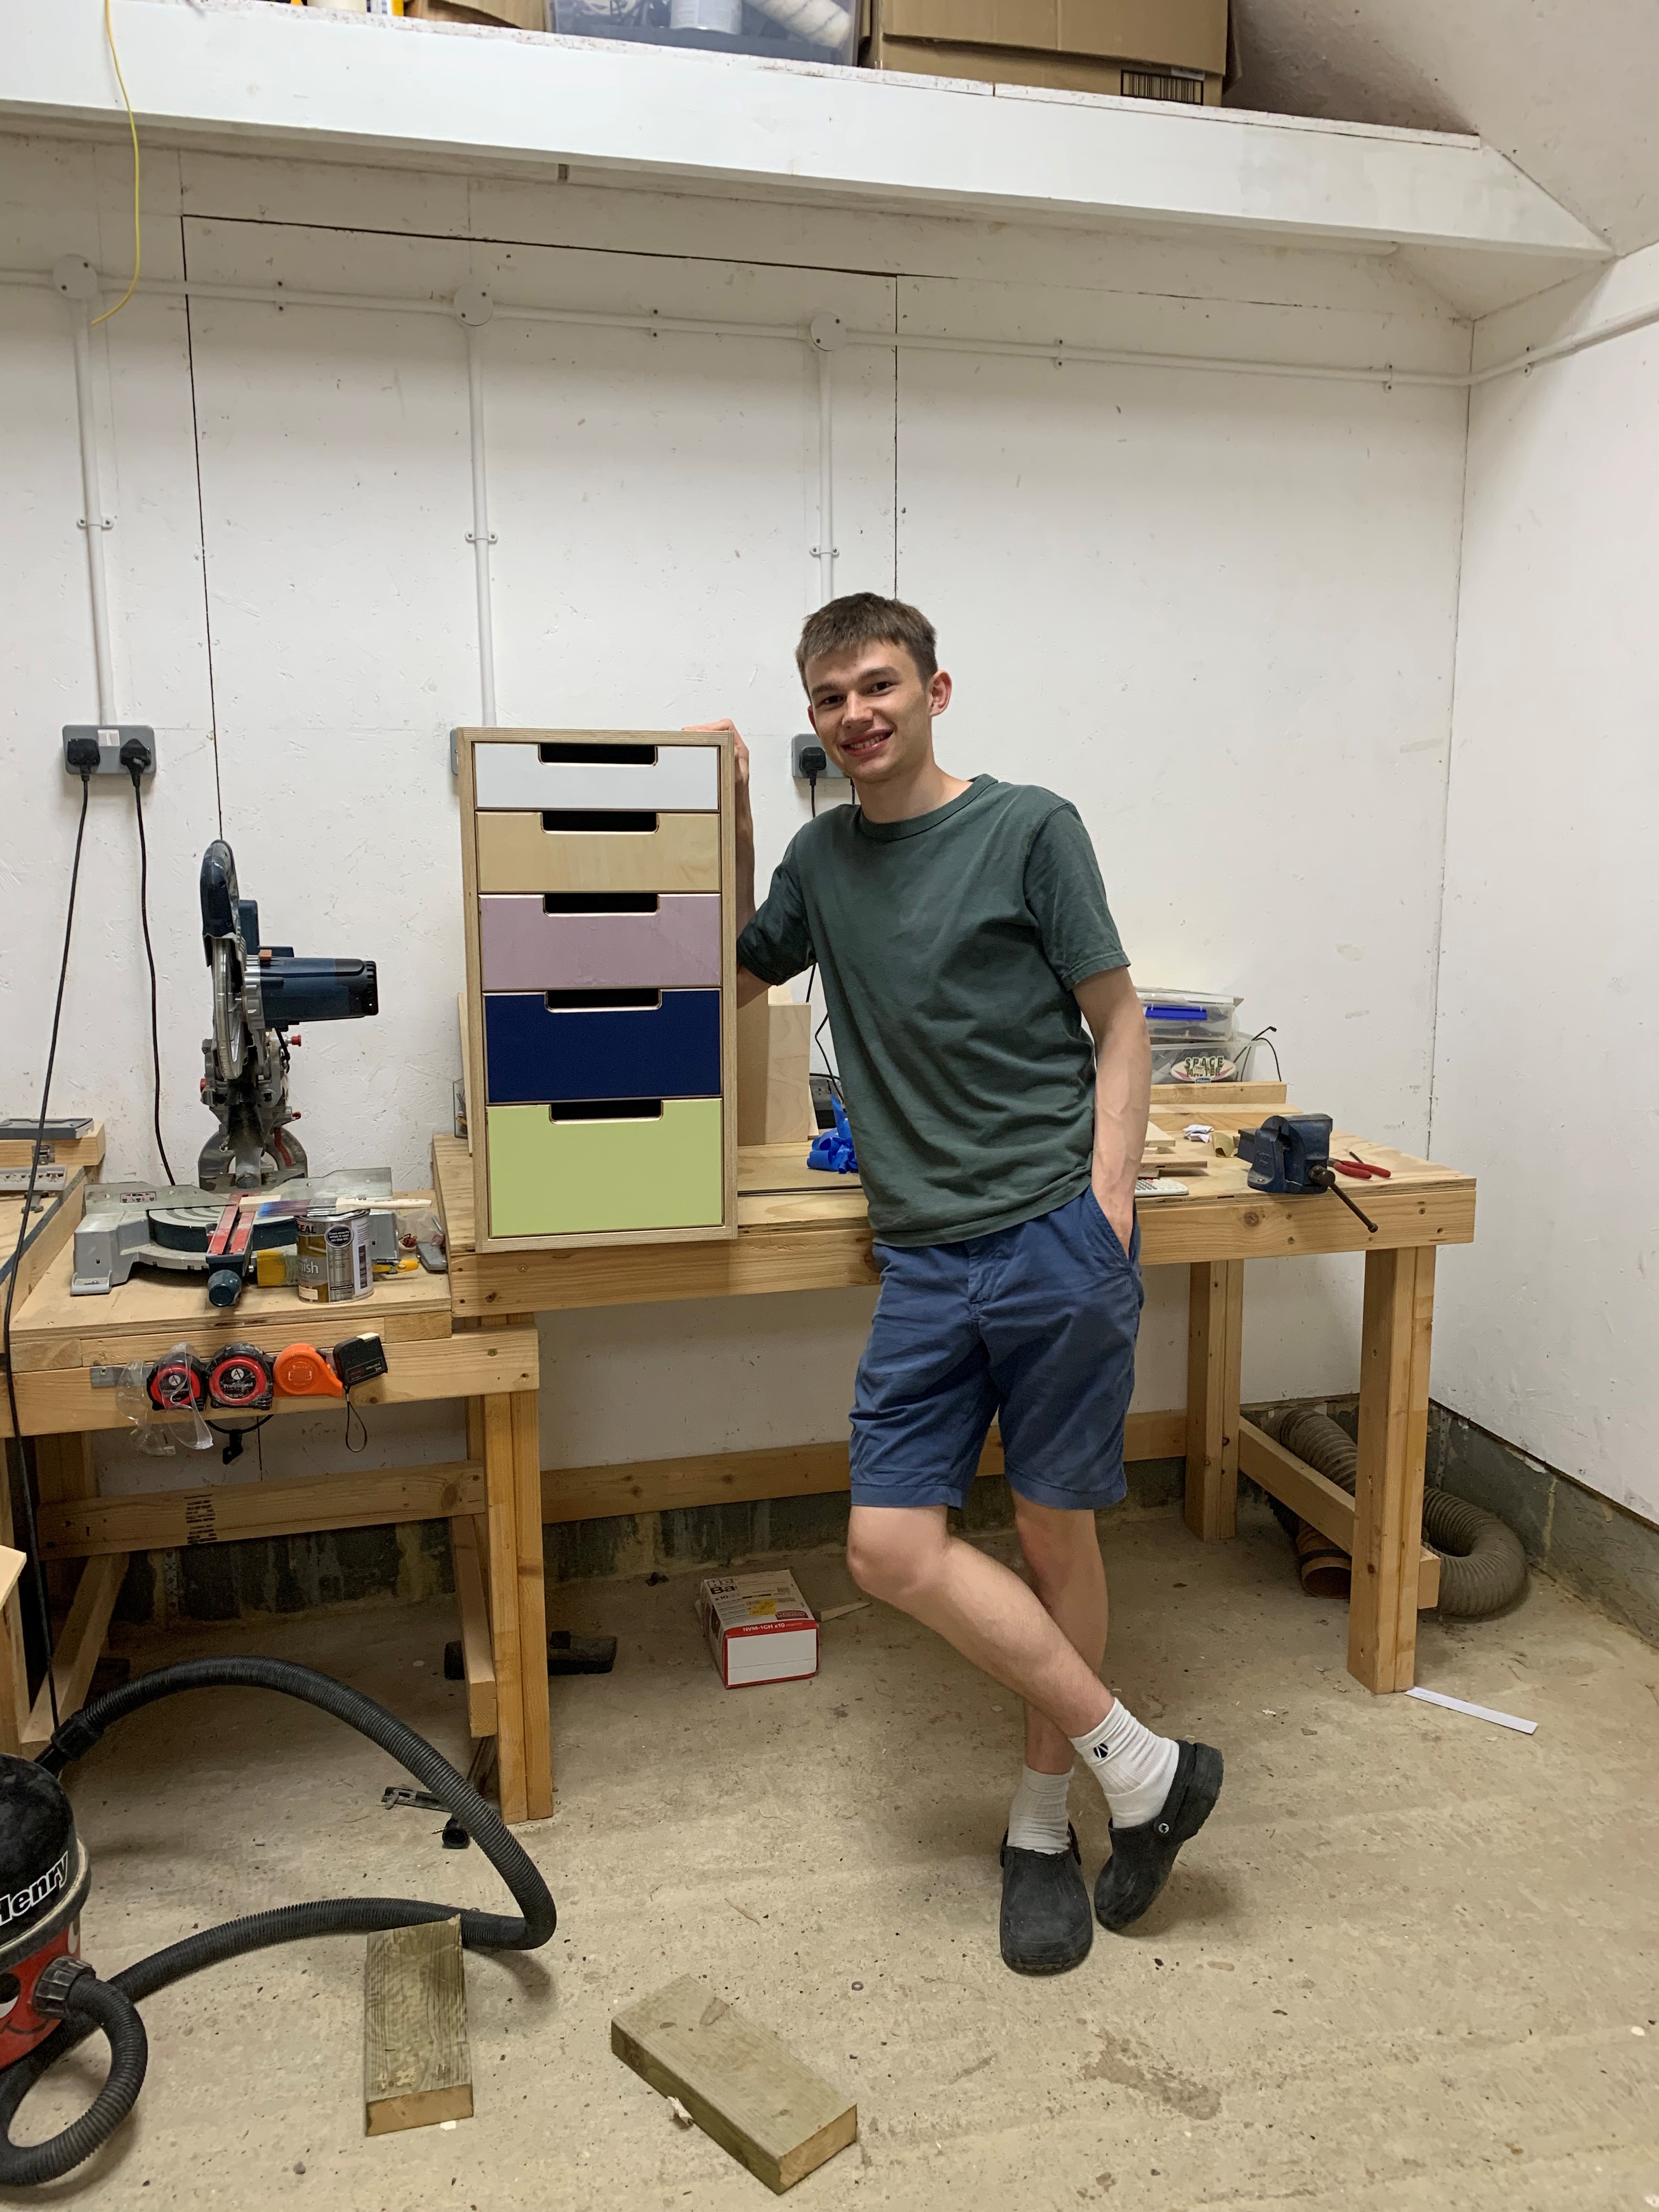
I’m really happy with how these came out. The cabinets go well together and provide lots of much-needed storage for stationery and electrical equipment – they will also end up supporting my desk surface. It was great fun seeing the design come to life and to finally start using the drawers.